HP Visualize J5000 hp Visualize J5000, J7000 workstations service handbook (a4 - Page 97
Removing the Top Panel, Removing the Top and Side Panels
 |
View all HP Visualize J5000 manuals
Add to My Manuals
Save this manual to your list of manuals |
Page 97 highlights
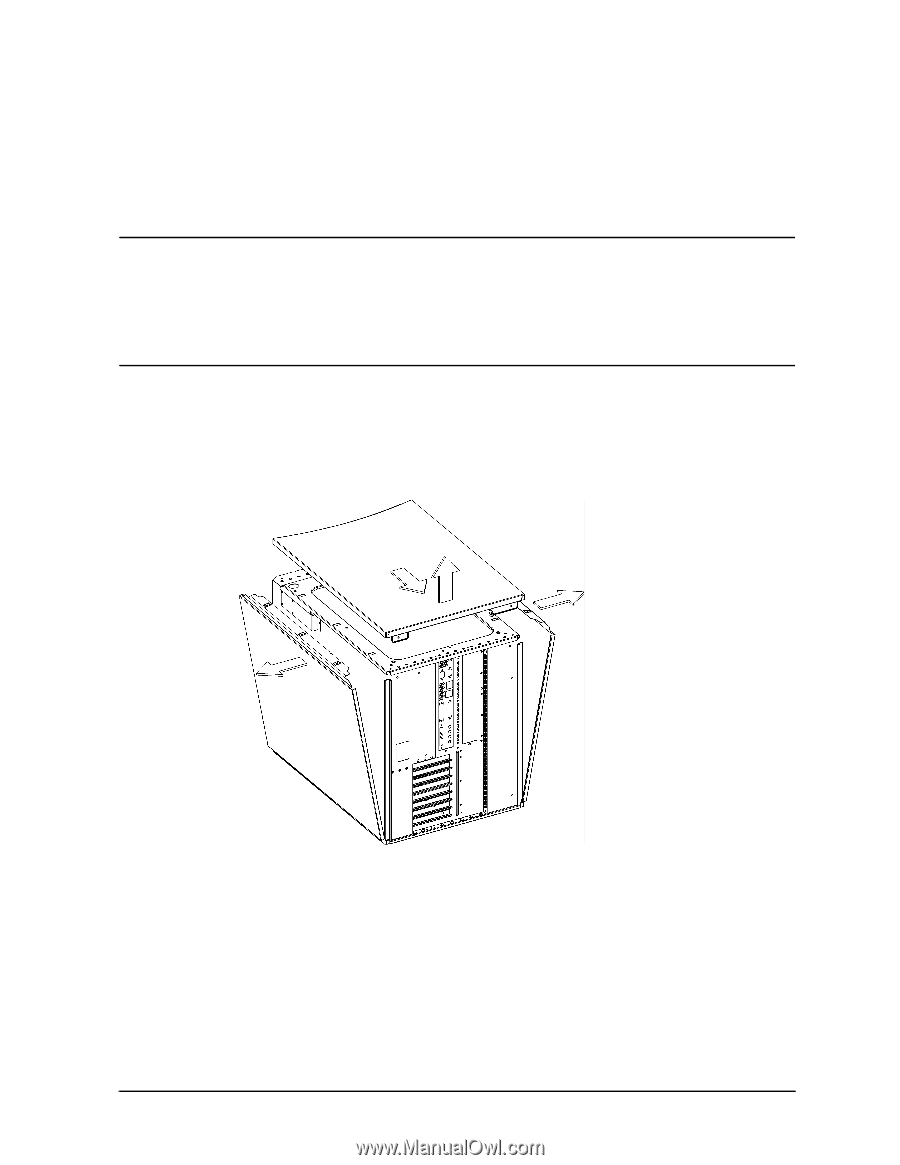
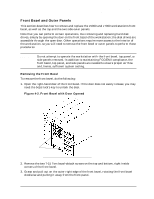
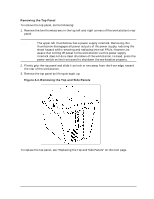
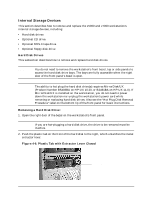
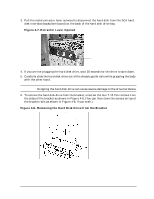
Field Replaceable Units (FRUs) FRU Removal and Replacement Removing the Top Panel To remove the top panel, do the following: 1. Remove the two thumbscrews in the top left and right corners of the workstation's rear panel. NOTE The upper-left thumbscrew has a power supply interlock. Removing this thumbscrew disengages all power outputs of the power supply, reducing the shock hazard while removing and replacing internal FRUs. However, be aware that cutting off power to the workstation via this power supply interlock does not do a clean shutdown of the workstation. Instead, press the power switch on the front panel to shutdown the workstation properly. 2. Firmly grip the top panel and slide it an inch or two away from the front edge, toward the rear of the workstation. 3. Remove the top panel by lifting straight up. Figure 4-4. Removing the Top and Side Panels To replace the top panel, see "Replacing the Top and Side Panels" on the next page. Chapter 4 93
-
 1
1 -
2
-
3
-
4
-
5
-
6
-
7
-
8
-
9
-
10
-
11
-
12
-
13
-
14
-
15
-
16
-
17
-
18
-
19
-
20
-
21
-
22
-
23
-
24
-
25
-
26
-
27
-
28
-
29
-
30
-
31
-
32
-
33
-
34
-
35
-
36
-
37
-
38
-
39
-
40
-
41
-
42
-
43
-
44
-
45
-
46
-
47
-
48
-
49
-
50
-
51
-
52
-
53
-
54
-
55
-
56
-
57
-
58
-
59
-
60
-
61
-
62
-
63
-
64
-
65
-
66
-
67
-
68
-
69
-
70
-
71
-
72
-
73
-
74
-
75
-
76
-
77
-
78
-
79
-
80
-
81
-
82
-
83
-
84
-
85
-
86
-
87
-
88
-
89
-
90
-
91
-
 92
92 -
 93
93 -
 94
94 -
 95
95 -
 96
96 -
 97
97 -
 98
98 -
 99
99 -
 100
100 -
 101
101 -
 102
102 -
103
-
104
-
105
-
106
-
107
-
108
-
109
-
110
-
111
-
112
-
113
-
114
-
115
-
116
-
117
-
118
-
119
-
120
-
121
-
122
-
123
-
124
-
125
-
126
-
127
-
128
-
129
-
130
-
131
-
132
-
133
-
134
-
135
-
136
-
137
-
138
-
139
-
140
-
141
-
142
-
143
-
144
-
145
-
146
-
147
-
148
-
149
-
150
-
151
-
152
-
153
-
154
-
155
-
156
-
157
-
158
-
159
-
160
-
161
-
162
-
163
-
164
-
165
-
166
-
167
-
168
-
169
-
170
-
171
-
172
-
173
-
174
-
175
-
176
-
177
-
178
-
179
-
180
-
181
-
182
-
183
-
184
-
185
-
186
-
187
-
188
-
189
-
190
-
191
-
192
-
193
-
194
-
195
-
196
-
197
-
198
-
199
-
200
-
201
-
202
-
203
-
204
-
205
-
206
-
207
-
208
-
209
-
210
-
211
-
212
 |
 |