HP Visualize J5000 hp Visualize J5000, J7000 workstations service handbook (a4 - Page 22
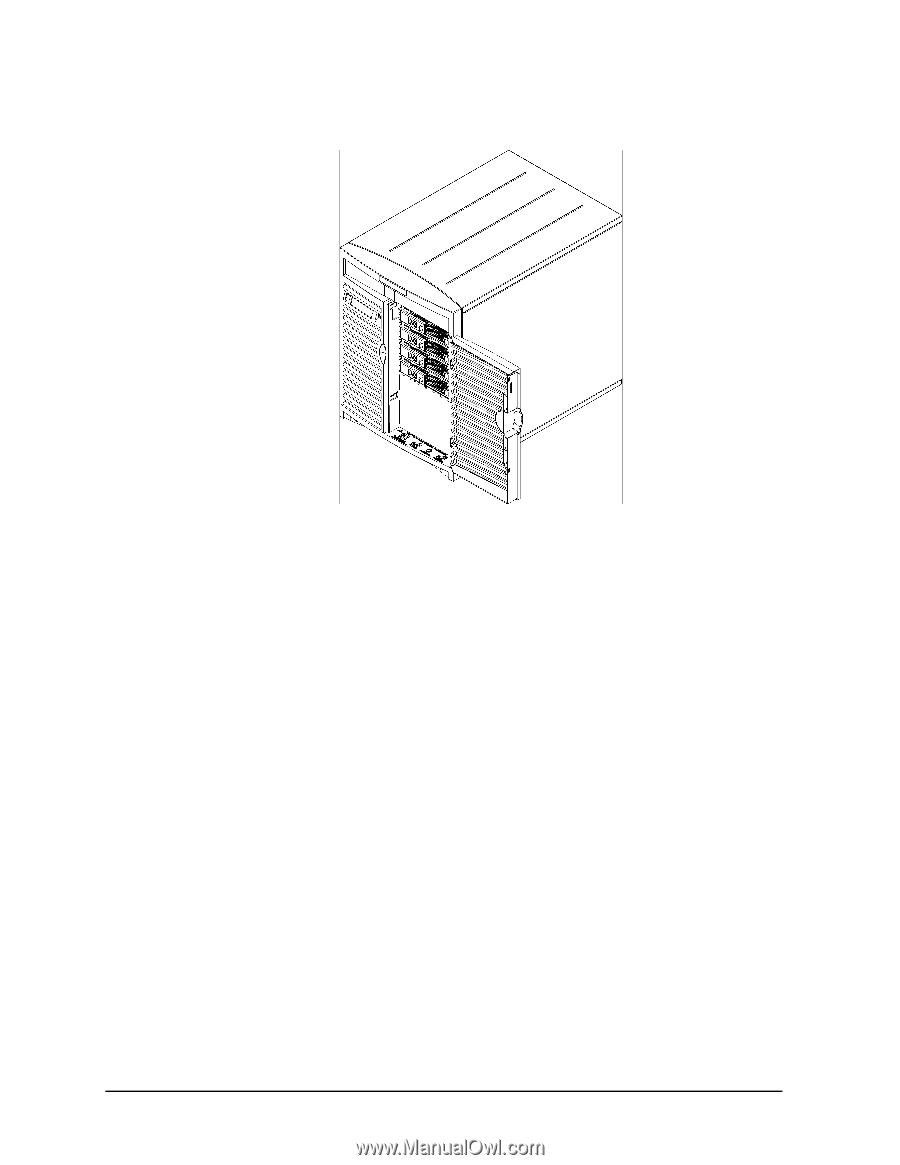
Front Panel with the Bezel Door Open
 |
View all HP Visualize J5000 manuals
Add to My Manuals
Save this manual to your list of manuals |
Page 22 highlights
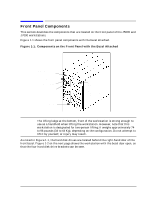
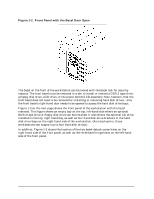
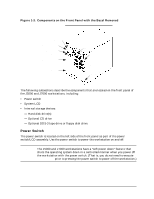
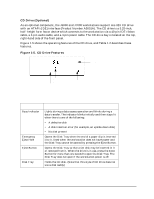
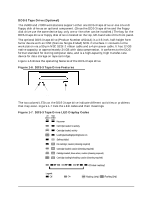
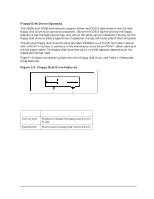
Product Information Front Panel Components Figure 1-2. Front Panel with the Bezel Door Open The bezel on the front of the workstation can be locked with the bezel lock for security reasons. The front bezel must be removed in order to install or remove a DDS-3 tape drive, a floppy disk drive, a CD drive, or the power switch/LCD assembly. Note, however, that the front bezel does not need to be removed for installing or removing hard disk drives - only the front bezel's right-hand door needs to be opened to access the hard disk drive bays. Figure 1-3 on the next page shows the front panel of the workstation with the bezel removed. This figure shows an empty bay on the top, left-hand side where an optional DDS-3 tape drive or floppy disk drive can be installed. It also shows the optional CD drive installed in the top, right-hand bay, as well as four hard disk drive brackets in the hard disk drive bays on the right-hand side of the workstation. (As noted earlier, these workstations can support up to four hard disk drives.) In addition, Figure 1-3 shows the location of the two bezel-detach screw holes on the right-hand side of the front panel, as well as the three bezel hinge holes on the left-hand side of the front panel. 18 Chapter 1
-
 1
1 -
2
-
3
-
4
-
5
-
6
-
7
-
8
-
9
-
10
-
11
-
12
-
13
-
14
-
15
-
16
-
 17
17 -
 18
18 -
 19
19 -
 20
20 -
 21
21 -
 22
22 -
 23
23 -
 24
24 -
 25
25 -
 26
26 -
 27
27 -
28
-
29
-
30
-
31
-
32
-
33
-
34
-
35
-
36
-
37
-
38
-
39
-
40
-
41
-
42
-
43
-
44
-
45
-
46
-
47
-
48
-
49
-
50
-
51
-
52
-
53
-
54
-
55
-
56
-
57
-
58
-
59
-
60
-
61
-
62
-
63
-
64
-
65
-
66
-
67
-
68
-
69
-
70
-
71
-
72
-
73
-
74
-
75
-
76
-
77
-
78
-
79
-
80
-
81
-
82
-
83
-
84
-
85
-
86
-
87
-
88
-
89
-
90
-
91
-
92
-
93
-
94
-
95
-
96
-
97
-
98
-
99
-
100
-
101
-
102
-
103
-
104
-
105
-
106
-
107
-
108
-
109
-
110
-
111
-
112
-
113
-
114
-
115
-
116
-
117
-
118
-
119
-
120
-
121
-
122
-
123
-
124
-
125
-
126
-
127
-
128
-
129
-
130
-
131
-
132
-
133
-
134
-
135
-
136
-
137
-
138
-
139
-
140
-
141
-
142
-
143
-
144
-
145
-
146
-
147
-
148
-
149
-
150
-
151
-
152
-
153
-
154
-
155
-
156
-
157
-
158
-
159
-
160
-
161
-
162
-
163
-
164
-
165
-
166
-
167
-
168
-
169
-
170
-
171
-
172
-
173
-
174
-
175
-
176
-
177
-
178
-
179
-
180
-
181
-
182
-
183
-
184
-
185
-
186
-
187
-
188
-
189
-
190
-
191
-
192
-
193
-
194
-
195
-
196
-
197
-
198
-
199
-
200
-
201
-
202
-
203
-
204
-
205
-
206
-
207
-
208
-
209
-
210
-
211
-
212
 |
 |