Konica Minolta Fujitsu fi-6800 Operating Guide - Page 95
Scanning in Continuous Feed mode, Pick Roller Unit
 |
View all Konica Minolta Fujitsu fi-6800 manuals
Add to My Manuals
Save this manual to your list of manuals |
Page 95 highlights
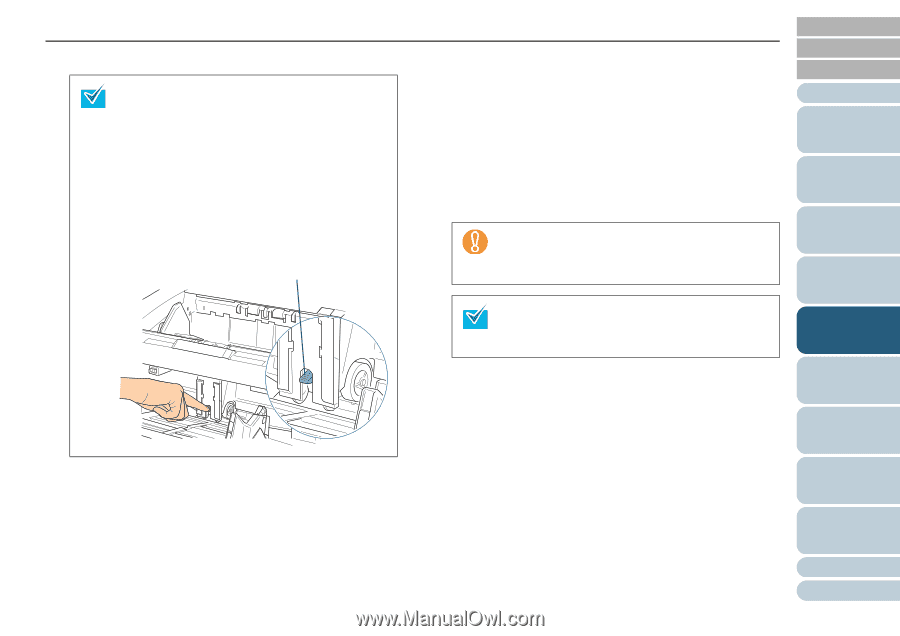
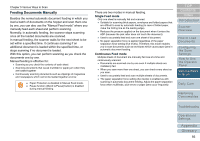
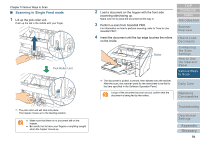
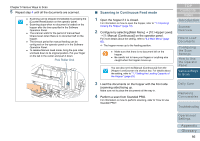
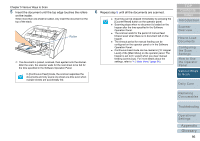
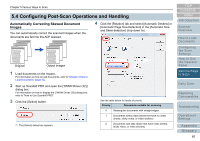
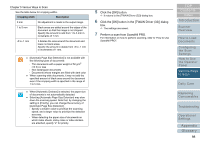
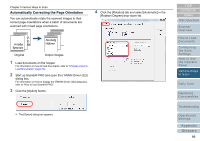
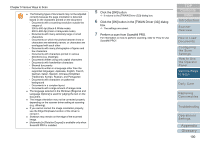
Chapter 5 Various Ways to Scan 5 Repeat step 4 until all the documents are scanned. z Scanning can be stopped immediately by pressing the [Counter Reset] button on the operator panel. z Scanning stops when no document is loaded on the hopper after the time specified in the Software Operation Panel. z The scanner waits for the period of manual feed timeout even when there is no document left on the hopper. z The timeout period for manual feeding can be configured on the operator panel or in the Software Operation Panel. z To release Manual Feed mode, bring the pick roller unit back down to its original position. Put your finger on the tab in the center and push it down. Pick Roller Unit ■ Scanning in Continuous Feed mode 1 Open the hopper if it is closed. For information on how to open the hopper, refer to "1.4 Opening/ Closing the Hopper" (page 19). 2 Configure by selecting [Main Menu] J [10: Hopper Level] J [1: Manual (Continuous)] on the operator panel. For more details about the setting, refer to "4.2 Main Menu" (page 65). D The hopper moves up to the feeding position. z Make sure that there is no document left on the hopper. z Be careful not to have your fingers or anything else caught when the hopper moves up. You can also set it to [Manual (Continuous)] from the [Hopper Level] screen via shortcut key. For details about the setting, refer to "1.7 Setting the Loading Capacity of the Hopper" (page 23). 3 Load the documents on the hopper with the front side (scanning side) facing up. Make sure not to place the documents all the way in. 4 Perform a scan from ScandAll PRO. For information on how to perform scanning, refer to "How to Use ScandAll PRO". TOP Contents Index Introduction Scanner Overview How to Load Documents Configuring the Scan Settings How to Use the Operator Panel Various Ways to Scan Daily Care Replacing Consumables Troubleshooting Operational Settings Appendix Glossary 95
-
 1
1 -
2
-
3
-
4
-
5
-
6
-
7
-
8
-
9
-
10
-
11
-
12
-
13
-
14
-
15
-
16
-
17
-
18
-
19
-
20
-
21
-
22
-
23
-
24
-
25
-
26
-
27
-
28
-
29
-
30
-
31
-
32
-
33
-
34
-
35
-
36
-
37
-
38
-
39
-
40
-
41
-
42
-
43
-
44
-
45
-
46
-
47
-
48
-
49
-
50
-
51
-
52
-
53
-
54
-
55
-
56
-
57
-
58
-
59
-
60
-
61
-
62
-
63
-
64
-
65
-
66
-
67
-
68
-
69
-
70
-
71
-
72
-
73
-
74
-
75
-
76
-
77
-
78
-
79
-
80
-
81
-
82
-
83
-
84
-
85
-
86
-
87
-
88
-
89
-
 90
90 -
 91
91 -
 92
92 -
 93
93 -
 94
94 -
 95
95 -
 96
96 -
 97
97 -
 98
98 -
 99
99 -
 100
100 -
101
-
102
-
103
-
104
-
105
-
106
-
107
-
108
-
109
-
110
-
111
-
112
-
113
-
114
-
115
-
116
-
117
-
118
-
119
-
120
-
121
-
122
-
123
-
124
-
125
-
126
-
127
-
128
-
129
-
130
-
131
-
132
-
133
-
134
-
135
-
136
-
137
-
138
-
139
-
140
-
141
-
142
-
143
-
144
-
145
-
146
-
147
-
148
-
149
-
150
-
151
-
152
-
153
-
154
-
155
-
156
-
157
-
158
-
159
-
160
-
161
-
162
-
163
-
164
-
165
-
166
-
167
-
168
-
169
-
170
-
171
-
172
-
173
-
174
-
175
-
176
-
177
-
178
-
179
-
180
-
181
-
182
-
183
-
184
-
185
-
186
-
187
-
188
-
189
-
190
-
191
-
192
-
193
-
194
-
195
-
196
-
197
-
198
-
199
-
200
-
201
-
202
-
203
-
204
-
205
-
206
-
207
-
208
-
209
-
210
-
211
-
212
-
213
-
214
-
215
-
216
-
217
-
218
-
219
-
220
-
221
-
222
-
223
-
224
-
225
-
226
-
227
-
228
-
229
-
230
-
231
-
232
-
233
-
234
-
235
-
236
-
237
-
238
-
239
-
240
-
241
-
242
-
243
 |
 |