ASRock Z87 Extreme11/ac LSI Mega RAID Storage Manager Guide - Page 42
Creating a Virtual Drive Using Advanced Configuration
 |
View all ASRock Z87 Extreme11/ac manuals
Add to My Manuals
Save this manual to your list of manuals |
Page 42 highlights
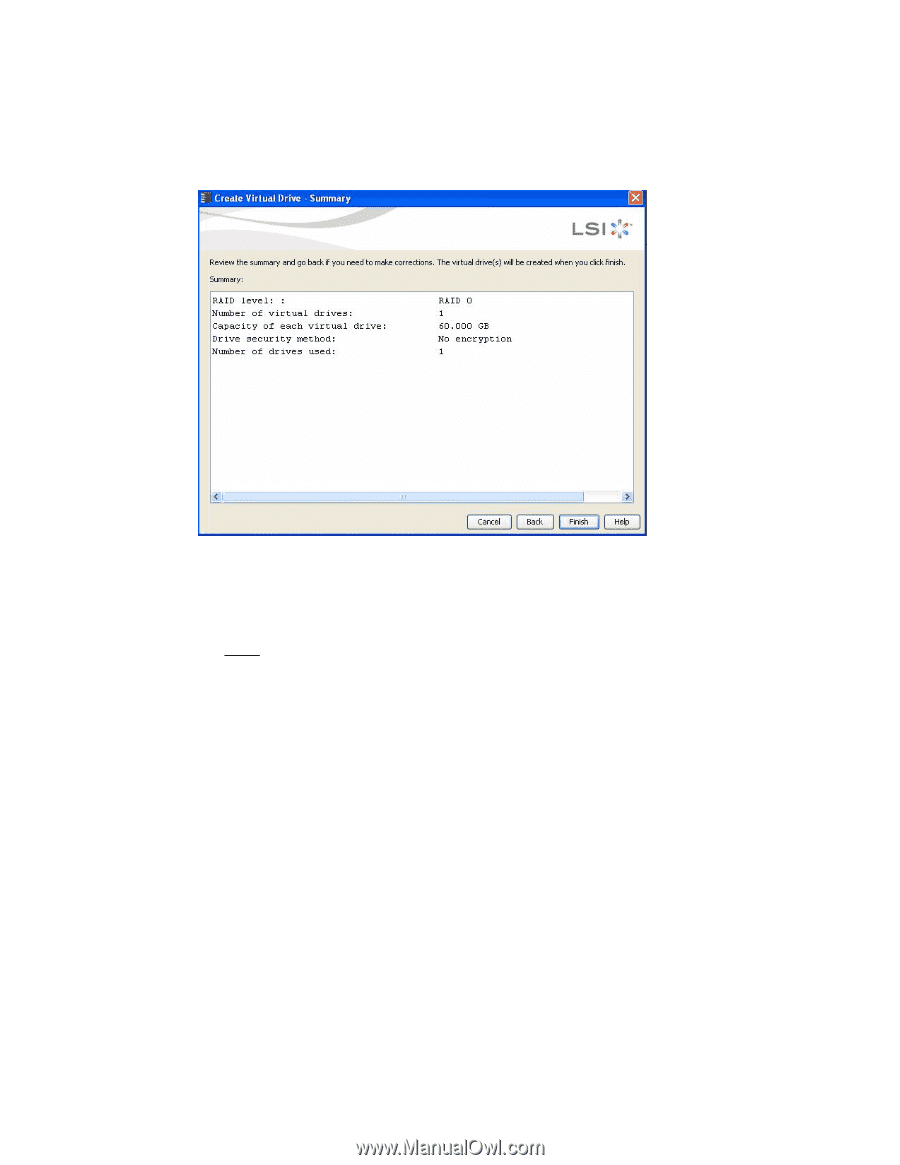
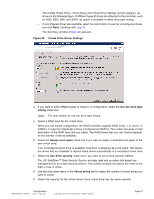
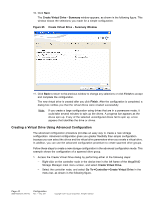
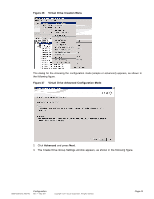
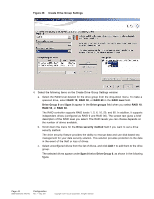
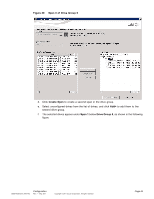
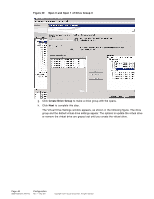
10. Click Next. The Create Virtual Drive - Summary window appears, as shown in the following figure. This window shows the selections you made for a simple configuration. Figure 25 Create Virtual Drive - Summary Window 11. Click Back to return to the previous window to change any selections or click Finish to accept and complete the configuration. The new virtual drive is created after you click Finish. After the configuration is completed, a dialog box notifies you that the virtual drives were created successfully. Note: If you create a large configuration using drives that are in a powersave mode, it could take several minutes to spin up the drives. A progress bar appears as the drives spin up. If any of the selected unconfigured drives fail to spin up, a box appears that identifies the drive or drives. Creating a Virtual Drive Using Advanced Configuration The advanced configuration procedure provides an easy way to create a new storage configuration. Advanced configuration gives you greater flexibility than simple configuration because you can select the drives and the virtual drive parameters when you create a virtual drive. In addition, you can use the advanced configuration procedure to create spanned drive groups. Follow these steps to create a new storage configuration in the advanced configuration mode. This example shows the configuration of a spanned drive group. 1. Access the Create Virtual Drive dialog by performing either of the following steps: - Right-click on the controller node in the device tree in the left frame of the MegaRAID Storage Manager main menu screen, and select Create Virtual Drive. - Select the controller node, and select Go To->Controller->Create Virtual Drive in the menu bar, as shown in the following figure. Page 42 DB09-000202-05 37857-02 Configuration Rev. F - May 2011 Copyright © 2011 by LSI Corporation. All rights reserved.
-
 1
1 -
2
-
3
-
4
-
5
-
6
-
7
-
8
-
9
-
10
-
11
-
12
-
13
-
14
-
15
-
16
-
17
-
18
-
19
-
20
-
21
-
22
-
23
-
24
-
25
-
26
-
27
-
28
-
29
-
30
-
31
-
32
-
33
-
34
-
35
-
36
-
 37
37 -
 38
38 -
 39
39 -
 40
40 -
 41
41 -
 42
42 -
 43
43 -
 44
44 -
 45
45 -
 46
46 -
 47
47 -
48
-
49
-
50
-
51
-
52
-
53
-
54
-
55
-
56
-
57
-
58
-
59
-
60
-
61
-
62
-
63
-
64
-
65
-
66
-
67
-
68
-
69
-
70
-
71
-
72
-
73
-
74
-
75
-
76
-
77
-
78
-
79
-
80
-
81
-
82
-
83
-
84
-
85
-
86
-
87
-
88
-
89
-
90
-
91
-
92
-
93
-
94
-
95
-
96
-
97
-
98
-
99
-
100
-
101
-
102
-
103
-
104
-
105
-
106
-
107
-
108
-
109
-
110
-
111
-
112
-
113
-
114
-
115
-
116
-
117
-
118
-
119
-
120
-
121
-
122
-
123
-
124
-
125
-
126
-
127
-
128
-
129
-
130
-
131
-
132
-
133
-
134
-
135
-
136
-
137
-
138
-
139
-
140
-
141
-
142
-
143
-
144
-
145
-
146
-
147
-
148
-
149
-
150
-
151
-
152
-
153
-
154
-
155
-
156
-
157
-
158
-
159
-
160
-
161
-
162
-
163
-
164
-
165
-
166
-
167
-
168
-
169
-
170
-
171
-
172
-
173
-
174
-
175
-
176
-
177
-
178
 |
 |