ASRock Z87 Extreme11/ac LSI Mega RAID Storage Manager Guide - Page 61
Removing a Drive from a Configuration - review
 |
View all ASRock Z87 Extreme11/ac manuals
Add to My Manuals
Save this manual to your list of manuals |
Page 61 highlights
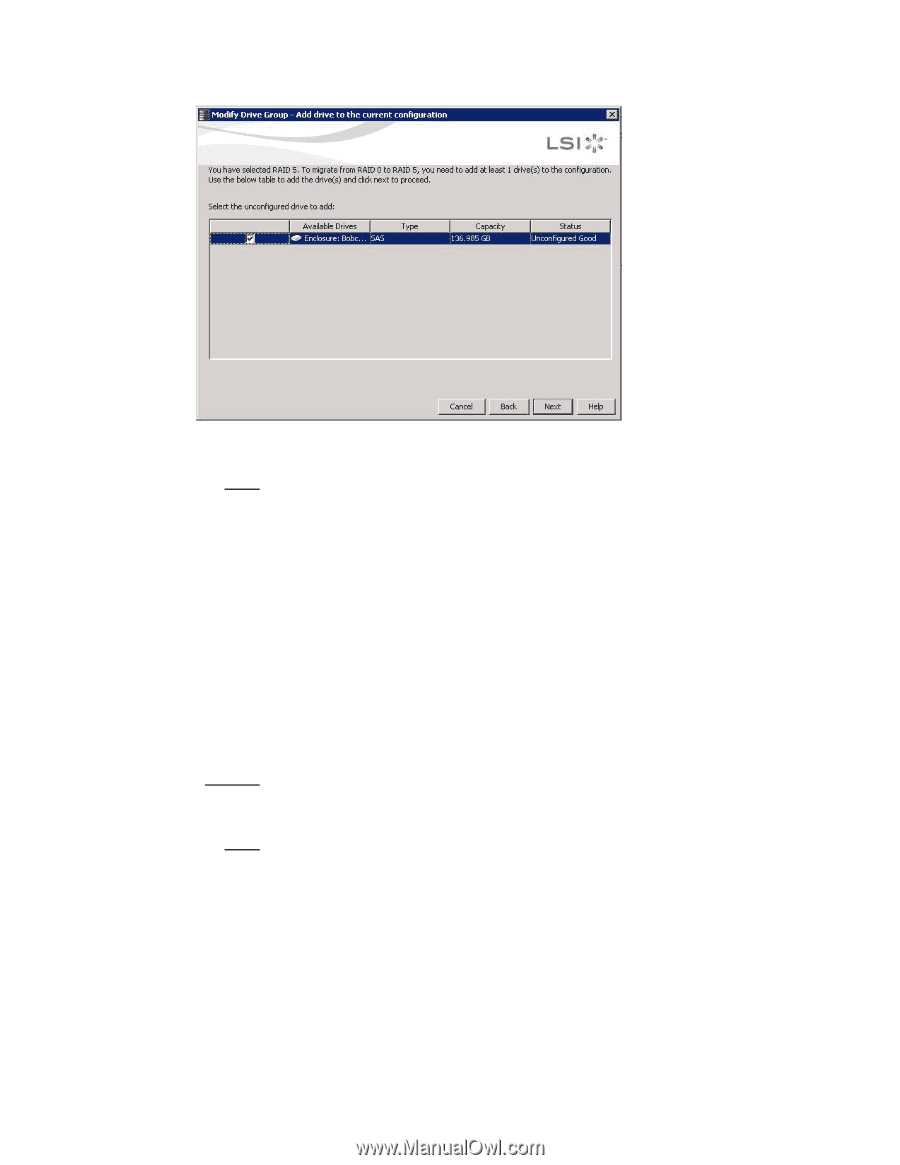
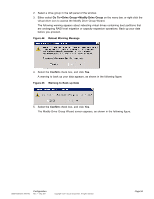
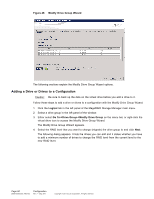
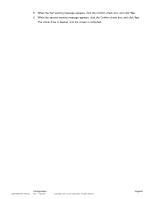
Figure 47 Add Drive(s) to the Current Configuration Screen 5. Select the check box next to any unconfigured drives that you want to add and click Next. Note: The drive or drives you add must have the same capacity as or greater capacity than the drives already in the drive group, or you cannot change the RAID level. The Summary screen appears. This screen shows the current settings and what the settings will be after the drives are added. 6. Review the configuration information. Click Back if you need to change any selections. 7. Click Finish to accept the changes. A confirmation message appears. The message states that this operation cannot be aborted and asks whether you want to continue. 8. Click Yes to accept and complete the addition of the drives to the drive group. Removing a Drive from a Configuration Caution: Be sure to back up the data on the virtual drive before you remove a drive from it. Follow these steps to remove a drive from a RAID 1 configuration or a RAID 1E configuration. Note: This option is not available for RAID 0 configurations. 1. Click the Logical tab in the left panel of the MegaRAID Storage Manager main menu screen. 2. Click a drive icon in the left panel of the screen. 3. Either select Go To->Physical Drive->Make Drive Offline on the menu bar, or right-click the drive and select Make Drive Offline from the menu. A confirmation message appears. The message states that this operation cannot be aborted and asks whether you want to continue. 4. Click Yes to accept and complete the removal of the drive from the drive group. DB09-000202-05 37857-02 Configuration Rev. F - May 2011 Copyright © 2011 by LSI Corporation. All rights reserved. Page 61
-
 1
1 -
2
-
3
-
4
-
5
-
6
-
7
-
8
-
9
-
10
-
11
-
12
-
13
-
14
-
15
-
16
-
17
-
18
-
19
-
20
-
21
-
22
-
23
-
24
-
25
-
26
-
27
-
28
-
29
-
30
-
31
-
32
-
33
-
34
-
35
-
36
-
37
-
38
-
39
-
40
-
41
-
42
-
43
-
44
-
45
-
46
-
47
-
48
-
49
-
50
-
51
-
52
-
53
-
54
-
55
-
 56
56 -
 57
57 -
 58
58 -
 59
59 -
 60
60 -
 61
61 -
 62
62 -
 63
63 -
 64
64 -
 65
65 -
 66
66 -
67
-
68
-
69
-
70
-
71
-
72
-
73
-
74
-
75
-
76
-
77
-
78
-
79
-
80
-
81
-
82
-
83
-
84
-
85
-
86
-
87
-
88
-
89
-
90
-
91
-
92
-
93
-
94
-
95
-
96
-
97
-
98
-
99
-
100
-
101
-
102
-
103
-
104
-
105
-
106
-
107
-
108
-
109
-
110
-
111
-
112
-
113
-
114
-
115
-
116
-
117
-
118
-
119
-
120
-
121
-
122
-
123
-
124
-
125
-
126
-
127
-
128
-
129
-
130
-
131
-
132
-
133
-
134
-
135
-
136
-
137
-
138
-
139
-
140
-
141
-
142
-
143
-
144
-
145
-
146
-
147
-
148
-
149
-
150
-
151
-
152
-
153
-
154
-
155
-
156
-
157
-
158
-
159
-
160
-
161
-
162
-
163
-
164
-
165
-
166
-
167
-
168
-
169
-
170
-
171
-
172
-
173
-
174
-
175
-
176
-
177
-
178
 |
 |