Epson Stylus Pro 9000 Service Manual - Page 107
Updating From a Memory Card, 5.3 Self-Diagnostics
 |
View all Epson Stylus Pro 9000 manuals
Add to My Manuals
Save this manual to your list of manuals |
Page 107 highlights
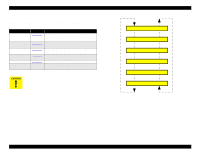
EPSON Stylus Pro 9000 6. Turn the printer off, and then back on. UPDATING FROM A MEMORY CARD 1. Copy the file for uploading to the flash memory card (it's a .BIN file). 2. Turn off the printer. 3. Remove the access cover from the top of the Upper Paper Guide (see Figure 4-13 on page 64). Insert the flash memory card containing the updated firmware into the card slot (CN20 on the Main Board). 4. Turn the printer on. 5. "Update Complete" appears when the all the data has copied. 6. Turn off the printer, remove the memory card, and then turn the printer back on. If the printer loses power during the firmware update, restart the update procedure. This returns the printer to normal status. The PC card must meet the 5 V read/write specification for PC cards. 5.3 Self-Diagnostics To determine which self-diagnostic functions to perform, see the Service Parts & Required Adjustments table on page 103. Then follow the links in the table to one of these sections: Test Menu on page 110. Checks the operation of components such as fans, sensors, and control panel buttons, and displays the ROM version and fatal error history. Adjustment Menu on page 115. Used to adjust and clean the printhead, calibrate the paper feed sensors, and print a nozzle check pattern or list of current adjustment settings. Cleaning menu on page 128. Performs printhead cleaning and sets the initial ink charge flag. Print menu on page 128. Performs the same function as the "Test Pattern Print" option in the Adjustment menu. Parameter menu on page 129. Updates or clears the adjustment settings. If you've never used the printer's self-diagnostic functions before, see Using the Self-Diagnostic Mode below to get started. Adjustments 107
-
 1
1 -
2
-
3
-
4
-
5
-
6
-
7
-
8
-
9
-
10
-
11
-
12
-
13
-
14
-
15
-
16
-
17
-
18
-
19
-
20
-
21
-
22
-
23
-
24
-
25
-
26
-
27
-
28
-
29
-
30
-
31
-
32
-
33
-
34
-
35
-
36
-
37
-
38
-
39
-
40
-
41
-
42
-
43
-
44
-
45
-
46
-
47
-
48
-
49
-
50
-
51
-
52
-
53
-
54
-
55
-
56
-
57
-
58
-
59
-
60
-
61
-
62
-
63
-
64
-
65
-
66
-
67
-
68
-
69
-
70
-
71
-
72
-
73
-
74
-
75
-
76
-
77
-
78
-
79
-
80
-
81
-
82
-
83
-
84
-
85
-
86
-
87
-
88
-
89
-
90
-
91
-
92
-
93
-
94
-
95
-
96
-
97
-
98
-
99
-
100
-
101
-
 102
102 -
 103
103 -
 104
104 -
 105
105 -
 106
106 -
 107
107 -
 108
108 -
 109
109 -
 110
110 -
 111
111 -
 112
112 -
113
-
114
-
115
-
116
-
117
-
118
-
119
-
120
-
121
-
122
-
123
-
124
-
125
-
126
-
127
-
128
-
129
-
130
-
131
-
132
-
133
-
134
-
135
-
136
-
137
-
138
-
139
-
140
-
141
-
142
-
143
-
144
-
145
-
146
-
147
-
148
-
149
-
150
-
151
-
152
-
153
-
154
-
155
-
156
-
157
-
158
-
159
-
160
-
161
-
162
-
163
-
164
-
165
-
166
-
167
-
168
-
169
-
170
-
171
-
172
-
173
-
174
-
175
-
176
-
177
-
178
-
179
-
180
-
181
-
182
-
183
-
184
-
185
-
186
-
187
-
188
-
189
-
190
-
191
-
192
-
193
-
194
-
195
-
196
-
197
-
198
 |
 |
