Epson Stylus Pro 9000 Service Manual - Page 126
Rear Sensor Position Adjustment, Please Set Cut Sheet, Printing Pattern, Paper Width, 627mm
 |
View all Epson Stylus Pro 9000 manuals
Add to My Manuals
Save this manual to your list of manuals |
Page 126 highlights
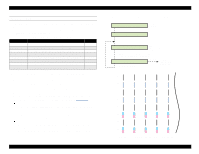
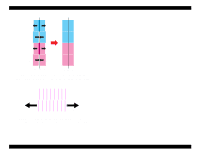
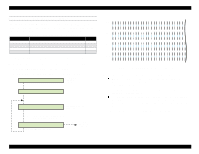
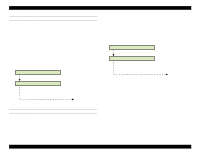
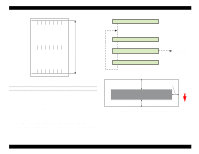
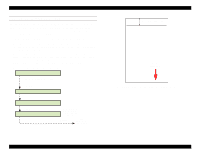
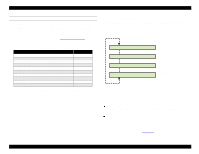
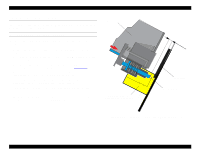
EPSON Stylus Pro 9000 REAR SENSOR POSITION ADJUSTMENT This function makes sure the Rear Paper Sensor correctly detects the rear edge of cut-sheet paper. After the printer makes a line near the rear edge of the paper, measure the distance from the line to the paper's edge, and then enter this measurement when prompted. 1. Make sure "Adj Rear Sensor Pos." appears, and press the Enter button. 2. When you see the "Please Set Cut Sheet" message, load a sheet of cut- sheet paper, short edge first. After the paper is set, press the Enter button to print the check pattern. 3. After printing is finished, measure the distance from the rear edge of the printed pattern to the rear edge of the paper. Press the SelecType or Item button until you see "RearSen. Pos. xx.xmm", and then enter the measurement in increments of 0.1 mm using the Paper Feed +/- buttons. 4. After entering the measurement, press Enter. Please Set Cut Sheet Load cut-sheet paper short edge first. [Enter] Printing Pattern Paper Width 627mm [Enter] RearSen. Pos. +3mm Enter the value with the Paper Feed [+] or [-] button. [Enter] End adjustment/ next menu Measure this value and enter it. Feed direction Figure 5-13. Rear Sensor Position Measurement Adjustments 126
-
 1
1 -
2
-
3
-
4
-
5
-
6
-
7
-
8
-
9
-
10
-
11
-
12
-
13
-
14
-
15
-
16
-
17
-
18
-
19
-
20
-
21
-
22
-
23
-
24
-
25
-
26
-
27
-
28
-
29
-
30
-
31
-
32
-
33
-
34
-
35
-
36
-
37
-
38
-
39
-
40
-
41
-
42
-
43
-
44
-
45
-
46
-
47
-
48
-
49
-
50
-
51
-
52
-
53
-
54
-
55
-
56
-
57
-
58
-
59
-
60
-
61
-
62
-
63
-
64
-
65
-
66
-
67
-
68
-
69
-
70
-
71
-
72
-
73
-
74
-
75
-
76
-
77
-
78
-
79
-
80
-
81
-
82
-
83
-
84
-
85
-
86
-
87
-
88
-
89
-
90
-
91
-
92
-
93
-
94
-
95
-
96
-
97
-
98
-
99
-
100
-
101
-
102
-
103
-
104
-
105
-
106
-
107
-
108
-
109
-
110
-
111
-
112
-
113
-
114
-
115
-
116
-
117
-
118
-
119
-
120
-
 121
121 -
 122
122 -
 123
123 -
 124
124 -
 125
125 -
 126
126 -
 127
127 -
 128
128 -
 129
129 -
 130
130 -
 131
131 -
132
-
133
-
134
-
135
-
136
-
137
-
138
-
139
-
140
-
141
-
142
-
143
-
144
-
145
-
146
-
147
-
148
-
149
-
150
-
151
-
152
-
153
-
154
-
155
-
156
-
157
-
158
-
159
-
160
-
161
-
162
-
163
-
164
-
165
-
166
-
167
-
168
-
169
-
170
-
171
-
172
-
173
-
174
-
175
-
176
-
177
-
178
-
179
-
180
-
181
-
182
-
183
-
184
-
185
-
186
-
187
-
188
-
189
-
190
-
191
-
192
-
193
-
194
-
195
-
196
-
197
-
198
 |
 |
