Epson Stylus Pro 9000 Service Manual - Page 142
EPSON Stylus Pro 9000, Maintenance, Table 6-4.
 |
View all Epson Stylus Pro 9000 manuals
Add to My Manuals
Save this manual to your list of manuals |
Page 142 highlights
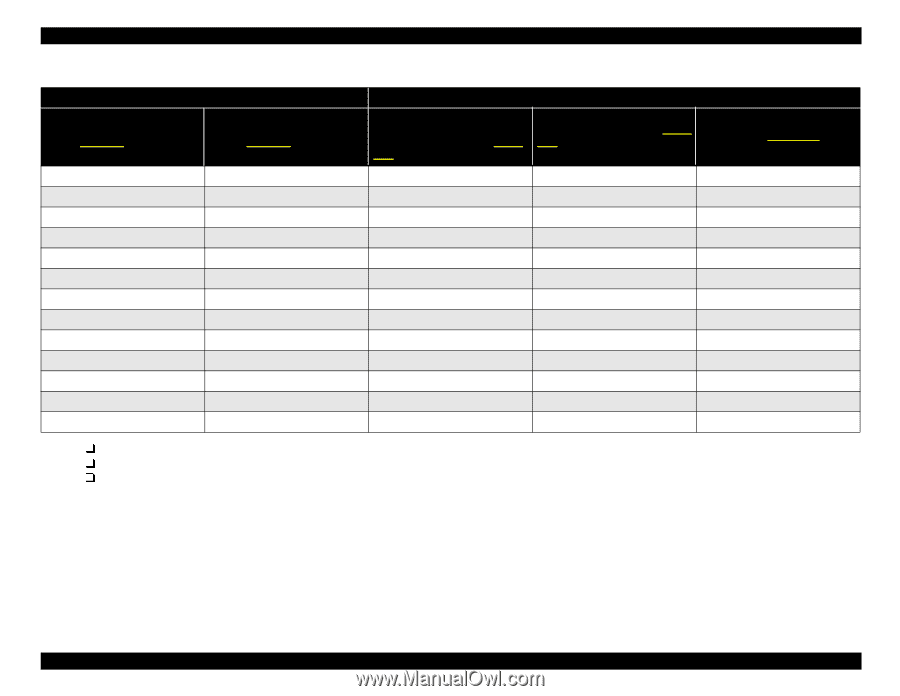
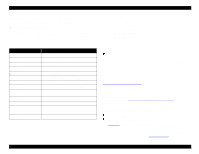
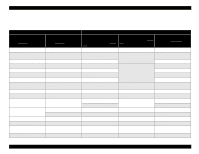
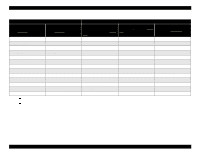
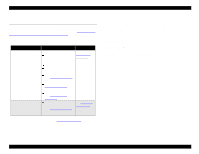
EPSON Stylus Pro 9000 Table 6-4. Summary of Ways to Check and Clear Maintenance Counters (continued) Ways to Check Counters Ways to Clear Counters Self-Diagnostics: Test \ Elec. (see Table 5-6 on page 114) Printer Status Menu (see Table 1-7 on page 15) Self-Diagnostics: Adjustments \ Counter Clear (resets all the following counters); see Table 5-11 on page 128 Maintenance Mode 2 (see Table 1-12 on page 17) Self-Diagnostics: Parameter \ Initialize (see Table 5.3.7 on page 129) Wiper Wiper Head Rubbing R/L Rubbing Cut (cutter blade) Cutter Life Cutter Solenoid Lock Solenoid Capping Mechanism Serial Number PF Resolution NVRAM Initial Charge Flag Periodic Pseudo-Vacuum Flag Firmware Version NOTE: To enter the Self-Diagnostic Mode, press Paper Feed Down + Cut/Eject + Cleaning while turning on the printer. To enter Maintenance Mode 2, press Paper Source + Cut/Eject + Paper Feed Down while turning on the printer. To view the Printer Status Menu, press the SelecType button when the printer is turned on but not printing. Press SelecType repeatedly until "Printer Status Menu" appears. Press the Item button to select the item you want to view. Maintenance 142
-
 1
1 -
2
-
3
-
4
-
5
-
6
-
7
-
8
-
9
-
10
-
11
-
12
-
13
-
14
-
15
-
16
-
17
-
18
-
19
-
20
-
21
-
22
-
23
-
24
-
25
-
26
-
27
-
28
-
29
-
30
-
31
-
32
-
33
-
34
-
35
-
36
-
37
-
38
-
39
-
40
-
41
-
42
-
43
-
44
-
45
-
46
-
47
-
48
-
49
-
50
-
51
-
52
-
53
-
54
-
55
-
56
-
57
-
58
-
59
-
60
-
61
-
62
-
63
-
64
-
65
-
66
-
67
-
68
-
69
-
70
-
71
-
72
-
73
-
74
-
75
-
76
-
77
-
78
-
79
-
80
-
81
-
82
-
83
-
84
-
85
-
86
-
87
-
88
-
89
-
90
-
91
-
92
-
93
-
94
-
95
-
96
-
97
-
98
-
99
-
100
-
101
-
102
-
103
-
104
-
105
-
106
-
107
-
108
-
109
-
110
-
111
-
112
-
113
-
114
-
115
-
116
-
117
-
118
-
119
-
120
-
121
-
122
-
123
-
124
-
125
-
126
-
127
-
128
-
129
-
130
-
131
-
132
-
133
-
134
-
135
-
136
-
 137
137 -
 138
138 -
 139
139 -
 140
140 -
 141
141 -
 142
142 -
 143
143 -
 144
144 -
 145
145 -
 146
146 -
 147
147 -
148
-
149
-
150
-
151
-
152
-
153
-
154
-
155
-
156
-
157
-
158
-
159
-
160
-
161
-
162
-
163
-
164
-
165
-
166
-
167
-
168
-
169
-
170
-
171
-
172
-
173
-
174
-
175
-
176
-
177
-
178
-
179
-
180
-
181
-
182
-
183
-
184
-
185
-
186
-
187
-
188
-
189
-
190
-
191
-
192
-
193
-
194
-
195
-
196
-
197
-
198
 |
 |