Epson Stylus Pro 9000 Service Manual - Page 33
Paper Loading Errors, 2.2.3 Carriage Lock Mechanism,
 |
View all Epson Stylus Pro 9000 manuals
Add to My Manuals
Save this manual to your list of manuals |
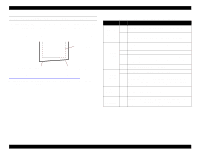
Page 33 highlights
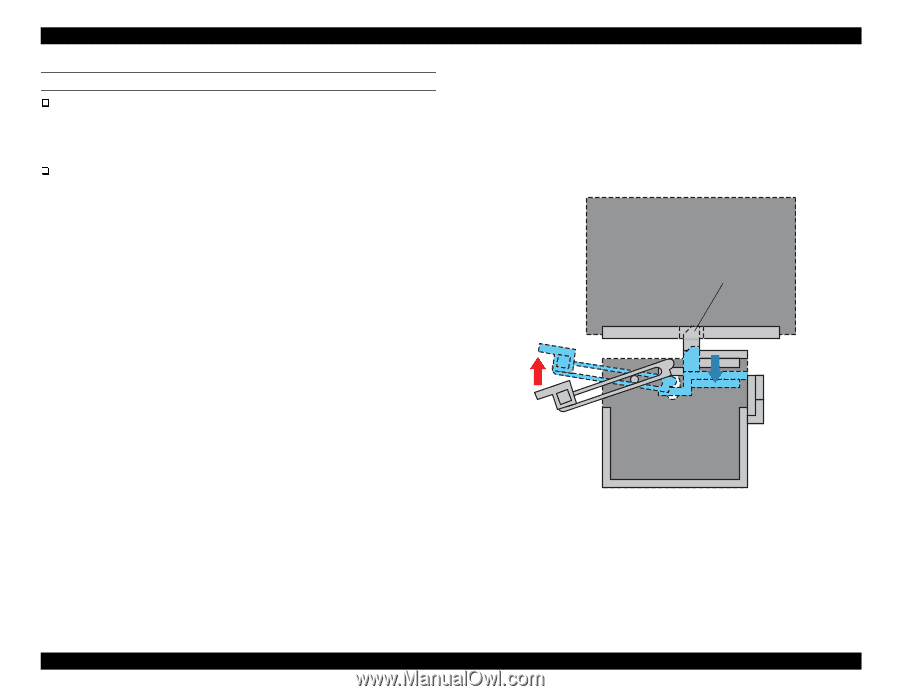
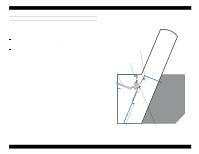
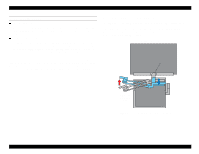
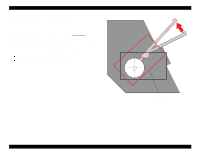
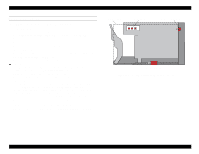
EPSON Stylus Pro 9000 PAPER LOADING ERRORS "Reload Paper" Error After paper is loaded in the printer, the printer performs the left, right, and leading edge detection operations described above. If the operations fail at any point, a "Reload Paper" error occurs. "Paper Not Straight" Error To avoid printing on paper that is skewed or fed at a slant too far to the right or left, the printer detects the right and left edges at the leading edge of each page. If the printer determines that the paper is skewed 3 mm or more from the position previously detected, a "Paper Not Straight" error occurs. To avoid paper loading errors, make sure the paper's left edge (near HP) is lined up with the vertical line of holes in the Lower Paper Guide. Paper loaded within 10 mm of the center of the vertical line of holes in the Lower Paper Guide is considered in the printable zone; however, paper loaded outside that 10 mm zone causes an error. 2.2.3 Carriage Lock Mechanism The printer uses an electromagnetic solenoid to release the carriage lock. When the carriage lock does not receive any signal, the actuator rises into the opening at the bottom of the subcarriage, restricting carriage movement. To release the carriage for printing, the printer signals the actuator which then moves down, releasing the carriage. Carriage Cover Locking Actuator CR Lock Release Lever Figure 2-11. Carriage Lock Mechanism Technical Overview 33
-
 1
1 -
2
-
3
-
4
-
5
-
6
-
7
-
8
-
9
-
10
-
11
-
12
-
13
-
14
-
15
-
16
-
17
-
18
-
19
-
20
-
21
-
22
-
23
-
24
-
25
-
26
-
27
-
 28
28 -
 29
29 -
 30
30 -
 31
31 -
 32
32 -
 33
33 -
 34
34 -
 35
35 -
 36
36 -
 37
37 -
 38
38 -
39
-
40
-
41
-
42
-
43
-
44
-
45
-
46
-
47
-
48
-
49
-
50
-
51
-
52
-
53
-
54
-
55
-
56
-
57
-
58
-
59
-
60
-
61
-
62
-
63
-
64
-
65
-
66
-
67
-
68
-
69
-
70
-
71
-
72
-
73
-
74
-
75
-
76
-
77
-
78
-
79
-
80
-
81
-
82
-
83
-
84
-
85
-
86
-
87
-
88
-
89
-
90
-
91
-
92
-
93
-
94
-
95
-
96
-
97
-
98
-
99
-
100
-
101
-
102
-
103
-
104
-
105
-
106
-
107
-
108
-
109
-
110
-
111
-
112
-
113
-
114
-
115
-
116
-
117
-
118
-
119
-
120
-
121
-
122
-
123
-
124
-
125
-
126
-
127
-
128
-
129
-
130
-
131
-
132
-
133
-
134
-
135
-
136
-
137
-
138
-
139
-
140
-
141
-
142
-
143
-
144
-
145
-
146
-
147
-
148
-
149
-
150
-
151
-
152
-
153
-
154
-
155
-
156
-
157
-
158
-
159
-
160
-
161
-
162
-
163
-
164
-
165
-
166
-
167
-
168
-
169
-
170
-
171
-
172
-
173
-
174
-
175
-
176
-
177
-
178
-
179
-
180
-
181
-
182
-
183
-
184
-
185
-
186
-
187
-
188
-
189
-
190
-
191
-
192
-
193
-
194
-
195
-
196
-
197
-
198
 |
 |