Epson Stylus Pro 9000 Service Manual - Page 135
Cover Open Sensor Assembly (Right and left), Press the SelecType or Item button until Sen: Cover
 |
View all Epson Stylus Pro 9000 manuals
Add to My Manuals
Save this manual to your list of manuals |
Page 135 highlights
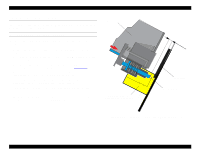
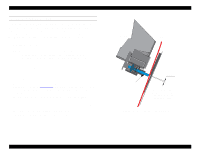
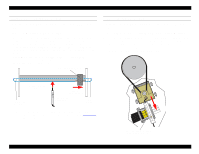
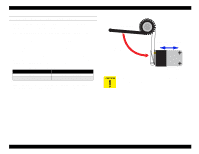
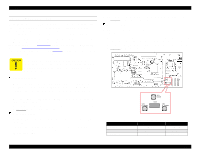
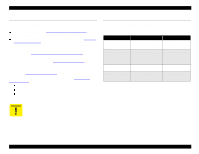
EPSON Stylus Pro 9000 COVER OPEN SENSOR ASSEMBLY (RIGHT AND LEFT) If you remove or replace the Front Cover, it's a good idea to check the operation of the Cover Open sensors as described below. 1. Press the following buttons and turn on the printer to enter the SelfDiagnostics mode: Paper Feed ↓ + Cut/Eject + Cleaning 2. Press the SelecType or Item button until "Check: Test" appears on the LCD, and then press the Enter button. 3. Press the SelecType or Item button until "Test: Sensor" appears on the LCD, and then press Enter. 4. Press the SelecType or Item button until "Sen: Cover xxxx" appears. 5. While opening and closing the Front Cover, check that the LCD display changes depending on the Front Cover position: Table 5-13. Cover Open Sensor Check Front Cover Open Closed LCD Message Sen: Cover Open Sen: Cover Close 6. If the correct message does not appear, adjust the sensor position as shown in the figure at right, and then retest its operation. Sensor Actuator Close the Front Cover Adjust the position to the actuator. Front Cover Sensor Make sure both Front Cover sensors are on when the Front Cover is closed. Adjustments 135
-
 1
1 -
2
-
3
-
4
-
5
-
6
-
7
-
8
-
9
-
10
-
11
-
12
-
13
-
14
-
15
-
16
-
17
-
18
-
19
-
20
-
21
-
22
-
23
-
24
-
25
-
26
-
27
-
28
-
29
-
30
-
31
-
32
-
33
-
34
-
35
-
36
-
37
-
38
-
39
-
40
-
41
-
42
-
43
-
44
-
45
-
46
-
47
-
48
-
49
-
50
-
51
-
52
-
53
-
54
-
55
-
56
-
57
-
58
-
59
-
60
-
61
-
62
-
63
-
64
-
65
-
66
-
67
-
68
-
69
-
70
-
71
-
72
-
73
-
74
-
75
-
76
-
77
-
78
-
79
-
80
-
81
-
82
-
83
-
84
-
85
-
86
-
87
-
88
-
89
-
90
-
91
-
92
-
93
-
94
-
95
-
96
-
97
-
98
-
99
-
100
-
101
-
102
-
103
-
104
-
105
-
106
-
107
-
108
-
109
-
110
-
111
-
112
-
113
-
114
-
115
-
116
-
117
-
118
-
119
-
120
-
121
-
122
-
123
-
124
-
125
-
126
-
127
-
128
-
129
-
 130
130 -
 131
131 -
 132
132 -
 133
133 -
 134
134 -
 135
135 -
 136
136 -
 137
137 -
 138
138 -
 139
139 -
 140
140 -
141
-
142
-
143
-
144
-
145
-
146
-
147
-
148
-
149
-
150
-
151
-
152
-
153
-
154
-
155
-
156
-
157
-
158
-
159
-
160
-
161
-
162
-
163
-
164
-
165
-
166
-
167
-
168
-
169
-
170
-
171
-
172
-
173
-
174
-
175
-
176
-
177
-
178
-
179
-
180
-
181
-
182
-
183
-
184
-
185
-
186
-
187
-
188
-
189
-
190
-
191
-
192
-
193
-
194
-
195
-
196
-
197
-
198
 |
 |
