Epson Stylus Pro 9000 Service Manual - Page 55
Overview, 4.1.1 Precautions, Precautions
 |
View all Epson Stylus Pro 9000 manuals
Add to My Manuals
Save this manual to your list of manuals |
Page 55 highlights
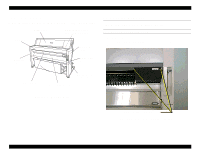
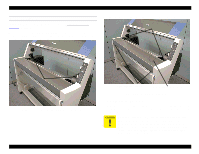
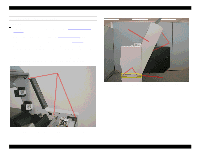
EPSON Stylus Pro 9000 4.1 Overview This section provides disassembly and assembly instructions for the EPSON Stylus Pro 9000. Except as otherwise noted, you can reassemble the printer by reversing the order in which you took it apart. 4.1.1 Precautions In addition to reading the precautions that appear throughout this chapter, read and keep in mind the following: To prevent electric shock or damage to the printer, always turn off the power switch and unplug the power cable before servicing the printer. If you have to remove the printer housing while the printer is on to view internal operations, be very careful around moving parts such as the fans, gears, carriage, and carriage drive belt. Keep in mind that the steel carriage drive belt and cutter blade have sharp edges and can be dangerous. The printer is very heavy (about 200 lbs). If you need to separate the printer from its stand or lift the printer, four people are needed. For safety reasons, the front cover's position, up or down, is detected by the cover-open sensors, located under the left and right side covers of the printer. Do not block or modify these sensors. If ink gets on your hands, wash them thoroughly with soap and water. If ink gets in your eyes, rinse them immediately with water. Because the main board includes a lithium battery for memory backup purposes, keep the following in mind: -Avoid shorting the battery, which can make it very hot or cause it to explode. -When replacing the battery, make sure the positive and negative sides are correctly installed. Disassembly & Assembly Because ink may leak from the printer when servicing inkrelated parts, remove the paper hammock and put a sheet or cloth under the printer when performing such repairs. Static electricity can damage sensitive printer components, especially on the main board. Use an anti-static wrist band or similar grounding device to prevent static electricity buildup. The cutter blade is very hard and can damage or scratch printer parts. Also, it can be easily chipped or damaged. Be careful when handling or replacing the cutter. 55
-
 1
1 -
2
-
3
-
4
-
5
-
6
-
7
-
8
-
9
-
10
-
11
-
12
-
13
-
14
-
15
-
16
-
17
-
18
-
19
-
20
-
21
-
22
-
23
-
24
-
25
-
26
-
27
-
28
-
29
-
30
-
31
-
32
-
33
-
34
-
35
-
36
-
37
-
38
-
39
-
40
-
41
-
42
-
43
-
44
-
45
-
46
-
47
-
48
-
49
-
 50
50 -
 51
51 -
 52
52 -
 53
53 -
 54
54 -
 55
55 -
 56
56 -
 57
57 -
 58
58 -
 59
59 -
 60
60 -
61
-
62
-
63
-
64
-
65
-
66
-
67
-
68
-
69
-
70
-
71
-
72
-
73
-
74
-
75
-
76
-
77
-
78
-
79
-
80
-
81
-
82
-
83
-
84
-
85
-
86
-
87
-
88
-
89
-
90
-
91
-
92
-
93
-
94
-
95
-
96
-
97
-
98
-
99
-
100
-
101
-
102
-
103
-
104
-
105
-
106
-
107
-
108
-
109
-
110
-
111
-
112
-
113
-
114
-
115
-
116
-
117
-
118
-
119
-
120
-
121
-
122
-
123
-
124
-
125
-
126
-
127
-
128
-
129
-
130
-
131
-
132
-
133
-
134
-
135
-
136
-
137
-
138
-
139
-
140
-
141
-
142
-
143
-
144
-
145
-
146
-
147
-
148
-
149
-
150
-
151
-
152
-
153
-
154
-
155
-
156
-
157
-
158
-
159
-
160
-
161
-
162
-
163
-
164
-
165
-
166
-
167
-
168
-
169
-
170
-
171
-
172
-
173
-
174
-
175
-
176
-
177
-
178
-
179
-
180
-
181
-
182
-
183
-
184
-
185
-
186
-
187
-
188
-
189
-
190
-
191
-
192
-
193
-
194
-
195
-
196
-
197
-
198
 |
 |