Yamaha LS9-32 Owner's Manual
Yamaha LS9-32 Manual
 |
View all Yamaha LS9-32 manuals
Add to My Manuals
Save this manual to your list of manuals |
Yamaha LS9-32 manual content summary:
- Yamaha LS9-32 | Owner's Manual - Page 1
LS9-16/LS9-32 Owner's Manual EN - Yamaha LS9-32 | Owner's Manual - Page 2
/uses radio frequencies and, if not installed and used according to the instructions found in the users manual, Yamaha Corporation of America Address : 6600 Orangethorpe Ave., Buena Park, Calif. 90620 Telephone : 714-522-9011 Type of Equipment : DIGITAL MIXING CONSOLE Model Name : LS9-16, LS9-32 - Yamaha LS9-32 | Owner's Manual - Page 3
SERVICEABLE PARTS INSIDE. REFER SERVICING TO QUALIFIED SERVICE servicing) instructions in the literature accompanying the product. IMPORTANT SAFETY INSTRUCTIONS 1 Read these instructions. 2 Keep these instructions. 3 Heed all warnings. 4 Follow all instructions. 5 Do not use power used, use Yamaha - Yamaha LS9-32 | Owner's Manual - Page 4
is a sudden loss of sound during use of the device, or if any unusual smells or smoke should appear to be caused by it, immediately turn off the power switch, disconnect the electric plug from the outlet, and have the device inspected by qualified Yamaha service personnel. • If this device should be - Yamaha LS9-32 | Owner's Manual - Page 5
turn the power off when the device is not in use. The performance of components with moving contacts, such as switches, volume controls, and connectors, deteriorates over time. Consult qualifi ed Yamaha service personnel about replacing defective components. (5)-4 2/2 LS9-16/32 Owner's Manual 5 - Yamaha LS9-32 | Owner's Manual - Page 6
of the LS9 9 Differences between the LS9-16 and LS9-32 ......... 11 Number of INPUT channels 11 Rear panel 11 Top panel 12 Other 13 The LS9's channel structure 13 About the MIX bus types (VARI / FIXED 14 About word clock 14 Conventions in this manual 14 About the firmware version 14 - Yamaha LS9-32 | Owner's Manual - Page 7
121 Using mute groups 121 Using the MUTE GROUP screen to operate mute groups 121 Using the SELECTED CH VIEW screen to specify mute groups 122 Using the Mute Safe function 123 The Channel Link Editing a user authentication key 192 Changing the user level 192 LS9-16/32 Owner's Manual 7 - Yamaha LS9-32 | Owner's Manual - Page 8
205 About the SETUP screen 205 Word clock settings 206 Switching a digital I/O card's SRC on/off 208 Using cascade connections 209 Operations on the cascade slave LS9 210 Operations on the cascade master LS9 212 Basic settings for MIX buses and MATRIX buses 213 Setting the date and time of - Yamaha LS9-32 | Owner's Manual - Page 9
analog mixer. Mix parameter settings, including head amp gain and phantom power for input channels, can be stored and recalled as "scenes." All faders on the panel are motorized moving faders, so that when you recall a scene, the previous fader locations are reproduced immediately. LS9-16/32 Owner - Yamaha LS9-32 | Owner's Manual - Page 10
) is not supported. This function is convenient when you want to record the mix output of a specific bus, or if you want to play back a song from the speakers during the sound check. ■ Cascade connections in the digital domain A second LS9 console or a digital mixer such as the Yamaha M7CL or PM5D - Yamaha LS9-32 | Owner's Manual - Page 11
Number of INPUT channels The LS9-16 has up to 32 operable INPUT channels, while the LS9-32 has up to 64. The number and structure of other channels (ST IN channels, MIX channels, MATRIX channels, STEREO/MONO channels) are identical. Rear panel The LS9-16 and LS9-32 differ in the number - Yamaha LS9-32 | Owner's Manual - Page 12
IN channels The LS9-16 provides thirty-two channel modules and four ST IN channels. By switching fader layers you can operate up to sixty-four INPUT channels (monaural). The four ST IN channels (stereo) can be operated from either layer (1-32 or 33-64). Channel modules 12 LS9-16/32 Owner's Manual - Yamaha LS9-32 | Owner's Manual - Page 13
in the numbering of the channel modules on the panel and the channels that are assigned to each fader layer. HINT • In this owner's manual, whenever there is a difference between the LS9-16 model and the LS9-32 model, specifications that apply only to the LS9-32 model are enclosed in curly - Yamaha LS9-32 | Owner's Manual - Page 14
Conventions in this manual • About the firmware version About the MIX bus types (VARI / FIXED) The sixteen MIX buses provided on the LS9 can be assigned input channel to a VARI type MIX bus can be chosen from before the EQ (attenuator), before the fader, or after the [ON] key. This type is used - Yamaha LS9-32 | Owner's Manual - Page 15
SELECTED CHANNEL section (p. 21) ⁄2 USB connector (side panel, to the right of the display) (p. 22) ⁄1 Data entry section (p. 22) x ST IN (stereo input) section (p. 17) z Channel module section (p. 17) c STEREO MASTER section (p. 18) v USER DEFINED KEYS section (p. 18) LS9-16/32 Owner's Manual - Yamaha LS9-32 | Owner's Manual - Page 16
Top panel LS9-32 m MIX/MATRIX SELECT section (p. 20) ⁄0 SELECTED CHANNEL section (p. 21) b DISPLAY ACCESS section (p. 19) n LAYER Channel module section (p. 17) c STEREO MASTER section (p. 18) v USER DEFINED KEYS section (p. 18) x ST IN (stereo input) section (p. 17) 16 LS9-16/32 Owner's Manual - Yamaha LS9-32 | Owner's Manual - Page 17
MIX channel, to the MATRIX bus). E Fader/Encoder This adjusts the signal level or monitor level of the input channel or output channel. In SENDS ON FADER mode, this adjusts the send level from that channel to the currently selected MIX bus (or from a MIX channel, to the MATRIX bus). LS9-16/32 Owner - Yamaha LS9-32 | Owner's Manual - Page 18
of the MIX/MATRIX channels or the send level from the STEREO channel to the MATRIX buses, depending on the LAYER. HINT • If you turn on MONITOR ON MASTER FADER in the USER DEFINED KEY SETUP screen, the [ON] key and fader will respectively turn MONITOR on/off and control its level. 18 LS9-16/32 Owner - Yamaha LS9-32 | Owner's Manual - Page 19
the LS9-32 LAYER key / module LAYER [1-32] key LAYER [33-64] key LAYER [MASTER] key 1-16 CH 1-16 CH 33-48 MIX 1-16 17-24 CH 17-24 CH 49-56 MATRIX 1-8 25-31 CH 25-31 CH 57-63 - 32 CH 32 CH 64 MONO ST IN 1-4 ST IN 1-4 ST IN 1-4 - D LAYER [CUSTOM FADER] key This key assigns the channels selected - Yamaha LS9-32 | Owner's Manual - Page 20
cursor to the desired parameter, and use the dial or the [INC][DEC] keys to edit the value. . Stereo meter / Cue section In this section you can view the level of the STEREO channel or cue monitor. 1 20 LS9-16/32 Owner's Manual 2 3 1 Stereo meter This is a 32-segment LED meter that indicates the - Yamaha LS9-32 | Owner's Manual - Page 21
when using phantom power. ● When any other channel is selected The encoder will not do anything. B [PAN] encoder ● When an INPUT/ST IN channel is selected ● When a MIX channel is selected The encoder will adjust the panning of the signal sent to the L/R channels (or the L/C/R channels in the case of - Yamaha LS9-32 | Owner's Manual - Page 22
returns the state of the LS9's panel to home position. When you press this key, the panel will change as follows. • The display will show the SELECTED CH VIEW screen for the currently selected channel. • The channel level function will be assigned to the faders (SENDS ON FADER mode will be defeated - Yamaha LS9-32 | Owner's Manual - Page 23
Rear panel LS9-16 2 4 5 67 8 1 Rear panel 2 3 Parts and their function LM KJ LS9-32 KJ 4 5 67 8 9 1 LM 2 3 LS9-16/32 Owner's Manual 23 - Yamaha LS9-32 | Owner's Manual - Page 24
LS9-32 1 (ground) 3 (cold) 2 (hot) LS9-16 LS9-16 LS9-32 These are XLR-3-32 male output jacks for outputting analog audio signals. These are used mainly to output MIX/ MATRIX channel .) For details, contact to your Yamaha dealer listed at the end of this manual. 24 LS9-16/32 Owner's Manual - Yamaha LS9-32 | Owner's Manual - Page 25
from the LS9. These are used mainly for recording LS9 parameter operations or scene/library changes on an external device, or for remotely operating LS9 parameters. I LAMP connector (LS9-32 only) This is an XLR-4-31 connector that supplies power to a separately sold gooseneck lamp (e.g., Yamaha LA1L - Yamaha LS9-32 | Owner's Manual - Page 26
Front panel Front panel 1 2 1 PHONES LEVEL control This adjusts the level of the signal that is output from the PHONES OUT jack 2. B PHONES OUT (headphone output) jack This is a headphone jack for monitoring the MONITOR OUT or CUE signal. 26 LS9-16/32 Owner's Manual - Yamaha LS9-32 | Owner's Manual - Page 27
want to control. LS9-16 LS9-32 • The channel level function will be assigned to the faders (SENDS ON FADER mode will be defeated). The [HOME] key will blink if the display is showing any screen other than the SELECTED CH VIEW screen, or if SENDS ON FADER mode is active. In such cases, you will - Yamaha LS9-32 | Owner's Manual - Page 28
CH 17-32 INPUT CH 33-48 INPUT CH 49-64 MIX 1-16 MATRIX 1-8 - Any desired channels MONO STEREO STEREO STEREO STEREO ST IN 1-4 ST IN 1-4 - Any desired channels HINT • On the LS9-16, MATRIX channels and MONO channels are not assigned to the fader layers that are preset. If you want to use - Yamaha LS9-32 | Owner's Manual - Page 29
channel from the top panel. Selecting functions Use the keys of the DISPLAY ACCESS section when you want to use functions other than mix parameters, or when you want to change various settings. 3 Basic operations on the LS9 , the previously displayed screen will appear. LS9-16/32 Owner's Manual 29 - Yamaha LS9-32 | Owner's Manual - Page 30
of color as the keys of the MIX/MATRIX SELECT section), and the indices will be white. When off, the knob will be gray and the indices will be black. HINT • In SENDS ON FADER mode, the send-destination bus is shown blinking at the right of the scene number. 30 LS9-16/32 Owner's Manual - Yamaha LS9-32 | Owner's Manual - Page 31
CH VIEW screen This screen shows all mix parameters of the currently selected channel. To access this screen, press the [HOME] key of the SELECTED CHANNEL part of the window. You can use these tool buttons to recall or copy CHANNEL VIEW screen by pressing the [HOME] key.) LS9-16/32 Owner's Manual 31 - Yamaha LS9-32 | Owner's Manual - Page 32
Faders in the screen are mainly used to view or edit the level of the corresponding channels. They will move in tandem with the faders of the top panel. You can also move the cursor to a fader and use the list up or down, use the dial or the [DEC]/[INC] keys. List window 32 LS9-16/32 Owner's Manual - Yamaha LS9-32 | Owner's Manual - Page 33
or comment to a scene or library, or when you assign a name to a channel. To enter characters, move the cursor to the desired character in the window and the problem. If you move the cursor to the CANCEL button and press the [ENTER] key, the operation will be cancelled. LS9-16/32 Owner's Manual 33 - Yamaha LS9-32 | Owner's Manual - Page 34
LS9, you can assign a name to each input channel and output channel, and assign a title to each scene or library data item when you save it. To assign a name, you will use characters that have been input. 2 Use the on-screen keyboard to enter Inserts the text string copied using the COPY button at the - Yamaha LS9-32 | Owner's Manual - Page 35
copy the parameters of a channel to a different channel. Here we will explain how to use the tool buttons. About the tool buttons Using libraries 3 Basic operations on the LS9 Tool buttons like the ALL..........Turns off all of the parameters in the screen. LS9-16/32 Owner's Manual 35 - Yamaha LS9-32 | Owner's Manual - Page 36
. ● Dynamics library The dynamics library holds three types of data; Dynamics 1 and Dynamics 2 for input channels, and Dynamics 1 for output channels. Recall is not possible if you've selected a type that is not supported by the corresponding dynamics processor. 36 LS9-16/32 Owner's Manual - Yamaha LS9-32 | Owner's Manual - Page 37
Using selected data will be loaded into the channel (EQ/ dynamics) or rack (GEQ/ Move the cursor to the list, and use the dial or the [DEC]/[INC] LS9 ● Storing data in a library 1 Access a popup window or screen that contains tool buttons. 2 Select the channel the power while the Store operation is in progress - Yamaha LS9-32 | Owner's Manual - Page 38
Using channel or the effect settings of a rack to their initial state. HINT • GEQ settings can be initialized using the FLAT button in the screen. 1 Access a popup window or screen that contains tool buttons. 2 Select the channel the list, and use the dial or settings of the channel you selected - Yamaha LS9-32 | Owner's Manual - Page 39
The settings of the channel (EQ/dynamics) or the rack (GEQ/effect) you selected in step 2 will be pasted. Comparing two sets of settings By using the compare button in you can also initialize the channel/rack and create the second version of your settings from scratch. LS9-16/32 Owner's Manual 39 - Yamaha LS9-32 | Owner's Manual - Page 40
Using the tool buttons 5 When you want to compare the first and second time as long as the buffer memory has not been overwritten. HINT • The settings held in buffer memory can also be used by the Paste operation. • If you operate the tool buttons for a rack in which Flex15GEQ (of the two types - Yamaha LS9-32 | Owner's Manual - Page 41
channels INPUT channels 1-32 NOTE • This patching can be changed as necessary (→ p. 99). For example if you want to connect a stereo line-level device, you can assign two INPUT jacks to a ST IN channel so that the left and right channels can be operated in tandem for convenience. LS9-16/32 Owner - Yamaha LS9-32 | Owner's Manual - Page 42
(→ p. 95). For the LS9-16 Analog output jacks OMNI OUT jacks 1-6 OMNI OUT jacks 7-8 Output channels MIX channels 1-6 STEREO L/R channel For the LS9-32 Analog output jacks OMNI OUT jacks 1-14 OMNI OUT jacks 15-16 Output channels MIX channels 1-14 STEREO L/R channel 42 LS9-16/32 Owner's Manual - Yamaha LS9-32 | Owner's Manual - Page 43
-48 INPUT channels 49-56 INPUT channels 57-64 MIX channels 1-8 MIX channels 9-16 MIX channels 1-8 MIX channels 9-16 The LS9's 2TR IN DIGITAL/2TR OUT DIGITAL jacks are used to transfer two-channel digital audio signals to or from an external device (e.g., CD player or CD/MD recorder). By installing - Yamaha LS9-32 | Owner's Manual - Page 44
card Before you install an I/O card in a slot, you must check the Yamaha website to verify whether the LS9 supports that card and to verify the number of other Yamaha cards or third-party cards that can be used in conjunction with it. http://www.yamahaproaudio.com/ To install an option I/O card - Yamaha LS9-32 | Owner's Manual - Page 45
you start up. 1 Power-on the LS9. When you power-on the LS9, you must turn on your equipment in the order of the LS9 → power amp or monitor system. (Use the opposite order when powering-off.) 2 In the selection will not be affected.) 1 2 1 Scene list B RECALL button LS9-16/32 Owner's Manual 45 - Yamaha LS9-32 | Owner's Manual - Page 46
either case, you must use the following procedure to specify the word clock source that the LS9 will use for operation. HINT • The following procedure is not necessary if you are using the LS9 as the word clock master, or if no external devices are digitally connected to the LS9. 46 LS9-16/32 Owner - Yamaha LS9-32 | Owner's Manual - Page 47
the HA (head amp) gain, switch phantom power on/off, and switch the phase for each input channel to which you've connected a mic or instrument. When setting HA-related parameters on the LS9, you can either use the SELECTED CHANNEL section or the SELECTED CH VIEW screen in the display to make set - Yamaha LS9-32 | Owner's Manual - Page 48
a difference between the Hot and Cold output impedance of the external device connected to the INPUT connector when using phantom power. 6 To make HA settings for another channel, use the [SEL] keys to select another channel and make settings in the same way. 1 GAIN knob 48 LS9-16/32 Owner's Manual - Yamaha LS9-32 | Owner's Manual - Page 49
not currently shown in the popup window, use the [SEL] key to select that channel, and then make settings for it. For example if INPUT channels 1-8 are shown in the popup window, pressing the INPUT channel 9 [SEL] key will change the popup window to INPUT channels 9-16. LS9-16/32 Owner's Manual 49 - Yamaha LS9-32 | Owner's Manual - Page 50
or the ST IN section, make sure that the [ON] key of the currently selected channel is turned on. 1 ST button B PAN/BAL knob 2 Use the keys of the LAYER section and the [SEL] keys of the channel module section to select the channel for the INPUT jack you want to control. 50 LS9-16/32 Owner's Manual - Yamaha LS9-32 | Owner's Manual - Page 51
will appear, allowing you to adjust the level and pan/balance of the signal sent to the STEREO bus, eight channels at a time. This popup window shows the parameters for the eight channels that include the channel you selected in step 2. 1 2 1 ST button B PAN/BAL knob LS9-16/32 Owner's Manual 51 - Yamaha LS9-32 | Owner's Manual - Page 52
. For example if INPUT channels 1-8 are shown in the popup window, pressing the INPUT channel 9 [SEL] key will change the popup window to INPUT channels 9-16. If you press a [SEL] key of the ST IN section, the L/R channels of ST IN channels 1-4 will be displayed together. 52 LS9-16/32 Owner's Manual - Yamaha LS9-32 | Owner's Manual - Page 53
jacks or slot, and sends them to the STEREO bus, MONO bus, and MIX buses. There are two types of input channel, as follows. ■ INPUT channels 1-32 {1-64 These channels are used to process monaural signals. When the LS9 is in the default state, the input signals from the rear panel INPUT jacks - Yamaha LS9-32 | Owner's Manual - Page 54
output port in order to output the input signal directly (→ p. 103). The direct out signal can be taken from pre-HPF, pre-EQ, or pre-fader. ● METER This meters the level of the input channel. You can switch the position at which the level is detected. 54 LS9-16/32 Owner's Manual - Yamaha LS9-32 | Owner's Manual - Page 55
we will explain how to specify the channel name and icon. 1 Press the SELECTED CHANNEL section [HOME] key. The SELECTED CH VIEW screen will appear in the display. 2 Use the LAYER section to select the desired fader layer. 3 Press a [SEL] key in the channel module section or ST IN section to select - Yamaha LS9-32 | Owner's Manual - Page 56
), move the cursor to the channel name field in the upper part of the window and press the [ENTER] key. The keyboard window will appear in the lower part of the window, allowing you to enter or edit the text. For details on using the keyboard window, refer to p.34. 56 LS9-16/32 Owner's Manual - Yamaha LS9-32 | Owner's Manual - Page 57
channel in the window, and press the [ENTER] key. The +48V button will turn on (red), and phantom power will be supplied to the corresponding INPUT jack. NOTE • If you want to use phantom power, you must first turn ON the +48V MASTER ON/OFF button located in the SYSTEM SETUP screen. LS9-16/32 Owner - Yamaha LS9-32 | Owner's Manual - Page 58
knob in the screen. HINT • If you want to use headphones etc. to monitor the signal of the STEREO bus or MONO bus, you should press the DISPLAY ACCESS section [MONITOR] key several times to access the MONITOR screen, and select "LCR" as the monitor source (→ p. 146). 58 LS9-16/32 Owner's Manual - Yamaha LS9-32 | Owner's Manual - Page 59
the signal sent to the STEREO bus. For a ST IN channel, this acts as a BALANCE knob that adjusts the volume balance of the left/right signals sent to the STEREO bus. Move the cursor to the knob and use the dial or the [DEC]/[INC] keys to adjust the setting. LS9-16/32 Owner's Manual 59 - Yamaha LS9-32 | Owner's Manual - Page 60
If you want to use the MONO bus, make sure that the [ON] key of the MONO channel is turned on, and raise the fader of the MONO channel to an appropriate position. This operation will differ between the LS9-16 and LS9-32. ● For the LS9-16 Assign the MONO channel to the custom fader layer, press the - Yamaha LS9-32 | Owner's Manual - Page 61
change the signal levels sent from the ST IN L/R channels to the STEREO (L/R) bus and MONO (C) bus as shown in the following illustration. In this case, the [PAN] encoder will operate as a conventional the STEREO (R) bus L C R PAN knob Signal level Signal level LS9-16/32 Owner's Manual 61 - Yamaha LS9-32 | Owner's Manual - Page 62
point for the signals sent from a set of eight channels to a specific MIX bus. ■ Using the top panel faders In this method, you switch the LS9 to SENDS ON FADER mode and use the top panel faders to adjust the send levels to the MIX bus. This method lets you simultaneously control the send levels - Yamaha LS9-32 | Owner's Manual - Page 63
can be linked with the TO ST PAN/TO ST BAL knob of the SELECTED CH VIEW screen (→ p. 213). • If you want to monitor the signal that is being sent to a specific MIX bus, select the master fader layer and press the [CUE] key for that MIX channel. Input channel operations LS9-16/32 Owner's Manual 63 - Yamaha LS9-32 | Owner's Manual - Page 64
input channels to the VARI type MIX bus. F ALL POST button This button selects POST as the position from which the signals are sent from all input channels to the VARI type MIX bus. If the send-destination MIX bus is set to stereo, the screen will change as follows. 7 64 LS9-16/32 Owner's Manual - Yamaha LS9-32 | Owner's Manual - Page 65
the MIX bus to which you're sending the signal, and that a monitor system or external effect processor etc. is connected to the corresponding output port. 2 Press the SELECTED CHANNEL section [HOME] key. The SELECTED CH VIEW screen will appear in the display. 1 1 SEND popup button LS9-16/32 Owner - Yamaha LS9-32 | Owner's Manual - Page 66
the send-destination is a MIX bus), SENDS ON FADER mode will be cancelled. • You cannot operate the fader or [ON] key of a channel that is not a send-source (a channel that does not have a MIX SEND parameter) or of a channel that is not a send-destination bus master. 66 LS9-16/32 Owner's Manual - Yamaha LS9-32 | Owner's Manual - Page 67
METER MIX OUT1-16 POST ON (13-16)To KEYIN To RACKIN PATCH To OUTPUT PATCH To MONITOR SELECT To RECORDER IN PATCH ST L MONO(C) ST R LEVEL ON PAN To MATRIX PRE FADER / POST ON VARI STEREO PAN MODE TO ST TO MONO PAN LR MONO TO LCR LCR CSR POST ON LS9-16/32 Owner's Manual - Yamaha LS9-32 | Owner's Manual - Page 68
levels 1-8) This adjusts the send level of the signal sent from the MIX channels, STEREO (L/R) channel, or MONO (C) channel to each MATRIX bus 1-8. As the position from which the signal is sent to the MATRIX bus, you can choose either pre-fader or after the [ON] key. 68 LS9-16/32 Owner's Manual - Yamaha LS9-32 | Owner's Manual - Page 69
Here's how to specify the channel name and icon for each output channel. 1 Press the SELECTED CHANNEL section [HOME] key. The SELECTED CH VIEW screen will appear in the display. 2 Use the LAYER section to select the fader layer that contains the desired output channel. 4 Move the cursor to the - Yamaha LS9-32 | Owner's Manual - Page 70
use the [SEL] keys to switch the channel that you're operating. 10 When you've finished entering information, move the cursor to the CLOSE button (or the × symbol in the upper right of the window) and press the [ENTER] key. You will return to the SELECTED CH VIEW screen. 70 LS9-16/32 Owner's Manual - Yamaha LS9-32 | Owner's Manual - Page 71
only want to adjust the pan or balance of the MIX channel, operate the SELECTED CHANNEL section [PAN] encoder (→ p. 86). You can obtain the same result by moving the cursor to the PAN/BAL knob in the SELECTED CH VIEW screen and operating the dial or the [DEC]/[INC] keys. LS9-16/32 Owner's Manual 71 - Yamaha LS9-32 | Owner's Manual - Page 72
sent from the MIX channel to the STEREO bus and MONO bus. 8 If you want to use the STEREO bus, make sure that the [ON] key of the STEREO channel is turned on in the top panel STEREO MASTER section, and raise the fader of the STEREO channel to an appropriate position. 72 LS9-16/32 Owner's Manual - Yamaha LS9-32 | Owner's Manual - Page 73
signals from MIX channels to the STEREO/MONO bus 9 If you want to use the MONO bus, make sure that the [ON] key of the MONO channel is turned on, and raise the fader of the MONO channel to an appropriate position. This operation will differ between the LS9-16 and LS9-32. ● For the LS9-16 Assign - Yamaha LS9-32 | Owner's Manual - Page 74
MIX channel to the STEREO (L) bus Signal sent from the odd-numbered MIX channel to the MONO (C) bus Signal level L C R TO ST BALANCE knob Signal sent from the even-numbered MIX channel to the MONO (C) bus Signal sent from the even-numbered MIX channel to the STEREO (R) bus 74 LS9-16/32 Owner - Yamaha LS9-32 | Owner's Manual - Page 75
section [SEL] keys to select the send-source MIX, STEREO (L/R), or MONO channel. HINT • In order to select a MONO channel on the LS9-16, you must first select the custom fader layer to which you've assigned that MONO channel, and then press the corresponding [SEL] key. LS9-16/32 Owner's Manual 75 - Yamaha LS9-32 | Owner's Manual - Page 76
the signals sent from MIX channels 1-16 to the currently selected MATRIX bus. HINT • In order to select a MATRIX channel on the LS9-16, you must first select the custom fader layer to which you've assigned that MATRIX channel, and then press the corresponding [SEL] key. 76 LS9-16/32 Owner's Manual - Yamaha LS9-32 | Owner's Manual - Page 77
, press the [ENTER] key once again. NOTE • When the SELECTED CH VIEW screen for MATRIX channels is displayed, the keys of the MIX/MATRIX section will operate as keys that select the send-destination MIX bus for the input channels. 5 Use the top panel [SEL] keys to switch the send-destination MATRIX - Yamaha LS9-32 | Owner's Manual - Page 78
channels to a specific MATRIX bus. 1 Press the SELECTED CHANNEL section [HOME] key. The SELECTED CH VIEW screen will appear in the display. 1 1 SEND popup button 2 Use the LAYER section keys and the channel module section [SEL] keys to select a MIX, STEREO (L/R), or MONO channel. 78 LS9-16/32 Owner - Yamaha LS9-32 | Owner's Manual - Page 79
/MATRIX SELECT section will light. This indicates that the LS9 is now in SENDS ON FADER mode, allowing you to use the faders to control the send levels to the MIX bus / MATRIX bus. In SENDS ON FADER mode, the faders and [ON] keys of the channel module section will change their operation as follows - Yamaha LS9-32 | Owner's Manual - Page 80
80 LS9-16/32 Owner's Manual - Yamaha LS9-32 | Owner's Manual - Page 81
linked. Operations in the SELECTED CHANNEL section SELECTED CHANNEL section HINT • If you want to use the SELECTED CHANNEL section to set the send levels to the MIX/MATRIX buses, use the keys of the MIX/MATRIX SELECT section located at the left of the display. LS9-16 LS9-16/32 Owner's Manual 81 - Yamaha LS9-32 | Owner's Manual - Page 82
. L FADER field Here you can view and edit the input/output level of the channel, and switch the channel on/off. M MUTE field Here you can select the mute group to which that channel is assigned. SAFE indicator will light if the corresponding channel is set to Mute Safe. 82 LS9-16/32 Owner's Manual - Yamaha LS9-32 | Owner's Manual - Page 83
the custom fader layer to which you've assigned that channel, and then press the corresponding [SEL] key. • You can also move the cursor to the selected channel in the upper left of the display, and use the dial or the [DEC]/[INC] keys to change the selected channel. LS9-16/32 Owner's Manual 83 - Yamaha LS9-32 | Owner's Manual - Page 84
MIX bus is a FIXED type, the TO MIX LEVEL knob will not appear; instead, the TO MIX ON/OFF button will be shown. By moving the cursor to the TO MIX ON/OFF button and pressing the [ENTER] key, you can turn the signal sent from that channel to the MIX button on/off. 84 LS9-16/32 Owner's Manual - Yamaha LS9-32 | Owner's Manual - Page 85
from the MIX channels to a specific MATRIX bus To adjust the send level from the MIX channels to a specific MATRIX bus, access the send-destination MATRIX channel in the SELECTED CH VIEW screen. external device connected to the INPUT connector when using phantom power. LS9-16/32 Owner's Manual 85 - Yamaha LS9-32 | Owner's Manual - Page 86
STEREO bus, use the [PAN] encoder of the SELECTED CHANNEL section and the PAN field of the SELECTED CH VIEW screen. The PAN field includes the following items. 1 3 2 B PAN/BAL knob The following parameter will change, according to the channel that is selected. INPUT channel ST IN channel MIX (MONO - Yamaha LS9-32 | Owner's Manual - Page 87
, and use the dial or the [DEC]/[INC] keys. To make detailed EQ settings, move the cursor to the EQ popup button or the knobs of the EQ field, and press the [ENTER] key to access the ATT/HPF/EQ popup window. (For details on the popup window → p. 115) LS9-16/32 Owner's Manual 87 - Yamaha LS9-32 | Owner's Manual - Page 88
channels 1-32 and MIX/MATRIX/STEREO/MONO channels only) Use the INSERT field to make insert-related settings in the SELECTED CH parameters of that channel are set to Recall Safe. C RECALL SAFE ON set only specific parameters of the channel to Recall Safe mode, use the SAFE popup button to access the - Yamaha LS9-32 | Owner's Manual - Page 89
the top panel, the corresponding [ON] key and fader will be linked with these operations. ● Assigning a channel to a mute group In the SELECTED CH VIEW screen, use the MUTE field to assign a channel to a mute group (a group that allows multiple channels to be muted/unmuted simultaneously). This field - Yamaha LS9-32 | Owner's Manual - Page 90
90 LS9-16/32 Owner's Manual - Yamaha LS9-32 | Owner's Manual - Page 91
channel module section and ST IN channel section. Use the keys of the LAYER section to switch fader layers. Fader layer 1-16 Master fader layer LS9-16 Fader layer 17-32 Custom fader layer Fader layer 1-32 Master fader layer LS9-32 Fader layer 33-64 Custom fader layer LS9-16/32 Owner's Manual - Yamaha LS9-32 | Owner's Manual - Page 92
the CUSTOM FADER LAYER popup button in the screen, and press the [ENTER] key. The CUSTOM FADER LAYER popup window will appear, allowing you to select the channel that will be assigned to each channel module or ST channel. 1 1 2 1 CUSTOM FADER LAYER popup button 92 LS9-16/32 Owner's Manual LS9-32 - Yamaha LS9-32 | Owner's Manual - Page 93
INPUT channels 1-32 {1-64} • ST IN channels 1-4 • STEREO channel • MONO channels • MIX channels 1-16 • MATRIX channels 1-8 • MONITOR LEVEL If you select a ST IN channel 1-4 or the STEREO channel in the channel module select field, the L/R channels will be assigned together. In this case, the channel - Yamaha LS9-32 | Owner's Manual - Page 94
94 LS9-16/32 Owner's Manual - Yamaha LS9-32 | Owner's Manual - Page 95
5A (L), 6A (L), 7A (L), 8A (L) 2TR OUT DIGITAL jack (L/R) USB memory recorder input (L/R) Output channels MIX channels 1-6 STEREO L/R channel MIX channels 1-8 MIX channels 9-16 MIX channels 13-16 STEREO L/R channel STEREO L/R channel For the LS9-32 Output port (jack / internal port) OMNI OUT - Yamaha LS9-32 | Owner's Manual - Page 96
press the [ENTER] key to return to the previous screen. HINT • As an alternative to using the CLOSE button, you can return to the previous screen by pressing the SELECTED CHANNEL section [HOME] key once. 7 If necessary, perform the same steps for other output channels. 96 LS9-16/32 Owner's Manual - Yamaha LS9-32 | Owner's Manual - Page 97
that slot. Input/output patching C DELAY SCALE field Use the following buttons to select the units for the delay channel is assigned. E Channel select button This button selects the channel assigned to the output port. The number of the currently selected channel is shown. LS9-16/32 Owner's Manual - Yamaha LS9-32 | Owner's Manual - Page 98
channels 1-8, STEREO L/R channel, and MONO (C) channel) will be shown. ● MONITOR OUT The MONITOR OUT L/R/C channels will be shown. ● CH 1-32 {1-32/33-64} INPUT channels 1-32 {1-64} will be shown. B Channel select button This selects the channel that is assigned to the output port. 98 LS9-16/32 Owner - Yamaha LS9-32 | Owner's Manual - Page 99
Hot and Cold output impedance of the external device connected to the INPUT connector when using phantom power. F ø (phase) button This button switches the head amp assigned to that channel between normal phase (black) and reverse phase (orange). Input/output patching LS9-16/32 Owner's Manual 99 - Yamaha LS9-32 | Owner's Manual - Page 100
DIGITAL jack and the USB memory recorder's output. Use this when you want to send the input signal from the 2TR IN DIGITAL jack or the output signal of the USB memory recorder to an input channel. B Port select button This selects the input port that is assigned to the channel. 100 LS9-16/32 Owner - Yamaha LS9-32 | Owner's Manual - Page 101
is the channel name. D Insert point select box This selects the insert point for the signal. Move the cursor to this box and use the dial or the [DEC]/[INC] keys to switch between PRE EQ (immediately before the EQ) or PRE FADER (immediately before the fader). 1 INSERT popup button LS9-16/32 Owner - Yamaha LS9-32 | Owner's Manual - Page 102
to this button and use the [DEC]/ [ . 1 2 LS9-16 1 Category channels 1-16 of the slot(s) {1/2}. ● RACK Shows the inputs of racks 1-8. Use these when you want to insert a GEQ or effect into that channel port by using the dial . 1 2 LS9-16 1 Category use the dial PRE FADER (immediately before the fader). - Yamaha LS9-32 | Owner's Manual - Page 103
the desired OMNI OUT jack or from the output channel of a desired slot. For example by sending signals to an external digital recorder via a digital I/O card installed in a slot, you can make a live recording without affecting the LS9's internal mixing. 1 Connect your external device to an OMNI OUT - Yamaha LS9-32 | Owner's Manual - Page 104
the cursor to the direct out point select box, and use the dial or the [DEC]/ [INC] keys to select the direct out point. You can choose PRE HPF (immediately before the high-pass filter), PRE EQ (immediately before the EQ), or PRE FADER (immediately before the fader). 104 LS9-16/32 Owner's Manual - Yamaha LS9-32 | Owner's Manual - Page 105
MONO INPUT 1-32 {1-64} DIRECT OUT RECORDER INPUT L R USB memory recorder PLAYBACK L OUT R INPUT 1-32 {1-64} ST IN 1L/1R- ST IN 4L/4R NOTE • Recording and playback cannot be done simultaneously. • The signal being recorded cannot be input to an INPUT channel. LS9-16/32 Owner's Manual 105 - Yamaha LS9-32 | Owner's Manual - Page 106
[ENTER] key to turn cue on/off. 1 2 LS9-32 1 Category tabs These tabs select the type of channels shown in the lower part of the window. ● OUT CH Output channels will be shown. ● CH 1-32 {1-32/33-64} Direct outputs of INPUT channels 1-32 {1-32/ 33-64} will be shown. 106 LS9-16/32 Owner's Manual - Yamaha LS9-32 | Owner's Manual - Page 107
that will be patched to the USB memory recorder's outputs, from the following choices. ● CH 1-32 {1-64} INPUT channels 1-32 {1-64} ● STIN 1L/1R-STIN 4L/4R L/R channels of ST IN channels 1-4 7 Use the category tabs and the channel select buttons to select the channel that you want to patch to the USB - Yamaha LS9-32 | Owner's Manual - Page 108
currently selected folder below that level. 108 LS9-16/32 Owner's Manual 3 Assign the desired channels to the input and output of the USB memory recorder (→ p. 106). 4 So that you can monitor the signal being recorded on the recorder, raise the fader of the channel(s) that are patched to the input - Yamaha LS9-32 | Owner's Manual - Page 109
use the transport at the bottom of the screen to perform record/play/stop operations for the recorder cases recorded content will be played back via the input channel you specified in step 3. B To stop playback, move the cursor to the STOP (■) button and press the [ENTER] key. LS9-16/32 Owner's Manual - Yamaha LS9-32 | Owner's Manual - Page 110
USB memory. In addition to files that were recorded on the LS9 console, you can also play files that were copied or 48 kHz, and the bit rate can be between 64 kbps and 320 kbps. 1 Connect the USB memory containing RECORDER screen and in the TITLE/ARTIST EDIT popup window. 110 LS9-16/32 Owner's Manual - Yamaha LS9-32 | Owner's Manual - Page 111
use selected as the recording-destination. NOTE • LS9 can recognize a file name that is a maximum of 64 characters a single directory. A maximum of 64 songs can be managed in a subdirectory USB memory recorder can play back audio files whose which the LS9 is operating USB memory recorder 10 NOTE - Yamaha LS9-32 | Owner's Manual - Page 112
. 2 In the DISPLAY ACCESS section, press the [RECORDER] key repeatedly to access the TITLE LIST screen. 1 SONG TITLE/FILE NAME field. 3 Use the No. button and the change directory A maximum of 128 single-byte characters (64 doublebyte characters) can be input for both LS9-16/32 Owner's Manual - Yamaha LS9-32 | Owner's Manual - Page 113
support Japanese. NOTE • Other items in the SCENE PLAYBACK LINK screen are the same as in the SCENE LIST screen (→ p. 134). 3 Operate the dial or the [DEC]/[INC] keys so that the scene to which you want to assign a song is displayed in the middle. USB memory recorder 10 LS9-16/32 Owner's Manual - Yamaha LS9-32 | Owner's Manual - Page 114
title will be displayed using Shift-JIS code (double-byte character code) to support Japanese. C PATH field background. 114 LS9-16/32 Owner's Manual 6 If necessary, move the cursor to the OFFSET knob and use the dial • You cannot play back during recording or in record-ready mode. • If another song - Yamaha LS9-32 | Owner's Manual - Page 115
channels and output channels. 1 Press the SELECTED CHANNEL section [HOME] key. The SELECTED CH VIEW screen will appear in the display. 1 2 Use the LAYER section to select the desired fader layer. 3 Press a [SEL] key in the channel the SELECTED CH VIEW screen is shown. LS9-16/32 Owner's Manual 115 - Yamaha LS9-32 | Owner's Manual - Page 116
] encoders of the SELECTED CHANNEL section. In this case, use the EQ [HIGH], EQ [HIGH MID], EQ [LOW MID], and EQ [LOW] keys to select the band that you want to adjust. You can also switch EQ bands for editing by moving the cursor onto a parameter of the desired band. 116 LS9-16/32 Owner's Manual - Yamaha LS9-32 | Owner's Manual - Page 117
the above popup window by pressing any of the [DYNAMICS 1]/[DYNAMICS 2] encoders while the SELECTED CH VIEW screen is shown. EQ and Dynamics 11 1 DYNA1 popup button B DYNA2 popup button (input channels only) 2 Use the LAYER section to select the desired fader layer. LS9-16/32 Owner's Manual 117 - Yamaha LS9-32 | Owner's Manual - Page 118
DYNAMICS 1/ DYNAMICS 2 popup window, move the cursor to the desired button/knob and use the [ENTER] key, the dial, or the [DEC]/[INC] keys. HINT • You can also adjust the dynamics threshold by using the [DYNAMICS 1]/[DYNAMICS 2] encoders of the SELECTED CHANNEL section. 118 LS9-16/32 Owner's Manual - Yamaha LS9-32 | Owner's Manual - Page 119
channel belongs, from the following five {nine} groups: CH 1-8, CH 9-16, CH17-24, CH25-32, {CH33-40, CH41-48, CH49-56, CH57-64}, and STIN1L1R-4L4R. For an output channel SELF PRE EQ SELF POST EQ MIX cursor to the KEY IN SOURCE box, and use the dial or the [DEC]/[INC] keys LS9-16/32 Owner's Manual 119 - Yamaha LS9-32 | Owner's Manual - Page 120
on library operations, refer to "Using libraries" (→ p. 35). HINT • You can recall 199 settings from this library. The library contains 41 read-only presets. • For details on how to access the DYNAMICS 1/DYNAMICS 2 popup window, refer to "Using dynamics" (→ p. 117). 120 LS9-16/32 Owner's Manual - Yamaha LS9-32 | Owner's Manual - Page 121
[CHANNEL JOB] key repeatedly to access the MUTE GROUP screen of the CHANNEL JOB screens. The [CHANNEL JOB] key accesses various CHANNEL JOB screens that allow you to perform operations on channels. The screen will change each time you press the key. [CHANNEL JOB] key LS9-16/32 Owner's Manual 121 - Yamaha LS9-32 | Owner's Manual - Page 122
on/off, you must either use the MUTE GROUP screen of the CHANNEL JOB screens (→ p. 121), or assign the mute on/off function to a user-defined key and operate that key (→ p. 196). 1 Press the SELECTED CHANNEL section [HOME] key to access the SELECTED CH VIEW screen. 122 LS9-16/32 Owner's Manual - Yamaha LS9-32 | Owner's Manual - Page 123
to make it go dark. Channels that are set to Mute Safe will not be affected when you mute a mute group to which that channel belongs. HINT • Mute Safe settings are not saved in the scene. They will remain valid until you cancel the settings. Grouping and linking 12 LS9-16/32 Owner's Manual 123 - Yamaha LS9-32 | Owner's Manual - Page 124
button FADER button CH ON button Head amp settings EQ settings (including ATT/HPF) Dynamics 1 and 2 settings On/off status of signals sent to MIX buses Send levels of signals sent to MIX buses Fader operations [ON] key operations HINT • If you link Dynamics 1 or 2 for two or more input channels - Yamaha LS9-32 | Owner's Manual - Page 125
the channel whose balance you want to adjust, and edit the desired parameter. HA GAIN and fader will not be linked while you are holding down the [SEL] key. (However, this function will not work during the fade of a scene memory recall operation.) Grouping and linking 12 LS9-16/32 Owner's Manual - Yamaha LS9-32 | Owner's Manual - Page 126
selected as the copy-destination. D CLEAR DEST button This button clears the channels shown in the DESTINATION CHs field. 126 LS9-16/32 Owner's Manual 3 To select the copy-destination channel(s), press the corresponding [SEL] key to make it light (multiple selections are allowed). The corresponding - Yamaha LS9-32 | Owner's Manual - Page 127
This button clears the channels shown in the SOURCE CH field and DESTINATION CH field. C DESTINATION CH field This indicates the move-destination channel. D CLEAR DEST button This button clears all channels shown in the DESTINATION CH field. E MOVE button Executes the move. LS9-16/32 Owner's Manual 127 - Yamaha LS9-32 | Owner's Manual - Page 128
] key. 3 To execute the Initialize operation, move the cursor to the CLEAR button and press the [ENTER] key. The parameters of the selected channel(s) will be initialized. After initialization, the TARGET CHs field will return to a state in which nothing is selected. 128 LS9-16/32 Owner's Manual - Yamaha LS9-32 | Owner's Manual - Page 129
• Mute group settings • Channel link settings Scene memory 13 Using scene memories This section explains how to store and recall the LS9's mix parameters as "scenes." Storing a scene To store the current mix settings as a scene memory, use the SCENE MEMORY screen. 1 Use the various controllers of - Yamaha LS9-32 | Owner's Manual - Page 130
use the dial or the [DEC]/[INC] keys to select the store-destination scene number. NOTE • Note that the scene number, channel number, or ST IN channel (lock) symbol. B STORE button This stores the current mix settings into the location currently selected in the scene list. LS9-16/32 Owner's Manual - Yamaha LS9-32 | Owner's Manual - Page 131
Using scene memories 7 To execute the Store operation, move the cursor to the OK button and press the [ENTER] key. The current mix you can use the STORE Undo, you can use the STORE UNDO You can use the same was stored in scene memory, use the SCENE MEMORY screen. 1 display area, and use the dial or - Yamaha LS9-32 | Owner's Manual - Page 132
, you can recall a scene by moving the cursor to the scene number in the constant display area, using the dial or the [DEC]/[INC] keys to select a scene number, and pressing the [ENTER] key. A repeatedly to access the USER SETUP screen. USER DEFINED KEYS button 132 LS9-16/32 Owner's Manual - Yamaha LS9-32 | Owner's Manual - Page 133
Using 4 Move the cursor to the FUNCTION column, and use the dial or the [DEC]/[INC] keys to Move the cursor to the PARAMETER 1 column, and use the dial or the [DEC]/[INC] keys to select assign DIRECT RECALL Move the cursor to the PARAMETER 1 column, use the dial or the [DEC]/[INC] keys to choose " - Yamaha LS9-32 | Owner's Manual - Page 134
To select a scene number, make sure that the cursor is located somewhere other than the constant display area, and use the dial or the [DEC]/[INC] keys. The line highlighted in blue in the scene list indicates the scene or scrolling the scene list up or down (→ p. 196). 134 LS9-16/32 Owner's Manual - Yamaha LS9-32 | Owner's Manual - Page 135
protected. NOTE • The R symbol for scene number 000 cannot be disabled. 6 Use the tool buttons to edit the scene memory. For details, refer to the write-protected scene. • If you want to edit the comment of a scene, use the COMMENT/TIME STAMP tabs to display the comments in the scene list, move the - Yamaha LS9-32 | Owner's Manual - Page 136
buffer memory. 5 Make sure that the cursor is located somewhere other than the constant display area, and use the dial or the [DEC]/[INC] keys to select the paste-destination scene number. 6 Move the been stored in the buffer memory, the PASTE button is not available. 136 LS9-16/32 Owner's Manual - Yamaha LS9-32 | Owner's Manual - Page 137
5. If you decide to cancel the Paste operation, use the CANCEL button instead of the OK button. NOTE located somewhere other than the constant display area, and use the dial or the [DEC]/[INC] keys to decide to cancel the Clear operation, use the CANCEL button instead of the OK button. NOTE - Yamaha LS9-32 | Owner's Manual - Page 138
nothing has been stored in the buffer memory, the INSERT button is not available. • The INSERT button cannot be used if the Insert operation would cause the number of stored scenes to exceed 300. • You can't insert in front preceding that scene will be moved back by one. 138 LS9-16/32 Owner's Manual - Yamaha LS9-32 | Owner's Manual - Page 139
"FOCUS" indication in the STATUS field of the SCENE LIST screen. • The Focus function can be used in conjunction with the Recall Safe function (→ p. 140). Channels or parameters that are excluded from Recall operations by either Focus or Recall Safe will not be recalled. LS9-16/32 Owner's Manual 139 - Yamaha LS9-32 | Owner's Manual - Page 140
field's SET BY SEL button is on, Recall Safe will be enabled when you press the [SEL] key, and the corresponding channel will be highlighted in the CH RECALL SAFE field. You can select parameters as described in step 3 even after turning Recall Safe on. 1 5 4 LS9-32 140 LS9-16/32 Owner's Manual - Yamaha LS9-32 | Owner's Manual - Page 141
specific parameters of the selected channel, make the following settings in the SAFE PARAMETER field. ● For an input channel Use the buttons in the lower part channel. LS9-16 LS9-32 These buttons correspond to the following parameters. Button name ALL HA EQ DYNA 1 DYNA 2 MIX ON MIX SEND FADER CH - Yamaha LS9-32 | Owner's Manual - Page 142
a MIX channel. In addition, you can use the WITH MATRIX SEND button to enable Recall Safe for the on/off status and send level of the signals sent from output channels to MATRIX buses. LS9-16 SAFE button These buttons correspond to the following parameters. Button name ALL EQ DYNA 1 FADER CH ON - Yamaha LS9-32 | Owner's Manual - Page 143
of two MIX/MATRIX channels set to stereo, the parameter settings of that channel may differ from those of the other channel(s) when you recall a scene. In such cases, the applicable parameter will be automatically re-linked the next time it is operated. HINT • The Recall Safe function can be used in - Yamaha LS9-32 | Owner's Manual - Page 144
by Channel Link. HINT • If you stop a moving fader while you hold down the corresponding [SEL] key, the fade effect will stop at that point. • If you recall the same scene while faders are moving, all channel faders will move immediately to their target positions. 144 LS9-16/32 Owner's Manual - Yamaha LS9-32 | Owner's Manual - Page 145
The LS9's OUT L/R/C channels to MIX, and MATRIX channels, the USB memory recorder output signal, INPUT channel 15/ 16 {31/32}, and the 2TR IN DIGITAL jack input signal The Cue function lets you check an individual selected channel assigned to the MONITOR OUT L/R/C channels, and also the PHONES OUT - Yamaha LS9-32 | Owner's Manual - Page 146
you can use the ASSIGN channel output signal MONO channel output signal 2TR IN DIGITAL jack input signal STEREO L/R + MONO channel (LCR) output signal INPUT channels 15/16 {31/32} input signal USB memory recorder playback signal The signal(s) selected in the ASSIGN field 146 LS9-16/32 Owner's Manual - Yamaha LS9-32 | Owner's Manual - Page 147
INPUT 15/16 {31/32} button PLAYBACK OUT button MIX channels 1-16 output signals MATRIX buses 1-8 output signals STEREO L/R channel output signal MONO channel output signal 2TR IN DIGITAL jack input signal INPUT channels 15/16 {31/32} input signal USB memory recorder playback signal NOTE • You - Yamaha LS9-32 | Owner's Manual - Page 148
use the LS9's Cue function. About cue groups The LS9's cue signals can be categorized into the following three groups. 1 INPUT CUE group The cue signals of input channels group [CUE] key of a channel module to which a MIX/MATRIX/MONO channel is assigned For example if you LS9-16/32 Owner's Manual - Yamaha LS9-32 | Owner's Manual - Page 149
] keys within the same CUE group are turned on. Use the following two buttons to choose the Cue mode. ● MIX CUE button All channels within the same CUE group whose [CUE] key is on will be mixed for monitoring (MIX CUE mode). ● LAST CUE button Only the channel whose [CUE] key was last turned on will - Yamaha LS9-32 | Owner's Manual - Page 150
Using the Cue function 4 Press the [CUE] key of a desired channel to turn it on. The Cue signal of the corresponding channel you want Cue operations and channel select operations to be linked, MONITOR screen, and use the MONITOR LEVEL knob in can use both if you switch between MIX CUE mode and LAST - Yamaha LS9-32 | Owner's Manual - Page 151
3 B INPUT TO TALKBACK field Of the INPUT jacks 1-16 {1-32}, the input sensitivity, input level, and phantom power on/off status of the jack used for talkback is shown here. You can adjust the input sensitivity by press the [ENTER] key. Talkback / Oscillator 15 LS9-16/32 Owner's Manual 151 - Yamaha LS9-32 | Owner's Manual - Page 152
this case, you can choose either latched operation or unlatched operation (i.e., talkback will be On only while you hold down the key) (→ p. 196). • You can also use Talkback Dimmer to lower the monitor level of the non-talkback signals when talkback is on (→ p. 146). 152 LS9-16/32 Owner's Manual - Yamaha LS9-32 | Owner's Manual - Page 153
channel Using the MIX 1-16 buttons MATRIX 1-8 buttons ST L, ST R, MONO buttons MIX buses 1-16 MATRIX buses 1-8 STEREO bus L/R, MONO bus HINT • If you want to clear all selections, move the cursor to the CLEAR ALL button and press the [ENTER] key. Talkback / Oscillator 15 LS9-16/32 Owner's Manual - Yamaha LS9-32 | Owner's Manual - Page 154
Using the oscillator 5 To enable the oscillator, move the cursor to the OUTPUT button and press the [ENTER] key to turn it on. The once again, the oscillator will be turned off. HINT • You can also assign the oscillator on/off function to a userdefined key (→ p. 196). 154 LS9-16/32 Owner's Manual - Yamaha LS9-32 | Owner's Manual - Page 155
the METER CH1-32 screen, {METER CH 33-64 screen}, OUTPUT 4 METER screen, and CUSTOM FADER screen. 2 [ METER CH1-32 screen ] 5 1 [ OUTPUT METER screen ] 2 LS9-16 1 Metering point select buttons Use these three buttons to select the metering point for 3 the input/output channels. B Level - Yamaha LS9-32 | Owner's Manual - Page 156
Use the dial or the [DEC]/[INC] keys to select the metering point for the input/output channels. E Channel name This shows the first four characters of the channel name for the channels assigned to the [CUSTOM FADER] layer. Channels be displayed when you press a LAYER key. 156 LS9-16/32 Owner's Manual - Yamaha LS9-32 | Owner's Manual - Page 157
RACK4 OUT A(L)/B(R) CH INSERT IN 1-32 32 MIX INSERT IN 1-16 16 STEREO INSERT IN L,R,MONO(C) 3 MATRIX INSERT IN 1-8 8 To CH INSERT IN To MIX INSERT IN a rack for mounting external head amps (Yamaha AD8HR). For details, refer to "Using an external head amp" (→ p. 175). LS9-16/32 Owner's Manual 157 - Yamaha LS9-32 | Owner's Manual - Page 158
other key. The screen contains the following items. 1 2 3 D INPUT button This button displays the OUTPUT CH SELECT popup window, where you can select the input source for the rack. E Virtual rack This area shows eight rack in which you can mount a GEQ or effect. 158 LS9-16/32 Owner's Manual - Yamaha LS9-32 | Owner's Manual - Page 159
name OUT CH (*1) CH 1-32 (INSERT OUT) OUT CH (INSERT OUT) Button name MIX 1-16 MTRX 1-8 ST L, ST R, MONO CH 1-32 MIX 1-16 MTRX 1-8 ST L, ST R, MONO Input source MIX channel 1-16 outputs MATRIX channel 1-8 outputs STEREO (L/R) channel output, MONO (C) channel output INPUT channel 1-32 Insert Outs - Yamaha LS9-32 | Owner's Manual - Page 160
CH 1-32 (*1) CH33-64 (*1) (LS9-32 only) STIN (*1) CH 1-32 (INSERT OUT) OUT CH (INSERT OUT) Button name CH 1-32 CH 33-64 STIN1L/1R- 4L/4R CH 1-32 MIX 1-16 MTRX 1-8 ST L, ST R, MONO Output destination INPUT channel 1-32 inputs INPUT channel 33-64 inputs ST IN channel 1-4 inputs INPUT channel 1-32 - Yamaha LS9-32 | Owner's Manual - Page 161
Graphic EQ operations Graphic EQ operations About the graphic EQ The LS9 lets you mount a GEQ in racks 1-8 and patch it to the insert-out/in of a channel. You can use the top panel faders and [ON] keys to operate the amount of boost/cut for each band. The following two types of GEQ are - Yamaha LS9-32 | Owner's Manual - Page 162
CH SELECT popup window, where you can select the output destination of the rack. The operating procedure is the same as for the OUTPUT button in the GEQ/EFFECT field. 162 LS9-16/32 Owner's Manual E GEQ LINK button This button links adjacent GEQ units. In the case Flex15GEQ, you can use the GEQ LINK - Yamaha LS9-32 | Owner's Manual - Page 163
band, proceed as follows. 1 Move the cursor to the button in the FADER ASSIGN field and press the [ENTER] key. When this button is turned on, the faders in the screen will turn white, and you will be able to use the top panel faders to adjust the GEQ bands. 3 LS9-32 LS9-16/32 Owner's Manual 163 - Yamaha LS9-32 | Owner's Manual - Page 164
using the dedicated library (→ p. 174). ● For the LS9-32 Only the [20-20k] button can be selected. When this button is on, you can use the top panel faders 1-31 to operate all 31 bands. B Operate the faders screen is shown separately as xA and xB (x is the rack number). 164 LS9-16/32 Owner's Manual - Yamaha LS9-32 | Owner's Manual - Page 165
cursor to the desired fader and operate the dial using the tool buttons at the top of the screen. For details on how to use these buttons, refer to "Using the tool buttons" (→ p. 35). HINT • GEQ settings can be saved/loaded at any time using the dedicated library (→ p. 174). LS9-16/32 Owner's Manual - Yamaha LS9-32 | Owner's Manual - Page 166
that mix the two channels to monaural before processing them. If signals are assigned to both the L and R inputs of an effect, the way in which the L/R channels are processed will depend on whether a Stereo effect type or a Mix effect type is selected, as follows. 166 LS9-16/32 Owner's Manual - Yamaha LS9-32 | Owner's Manual - Page 167
Use the INPUT L button to open the OUTPUT CH SELECT popup window, and select a MIX channel as the input source for the rack. The output of the MIX channel you're using CH SELECT popup window. The operating procedure is the same as for the OUTPUT button in the GEQ/EFFECT field. LS9-16/32 Owner's Manual - Yamaha LS9-32 | Owner's Manual - Page 168
CH SELECT popup window, and select the insert-out of a channel as the inputsource. Insert-out will be assigned to the L input of the effect. For details on the OUTPUT CH SELECT popup window, refer to step 4 of "Mounting a GEQ or effect in the virtual rack" (→ p. 158). 168 LS9-16/32 Owner's Manual - Yamaha LS9-32 | Owner's Manual - Page 169
point at the input or output stage of the effect. 17 Graphic EQ and effects 9 Select the fader layer that includes the channel you selected in step 3 as the output destination of the rack, and operate the corresponding fader to adjust the level appropriately. LS9-16/32 Owner's Manual 169 - Yamaha LS9-32 | Owner's Manual - Page 170
effect title, the name of the type that is used, and a graphic. The number of input/output channels (1 IN/2 OUT or 2 IN/2 OUT) of the OUTPUT CH SELECT popup window. G OUTPUT L/R buttons These buttons display the INPUT CH SELECT popup window 64 57 CLOSE button 3 8 170 LS9-16/32 Owner's Manual - Yamaha LS9-32 | Owner's Manual - Page 171
the settings, you can do so using the tool buttons at the top of the screen. For details on how to use these buttons, refer to "Using the tool buttons" (→ p. 35). HINT • Effect settings can be stored and recalled at any time using the effect library (→ p. 174). LS9-16/32 Owner's Manual 171 - Yamaha LS9-32 | Owner's Manual - Page 172
shown in the special parameter field. It is included in delay-type and modulation-type effects, and can be used to specify the delay time or modulation speed. 1 1 User defined keys popup buttons 1 3 Move DEFINED KEY SETUP popup window will appear. 172 LS9-16/32 Owner's Manual 1 BPM parameter - Yamaha LS9-32 | Owner's Manual - Page 173
manual (→ p. 233). 17 Graphic EQ and effects 6 To play back the recorded sample, move the cursor to the PLAY button and press the [ENTER] key. NOTE • If, after recording, you turn on the REC button again to enter record-ready mode, the sampled content will be erased. LS9-16/32 Owner's Manual - Yamaha LS9-32 | Owner's Manual - Page 174
(→ p. 35). NOTE • Library items using the "HQ.PITCH" or "FREEZE" effect types can be recalled only into rack 5 or 7. They cannot be recalled into rack 6 or 8. HINT • You can also use MIDI messages (program changes) to recall effect settings from the library (→ p. 180). 174 LS9-16/32 Owner's Manual - Yamaha LS9-32 | Owner's Manual - Page 175
Using an external head amp If an I/O card (expected to go on sale in the future) that supports the external head amp (Yamaha AD8HR) remote protocol is installed in an LS9 slot, you'll be able to remotely control parameters such as the external head amp's phantom power . LS9-16/32 Owner's Manual 175 - Yamaha LS9-32 | Owner's Manual - Page 176
. (Switching this on/off is performed on the external HA itself.) C +48V buttons These switch phantom power on/off for each channel. D GAIN knobs These indicate the gain of the external HA. Move the cursor to the knob and use the dial or the [DEC]/[INC] keys to adjust the setting. E HPF knobs / ON - Yamaha LS9-32 | Owner's Manual - Page 177
fader/encoder or key operation) on the LS9 LS9 operations can be recorded and played back on a MIDI sequencer or other external device, or changes in system settings and user settings can be reflected on another LS9 console. NOTE • As the MIDI port used recorder. 18 MIDI LS9-16/32 Owner's Manual 177 - Yamaha LS9-32 | Owner's Manual - Page 178
the type of MIDI messages the LS9 will transmit and receive, the MIDI port that will be used, and the MIDI channel. 1 In the DISPLAY ACCESS be used. This page includes the following items. 1 PORT/CH field Here you can select the port and MIDI channel that will be used to 178 LS9-16/32 Owner's Manual - Yamaha LS9-32 | Owner's Manual - Page 179
of available ports will depend on the card that is installed.) Description No port will be used. Rear panel MIDI IN (Rx) / OUT (Tx) connector A card that supports serial transmission, installed in a rear panel slot {1/2} (MY16-CII is valid in SLOT {1-2}) MIDI 18 LS9-16/32 Owner's Manual 179 - Yamaha LS9-32 | Owner's Manual - Page 180
Indicates the MIDI channel 1-16 on which program changes are transmitted/received. In Single mode if the BANK button is on, this will be labeled BANK, and the numerical value in this column will correspond to the bank number. ● NO. Indicates the program number 1-128. 180 LS9-16/32 Owner's Manual - Yamaha LS9-32 | Owner's Manual - Page 181
is on The CH indication in the list will change to BANK (bank number), and bank select (control change #0, #32) + program at the same time. In this case, bank select + program change messages of all MIDI channels will be received. 8 Use the buttons of the PROGRAM CHANGE fi LS9-16/32 Owner's Manual 181 - Yamaha LS9-32 | Owner's Manual - Page 182
the library number and its title. 10 Use the TYPE field to select the type of event you want to assign, and use the LIBRARY NAME field to select the one MIDI channel and more than one program number, only the lowest program number on each MIDI channel will be transmitted. 182 LS9-16/32 Owner's Manual - Yamaha LS9-32 | Owner's Manual - Page 183
Using control changes to control parameters You can use MIDI control change messages to control specified events (fader/encoder operations, [ON] key on/off operations etc.) on the LS9. This capability can be used to record fader and MIDI channels that will be used to LS9-16/32 Owner's Manual 183 - Yamaha LS9-32 | Owner's Manual - Page 184
mix parameters will be transmitted and received on a single MIDI channel as control change messages. HINT • The channel on which control changes are transmitted and received is specified by the MIDI SETUP popup window PORT/CH field (→ p. 178). 8 Use for individual scenes. 184 LS9-16/32 Owner's Manual - Yamaha LS9-32 | Owner's Manual - Page 185
device. The transmit (Tx) channel and receive (Rx) channel specified in the MIDI SETUP page are used as the device number. • Please be aware that if the device number included in the transmitted parameter change does not match the device number of the receiving LS9 console, the message will be - Yamaha LS9-32 | Owner's Manual - Page 186
(Rx) channel specified in the MIDI SETUP page is used as the device number. • Please be aware that if the device number included in the transmitted MMC message does not match the device number of the receiving LS9 console, the message will be ignored. 5 Prepare the USB memory recorder for use. For - Yamaha LS9-32 | Owner's Manual - Page 187
of the LS9, and can use all of its functionality. Only one set of Administrator settings is internally maintained in the console. The fader layer, user-defined key, and preference settings can be edited, and these settings stored in the user authentication key. In addition, a User who has Power - Yamaha LS9-32 | Owner's Manual - Page 188
key can be created only by an Administrator or Power User. The user level can be specified when the authentication key is created, but the custom fader layer, user-defined key settings, and preference key. A keyboard window will appear, allowing you to enter a password. 188 LS9-16/32 Owner's Manual - Yamaha LS9-32 | Owner's Manual - Page 189
will forcibly revert to Guest. NOTE • If the power is turned off and then on again, the console will generally start up in the log-in state in which the power was turned off. If a user password has ] key. The LOGIN popup window will appear. 19 User settings (Security) LS9-16/32 Owner's Manual 189 - Yamaha LS9-32 | Owner's Manual - Page 190
To log-in as a User, you will use a user authentication key saved on USB memory. You may also log-in using a user authentication key that was created on a different LS9 console. 1 Connect the USB memory to the USB , refer to "Loading a file from USB memory" (→ p. 200). 190 LS9-16/32 Owner's Manual - Yamaha LS9-32 | Owner's Manual - Page 191
that was created on a different LS9 console, a keyboard window will appear, allowing you to enter the Administrator password of the LS9 console that you will be using. (If the Administrator passwords are , allowing you to enter the password. 19 User settings (Security) LS9-16/32 Owner's Manual 191 - Yamaha LS9-32 | Owner's Manual - Page 192
user authentication key. In this case, you can also save the can edit your custom fader layer, user-defined keys, Power User ....The setting of that User account can be changed. 1 In the DISPLAY ACCESS section, press the [SETUP] key repeatedly to access the USER SETUP screen. 192 LS9-16/32 Owner's Manual - Yamaha LS9-32 | Owner's Manual - Page 193
CH OPERATION field Here you can specify (for each channel) the operations that will be permitted for input channels and output channels. The settings will apply to the currently selected channel. Use the panel [SEL] keys to select the channel performed. ● MIXER SETUP ● LS9-16/32 Owner's Manual 193 - Yamaha LS9-32 | Owner's Manual - Page 194
] → [SEL] LINK Specifies whether channel selection will be linked with fader layer selection. If this button is on, and you press a panel LAYER key to switch the fader layer, the last-selected channel of that fader layer will be selected, and its [SEL] key will light. 194 LS9-16/32 Owner's Manual - Yamaha LS9-32 | Owner's Manual - Page 195
channel and MONO channel on/off and fader operations will be linked. If you turn this button on, the STEREO channel on/off setting will be copied to the MONO channel, and subsequently on/off operations will be linked. Faders . Preferences 19 User settings (Security) LS9-16/32 Owner's Manual 195 - Yamaha LS9-32 | Owner's Manual - Page 196
of "----" is shown. 4 Make sure that the FUNCTION field is enclosed by a yellow frame, and then use the dial or the [DEC]/[INC] keys of the panel to select the function you want to assign. If function, press the corresponding USER DEFINED [1]-[12] key on the panel. 196 LS9-16/32 Owner's Manual - Yamaha LS9-32 | Owner's Manual - Page 197
the CONSOLE LOCK button and press the [ENTER] key. If you are logged-in as a user for whom a password is set, a keyboard window will appear, allowing you to enter the password. For details on entering a password, refer to "Assigning a name" (→ p. 34). 19 User settings (Security) LS9-16/32 Owner - Yamaha LS9-32 | Owner's Manual - Page 198
console will be unlocked. If you are logged-in as a user for whom a password is set, a keyboard window will appear, allowing you to enter the password. Specifying the CONSOLE LOCK screen image If an image file is saved in USB memory, the CONSOLE turn on the power, you will /24/32-bit console - Yamaha LS9-32 | Owner's Manual - Page 199
use it to save or load data such as internal settings for the LS9 and FAT32 formats are supported. On the LS9 V1.10 or power-off the LS9 while this indicator is shown. Doing so LS9's internal data on USB memory Here's how all of the LS9 and a comment of up to 32 characters; then move the cursor to - Yamaha LS9-32 | Owner's Manual - Page 200
CH VIEW screen, and use the [SEL] keys to select the INPUT channel from which you want to take a direct output. Before you load, turn off the power of the equipment connected to the LS9 and/or lower the volume so that there will not be a problem time you load the file. 200 LS9-16/32 Owner's Manual - Yamaha LS9-32 | Owner's Manual - Page 201
deletes the selected file (→ p. 203). Using USB memory to save/load data D TYPE ALL indicates a file containing LS9 internal settings, KEY indicates a user [DIR] indicates a directory. ● COMMENT For LS9 files, the comment is displayed here. When • You can use the COMMENT/TIME STAMP button located at - Yamaha LS9-32 | Owner's Manual - Page 202
entering text, refer to "Assigning a name" (→ p. 34). NOTE • If the COMMENT field is not displayed, use the COMMENT/ TIME STAMP button located at the lower right of the file list to turn COMMENT on. ● Sorting fi You cannot edit the file name or comment of a protected file. 202 LS9-16/32 Owner's Manual - Yamaha LS9-32 | Owner's Manual - Page 203
press the [ENTER] key to access the SAVE/LOAD popup window. 3 Move the cursor to the file list, use the panel dial to select the file that you want to delete, move the cursor to the DELETE button, and in the PATH field and press the [ENTER] key. User settings (Security) LS9-16/32 Owner's Manual 203 - Yamaha LS9-32 | Owner's Manual - Page 204
34). Formatting USB memory media Here's how to format USB memory media using the FAT16 file system. USB memory up to 2 Gbytes in capacity is supported. 1 In the DISPLAY ACCESS section, press the [SETUP] key ] key. Formatting will require several tens of seconds. 204 LS9-16/32 Owner's Manual - Yamaha LS9-32 | Owner's Manual - Page 205
187). 3 LS9-32 1 BUS SETUP field Here you can make basic settings for MIX/MATRIX buses (→ p. 213). B OUTPUT PORT field In this field you can assign an output channel to each output port. For details, refer to chapter 9 "Selecting the output channel for each output port" (→ p. 97). C MIXER SETUP field - Yamaha LS9-32 | Owner's Manual - Page 206
2 Move the cursor to the WORD CLOCK button of the MIXER SETUP field in the lower part of the screen, and press the [ENTER] key. The WORD CLOCK popup window will appear, allowing you to make word clock settings. This popup window contains the following items. 1 2 206 LS9-16/32 Owner's Manual LS9-32 - Yamaha LS9-32 | Owner's Manual - Page 207
digital audio input signal from a digital I/O card in the slot {slots 1/2} will be used as the clock source. (Select this in two-channel units.) In this case, the LS9 the power amp volume before changing the word clock setting. • If you attempt to select a channel whose LS9-16/32 Owner's Manual 207 - Yamaha LS9-32 | Owner's Manual - Page 208
in the slot. {On the LS9-32, this area shows the slot number and the type of I/O card in each slot.} B FREQ (Frequency) This indicates the sampling frequency of the signal being input to each channel of an MY8-AE96 or MY8-AE96S digital I/O card, in sets of two channels. 208 LS9-16/32 Owner's Manual - Yamaha LS9-32 | Owner's Manual - Page 209
, and fader layer selections. In this case, you can operate the two LS9 consoles as if they were a single mixer. Here we will explain cascade connections and operation, using an example in which two LS9 consoles are cascade-connected. To cascade two LS9 consoles, you will install digital I/O cards - Yamaha LS9-32 | Owner's Manual - Page 210
OUTPUT PORT SELECT popup window for the LS9-32 ] 2 1 LS9-32 1 1 CASCADE OUT button 2 In the MIXER SETUP field located at the lower using the Cascade Link function, this specifies the port by which control signals will be transmitted and received between the two LS9 consoles LS9-16/32 Owner's Manual - Yamaha LS9-32 | Owner's Manual - Page 211
You can choose from the following items. LS9-16 Item ---MIDI SLOT-1- SLOT-8 Description No port will be used. Rear panel MIDI IN/OUT connectors Input/output channels 1-8 of a card supporting serial communication, installed in the rear panel slot LS9-32 Item ---MIDI SLOT1-1- SLOT1-8 SLOT2-1- SLOT2 - Yamaha LS9-32 | Owner's Manual - Page 212
receive control signals when using the Cascade Link function to link specific operations and parameter changes between two LS9 consoles. C CASCADE COMM added to the selected bus. B Slot select tabs (LS9-32 only) These tabs select slots 1/2. 4 Use the port select buttons {slot select tabs and port - Yamaha LS9-32 | Owner's Manual - Page 213
field B MIX button C MATRIX button LS9-32 1 SIGNAL TYPE (Signal processing method) This selects whether two adjacent odd-numbered/ even-numbered MIX buses will be used as stereo channels whose main parameters are linked (STEREO) or as two monaural channels (MONO × 2). LS9-16/32 Owner's Manual 213 - Yamaha LS9-32 | Owner's Manual - Page 214
be linked with the TO ST PAN setting. 214 LS9-16/32 Owner's Manual ● If the PAN LINK button is on The PAN knob that appears in the location of the TO MIX SEND LEVEL knob of the input channel's SELECTED CH VIEW screen when the send-destination MIX bus is stereo will be linked with the TO - Yamaha LS9-32 | Owner's Manual - Page 215
DATE/TIME popup window will appear. 1 3 6 Move the cursor to each field of the TIME field, and use the dial or the [DEC]/[INC] keys to specify the time. 7 When you have finished making settings, move fies the format in which the time will be displayed. 20 LS9-16/32 Owner's Manual 215 Other functions - Yamaha LS9-32 | Owner's Manual - Page 216
when you use the LS9's NETWORK connector LS9 Editor installation guide which can be downloaded from the following Yamaha website. http://www.yamahaproaudio.com/ 1 In the DISPLAY ACCESS section, press the [SETUP] key repeatedly to access the MISC SETUP screen. 1 2 3 LS9-32 LS9-16/32 Owner's Manual - Yamaha LS9-32 | Owner's Manual - Page 217
and use the dial Yamaha AD8HR is connected to an I/O card that provides a REMOTE connector, the brightness of the AD8HR's LEDs will also change. • LAMP knob (LS9-32 only) ........ Adjusts the brightness of the lamp connected to the rear panel LAMP jack. 20 Other functions LS9-16/32 Owner's Manual - Yamaha LS9-32 | Owner's Manual - Page 218
the user. * We accept no responsibility for any damages that may result from the use of Help files created by a third party other than Yamaha. Loading a Help file from a USB memory 3 Move the cursor to the SAVE button and press the [ENTER] key to begin loading the file. 218 LS9-16/32 Owner's Manual - Yamaha LS9-32 | Owner's Manual - Page 219
the [ENTER] key. The SAVE/LOAD popup window will appear. 4 Move the cursor to the file list, and use the dial on the panel to select the text file you want to load. 5 Move the cursor to the LOAD function you want to assign, and press the [ENTER] key. 20 Other functions LS9-16/32 Owner's Manual 219 - Yamaha LS9-32 | Owner's Manual - Page 220
Using the Help function 5 Use the desired section, and use the panel dial to scroll necessary, you can also scroll by using the buttons in the tool bar of contents, you can use the panel cursor key as within an article, you can use the panel [DEC] key within an article, you can use the panel [INC] key - Yamaha LS9-32 | Owner's Manual - Page 221
view these explanations. 3 To close the window, once again press the user-defined key to which the Help function is assigned. Other functions 20 LS9-16/32 Owner's Manual 221 - Yamaha LS9-32 | Owner's Manual - Page 222
section, turn on the power. After the opening screen, [ENTER] key. The console will start up in Yamaha cannot guarantee that the unit will operate correctly. HINT • Instead of using the EXIT button, you can also select a different button of the MODE SELECT field. 222 LS9-16/32 Owner's Manual - Yamaha LS9-32 | Owner's Manual - Page 223
in red in the popup window. 10 Move the cursor to the EXIT button and press the [ENTER] key. The console will start up in normal operating mode. HINT • Alternatively, you can continue by selecting a different menu instead of using the EXIT button. 20 Other functions LS9-16/32 Owner's Manual 223 - Yamaha LS9-32 | Owner's Manual - Page 224
key of the DISPLAY ACCESS section, turn on the power. After the opening screen, the following startup menu . 224 LS9-16/32 Owner's Manual LS9-32 LS9-32 3 Move the cursor to the desired knob in the screen, and use the dial [ENTER] key. The console will start up in normal operating mode. HINT • - Yamaha LS9-32 | Owner's Manual - Page 225
PEAKING PEAKING PEAKING H.SHELF 15 E. G. Clean G +2.0 dB -5.5 dB +0.5 dB +2.5 dB F 265 Hz 400 Hz 1.32 kHz 4.50 kHz Q 0.18 10.0 6.3 - PEAKING PEAKING PEAKING PEAKING G +4.5 dB 0.0 dB +4.0 dB +2.0 dB Hz 236 Hz 2.65 kHz 6.70 kHz Q 0.11 10.0 5.6 - Appendices LS9-16/32 Owner's Manual 225 - Yamaha LS9-32 | Owner's Manual - Page 226
+2.0 dB +6.0 dB F 95.0 Hz 750 Hz 1.80 kHz 18.0 kHz Q 7.0 2.8 5.6 - L.SHELF PEAKING PEAKING H.SHELF 32 Total EQ 3 G +1.5 dB +0.5 dB +2.0 dB +4.0 dB F 67.0 Hz 850 Hz 1.90 kHz 15.0 kHz Q- 0. dB +2.0 dB 0.0 dB F 106 Hz 710 Hz 2.50 kHz 10.0 kHz Q 4.0 7.0 0.63 - 226 LS9-16/32 Owner's Manual - Yamaha LS9-32 | Owner's Manual - Page 227
(dB) -19 Range (dB) -22 Attack (ms) 93 Hold (ms) 1.20 S Decay (ms) 6.32 S Threshold (dB) -11 Range (dB) -53 Attack (ms) 0 Hold (ms) 1.93 Decay (ms) 12 1.7 6 4.0 hard 133 -10 3.5 9 3.0 hard 250 -9 2.5 17 1.0 hard 238 -18 3.5 7 6.0 2 174 Appendices LS9-16/32 Owner's Manual 227 - Yamaha LS9-32 | Owner's Manual - Page 228
-18 1.7 8 -2.5 18 238 -14 2 2 3.5 4 35 -18 4 8 8.0 hard 354 # Title 32 Hip Comp 33 Solo Vocal1 34 Solo Vocal2 35 Chorus 36 Click Erase 37 Announcer 38 Limiter1 39 Limiter2 40 Total 20 -3.0 90 3.91 s 0 ∞ 0 0.0 hard 319 -18 3.5 94 2.5 hard 447 -16 6 11 6.0 1 180 228 LS9-16/32 Owner's Manual - Yamaha LS9-32 | Owner's Manual - Page 229
), COMPANDER-S (Compander Soft), and DE-ESSER. An output channel's DYNAMICS section 1 provides the following four types: COMPRESSOR, RANGE Input Level Time Time ■ DUCKING Ducking is commonly used for voice-over applications in which the background music level Time LS9-16/32 Owner's Manual 229 - Yamaha LS9-32 | Owner's Manual - Page 230
attenuates signals above a specified THRESHOLD by a specified RATIO. The COMP processor can also be used as a limiter, which, with a RATIO of ∞:1, reduces the level to the threshold. Output Level Input Level Output Level THRESHOLD RATIO Input Level Time Time 230 LS9-16/32 Owner's Manual - Yamaha LS9-32 | Owner's Manual - Page 231
Range -54 to 0 (55 points) 1kHz - 12.5kHz (45 points) Description Threshold level at which the de-esser effect applies. Cutoff frequency of the HPF used to detect the high frequencies. Appendices LS9-16/32 Owner's Manual 231 - Yamaha LS9-32 | Owner's Manual - Page 232
without the subsequent reverb Gated early reflections Gated reverse early reflections Simple mono delay Simple stereo delay Simple repeat delay with modulation 3-tap (left, center, right) delay Stereo delay with crossed left/ right feedback Chorus Flanger Proprietary Yamaha effect that produces - Yamaha LS9-32 | Owner's Manual - Page 233
dead, 10 = live) Initial delay before reverb begins Reflection diffusion (left- right Used in conjunction with TEMPO to determine left channel DELAY Used in conjunction with TEMPO to determine right channel DELAY *1. (Maximum value depends on the tempo setting) Appendices LS9-16/32 Owner's Manual - Yamaha LS9-32 | Owner's Manual - Page 234
level Center channel delay level Right channel delay level Feedback gain (plus values for normal-phase feedback, minus values for reverse-phase feedback) High-frequency feedback ratio High-pass filter cutoff frequency Low-pass filter cutoff frequency Tempo parameter sync on/off Used in conjunction - Yamaha LS9-32 | Owner's Manual - Page 235
Modulation speed Modulation depth Modulation delay time Modulation waveform Tempo parameter sync on/off Used in conjunction with TEMPO to determine FREQ. Low shelving filter frequency Low shelving shelving filter gain *1. L↔R, L→R, L←R, Turn L, Turn R *2. Appendices LS9-16/32 Owner's Manual 235 - Yamaha LS9-32 | Owner's Manual - Page 236
Description Channel #1 pitch shift Channel #1 pitch shift fine Channel #1 level (plus values for normal phase, minus values for reverse phase) Channel #1 pan Channel #1 delay time Channel #1 parameter sync on/off Used in conjunction with TEMPO to determine FM FREQ *1. 236 LS9-16/32 Owner's Manual - Yamaha LS9-32 | Owner's Manual - Page 237
and right-channel modulation phase difference Filter type: low pass, high pass, band pass Filter frequency offset Filter resonance Output level Tempo parameter sync on/off Used in conjunction gain *1. 6.0 ms-46.0 s (fs=44.1 kHz), 5.0 ms-42.3 s (fs=48 kHz) Appendices LS9-16/32 Owner's Manual 237 - Yamaha LS9-32 | Owner's Manual - Page 238
Reverb time Initial delay before reverb begins High-frequency reverb time ratio Spread Reverb density Reverb and chorused reverb balance (0% = all chorused reverb, 100% = all reverb) Tempo parameter sync on/off Used in conjunction with TEMPO to determine FREQ. *1. 238 LS9-16/32 Owner's Manual - Yamaha LS9-32 | Owner's Manual - Page 239
reverb) High-pass filter cutoff frequency Low-pass filter cutoff frequency Modulation speed Modulation depth Panning direction Modulation waveform Tempo parameter sync on/off Used in conjunction with TEMPO to determine FREQ. *1. L↔R, L→R, L←R, Turn L, Turn R *2. Appendices LS9-16/32 Owner's Manual - Yamaha LS9-32 | Owner's Manual - Page 240
flections Tempo parameter sync on/off Used in conjunction with TEMPO to determine left channel DELAY L Used in conjunction with TEMPO to determine right channel DELAY R Used in conjunction with TEMPO to determine FB. DLY *1. (Maximum value depends on the tempo setting) 240 LS9-16/32 Owner's Manual - Yamaha LS9-32 | Owner's Manual - Page 241
Reverb time Initial delay before reverb begins High-frequency reverb time ratio Spread Reverb density Tempo parameter sync on/off Used in conjunction with TEMPO to determine left channel DELAY L Used ) *1. (Maximum value depends on the tempo setting) *2. Appendices LS9-16/32 Owner's Manual 241 - Yamaha LS9-32 | Owner's Manual - Page 242
using the LOOP NUM parameter. In INPUT mode, playback is triggered by the input signal. Input trigger level (i.e., the signal level required to trigger recording 5458.3 ms (fs=48 kHz) ■ STEREO REVERB Two input, two output stereo reverb. Parameter REV TIME REV TYPE INI. DLY LS9-16/32 Owner's Manual - Yamaha LS9-32 | Owner's Manual - Page 243
=48 kHz) ■ REV-X HALL, REV-X ROOM, REV-X PLATE Newly-developed two input, two output reverb algorithm. Delivers dense and rich reverberation, smooth decay, and provides a spaciousness and depth that enhances the ROOM SIZE setting. Effects Parameters Appendices LS9-16/32 Owner's Manual 243 - Yamaha LS9-32 | Owner's Manual - Page 244
you edit TEMPO → DELAY (or FREQ.) will be set In this case, the DELAY (or FREQ.) value is calculated as follows. DELAY ( from 250 ms to 247.9 ms. *a Rounded values are used for the calculation results. • Ranges of the NOTE and 1/2 = 3/32 = 3/4 = 1/8 = 1/1 = 1/6 = 2/1 244 LS9-16/32 Owner's Manual - Yamaha LS9-32 | Owner's Manual - Page 245
110 111 112 113 114 115 116 117 118 119 120 121 122 123 124 125 126 127 128 ■ Preset Bank/Ch# 2 Program Change# 001 002 003 004 005 006 007 008 009 010 011 012 013 014 015 016 017 018 240 241 242 243 244 245 246 247 248 249 250 251 252 253 254 255 256 LS9-16/32 Owner's Manual Appendices 245 - Yamaha LS9-32 | Owner's Manual - Page 246
116 117 118 119 120 121 122 123 124 125 126 127 128 Scene/ Effect Preset# No Assign ■ Preset Bank/Ch# 4 Program Change# 001 002 003 004 005 006 007 008 009 010 011 012 013 014 015 016 017 018 120 121 122 123 124 125 126 127 128 Scene/ Effect Preset# No Assign 246 LS9-16/32 Owner's Manual - Yamaha LS9-32 | Owner's Manual - Page 247
Bank/Ch# 14 Program Change# 001 002 003 : 128 Scene/Effect Preset# No Assign ■ Preset Bank/Ch# 15 Program Change# 001 002 003 : 128 Scene/Effect Preset# No Assign ■ Preset Bank/Ch# 16 Program Change# 001 002 003 : 128 Scene/Effect Preset# No Assign Appendices LS9-16/32 Owner's Manual - Yamaha LS9-32 | Owner's Manual - Page 248
Scene Memory/Effect Library to Program Change Table ■ Bank/Ch# Program Change# 001 002 003 004 005 006 007 008 009 010 011 012 013 014 015 016 017 018 019 020 021 022 109 110 111 112 113 114 115 116 117 118 119 120 121 122 123 124 125 126 127 128 Scene/ Effect User# 248 LS9-16/32 Owner's Manual - Yamaha LS9-32 | Owner's Manual - Page 249
L RATIO GAIN H GAIN L KNEE/WIDTH Parameter 2 CH 1-CH 32{64} STIN1L-STIN4R CH 1-CH 32{64} STIN1L-STIN4R CH 1-CH 32{64} STIN1L-STIN4R MIX 1-MIX 16 MATRIX 1-MATRIX 8 STEREO L-MONO(C) MIX 1-MIX 16 MATRIX 1-MATRIX 16 STEREO L-MONO(C) CH 1-CH 32{64} STIN1L-STIN4R Appendices LS9-16/32 Owner's Manual 249 - Yamaha LS9-32 | Owner's Manual - Page 250
L-MONO(C) GAIN H GAIN L KNEE/WIDTH BYPASS MIX BAL PARAM 1 H - PARAM 32 L RACK5-8 ON A ON B RACK1-8 GAIN A 1 - GAIN A 31 GAIN B 1 - GAIN B 31 ON MASTER 1-MASTER 8 CH 1-CH 32{64} STIN1L-STIN4R ON MIX 1-MIX 16 MATRIX 1-MATRIX 8 STEREO L-MONO(C) RACK1-8 250 LS9-16/32 Owner's Manual - Yamaha LS9-32 | Owner's Manual - Page 251
Parameter 2 CH 1 CH 2 CH 3 CH 4 CH 5 CH 6 CH 7 CH 8 CH 9 CH10 CH11 CH12 CH13 CH14 CH15 CH16 CH17 CH18 CH19 CH20 CH21 CH22 CH23 CH24 CH 1 CH 2 CH 3 CH 4 CH 5 CH 6 CH 7 CH 8 CH 9 CH10 CH11 CH12 CH13 CH14 CH15 CH16 CH17 CH18 CH19 CH20 CH21 CH22 CH23 CH24 Appendices LS9-16/32 Owner's Manual 251 - Yamaha LS9-32 | Owner's Manual - Page 252
42 43 44 45 46 47 48 49 50 51 52 53 54 55 56 57 58 59 60 61 62 63 64 65 Mode Parameter 1 Parameter 2 252 LS9-16/32 Owner's Manual Control Change# 66 67 68 69 70 71 72 73 74 75 76 77 78 79 80 81 82 83 84 85 - Yamaha LS9-32 | Owner's Manual - Page 253
FADER INPUT to Mix9-16 LEVEL MIX1-16, STEREO LR to MATRIX LEVEL ON INPUT to Mix9-16 ON MIX1-16, STEREO LR to MATRIX ON MIX1-8 to STEREO ON PHASE INSERT ON INPUT to Mix9-16 PRE/POST INPUT57-64 to Mix1-8 LEVEL INPUT57-64 to Mix1-8 ON INPUT MIX 2395 2396 23B3 Appendices LS9-16/32 Owner's Manual 253 - Yamaha LS9-32 | Owner's Manual - Page 254
assignments Parameter RACK5-8(EFFECT) RACK1-3(GEQ) FADER BYPASS MIX BALANCE PARAM1 PARAM2 PARAM3 PARAM4 PARAM5 PARAM6 GAIN21 GAIN22 GAIN23 GAIN24 GAIN25 GAIN26 GAIN27 GAIN28 GAIN29 GAIN30 GAIN31 MONO(C) 254 LS9-16/32 Owner's Manual From (HEX) 26B4 26BC 26C4 26CC 26D4 26DC 26E4 26EC 26F4 26FC - Yamaha LS9-32 | Owner's Manual - Page 255
HPF8 INPUT1-56, STIN 1L-4R to MONO ON MIX to MONO ON ON SLOT OUT DELAY TIME HIGH TIME LOW ON OMNI OUT DELAY TIME HIGH TIME LOW ON DIGITAL OUT DELAY TIME HIGH TIME LOW INPUT1-48, STIN 3F0B 3F0F 3F13 3F17 3F1B 3F1F 3F23 3F27 3F2B 3F2F 3F33 3F4E Appendices LS9-16/32 Owner's Manual 255 - Yamaha LS9-32 | Owner's Manual - Page 256
LEVEL OUTPUT NAME MIX PROCESSING MIX PROCESSING MIX FADER/ON MIX FADER/ON MIX FADER/ON MIX PROCESSING MIX PROCESSING MIX PROCESSING MUTE ASSIGN WITH MIX SEND WITH MIX SEND MIX FADER/ON MIX FADER/ON MIX PROCESSING MIX PROCESSING STORE 256 LS9-16/32 Owner's Manual ■ MATRIX Channels Parameter Stereo - Yamaha LS9-32 | Owner's Manual - Page 257
CH ASSIGN - Lit if assignment is the same When you press this key, the previously-stored assignment state will be applied. While holding down this key, press a SEL key of a MIX or MATRIX channel FADER - ON: lit, OFF: dark If this is on, you can use the master fader LS9-16/32 Owner's Manual 257 - Yamaha LS9-32 | Owner's Manual - Page 258
In the case of a rack, the window CH SELECT INC, DEC - Flash Increment/Decrement the channel selection SET Fader function to the selected MIX or FADER mode MATRIX GEQ FADER ASSIGN - ON: lit, OFF: dark Turn the GEQ Fader Assign function on/off. RECORDER LS9-16/32 Owner's Manual - Yamaha LS9-32 | Owner's Manual - Page 259
to user-defined keys Function LS9 EDITOR PARAMETER 1 PARAMETER 2 LED MASTER - OVERVIEW CH1-16, CH17-32, {CH33-48, CH49-64 ,} STIN, MIX, MATRIX, ST/MONO, CUSTOM FADER LAYER CH1-16, {CUSTOM FADER LAYER CH17-32}, CUSTOM FADER LAYER STIN SELECTED CHANNEL - LIBRARY PATCH EDITOR DYNAMICS - Yamaha LS9-32 | Owner's Manual - Page 260
LS9 is able to understand, send, and receive. 1 CHANNEL MESSAGE 1.1 NOTE OFF (8n) Reception These messages are echoed to MIDI OUT if [OTHER COMMAND ECHO] is ON. They are received if [Rx CH] matches, and used correctly whether or not the status byte is omitted. 260 LS9-16/32 Owner's Manual - Yamaha LS9-32 | Owner's Manual - Page 261
for each MIDI channel will be transmitted. PROGRAM CHANGE messages are not used for transmission to LS9 Editor because there is no guarantee that the contents of the assignment tables will match. (PARAMETER CHANGE messages are always used.) You can choose either MULTI MIDI CH or SINGLE CH. If SINGLE - Yamaha LS9-32 | Owner's Manual - Page 262
Number (1-57 Request Only) *7) 512-575 Input 1-64, *8) 576-583 STIN 1L-4R, *9) 768-783 MIX 1-16, *10) 1024-1031 MATRIX 1-8 (LS9-32 only), *11) 1280-1282 STEREO L-C, *12) (YAMAHA) SUB STATUS 0001nnnn 1n n=0-15 (Device number=MIDI Channel) GROUP ID 00111110 3E Digital mixer MODEL ID 00010010 12 LS9 - Yamaha LS9-32 | Owner's Manual - Page 263
] (MIDI CH) in [Tx CH] when [PARAMETER CHANGE Tx] is on. STATUS 11110000 F0 System exclusive message ID No. 01000011 43 Manufacture's ID number (YAMAHA) SUB STATUS 0001nnnn 1n n=0-15 (Device number=MIDI Channel) GROUP ID 00111110 3E Digital mixer MODEL ID 00010010 12 LS9 DATA CATEGORY - Yamaha LS9-32 | Owner's Manual - Page 264
CH] YAMAHA) SUB STATUS 0001nnnn 1n n=0-15 (Device number=MIDI Channel) GROUP ID 00111110 3E Digital mixer MODEL ID 00010010 12 LS9 CH YAMAHA) SUB STATUS 0001nnnn 1n n=0-15 (Device number=MIDI Channel) GROUP ID 00111110 3E Digital mixer MODEL ID 00010010 12 LS9 ch Channel High 0ccccccc cl Channel - Yamaha LS9-32 | Owner's Manual - Page 265
CH] immediately the data is received. STATUS 11110000 F0 System exclusive message ID No. 01000011 43 Manufacture's ID number (YAMAHA) SUB STATUS 0011nnnn 3n n=0-15 (Device number=MIDI Channel) GROUP ID 00111110 3E Digital mixer MODEL ID 00010010 12 LS9 Appendices LS9-16/32 Owner's Manual 265 - Yamaha LS9-32 | Owner's Manual - Page 266
Number] in [Tx CH] when [PARAMETER CHANGE Tx] is on. STATUS 11110000 F0 System exclusive message ID No. 01000011 43 Manufacture's ID number (YAMAHA) SUB STATUS 0001nnnn 1n n=0-15 (Device number=MIDI Channel) GROUP ID 00111110 3E Digital mixer MODEL ID 00010010 12 LS9 DATA 00000000 00 OTHER - Yamaha LS9-32 | Owner's Manual - Page 267
0mmmmmmm mm 0mmmmmmm mm 0ccccccc ch 0ccccccc cl 11110111 F7 System exclusive message Manufacture's ID number (YAMAHA) n=0-15 (Device number=MIDI Channel) Digital mixer LS9 REMOTE LEVEL METER ADDRESS UL ADDRESS LU ADDRESS LL Count H Count L End of exclusive Appendices LS9-16/32 Owner's Manual 267 - Yamaha LS9-32 | Owner's Manual - Page 268
Select This Channel. You attempted to select a channel that cannot MAC Address! Cannot Use Network. Communication via power supply has stopped. If a malfunction has occurred, please contact your Yamaha dealer. Processing Aborted. Processing was interrupted. Recorder LS9-16/32 Owner's Manual - Yamaha LS9-32 | Owner's Manual - Page 269
input port. Too much data is being transmitted from the USB connector output port. Since the USB memory recorder is recording or playing back, functions such as Save/Load cannot be used. The recorder cannot oparate, since mixer scene memory/library data is being saved or loaded in USB memory - Yamaha LS9-32 | Owner's Manual - Page 270
as you expect ❍ Is SENDS ON FADER selected and INPUT TO MIX FADER and so on active in the panel? Only the sound of a specific channel is heard from the MONITOR OUT or PHONES jack ❍ Could a [CUE] key be on? Noise occurs from an externally connected recorder or other device ❍ Is the word clock - Yamaha LS9-32 | Owner's Manual - Page 271
the external head amp set correctly? ❍ Could there be a problem with the cable that connects the LS9 and external head amp? Are you using a D-sub 9-pin cross cable? Can't control the LS9 by LS9 Editor. ❍ Refer to LS9 Editor installation guide on our web site. http://www.yamahaproaudio.com/ In the - Yamaha LS9-32 | Owner's Manual - Page 272
+10˚C to +35˚C Storage: -20˚C to +60˚C Owner's Manual, AC Power Cord, Dust Cover (only LS9-32) mini-YGDAI cards, Gooseneck Light LA1L (for LS9-32), Rack Mount Kit RK1 250 cm Sampling Frequency External Clock Sampling Frequency Internal Clock Fader Frequency Range Jitter of PLL * * The jitter of - Yamaha LS9-32 | Owner's Manual - Page 273
-times oversampling. * +48V DC (phantom power) is supplied to INPUT XLR type connectors via each individual software controlled switch. ❏ Analog Output Characteristics Output Terminals OMNI OUT 1-8 OMNI OUT 1-16 PHONES OUT Actual Source For Use With Impedance Nominal 75 Ω 15 - Yamaha LS9-32 | Owner's Manual - Page 274
the Yamaha Pro Audio global website for the most recent information on mini-YGDAI cards. http://www.yamahaproaudio.com/ ❏ Control I/O Characteristics MIDI Terminal WORD CLOCK NETWORK (Ethernet) USB LAMP (LS9-32 only) IN OUT IN OUT Format MIDI MIDI - - 100Base-T USB 1.1 Host - *1. Bus-powered - Yamaha LS9-32 | Owner's Manual - Page 275
Output RL Conditions Min. Typ. INPUT 1-16 INPUT 1-32 OMNI OUT 1-8 OMNI OUT 1-16 600 Ω Rs=150Ω, GAIN: max. Master fader: nominal, One channel fader: nominal Rs=150Ω, GAIN: min. Master fader: nominal, One channel fader: nominal -128 EIN -62 -84 All Inputs - Yamaha LS9-32 | Owner's Manual - Page 276
1-32 Output OMNI OUT 1-8 OMNI OUT 1-16 RL 600 Ω Conditions Rs=150Ω, Input GAIN: max. Min. Typ. Max. Unit 86 dB ❏ Phantom Voltage INPUT 1-16 INPUT 1-32 Output Conditions hot & cold: No load Min. Typ. Max. Unit 46 48 50 V 276 LS9-16/32 Owner - Yamaha LS9-32 | Owner's Manual - Page 277
= Software control ❏ Output Port Function Out Port Delay Out Port Phase Attenuator Parameter 0 msec to 600 msec Normal/Reverse -96 to +24 dB ❏ Processor Function GEQ Effects Parameter 31 bands x 4(8) systems Stereo In/Stereo Out multi effector x 4 systems Appendices LS9-16/32 Owner's Manual - Yamaha LS9-32 | Owner's Manual - Page 278
Pin Assignment Pin Assignment 23 1 4 ❏ LAMP (LS9-32 only) Pin Signal Name 1 NC 2 NC 3 GND 4 +12V 278 LS9-16/32 Owner's Manual - Yamaha LS9-32 | Owner's Manual - Page 279
LS9-16 Dimensions Dimensions 220 500 25 430 25 480 220 LS9-32 500 25 834 25 884 Unit : mm * Specifications and descriptions in this owner's manual are for information purposes only. Yamaha Corp. reserves the right to change or modify products or specifications at any time without prior - Yamaha LS9-32 | Owner's Manual - Page 280
the following illustration. 4 Attach the hardware to the other side in the same way. CAUTION • When attaching the RK1 rackmount kit, make sure that the power is turned off. You must use the screws that are included with the RK1. 280 LS9-16/32 Owner's Manual - Yamaha LS9-32 | Owner's Manual - Page 281
YAMAHA [ Digital Mixing Console ] Model LS9-16/32 MIDI Implementation Chart Function... Transmitted Recognized Basic Default Channel o *1 o *1,*2 : Song Pos. x x Common : Song Sel. x o Recorder Control : Tune x x System : Clock x o Effect Control Real Time: Commands x - Yamaha LS9-32 | Owner's Manual - Page 282
39 Cue function 145, 148 [CUE] key 149 CUE screen 149 Cursor 32 [CUSTOM FADER] key 91 Custom fader layer 91 D Data entry section 22 DE-ESSER 231 DEF button 38 Digital input/output connections 43 Dimensions 279 DIRECT field 82 Direct output 103 Display 20, 30 DISPLAY ACCESS section - Yamaha LS9-32 | Owner's Manual - Page 283
function 143 FADER field 82 Fader layer 27 Firmware versionn 14 MIX/MATRIX SELECT section 20 MMC 186 Monitor function 145, 146 [MONITOR] key 19 MONITOR screen 146 MONO channels 13, 67 MUTE field 82 Mute group 121 MUTE GROUP screen 121 Mute safe 123 Appendices LS9-16/32 Owner's Manual - Yamaha LS9-32 | Owner's Manual - Page 284
ON FADER mode 65, 78 [SETUP] key 19 Slots 24, 44 ST IN channels 13, 53 ST IN section 17 ST/MONO mode 58, 71 STEREO channels 13, 67 STEREO MASTER section 18 Stereo meter / Cue section 20 STEREO/MONO channels Sending to MATRIX buses 75 SYSTEM SETUP screen 205 284 LS9-16/32 Owner's Manual - Yamaha LS9-32 | Owner's Manual - Page 285
35 Top panel 12, 15, 27 Troubleshooting 270 U USB connector 22 USB memory Editing files 201 Formatting 204 Loading 200 Saving 199 USB memory recorder 105 User 187 User authentication keys 187, connectors 25 WORD CLOCK popup window 46, 206 Index Appendices LS9-16/32 Owner's Manual 285 - Yamaha LS9-32 | Owner's Manual - Page 286
286 LS9-16/32 Owner's Manual - Yamaha LS9-32 | Owner's Manual - Page 287
MIX 1-16 INPUT PATCH INPUT 1-16{32} OSCILLATOR Sine Wave Pink Noise Burst Noise HPF LPF OSC LEVEL METER ON 2TR IN L,R 32 {64} PLAYBACK OUT L,R CH 1-32{64} To RACKIN PATCH To OUTPUT PATCH CH INSERT OUT 1-32 INSERT POINT PRE FADER OUT DIGITAL] PLAYBACK OUT RECORDER IN PATCH RECORDER IN - Yamaha LS9-32 | Owner's Manual - Page 288
■ LS9-16/LS9-32 Level Diagram Analog Digital dBu dBFS Bit Analog GAIN Digital AD INPUT EQ DYN DYN PATCH ø HPF INSERT ATT. (x4) 1 2 INSERT LEVEL ON PAN BUS Adder EQ INSERT ATT. (x4) DYN MASTER LEVEL / BAL MASTER - Yamaha LS9-32 | Owner's Manual - Page 289
0347-358 040 FRANCE Yamaha Musique France BP 70-77312 Marne-la-Vallée Cedex 2, France Tel: 01-64-61-4000 ITALY Yamaha Musica Italia S.P.A. Combo : 3-9693-5111 COUNTRIES AND TRUST TERRITORIES IN PACIFIC OCEAN Yamaha Corporation, Asia-Pacific Sales & Marketing Group Nakazawa-cho 10-1, Naka-ku, Hamamatsu - Yamaha LS9-32 | Owner's Manual - Page 290
Yamaha Pro Audio global web site: http://www.yamahaproaudio.com/ Yamaha Manual Library http://www.yamaha.co.jp/manual/ C.S.G., Pro Audio Division © 2006-2011 Yamaha Corporation 102POTO-H0 Printed in Japan WH39070
-
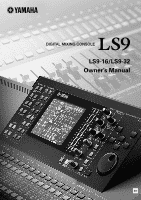 1
1 -
 2
2 -
 3
3 -
 4
4 -
 5
5 -
 6
6 -
 7
7 -
8
-
9
-
10
-
11
-
12
-
13
-
14
-
15
-
16
-
17
-
18
-
19
-
20
-
21
-
22
-
23
-
24
-
25
-
26
-
27
-
28
-
29
-
30
-
31
-
32
-
33
-
34
-
35
-
36
-
37
-
38
-
39
-
40
-
41
-
42
-
43
-
44
-
45
-
46
-
47
-
48
-
49
-
50
-
51
-
52
-
53
-
54
-
55
-
56
-
57
-
58
-
59
-
60
-
61
-
62
-
63
-
64
-
65
-
66
-
67
-
68
-
69
-
70
-
71
-
72
-
73
-
74
-
75
-
76
-
77
-
78
-
79
-
80
-
81
-
82
-
83
-
84
-
85
-
86
-
87
-
88
-
89
-
90
-
91
-
92
-
93
-
94
-
95
-
96
-
97
-
98
-
99
-
100
-
101
-
102
-
103
-
104
-
105
-
106
-
107
-
108
-
109
-
110
-
111
-
112
-
113
-
114
-
115
-
116
-
117
-
118
-
119
-
120
-
121
-
122
-
123
-
124
-
125
-
126
-
127
-
128
-
129
-
130
-
131
-
132
-
133
-
134
-
135
-
136
-
137
-
138
-
139
-
140
-
141
-
142
-
143
-
144
-
145
-
146
-
147
-
148
-
149
-
150
-
151
-
152
-
153
-
154
-
155
-
156
-
157
-
158
-
159
-
160
-
161
-
162
-
163
-
164
-
165
-
166
-
167
-
168
-
169
-
170
-
171
-
172
-
173
-
174
-
175
-
176
-
177
-
178
-
179
-
180
-
181
-
182
-
183
-
184
-
185
-
186
-
187
-
188
-
189
-
190
-
191
-
192
-
193
-
194
-
195
-
196
-
197
-
198
-
199
-
200
-
201
-
202
-
203
-
204
-
205
-
206
-
207
-
208
-
209
-
210
-
211
-
212
-
213
-
214
-
215
-
216
-
217
-
218
-
219
-
220
-
221
-
222
-
223
-
224
-
225
-
226
-
227
-
228
-
229
-
230
-
231
-
232
-
233
-
234
-
235
-
236
-
237
-
238
-
239
-
240
-
241
-
242
-
243
-
244
-
245
-
246
-
247
-
248
-
249
-
250
-
251
-
252
-
253
-
254
-
255
-
256
-
257
-
258
-
259
-
260
-
261
-
262
-
263
-
264
-
265
-
266
-
267
-
268
-
269
-
270
-
271
-
272
-
273
-
274
-
275
-
276
-
277
-
278
-
279
-
280
-
281
-
282
-
283
-
284
-
285
-
286
-
287
-
288
-
289
-
290
 |
 |
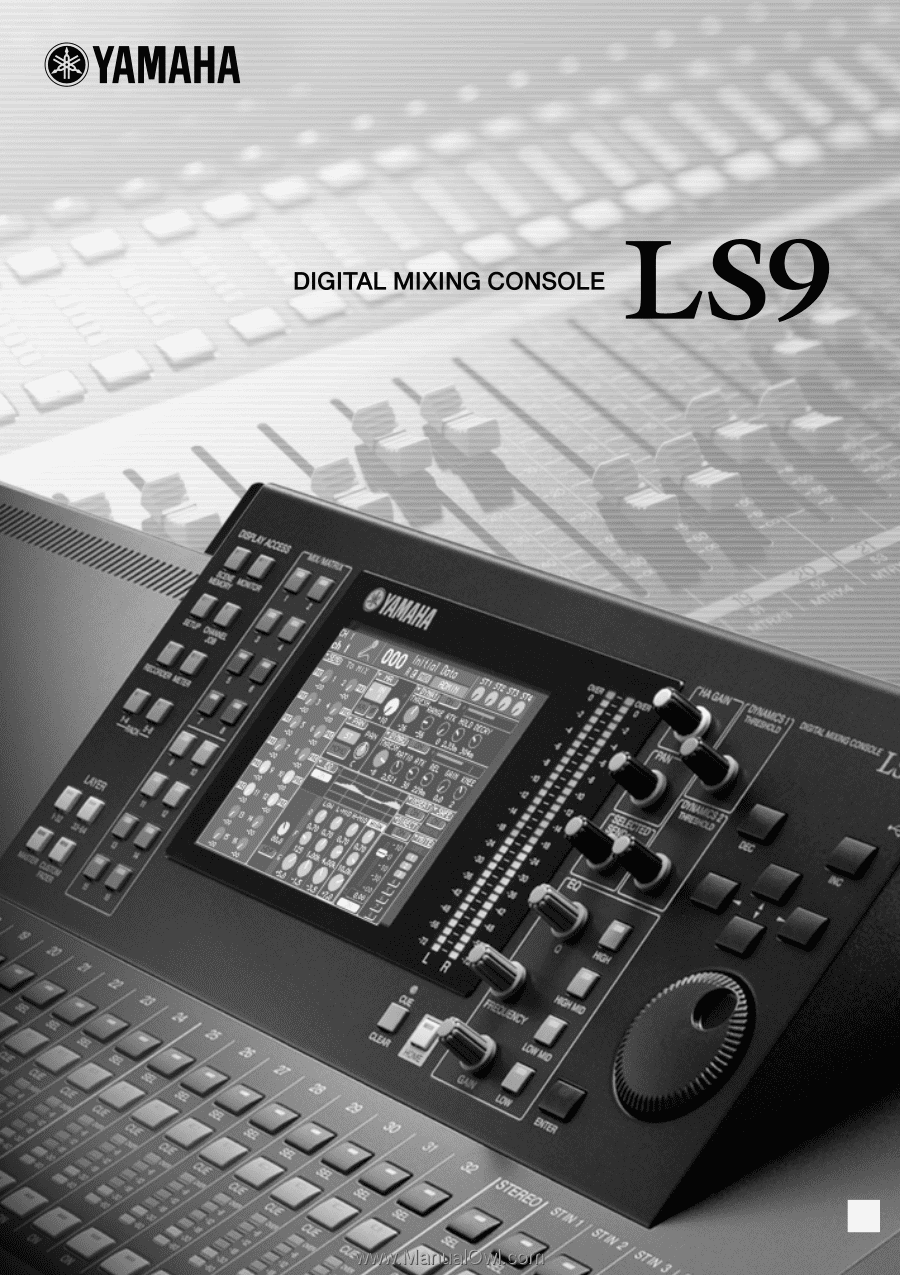
Owner’s Manual
LS9-16/LS9-32
EN