Yamaha LS9-32 Owner's Manual - Page 88
Making insert settings INPUT channels, 32 and MIX/MATRIX/STEREO/MONO, channels only
 |
View all Yamaha LS9-32 manuals
Add to My Manuals
Save this manual to your list of manuals |
Page 88 highlights
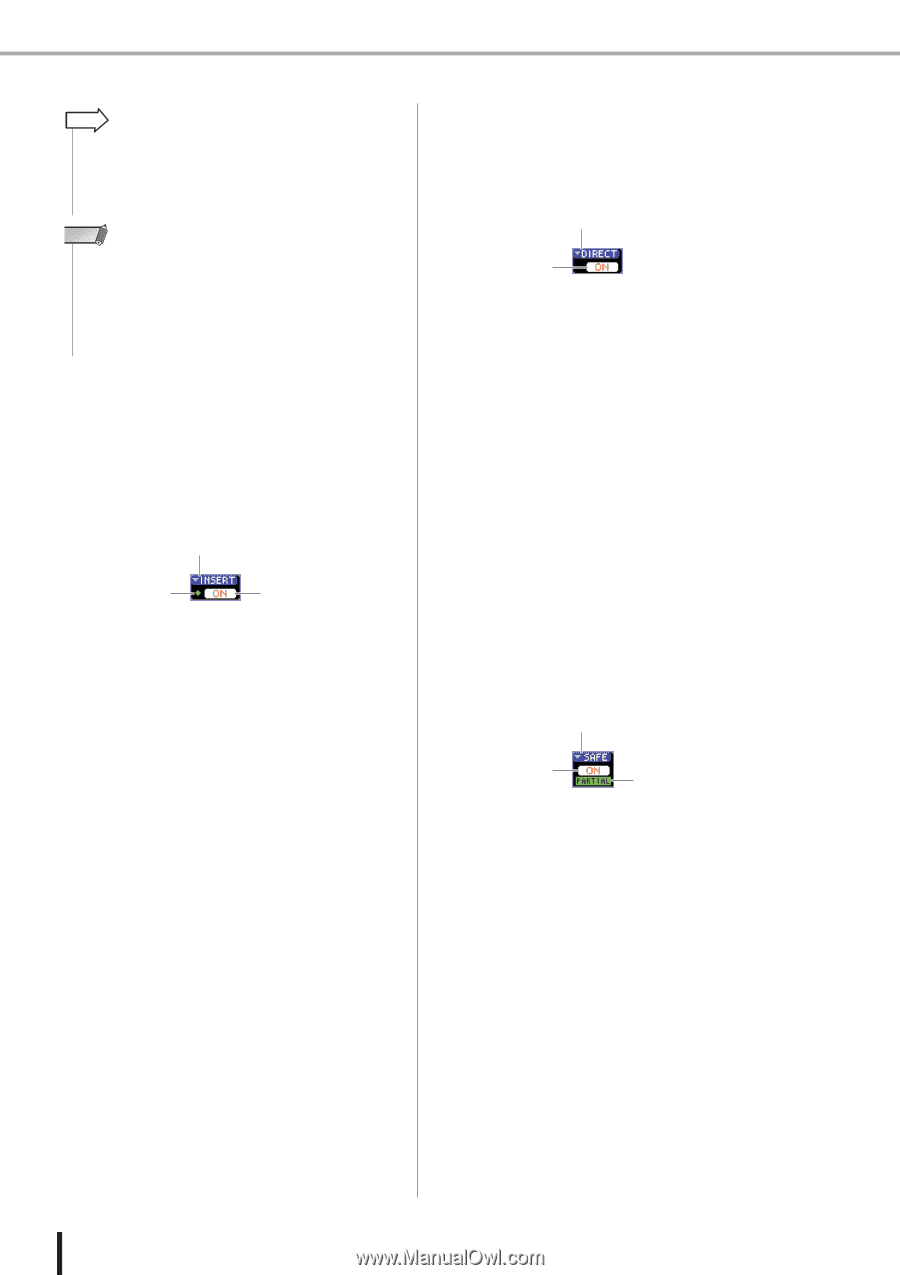
Operations in the SELECTED CHANNEL section HINT • You can also use the cursor keys to switch bands. • If you've turned on POPUP APPEARS WHEN PRESSING KNOBS in the PREFERENCE popup window (→ p. 194), you can also access the above popup window by pressing an EQ encoder in the SELECTED CHANNEL section. NOTE • The type of the LOW band EQ or HIGH band EQ cannot be switched in the SELECTED CH VIEW screen. If necessary, you can access the ATT/HPF/EQ popup window and switch the EQ type. • If the HIGH band EQ type is set to Low Pass Filter, the HIGH band Q knob will not be displayed, and the GAIN knob will function as an on/off switch for the Low Pass Filter. ● Making insert settings (INPUT channels 1-32 and MIX/MATRIX/STEREO/MONO channels only) Use the INSERT field to make insert-related settings in the SELECTED CH VIEW screen. This field includes the following items. 1 2 3 1 INSERT popup button This accesses the INSERT popup window, where you can assign input/output ports to insert-in/insert-out and specify the signal insertion points for eight channels at a time. B IN indicator This indicates the signal level of the input port that is patched to insert-in. C INSERT ON/OFF button Switches the insert on/off. To make insert settings, move the cursor to the INSERT popup button, and press the [ENTER] key to access the INSERT popup window. (For details on the popup window → p. 101) When you've assigned input/output ports to insert-in/out in the popup window, turn on the INSERT ON/OFF button. ● Making direct output settings (INPUT channels only) Use the DIRECT field to make direct-output related settings for an INPUT channel in the SELECTED CH VIEW screen. This field includes the following items. 1 2 1 DIRECT popup button This button accesses the DIRECT OUT popup window, where you can assign an output port to the direct output and adjust the output level for eight channels at a time. B DIRECT OUT ON/OFF button Turns the direct output on/off. To make direct output settings, move the cursor to the DIRECT popup button, and press the [ENTER] key to access the DIRECT OUT popup window. (For details on the popup window → p. 103) When you've assigned an output port to direct output in the popup window, turn on the DIRECT OUT ON/OFF button. ● Setting a channel to Recall Safe In the SELECTED CH VIEW screen, use the SAFE field to set the currently selected channel to the Recall Safe status (in which that channel will not be affected by Recall operations). This field includes the following items. 1 3 2 1 SAFE popup button This opens the RECALL SAFE screen, where you can make settings related to Recall Safe. B PARTIAL indicator This indicator will light if only some of the parameters of that channel are set to Recall Safe. C RECALL SAFE ON/OFF button Switches the Recall Safe status on/off for the channel. To set all parameters of the channel to Recall Safe mode, press the RECALL SAFE ON/OFF button to turn it on. If you want to set only specific parameters of the channel to Recall Safe mode, use the SAFE popup button to access the RECALL SAFE screen, and select the parameters that you want to be in Recall Safe mode. (For details on the RECALL SAFE screen → p. 140) 88 LS9-16/32 Owner's Manual
-
 1
1 -
2
-
3
-
4
-
5
-
6
-
7
-
8
-
9
-
10
-
11
-
12
-
13
-
14
-
15
-
16
-
17
-
18
-
19
-
20
-
21
-
22
-
23
-
24
-
25
-
26
-
27
-
28
-
29
-
30
-
31
-
32
-
33
-
34
-
35
-
36
-
37
-
38
-
39
-
40
-
41
-
42
-
43
-
44
-
45
-
46
-
47
-
48
-
49
-
50
-
51
-
52
-
53
-
54
-
55
-
56
-
57
-
58
-
59
-
60
-
61
-
62
-
63
-
64
-
65
-
66
-
67
-
68
-
69
-
70
-
71
-
72
-
73
-
74
-
75
-
76
-
77
-
78
-
79
-
80
-
81
-
82
-
 83
83 -
 84
84 -
 85
85 -
 86
86 -
 87
87 -
 88
88 -
 89
89 -
 90
90 -
 91
91 -
 92
92 -
 93
93 -
94
-
95
-
96
-
97
-
98
-
99
-
100
-
101
-
102
-
103
-
104
-
105
-
106
-
107
-
108
-
109
-
110
-
111
-
112
-
113
-
114
-
115
-
116
-
117
-
118
-
119
-
120
-
121
-
122
-
123
-
124
-
125
-
126
-
127
-
128
-
129
-
130
-
131
-
132
-
133
-
134
-
135
-
136
-
137
-
138
-
139
-
140
-
141
-
142
-
143
-
144
-
145
-
146
-
147
-
148
-
149
-
150
-
151
-
152
-
153
-
154
-
155
-
156
-
157
-
158
-
159
-
160
-
161
-
162
-
163
-
164
-
165
-
166
-
167
-
168
-
169
-
170
-
171
-
172
-
173
-
174
-
175
-
176
-
177
-
178
-
179
-
180
-
181
-
182
-
183
-
184
-
185
-
186
-
187
-
188
-
189
-
190
-
191
-
192
-
193
-
194
-
195
-
196
-
197
-
198
-
199
-
200
-
201
-
202
-
203
-
204
-
205
-
206
-
207
-
208
-
209
-
210
-
211
-
212
-
213
-
214
-
215
-
216
-
217
-
218
-
219
-
220
-
221
-
222
-
223
-
224
-
225
-
226
-
227
-
228
-
229
-
230
-
231
-
232
-
233
-
234
-
235
-
236
-
237
-
238
-
239
-
240
-
241
-
242
-
243
-
244
-
245
-
246
-
247
-
248
-
249
-
250
-
251
-
252
-
253
-
254
-
255
-
256
-
257
-
258
-
259
-
260
-
261
-
262
-
263
-
264
-
265
-
266
-
267
-
268
-
269
-
270
-
271
-
272
-
273
-
274
-
275
-
276
-
277
-
278
-
279
-
280
-
281
-
282
-
283
-
284
-
285
-
286
-
287
-
288
-
289
-
290
 |
 |