Yamaha LS9-32 Owner's Manual - Page 6

Contents, Operations - firmware

Page 6 highlights

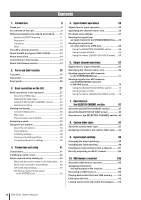
Contents 1. Introduction 9 Thank you 9 An overview of the LS9 9 Differences between the LS9-16 and LS9-32 ......... 11 Number of INPUT channels 11 Rear panel 11 Top panel 12 Other 13 The LS9's channel structure 13 About the MIX bus types (VARI / FIXED 14 About word clock 14 Conventions in this manual 14 About the firmware version 14 2. Parts and their function 15 Top panel 15 Rear panel 23 Front panel 26 3. Basic operations on the LS9 27 Basic operations in the top panel 27 About the [HOME] key 27 Selecting the fader layer 27 Using the SELECTED CHANNEL section 29 Selecting functions 29 Viewing the display 30 Constant display area 30 Main area 31 The on-screen user interface 32 Assigning a name 34 Using the tool buttons 35 About the tool buttons 35 Using libraries 35 Initializing settings 38 Copying and pasting settings 39 Comparing two sets of settings 39 4. Connections and setup 41 Connections 41 Installing an option card 44 Setup required when starting up 45 Returning the current scene to the initial state .... 45 Word clock connection and settings 46 HA (head amp) settings 47 Sending an input channel signal to the STEREO bus 50 5. Input channel operations 53 Signal flow for input channels 53 Specifying the channel name / icon 55 HA (head amp) settings 57 Sending the signal from an input channel to the STEREO/MONO bus......58 Sending the signal from an input channel to a MIX bus 62 Using the SELECTED CHANNEL section ...........62 Using a popup window 64 Using the faders (SENDS ON FADER mode) .....65 6. Output channel operations 67 Signal flow for output channels 67 Specifying the channel name / icon 69 Sending signals from MIX channels to the STEREO/MONO bus 71 Sending signals from MIX channels and STEREO/MONO channels to MATRIX buses 75 Using the SELECTED CHANNEL section ...........75 Using a popup window 77 Using the faders (SENDS ON FADER mode) .....78 7. Operations in the SELECTED CHANNEL section 81 About the SELECTED CHANNEL section 81 About the SELECTED CH VIEW screen 82 Operations in the SELECTED CHANNEL section ..83 8. Custom fader layer 91 About the custom fader layer 91 Assigning channels to the custom fader layer ......92 9. Input/output patching 95 Changing the output patching 95 Changing the input patching 99 Inserting an external device into a channel .........101 Directly outputting an INPUT channel 103 10. USB memory recorder 105 About the USB memory recorder 105 Assigning channels to the input/output of the recorder 106 Recording to USB memory 108 Playing back audio files from USB memory ........110 Editing the title list 112 Linking scene recall with audio file playback ......113 6 LS9-16/32 Owner's Manual

  • 1
  • 2
  • 3
  • 4
  • 5
  • 6
  • 7
  • 8
  • 9
  • 10
  • 11
  • 12
  • 13
  • 14
  • 15
  • 16
  • 17
  • 18
  • 19
  • 20
  • 21
  • 22
  • 23
  • 24
  • 25
  • 26
  • 27
  • 28
  • 29
  • 30
  • 31
  • 32
  • 33
  • 34
  • 35
  • 36
  • 37
  • 38
  • 39
  • 40
  • 41
  • 42
  • 43
  • 44
  • 45
  • 46
  • 47
  • 48
  • 49
  • 50
  • 51
  • 52
  • 53
  • 54
  • 55
  • 56
  • 57
  • 58
  • 59
  • 60
  • 61
  • 62
  • 63
  • 64
  • 65
  • 66
  • 67
  • 68
  • 69
  • 70
  • 71
  • 72
  • 73
  • 74
  • 75
  • 76
  • 77
  • 78
  • 79
  • 80
  • 81
  • 82
  • 83
  • 84
  • 85
  • 86
  • 87
  • 88
  • 89
  • 90
  • 91
  • 92
  • 93
  • 94
  • 95
  • 96
  • 97
  • 98
  • 99
  • 100
  • 101
  • 102
  • 103
  • 104
  • 105
  • 106
  • 107
  • 108
  • 109
  • 110
  • 111
  • 112
  • 113
  • 114
  • 115
  • 116
  • 117
  • 118
  • 119
  • 120
  • 121
  • 122
  • 123
  • 124
  • 125
  • 126
  • 127
  • 128
  • 129
  • 130
  • 131
  • 132
  • 133
  • 134
  • 135
  • 136
  • 137
  • 138
  • 139
  • 140
  • 141
  • 142
  • 143
  • 144
  • 145
  • 146
  • 147
  • 148
  • 149
  • 150
  • 151
  • 152
  • 153
  • 154
  • 155
  • 156
  • 157
  • 158
  • 159
  • 160
  • 161
  • 162
  • 163
  • 164
  • 165
  • 166
  • 167
  • 168
  • 169
  • 170
  • 171
  • 172
  • 173
  • 174
  • 175
  • 176
  • 177
  • 178
  • 179
  • 180
  • 181
  • 182
  • 183
  • 184
  • 185
  • 186
  • 187
  • 188
  • 189
  • 190
  • 191
  • 192
  • 193
  • 194
  • 195
  • 196
  • 197
  • 198
  • 199
  • 200
  • 201
  • 202
  • 203
  • 204
  • 205
  • 206
  • 207
  • 208
  • 209
  • 210
  • 211
  • 212
  • 213
  • 214
  • 215
  • 216
  • 217
  • 218
  • 219
  • 220
  • 221
  • 222
  • 223
  • 224
  • 225
  • 226
  • 227
  • 228
  • 229
  • 230
  • 231
  • 232
  • 233
  • 234
  • 235
  • 236
  • 237
  • 238
  • 239
  • 240
  • 241
  • 242
  • 243
  • 244
  • 245
  • 246
  • 247
  • 248
  • 249
  • 250
  • 251
  • 252
  • 253
  • 254
  • 255
  • 256
  • 257
  • 258
  • 259
  • 260
  • 261
  • 262
  • 263
  • 264
  • 265
  • 266
  • 267
  • 268
  • 269
  • 270
  • 271
  • 272
  • 273
  • 274
  • 275
  • 276
  • 277
  • 278
  • 279
  • 280
  • 281
  • 282
  • 283
  • 284
  • 285
  • 286
  • 287
  • 288
  • 289
  • 290

6
LS9-16/32
Owner’s Manual
1.
Introduction
9
Thank you
...................................................................
9
An overview of the LS9
..............................................
9
Differences between the LS9-16 and LS9-32
.........
11
Number of INPUT channels
.................................
11
Rear panel
...........................................................
11
Top panel
.............................................................
12
Other
....................................................................
13
The LS9’s channel structure
...................................
13
About the MIX bus types (VARI / FIXED)
................
14
About word clock
.....................................................
14
Conventions in this manual
.....................................
14
About the firmware version
.....................................
14
2.
Parts and their function
15
Top panel
...................................................................
15
Rear panel
.................................................................
23
Front panel
................................................................
26
3.
Basic operations on the LS9
27
Basic operations in the top panel
...........................
27
About the [HOME] key
.........................................
27
Selecting the fader layer
......................................
27
Using the SELECTED CHANNEL section
...........
29
Selecting functions
..............................................
29
Viewing the display
..................................................
30
Constant display area
..........................................
30
Main area
.............................................................
31
The on-screen user interface
...............................
32
Assigning a name
.....................................................
34
Using the tool buttons
.............................................
35
About the tool buttons
..........................................
35
Using libraries
......................................................
35
Initializing settings
...............................................
38
Copying and pasting settings
..............................
39
Comparing two sets of settings
...........................
39
4.
Connections and setup
41
Connections
..............................................................
41
Installing an option card
..........................................
44
Setup required when starting up
............................
45
Returning the current scene to the initial state
....
45
Word clock connection and settings
....................
46
HA (head amp) settings
.......................................
47
Sending an input channel signal
to the STEREO bus
..........................................
50
5.
Input channel operations
53
Signal flow for input channels
.................................
53
Specifying the channel name / icon
........................
55
HA (head amp) settings
............................................
57
Sending the signal from
an input channel to the STEREO/MONO bus
......
58
Sending the signal from
an input channel to a MIX bus
..............................
62
Using the SELECTED CHANNEL section
...........
62
Using a popup window
.........................................
64
Using the faders (SENDS ON FADER mode)
.....
65
6.
Output channel operations
67
Signal flow for output channels
..............................
67
Specifying the channel name / icon
........................
69
Sending signals from MIX channels
to the STEREO/MONO bus
...................................
71
Sending signals from MIX channels
and STEREO/MONO channels
to MATRIX buses
...................................................
75
Using the SELECTED CHANNEL section
...........
75
Using a popup window
.........................................
77
Using the faders (SENDS ON FADER mode)
.....
78
7.
Operations in
the SELECTED CHANNEL section
81
About the SELECTED CHANNEL section
...............
81
About the SELECTED CH VIEW screen
..................
82
Operations in the SELECTED CHANNEL section..83
8.
Custom fader layer
91
About the custom fader layer
..................................
91
Assigning channels to the custom fader layer
......
92
9.
Input/output patching
95
Changing the output patching
.................................
95
Changing the input patching
...................................
99
Inserting an external device into a channel
.........
101
Directly outputting an INPUT channel
..................
103
10.
USB memory recorder
105
About the USB memory recorder
..........................
105
Assigning channels to
the input/output of the recorder
.........................
106
Recording to USB memory
....................................
108
Playing back audio files from USB memory
........
110
Editing the title list
..................................................
112
Linking scene recall with audio file playback
......
113
Contents