Yamaha LS9-32 Owner's Manual - Page 136
Scene memory editing, Copying/pasting a scene, where other than the constant display area
 |
View all Yamaha LS9-32 manuals
Add to My Manuals
Save this manual to your list of manuals |
Page 136 highlights
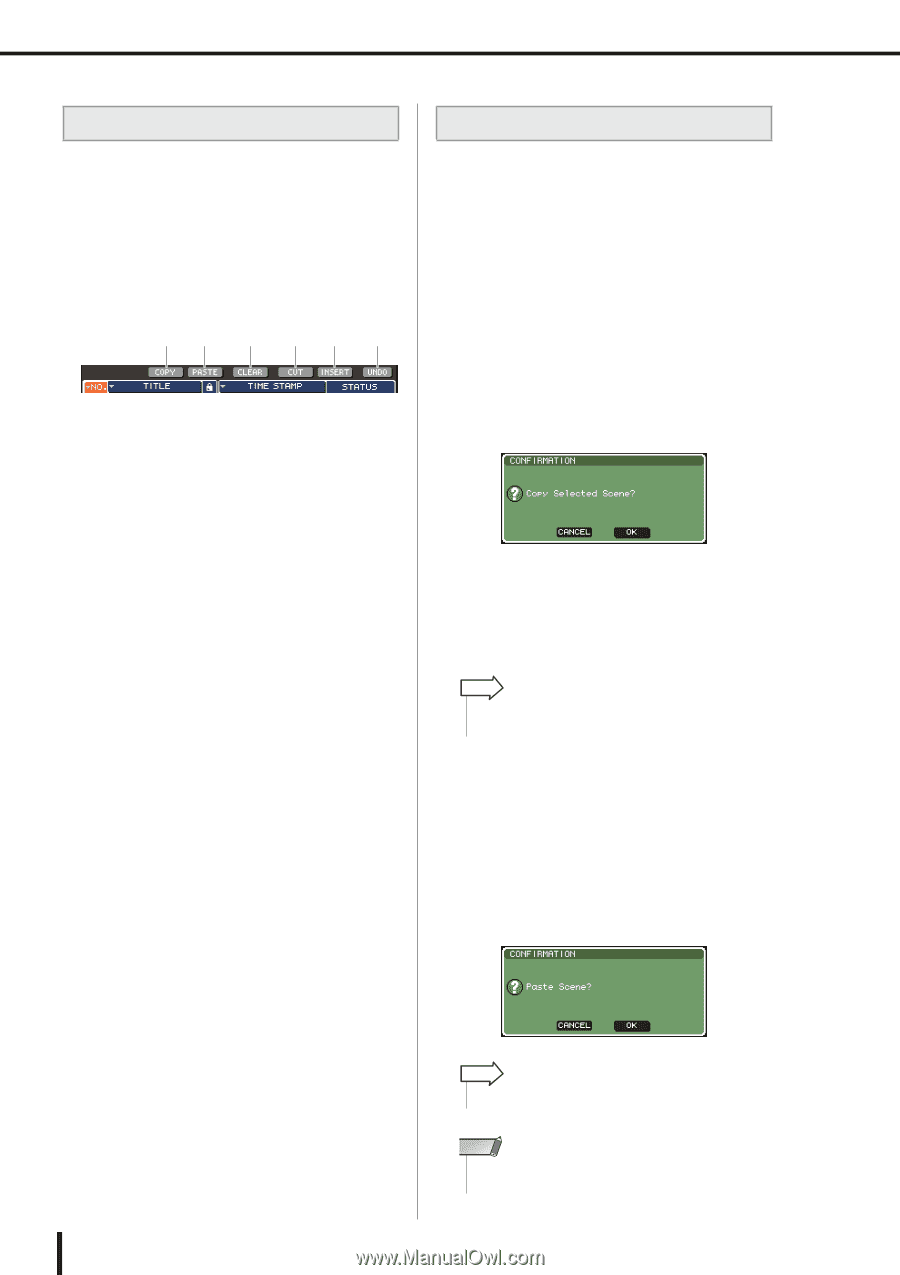
Editing scene memories Scene memory editing The scenes stored in scene memory can be copied/pasted to other scene numbers, or cleared (erased). 1 In the DISPLAY ACCESS section, press the [SCENE MEMORY] key to access any one of the SCENE MEMORY screens. Scene memories are edited using the buttons shown in the upper part of the SCENE MEMORY screen. Each button has the following function. 12 3 45 6 1 COPY button Copies a scene into a memory buffer (a temporary storage area). For details on how to use this, refer to "Copying/pasting a scene" below. B PASTE button This button pastes a scene (previously copied into the memory buffer) into another scene number. For details on how to use this, refer to "Copying/pasting a scene" below. C CLEAR button This button clears (erases) the selected scene. For details on how to use this, refer to "Clearing a scene" (→ p. 137). D CUT button Cuts a scene and places it in the memory buffer. Scenes following the scene number you cut will be moved forward. For details on how to use this, refer to "Cutting a scene" (→ p. 138). E INSERT button Inserts a scene from the memory buffer at the location of a different scene number. Scene numbers following the inserted position will be moved backward. For details on how to use this, refer to "Inserting a scene" (→ p. 138). F UNDO button This button cancels the most recently-executed scene editing operation. If you've accidentally cleared an important scene, you can press this key to return to the state prior to editing the scene. 2 Perform the desired editing operations. For details on the procedure, refer to the explanations that follow. Copying/pasting a scene Here's how to copy a scene into buffer memory, and then paste it to a different scene number. 1 In the DISPLAY ACCESS section, press the [SCENE MEMORY] key to access any one of the SCENE MEMORY screens. 2 Make sure that the cursor is located somewhere other than the constant display area, and use the dial or the [DEC]/[INC] keys to select the copy-source scene number. 3 Move the cursor to the COPY button and press the [ENTER] key. A dialog box will ask you to confirm the Copy operation. 4 To execute the Copy operation, move the cursor to the OK button and press the [ENTER] key. The scene you selected in step 2 will be saved in the buffer memory. HINT • Be aware that if you copy/cut another scene before you paste, the other scene will be overwritten to the buffer memory. 5 Make sure that the cursor is located somewhere other than the constant display area, and use the dial or the [DEC]/[INC] keys to select the paste-destination scene number. 6 Move the cursor to the PASTE button and press the [ENTER] key. A dialog box will ask you to confirm the Paste operation. HINT • A copied scene can also be inserted (→ p. 138). NOTE • If nothing has been stored in the buffer memory, the PASTE button is not available. 136 LS9-16/32 Owner's Manual
-
 1
1 -
2
-
3
-
4
-
5
-
6
-
7
-
8
-
9
-
10
-
11
-
12
-
13
-
14
-
15
-
16
-
17
-
18
-
19
-
20
-
21
-
22
-
23
-
24
-
25
-
26
-
27
-
28
-
29
-
30
-
31
-
32
-
33
-
34
-
35
-
36
-
37
-
38
-
39
-
40
-
41
-
42
-
43
-
44
-
45
-
46
-
47
-
48
-
49
-
50
-
51
-
52
-
53
-
54
-
55
-
56
-
57
-
58
-
59
-
60
-
61
-
62
-
63
-
64
-
65
-
66
-
67
-
68
-
69
-
70
-
71
-
72
-
73
-
74
-
75
-
76
-
77
-
78
-
79
-
80
-
81
-
82
-
83
-
84
-
85
-
86
-
87
-
88
-
89
-
90
-
91
-
92
-
93
-
94
-
95
-
96
-
97
-
98
-
99
-
100
-
101
-
102
-
103
-
104
-
105
-
106
-
107
-
108
-
109
-
110
-
111
-
112
-
113
-
114
-
115
-
116
-
117
-
118
-
119
-
120
-
121
-
122
-
123
-
124
-
125
-
126
-
127
-
128
-
129
-
130
-
 131
131 -
 132
132 -
 133
133 -
 134
134 -
 135
135 -
 136
136 -
 137
137 -
 138
138 -
 139
139 -
 140
140 -
 141
141 -
142
-
143
-
144
-
145
-
146
-
147
-
148
-
149
-
150
-
151
-
152
-
153
-
154
-
155
-
156
-
157
-
158
-
159
-
160
-
161
-
162
-
163
-
164
-
165
-
166
-
167
-
168
-
169
-
170
-
171
-
172
-
173
-
174
-
175
-
176
-
177
-
178
-
179
-
180
-
181
-
182
-
183
-
184
-
185
-
186
-
187
-
188
-
189
-
190
-
191
-
192
-
193
-
194
-
195
-
196
-
197
-
198
-
199
-
200
-
201
-
202
-
203
-
204
-
205
-
206
-
207
-
208
-
209
-
210
-
211
-
212
-
213
-
214
-
215
-
216
-
217
-
218
-
219
-
220
-
221
-
222
-
223
-
224
-
225
-
226
-
227
-
228
-
229
-
230
-
231
-
232
-
233
-
234
-
235
-
236
-
237
-
238
-
239
-
240
-
241
-
242
-
243
-
244
-
245
-
246
-
247
-
248
-
249
-
250
-
251
-
252
-
253
-
254
-
255
-
256
-
257
-
258
-
259
-
260
-
261
-
262
-
263
-
264
-
265
-
266
-
267
-
268
-
269
-
270
-
271
-
272
-
273
-
274
-
275
-
276
-
277
-
278
-
279
-
280
-
281
-
282
-
283
-
284
-
285
-
286
-
287
-
288
-
289
-
290
 |
 |