HP Cluster Platform Interconnects v2010 Quadrics QsNetII Interconnect - Page 94
Verifying the Node Level to Top Level Link
 |
View all HP Cluster Platform Interconnects v2010 manuals
Add to My Manuals
Save this manual to your list of manuals |
Page 94 highlights
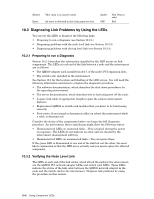
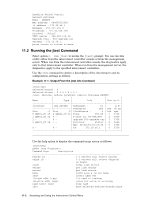
c. If the green LEDs are still not illuminated, proceed with step 11. 11. Test the node's PCI I/O system, as described in the documentation supplied with the node. If the node's PCI I/O system displays no errors, then the LED array is faulty and you must replace the appropriate components. You have completed the diagnostic process. 10.3.3 Verifying the Node Level to Top Level Link The switch card LEDs are at either end of the link cables that connect the node-level interconnects to the top-level interconnects. All three green LEDs on the end-to-end link must be illuminated when the node has booted and the interconnects have initialized. Note Ignore illuminated red LEDs on connected links when the interconnect is first powered up. These will be cleared by the interconnect manager software. You can also Ignore red LEDs on unconnected links. To clear the LEDs you will use the jtest utility to select and clear the error registers in all components. When you have cleared the registers, examine the LEDs and interpret them as follows: • Ignore any red LEDs on unconnected links. • If the green LED is lit at one end of a link but not the other, it is most likely that the LED array is are faulty. First try replacing the component that is not showing an illuminated green LED. • If the interconnects are powered up and connected to each other and any of the three green LEDs for each link cable are not illuminated, the link is not working and you should use the verification procedure described in this section. Use the following procedure to verify the link between the node and the top-level interconnects. 1. Visually inspect the hardware to ensure that the node level interconnect is correctly connected to the top-level interconnect and that all cards are correctly seated in each interconnect as follows: • Interconnect components are keyed to prevent incorrect insertion, and are latched or screwed down to ensure good connector contact. If a component that is inserted correctly, its bezel will not be aligned with the chassis or with other adjacent components. • Link cables must not deviate more than 10 degrees from horizontal at their connection point with a port. To avoid problems at port connections, ensure that all cables are correctly hooked into the cable management system. 2. Check the LEDs on the switch card in the node-level interconnect and the LEDs on the switch card in the top-level interconnect. If neither of the green LEDs is lit, replace each of the following components with a known good component, or verify the configuration as instructed. Ensure that you perform each stop in the order specified. Check the link LEDs after each step until both LEDs are illuminated, indicating that the link is now working: a. Verify the clock source setting and clock frequency on each interconnect by using the jtest command as specified in Section 11.2. b. If the output from the jtest command reports that the federated interconnect has phase errors, or if the clock speed is not reported to 10-8 Using Component LEDs
-
 1
1 -
2
-
3
-
4
-
5
-
6
-
7
-
8
-
9
-
10
-
11
-
12
-
13
-
14
-
15
-
16
-
17
-
18
-
19
-
20
-
21
-
22
-
23
-
24
-
25
-
26
-
27
-
28
-
29
-
30
-
31
-
32
-
33
-
34
-
35
-
36
-
37
-
38
-
39
-
40
-
41
-
42
-
43
-
44
-
45
-
46
-
47
-
48
-
49
-
50
-
51
-
52
-
53
-
54
-
55
-
56
-
57
-
58
-
59
-
60
-
61
-
62
-
63
-
64
-
65
-
66
-
67
-
68
-
69
-
70
-
71
-
72
-
73
-
74
-
75
-
76
-
77
-
78
-
79
-
80
-
81
-
82
-
83
-
84
-
85
-
86
-
87
-
88
-
 89
89 -
 90
90 -
 91
91 -
 92
92 -
 93
93 -
 94
94 -
 95
95 -
 96
96 -
 97
97 -
 98
98 -
 99
99 -
100
-
101
-
102
-
103
-
104
-
105
-
106
-
107
-
108
-
109
-
110
-
111
-
112
-
113
-
114
-
115
-
116
-
117
-
118
-
119
-
120
-
121
-
122
-
123
-
124
-
125
-
126
-
127
-
128
-
129
-
130
-
131
-
132
-
133
-
134
-
135
-
136
-
137
-
138
-
139
-
140
-
141
-
142
-
143
-
144
-
145
-
146
-
147
-
148
-
149
-
150
-
151
-
152
-
153
-
154
-
155
-
156
-
157
-
158
-
159
-
160
-
161
-
162
-
163
-
164
-
165
-
166
 |
 |