Kyocera KM-2030 Fax System (B) Instruction Handbook - Page 14
Preparations
 |
View all Kyocera KM-2030 manuals
Add to My Manuals
Save this manual to your list of manuals |
Page 14 highlights
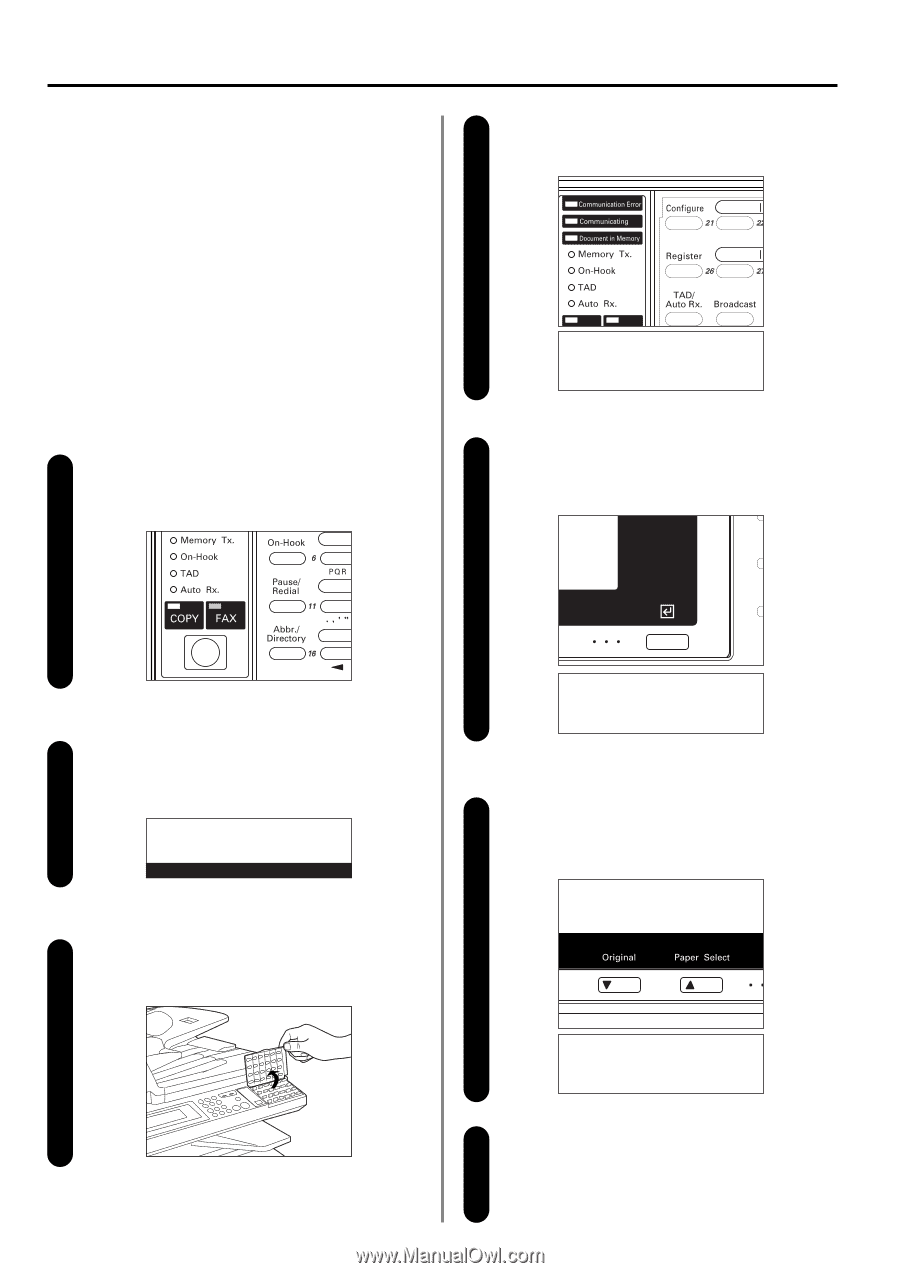
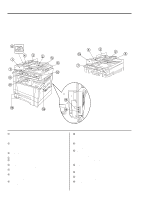
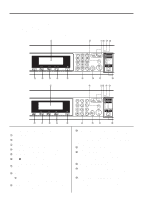
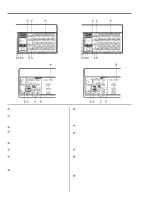
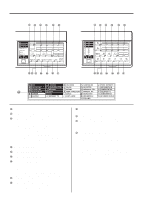
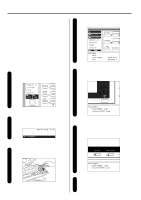
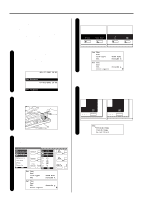
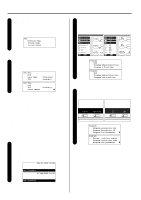
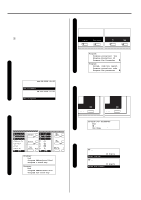
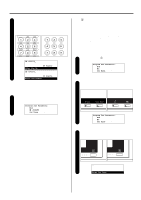
Section 1 Basic Use of this Fax Preparations When using the fax functions of this machine for the first time after purchase, perform the procedures as explained in "(1) Setting the Type of Phone Line" through "(4) Registering Self-Station Information". Entering the "Set Fax" mode 4 Press the Configure key. The "Set Fax" menu will appear in the message display. (1) Setting the Type of Phone Line (Inch version only) Set the type of phone line here to correspond to the type of telephone service that you are using. BE SURE the type of phone line you select here is correct because, if the setting is incorrect, dialing - and therefore fax communication - will be impossible. * If you want to cancel the procedure part way through, press the Reset key. The operation panel will return to the initial mode settings. Switching to the Fax Operation mode 1 Press the COPY/FAX switching key to light the FAX indicator. * When the FAX indicator is lit, the machine is in the Fax Operation mode. Set Fax: End Á Line Type TTI :Tone Dial :Outside P. Make sure that "Line Type" is selected in the message display 5 and press the Enter key. * The asterisk (*) in the message display indicates the current setting. Checking the initial mode display 2 Check the message display to make sure that the operation panel is in the initial mode for fax operation. (Refer to "(2) Initial Mode", page 1-14.) JUL-07-2001 10:00 Set Document Line Type: Á*Tone(DTMF) Line Pulse(10PPS) Line 6 Selecting the type of phone line Use the cursor up or the cursor down key to select the type of phone line that you are using. * Select between "Tone(DTMF) Line" and "Pulse(10PPS) Line". 3 Raising the cover plate Raise the cover plate that is located over the one-touch keys on the right side of the operation panel. 1-6 Line Type: *Tone(DTMF) Line Á Pulse(10PPS) Line Press the Enter key. 7 The setting for the type of phone line is complete. * To return to the initial mode settings, use the cursor up or the cursor down key to select "End". Then press the Enter key.
-
 1
1 -
2
-
3
-
4
-
5
-
6
-
7
-
8
-
 9
9 -
 10
10 -
 11
11 -
 12
12 -
 13
13 -
 14
14 -
 15
15 -
 16
16 -
 17
17 -
 18
18 -
 19
19 -
20
-
21
-
22
-
23
-
24
-
25
-
26
-
27
-
28
-
29
-
30
-
31
-
32
-
33
-
34
-
35
-
36
-
37
-
38
-
39
-
40
-
41
-
42
-
43
-
44
-
45
-
46
-
47
-
48
-
49
-
50
-
51
-
52
-
53
-
54
-
55
-
56
-
57
-
58
-
59
-
60
-
61
-
62
-
63
-
64
-
65
-
66
-
67
-
68
-
69
-
70
-
71
-
72
-
73
-
74
-
75
-
76
-
77
-
78
-
79
-
80
-
81
-
82
-
83
-
84
-
85
-
86
-
87
-
88
-
89
-
90
-
91
-
92
-
93
-
94
-
95
-
96
-
97
-
98
-
99
-
100
-
101
-
102
-
103
-
104
-
105
-
106
-
107
-
108
-
109
-
110
-
111
-
112
-
113
-
114
-
115
-
116
-
117
-
118
-
119
-
120
-
121
-
122
-
123
-
124
-
125
-
126
-
127
-
128
-
129
-
130
-
131
-
132
-
133
-
134
-
135
-
136
-
137
-
138
-
139
-
140
-
141
-
142
-
143
-
144
-
145
-
146
-
147
-
148
-
149
-
150
-
151
-
152
-
153
-
154
-
155
-
156
-
157
-
158
-
159
-
160
-
161
-
162
-
163
-
164
-
165
-
166
-
167
-
168
-
169
-
170
-
171
-
172
-
173
-
174
-
175
-
176
-
177
-
178
 |
 |