Kyocera KM-2030 Fax System (B) Instruction Handbook - Page 63
Enter Chain Name, Set Document, Press 1-Touch Key, Deleted, Press ENTER key, Delete, Enter chain
 |
View all Kyocera KM-2030 manuals
Add to My Manuals
Save this manual to your list of manuals |
Page 63 highlights
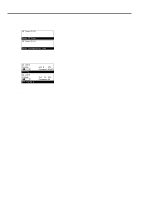
6. Press the Enter key. Enter Chain Name (Inch) Enter chain dial name (Metric) 7. Enter the desired name for the chain dial key. * The name for the chain dial key can be up to 20 characters in length. (Refer to "Entering characters", page 1-30.) DDL-Chicago (Lower case) Enter Chain Name DDL-Chicago (Small letter mode) Enter chain dial name (Inch) (Metric) 8. Press the Enter key. Registration of that chain dial key is complete. > If you want to continue registering other chain dial keys, repeat steps 4 - 8. > If you are finished registering chain dial keys, press the Reset key. The operation panel will return to the initial mode settings. (2) Modifying and Deleting * If you want to cancel the procedure part way through, press the Reset key. The operation panel will return to the initial mode settings. JUL-08-2001 12:00 Set Document 08-JUL-2001 12:00 Set original (Inch) (Metric) 1. Perform steps 1 - 3 of "(1) Registering", page 2-8. Chain: Press 1-Touch Key Chain: Press one-touch key (Inch) (Metric) Section 2 Various Functions of this Fax 2. Press the one-touch key (chain dial key) containing the chain dial information you want to modify or delete. (Inch) (Metric) 3. Perform the following procedure that corresponds to what you want to do: > Modifying registered information Use the cursor up or the cursor down key to select the information you want to modify. Then press the Enter key. * Follow the steps related to the desired information in "(1) Registering", page 2-8, to change that information. Chain:05 End v :0777 Á DDL-Chicago > Deleting the chain dial key 1 Press the Stop/Clear key. * If you want to cancel the deletion procedure, simply press the Stop/Clear key again. Chain:05 Delete Press ENTER key 2 Press the Enter key. Chain:05 Deleted 4. If you are finished modifying and/or deleting chain dial keys, press the Reset key. The operation panel will return to the initial mode settings. 2-9
-
 1
1 -
2
-
3
-
4
-
5
-
6
-
7
-
8
-
9
-
10
-
11
-
12
-
13
-
14
-
15
-
16
-
17
-
18
-
19
-
20
-
21
-
22
-
23
-
24
-
25
-
26
-
27
-
28
-
29
-
30
-
31
-
32
-
33
-
34
-
35
-
36
-
37
-
38
-
39
-
40
-
41
-
42
-
43
-
44
-
45
-
46
-
47
-
48
-
49
-
50
-
51
-
52
-
53
-
54
-
55
-
56
-
57
-
 58
58 -
 59
59 -
 60
60 -
 61
61 -
 62
62 -
 63
63 -
 64
64 -
 65
65 -
 66
66 -
 67
67 -
 68
68 -
69
-
70
-
71
-
72
-
73
-
74
-
75
-
76
-
77
-
78
-
79
-
80
-
81
-
82
-
83
-
84
-
85
-
86
-
87
-
88
-
89
-
90
-
91
-
92
-
93
-
94
-
95
-
96
-
97
-
98
-
99
-
100
-
101
-
102
-
103
-
104
-
105
-
106
-
107
-
108
-
109
-
110
-
111
-
112
-
113
-
114
-
115
-
116
-
117
-
118
-
119
-
120
-
121
-
122
-
123
-
124
-
125
-
126
-
127
-
128
-
129
-
130
-
131
-
132
-
133
-
134
-
135
-
136
-
137
-
138
-
139
-
140
-
141
-
142
-
143
-
144
-
145
-
146
-
147
-
148
-
149
-
150
-
151
-
152
-
153
-
154
-
155
-
156
-
157
-
158
-
159
-
160
-
161
-
162
-
163
-
164
-
165
-
166
-
167
-
168
-
169
-
170
-
171
-
172
-
173
-
174
-
175
-
176
-
177
-
178
 |
 |