Kyocera KM-2030 Fax System (B) Instruction Handbook - Page 90
Other Features of this Fax
 |
View all Kyocera KM-2030 manuals
Add to My Manuals
Save this manual to your list of manuals |
Page 90 highlights
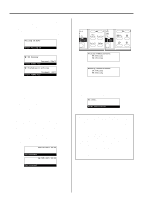
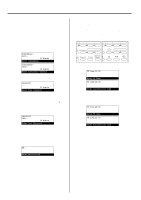
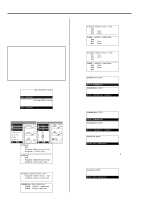
Section 4 Other Features of this Fax 5. If you want to designate the communication for this fax number as an F-Code Based Bulletin Board Polling Reception, press the F-Code [SUBADDRESS] key. > If you pressed the F-Code [SUBADDRESS] key, proceed to step 6. > If you DID NOT press the F-Code [SUBADDRESS] key, proceed to step 9. 6. Enter the subaddress you want to use for this F-Code Based Polling Reception. * The subaddress can be up to 20 digits in length and can include any combination of the numerals 0 - 9. SubAddress: 6635 20 Digits Enter SubAddress. (Inch) Subaddress: 6635 20 digits Enter subaddress numbers (Metric) 7. Press the Enter key. Password: 20 Digits Enter Your Password 8. If necessary, enter the predetermined F-Code password. * The password can be up to 20 digits in length and can include any combination of the numerals 0 - 9 and the symbols " " and "#". You do not have to enter an F-Code password here if you agree in advance with the transmitting party not to use one. * If you DO NOT need to enter an F-Code password, proceed to step 9. Password: 3856 20 Digits Enter Your Password 9. Press the Enter key. * If the fax number you entered has already been registered for this operation or too many numbers were entered, an error message will appear in the message display. In this case, press the Enter key and the message display will return to a display that allows you to enter the transmitting party's fax number again. v: Enter Destination 10. Select whether or not you want to continue entering other transmitting fax numbers. > If you DO want to enter more fax numbers, return to step 4 on page 4-7. > If you are finished entering fax numbers, proceed to step 11. 11. If you want to designate a time for the reception to begin, press the Delayed Tx. key. * If the maximum allowable number of communications that use the timer (max: 50) is reached, an error message will appear in the message display. In this case, press the Enter key and the operation panel will return to the initial mode settings. * If you want the reception to begin right away, this step is not necessary. Proceed to step 14. (Inch) (Metric) 12. Press the Enter key. TX Time:12:00 Enter TX Time TX time:12:00 Enter transmission time (Inch) (Metric) 13. Use the keypad to enter the desired time for the reception to begin. * If you want to reset the displayed time to "00:00", simply press the Stop/Clear key. TX Time:20:00 Enter TX Time TX time:20:00 Enter transmission time (Inch) (Metric) 14. Press the Enter key. The reception operation will begin automatically. * If a time for the reception to begin was designated, the reception operation will begin when the appointed time is reached. 4-8
-
 1
1 -
2
-
3
-
4
-
5
-
6
-
7
-
8
-
9
-
10
-
11
-
12
-
13
-
14
-
15
-
16
-
17
-
18
-
19
-
20
-
21
-
22
-
23
-
24
-
25
-
26
-
27
-
28
-
29
-
30
-
31
-
32
-
33
-
34
-
35
-
36
-
37
-
38
-
39
-
40
-
41
-
42
-
43
-
44
-
45
-
46
-
47
-
48
-
49
-
50
-
51
-
52
-
53
-
54
-
55
-
56
-
57
-
58
-
59
-
60
-
61
-
62
-
63
-
64
-
65
-
66
-
67
-
68
-
69
-
70
-
71
-
72
-
73
-
74
-
75
-
76
-
77
-
78
-
79
-
80
-
81
-
82
-
83
-
84
-
 85
85 -
 86
86 -
 87
87 -
 88
88 -
 89
89 -
 90
90 -
 91
91 -
 92
92 -
 93
93 -
 94
94 -
 95
95 -
96
-
97
-
98
-
99
-
100
-
101
-
102
-
103
-
104
-
105
-
106
-
107
-
108
-
109
-
110
-
111
-
112
-
113
-
114
-
115
-
116
-
117
-
118
-
119
-
120
-
121
-
122
-
123
-
124
-
125
-
126
-
127
-
128
-
129
-
130
-
131
-
132
-
133
-
134
-
135
-
136
-
137
-
138
-
139
-
140
-
141
-
142
-
143
-
144
-
145
-
146
-
147
-
148
-
149
-
150
-
151
-
152
-
153
-
154
-
155
-
156
-
157
-
158
-
159
-
160
-
161
-
162
-
163
-
164
-
165
-
166
-
167
-
168
-
169
-
170
-
171
-
172
-
173
-
174
-
175
-
176
-
177
-
178
 |
 |