Compaq ProLiant 1000 ProLiant Server Troubleshooting Guide - Page 110
Exiting Diagnostics
 |
View all Compaq ProLiant 1000 manuals
Add to My Manuals
Save this manual to your list of manuals |
Page 110 highlights
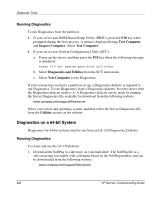
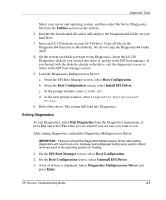
Diagnostic Tools Select your server and operating system, and then select the Server Diagnostics file from the Utilities section on the website. 2. Execute the downloaded file and it will unzip to the Diagnostics64 folder on your hard drive. 3. Insert an LS-120 diskette in your LS-240 drive. Copy all files in the Diagnostics64 directory to this diskette, but do not copy the Diagnostics64 folder itself. 4. On the system on which you want to run Diagnostics, insert the LS-120 Diagnostics diskette you created into drive A, and go to the EFI boot manager. If you booted with the diskette already in the drive, exit the diagnostics screen to return to the EFI boot manager screen. 5. Load the Diagnostics Multiprocessor Driver: a. From the EFI Boot Manager screen, select Boot Configuration. b. From the Boot Configuration screen, select Install EFI Driver. c. In the prompt window, enter DIAGMP.EFI. d. In the next prompt window, enter Diagnostics Multiprocessor Driver. 6. Reboot the server. The system will load into Diagnostics. Exiting Diagnostics To exit Diagnostics, select Exit Diagnostics from the Diagnostics main menu, or press Esc and select Yes when you are asked if you are sure you want to exit. After exiting Diagnostics, unload the Diagnostics Multiprocessor Driver: IMPORTANT: Failure to unload the Diagnostics Multiprocessor Driver after exiting Diagnostics will result in an error message being displayed during every system reboot and may result in the operating system not loading. 1. On the EFI Boot Manager screen, select Boot Configuration. 2. On the Boot Configuration screen, select Uninstall EFI Driver. 3. A list of drivers is displayed. Select Diagnostics Multiprocessor Driver and press Enter. HP Servers Troubleshooting Guide 4-7
-
 1
1 -
2
-
3
-
4
-
5
-
6
-
7
-
8
-
9
-
10
-
11
-
12
-
13
-
14
-
15
-
16
-
17
-
18
-
19
-
20
-
21
-
22
-
23
-
24
-
25
-
26
-
27
-
28
-
29
-
30
-
31
-
32
-
33
-
34
-
35
-
36
-
37
-
38
-
39
-
40
-
41
-
42
-
43
-
44
-
45
-
46
-
47
-
48
-
49
-
50
-
51
-
52
-
53
-
54
-
55
-
56
-
57
-
58
-
59
-
60
-
61
-
62
-
63
-
64
-
65
-
66
-
67
-
68
-
69
-
70
-
71
-
72
-
73
-
74
-
75
-
76
-
77
-
78
-
79
-
80
-
81
-
82
-
83
-
84
-
85
-
86
-
87
-
88
-
89
-
90
-
91
-
92
-
93
-
94
-
95
-
96
-
97
-
98
-
99
-
100
-
101
-
102
-
103
-
104
-
 105
105 -
 106
106 -
 107
107 -
 108
108 -
 109
109 -
 110
110 -
 111
111 -
 112
112 -
 113
113 -
 114
114 -
 115
115 -
116
-
117
-
118
-
119
-
120
-
121
-
122
-
123
-
124
-
125
-
126
-
127
-
128
-
129
-
130
-
131
-
132
-
133
-
134
-
135
-
136
-
137
-
138
-
139
-
140
-
141
-
142
-
143
-
144
-
145
-
146
-
147
-
148
-
149
-
150
-
151
-
152
-
153
-
154
-
155
-
156
-
157
-
158
-
159
-
160
-
161
-
162
-
163
-
164
-
165
-
166
-
167
-
168
-
169
-
170
-
171
-
172
-
173
-
174
-
175
-
176
-
177
-
178
-
179
-
180
-
181
-
182
-
183
-
184
-
185
-
186
-
187
-
188
-
189
-
190
-
191
-
192
-
193
-
194
-
195
-
196
-
197
-
198
-
199
-
200
-
201
-
202
-
203
-
204
-
205
-
206
-
207
-
208
-
209
-
210
-
211
-
212
-
213
-
214
-
215
-
216
-
217
-
218
-
219
-
220
-
221
-
222
-
223
-
224
-
225
-
226
-
227
-
228
-
229
-
230
-
231
-
232
-
233
-
234
-
235
-
236
-
237
-
238
-
239
-
240
-
241
-
242
-
243
-
244
-
245
-
246
-
247
-
248
-
249
-
250
-
251
-
252
-
253
-
254
-
255
-
256
-
257
-
258
-
259
-
260
-
261
-
262
-
263
-
264
-
265
-
266
-
267
-
268
-
269
-
270
-
271
-
272
-
273
-
274
-
275
-
276
-
277
-
278
-
279
-
280
-
281
-
282
-
283
-
284
-
285
-
286
-
287
-
288
-
289
-
290
-
291
-
292
-
293
-
294
-
295
-
296
-
297
-
298
-
299
-
300
-
301
-
302
-
303
-
304
-
305
-
306
-
307
 |
 |
