Kyocera KM-C3232E C2525E/C3225E/C3232E/C4035E Operation Guide Rev-1.0 (Advance - Page 288
Resetting a Document Box, Setting Box Names and Box Passwords, Setting Item, Description
 |
View all Kyocera KM-C3232E manuals
Add to My Manuals
Save this manual to your list of manuals |
Page 288 highlights
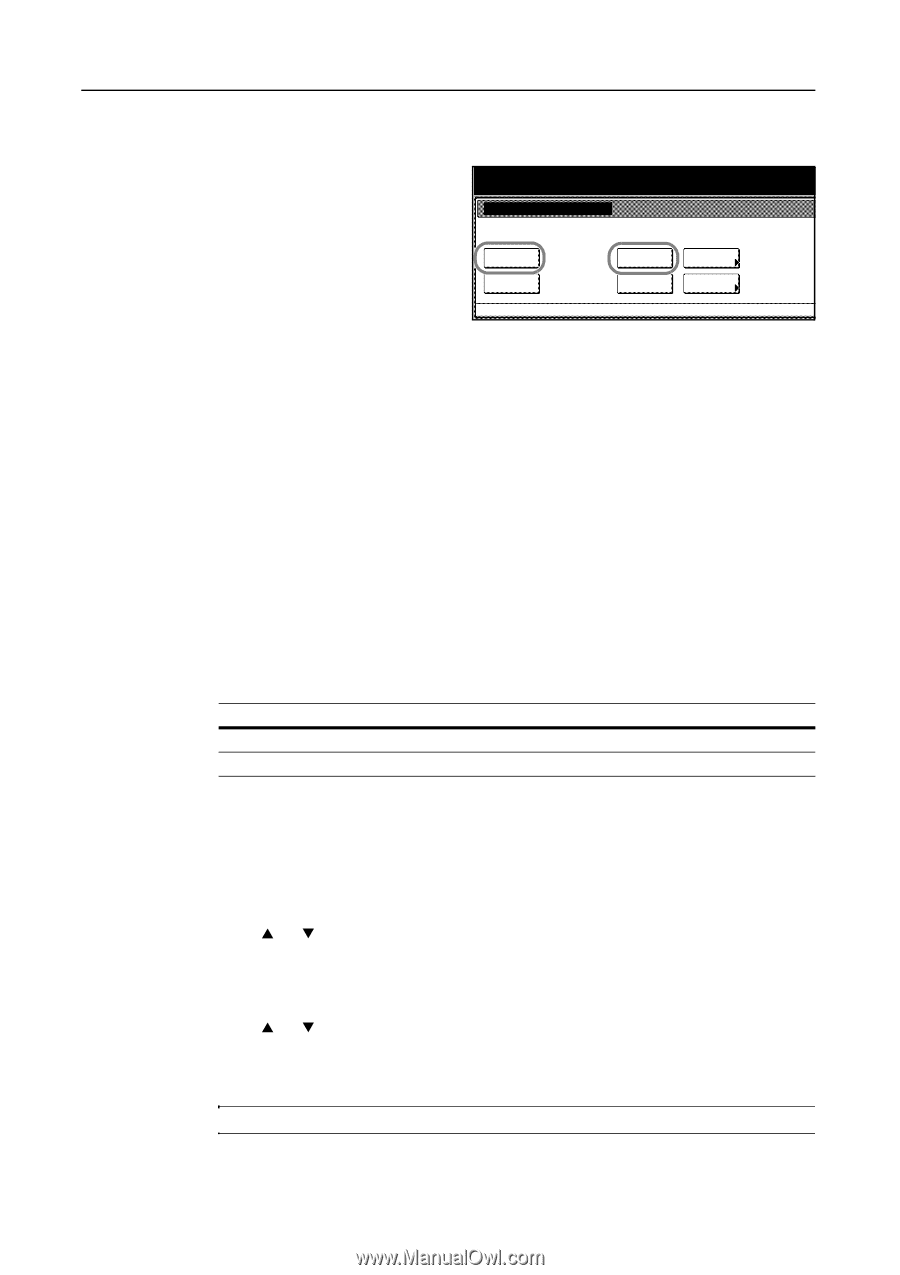
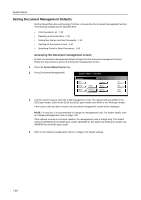
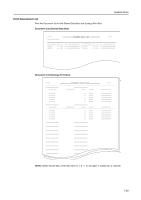
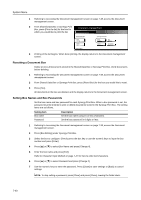
System Menu 1 Referring to Accessing the Document management screen on page 7-38, access the Document management screen. 2 From Shared Data Box or Synergy Print Box, press [Print the list] for the box for which you would like to print the list. Document management Document management Shared Data Box Print the list Reset Box System Menu Synergy Print Box Print the list Reset Box Box Editing Document save term 3 Printing of the list begins. When done printing, the display returns to the Document management screen. Resetting a Document Box Delete at once all documents stored in the Shared Data Box or Synergy Print Box. Verify documents before deleting. 1 Referring to Accessing the Document management screen on page 7-38, access the Document management screen. 2 From Shared Data Box or Synergy Print Box, press [Reset Box] for the box you would like to reset. 3 Press [Yes]. All documents in the box are deleted, and the display returns to the Document management screen. Setting Box Names and Box Passwords Set the box name and box password for each Synergy Print Box. When a box password is set, the password must be entered to print or delete documents stored in the Synergy Print Box. The setting items are as follows. Setting Item Box name Password Description Set the box name using 16 or less characters. Set the box password in 8 digits or less. 1 Referring to Accessing the Document management screen on page 7-38, access the Document management screen. 2 Press [Box Editing] under Synergy Print Box. 3 Select the box to configure. Directly press the box key or use the numeric keys to input the box number and press [Enter]. 4 Press [S] or [T] to select Box Name and press [Change #]. 5 Enter the box name and press [End]. Refer to Character Input Method on page 7-47 for how to enter text characters. 6 Press [S] or [T] to select Password and press [Change #]. 7 Use the numeric keys to enter the password. Press [Close] to save settings or [Back] to cancel settings. NOTE: To skip setting a password, press [Clear] and press [Close], leaving the fields blank. 7-40
-
 1
1 -
2
-
3
-
4
-
5
-
6
-
7
-
8
-
9
-
10
-
11
-
12
-
13
-
14
-
15
-
16
-
17
-
18
-
19
-
20
-
21
-
22
-
23
-
24
-
25
-
26
-
27
-
28
-
29
-
30
-
31
-
32
-
33
-
34
-
35
-
36
-
37
-
38
-
39
-
40
-
41
-
42
-
43
-
44
-
45
-
46
-
47
-
48
-
49
-
50
-
51
-
52
-
53
-
54
-
55
-
56
-
57
-
58
-
59
-
60
-
61
-
62
-
63
-
64
-
65
-
66
-
67
-
68
-
69
-
70
-
71
-
72
-
73
-
74
-
75
-
76
-
77
-
78
-
79
-
80
-
81
-
82
-
83
-
84
-
85
-
86
-
87
-
88
-
89
-
90
-
91
-
92
-
93
-
94
-
95
-
96
-
97
-
98
-
99
-
100
-
101
-
102
-
103
-
104
-
105
-
106
-
107
-
108
-
109
-
110
-
111
-
112
-
113
-
114
-
115
-
116
-
117
-
118
-
119
-
120
-
121
-
122
-
123
-
124
-
125
-
126
-
127
-
128
-
129
-
130
-
131
-
132
-
133
-
134
-
135
-
136
-
137
-
138
-
139
-
140
-
141
-
142
-
143
-
144
-
145
-
146
-
147
-
148
-
149
-
150
-
151
-
152
-
153
-
154
-
155
-
156
-
157
-
158
-
159
-
160
-
161
-
162
-
163
-
164
-
165
-
166
-
167
-
168
-
169
-
170
-
171
-
172
-
173
-
174
-
175
-
176
-
177
-
178
-
179
-
180
-
181
-
182
-
183
-
184
-
185
-
186
-
187
-
188
-
189
-
190
-
191
-
192
-
193
-
194
-
195
-
196
-
197
-
198
-
199
-
200
-
201
-
202
-
203
-
204
-
205
-
206
-
207
-
208
-
209
-
210
-
211
-
212
-
213
-
214
-
215
-
216
-
217
-
218
-
219
-
220
-
221
-
222
-
223
-
224
-
225
-
226
-
227
-
228
-
229
-
230
-
231
-
232
-
233
-
234
-
235
-
236
-
237
-
238
-
239
-
240
-
241
-
242
-
243
-
244
-
245
-
246
-
247
-
248
-
249
-
250
-
251
-
252
-
253
-
254
-
255
-
256
-
257
-
258
-
259
-
260
-
261
-
262
-
263
-
264
-
265
-
266
-
267
-
268
-
269
-
270
-
271
-
272
-
273
-
274
-
275
-
276
-
277
-
278
-
279
-
280
-
281
-
282
-
 283
283 -
 284
284 -
 285
285 -
 286
286 -
 287
287 -
 288
288 -
 289
289 -
 290
290 -
 291
291 -
 292
292 -
 293
293 -
294
-
295
-
296
-
297
-
298
-
299
-
300
-
301
-
302
-
303
-
304
-
305
-
306
-
307
-
308
-
309
-
310
-
311
-
312
-
313
-
314
-
315
-
316
-
317
-
318
-
319
-
320
-
321
-
322
-
323
-
324
-
325
-
326
-
327
-
328
-
329
-
330
-
331
-
332
-
333
-
334
-
335
-
336
-
337
-
338
-
339
-
340
-
341
-
342
-
343
-
344
-
345
-
346
-
347
-
348
-
349
-
350
-
351
-
352
-
353
-
354
-
355
-
356
-
357
-
358
-
359
-
360
-
361
-
362
-
363
-
364
-
365
-
366
-
367
-
368
-
369
-
370
-
371
-
372
-
373
-
374
 |
 |