Cisco N7K-C7010 Configuration Guide - Page 247
Manually Configuring the vPC Peer Device Role
 |
UPC - 882658174445
View all Cisco N7K-C7010 manuals
Add to My Manuals
Save this manual to your list of manuals |
Page 247 highlights
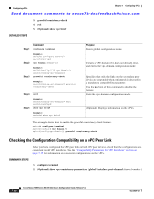
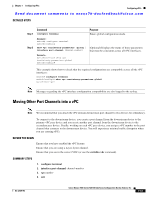
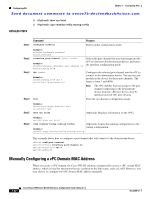
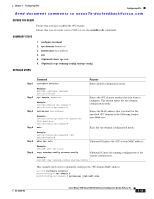
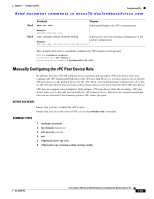
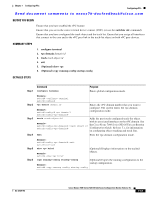
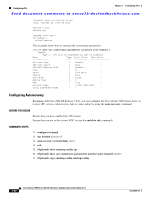
Chapter 7 Configuring vPCs Configuring vPCs Send document comments to [email protected] Step 5 Command show vpc role Purpose (Optional) Displays the vPC system priority. Step 6 Example: switch# show vpc role copy running-config startup-config (Optional) Copies the running configuration to the Example: startup configuration. switch# copy running-config startup-config This example shows how to manually configure the vPC domain system priority: switch# configure terminal switch(config)# vpc domain 5 switch(config-vpc-domain)# system-priority 4000 Manually Configuring the vPC Peer Device Role By default, the Cisco NX-OS software elects a primary and secondary vPC peer device after you configure the vPC domain and both sides of the vPC peer link. However, you may want to elect a specific vPC peer device as the primary device for the vPC. Then, you would manually configure the role value for the vPC peer device that you want as the primary device to be lower than the other vPC peer device. vPC does not support role preemption. If the primary vPC peer device fails, the secondary vPC peer device takes over to become operationally the vPC primary device. However, the original operational roles are not restored if the formerly primary vPC comes up again. BEFORE YOU BEGIN Ensure that you have enabled the vPC feature. Ensure that you are in the correct VDC (or use the switchto vdc command). SUMMARY STEPS 1. configure terminal 2. vpc domain domain-id 3. role priority priority 4. exit 5. (Optional) show vpc role 6. (Optional) copy running-config startup-config OL-23435-03 Cisco Nexus 7000 Series NX-OS Interfaces Configuration Guide, Release 5.x 7-45
-
 1
1 -
2
-
3
-
4
-
5
-
6
-
7
-
8
-
9
-
10
-
11
-
12
-
13
-
14
-
15
-
16
-
17
-
18
-
19
-
20
-
21
-
22
-
23
-
24
-
25
-
26
-
27
-
28
-
29
-
30
-
31
-
32
-
33
-
34
-
35
-
36
-
37
-
38
-
39
-
40
-
41
-
42
-
43
-
44
-
45
-
46
-
47
-
48
-
49
-
50
-
51
-
52
-
53
-
54
-
55
-
56
-
57
-
58
-
59
-
60
-
61
-
62
-
63
-
64
-
65
-
66
-
67
-
68
-
69
-
70
-
71
-
72
-
73
-
74
-
75
-
76
-
77
-
78
-
79
-
80
-
81
-
82
-
83
-
84
-
85
-
86
-
87
-
88
-
89
-
90
-
91
-
92
-
93
-
94
-
95
-
96
-
97
-
98
-
99
-
100
-
101
-
102
-
103
-
104
-
105
-
106
-
107
-
108
-
109
-
110
-
111
-
112
-
113
-
114
-
115
-
116
-
117
-
118
-
119
-
120
-
121
-
122
-
123
-
124
-
125
-
126
-
127
-
128
-
129
-
130
-
131
-
132
-
133
-
134
-
135
-
136
-
137
-
138
-
139
-
140
-
141
-
142
-
143
-
144
-
145
-
146
-
147
-
148
-
149
-
150
-
151
-
152
-
153
-
154
-
155
-
156
-
157
-
158
-
159
-
160
-
161
-
162
-
163
-
164
-
165
-
166
-
167
-
168
-
169
-
170
-
171
-
172
-
173
-
174
-
175
-
176
-
177
-
178
-
179
-
180
-
181
-
182
-
183
-
184
-
185
-
186
-
187
-
188
-
189
-
190
-
191
-
192
-
193
-
194
-
195
-
196
-
197
-
198
-
199
-
200
-
201
-
202
-
203
-
204
-
205
-
206
-
207
-
208
-
209
-
210
-
211
-
212
-
213
-
214
-
215
-
216
-
217
-
218
-
219
-
220
-
221
-
222
-
223
-
224
-
225
-
226
-
227
-
228
-
229
-
230
-
231
-
232
-
233
-
234
-
235
-
236
-
237
-
238
-
239
-
240
-
241
-
 242
242 -
 243
243 -
 244
244 -
 245
245 -
 246
246 -
 247
247 -
 248
248 -
 249
249 -
 250
250 -
 251
251 -
 252
252 -
253
-
254
-
255
-
256
-
257
-
258
-
259
-
260
-
261
-
262
-
263
-
264
-
265
-
266
-
267
-
268
-
269
-
270
-
271
-
272
-
273
-
274
-
275
-
276
-
277
-
278
-
279
-
280
-
281
-
282
-
283
-
284
-
285
-
286
-
287
-
288
-
289
-
290
-
291
-
292
-
293
-
294
-
295
-
296
-
297
-
298
-
299
-
300
-
301
-
302
-
303
-
304
-
305
-
306
-
307
-
308
 |
 |
