Dell PowerEdge T605 Hardware Owner's Manual (PDF) - Page 162
Shroud on Reconnect the system and peripherals to power and restart.
 |
View all Dell PowerEdge T605 manuals
Add to My Manuals
Save this manual to your list of manuals |
Page 162 highlights
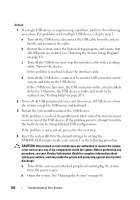
CAUTION: Only trained service technicians are authorized to remove the system cover and access any of the components inside the system. Before performing any procedure, see your Product Information Guide for complete information about safety precautions, working inside the system and protecting against electrostatic discharge. a Turn off the system and attached peripherals and unplug the system from the power source. b Open the system. See "Opening the System" on page 68. c Remove the expansion card shroud. See "Removing the Expansion Card Shroud" on page 72. d Locate the NVRAM_CLR jumper on your system board (see "System Board Jumpers and Connectors" on page 197) and set the jumper to the clear position (see Table 6-2). e Install the expansion card shroud. See "Installing the Expansion Card Shroud" on page 75. f Close the system. See "Closing the System" on page 70. g Reconnect the system and peripherals to power and restart. If the mouse and keyboard are operational, proceed to the next step. If the mouse and keyboard are still not operational, see "Getting Help" on page 205. h Repeat step a through step c. i Set the NVRAM_CLR jumper to the default position (see Table 6-2). j Install the expansion card shroud. See "Installing the Expansion Card Shroud" on page 75. k Close the system. See "Closing the System" on page 70. l Reconnect the system and peripherals to power and restart. m Enter the System Setup program and reenter any custom BIOS settings that were reset. Be sure to leave all USB ports enabled. 162 Troubleshooting Your System
-
 1
1 -
2
-
3
-
4
-
5
-
6
-
7
-
8
-
9
-
10
-
11
-
12
-
13
-
14
-
15
-
16
-
17
-
18
-
19
-
20
-
21
-
22
-
23
-
24
-
25
-
26
-
27
-
28
-
29
-
30
-
31
-
32
-
33
-
34
-
35
-
36
-
37
-
38
-
39
-
40
-
41
-
42
-
43
-
44
-
45
-
46
-
47
-
48
-
49
-
50
-
51
-
52
-
53
-
54
-
55
-
56
-
57
-
58
-
59
-
60
-
61
-
62
-
63
-
64
-
65
-
66
-
67
-
68
-
69
-
70
-
71
-
72
-
73
-
74
-
75
-
76
-
77
-
78
-
79
-
80
-
81
-
82
-
83
-
84
-
85
-
86
-
87
-
88
-
89
-
90
-
91
-
92
-
93
-
94
-
95
-
96
-
97
-
98
-
99
-
100
-
101
-
102
-
103
-
104
-
105
-
106
-
107
-
108
-
109
-
110
-
111
-
112
-
113
-
114
-
115
-
116
-
117
-
118
-
119
-
120
-
121
-
122
-
123
-
124
-
125
-
126
-
127
-
128
-
129
-
130
-
131
-
132
-
133
-
134
-
135
-
136
-
137
-
138
-
139
-
140
-
141
-
142
-
143
-
144
-
145
-
146
-
147
-
148
-
149
-
150
-
151
-
152
-
153
-
154
-
155
-
156
-
 157
157 -
 158
158 -
 159
159 -
 160
160 -
 161
161 -
 162
162 -
 163
163 -
 164
164 -
 165
165 -
 166
166 -
 167
167 -
168
-
169
-
170
-
171
-
172
-
173
-
174
-
175
-
176
-
177
-
178
-
179
-
180
-
181
-
182
-
183
-
184
-
185
-
186
-
187
-
188
-
189
-
190
-
191
-
192
-
193
-
194
-
195
-
196
-
197
-
198
-
199
-
200
-
201
-
202
-
203
-
204
-
205
-
206
-
207
-
208
-
209
-
210
-
211
-
212
-
213
-
214
-
215
-
216
-
217
-
218
-
219
-
220
-
221
-
222
-
223
-
224
-
225
-
226
-
227
-
228
-
229
-
230
 |
 |