Dell PowerEdge T605 Hardware Owner's Manual (PDF) - Page 166
If a single USB device is experiencing a problem, perform the following
 |
View all Dell PowerEdge T605 manuals
Add to My Manuals
Save this manual to your list of manuals |
Page 166 highlights
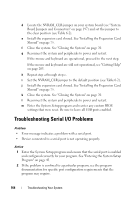
Action 1 If a single USB device is experiencing a problem, perform the following procedure. For problems with multiple USB devices, skip to step 2. a Turn off the USB device, disconnect the USB cable from the system briefly, and reconnect the cable. b Restart the system, enter the System Setup program, and ensure that all USB ports are enabled (see "Entering the System Setup Program" on page 43). c Turn off the USB device and swap the interface cable with a working cable. Turn on the device. If the problem is resolved, replace the interface cable. d Turn off the USB device, connect it to another USB connector on the system, and turn on the USB device. If the USB device functions, the USB connector on the system is likely defective. Otherwise, the USB device is faulty and needs to be replaced (see "Getting Help" on page 205). 2 Power off all USB peripheral devices and disconnect all USB devices from the system except the USB mouse and keyboard. 3 Restart the system and reconnect the USB devices. If the problem is resolved, the problem was likely caused by an overcurrent event on one of the USB devices. If the problem persists, attempt to isolate the faulty device by trying different USB configurations. If the problem is not resolved, proceed to the next step. 4 Reset the system BIOS to the default settings by setting the NVRAM_CLR jumper inside your system. Use the following procedure. CAUTION: Only trained service technicians are authorized to remove the system cover and access any of the components inside the system. Before performing any procedure, see your Product Information Guide for complete information about safety precautions, working inside the system and protecting against electrostatic discharge. a Turn off the system and attached peripherals and unplug the system from the power source. b Open the system. See "Opening the System" on page 68. 166 Troubleshooting Your System
-
 1
1 -
2
-
3
-
4
-
5
-
6
-
7
-
8
-
9
-
10
-
11
-
12
-
13
-
14
-
15
-
16
-
17
-
18
-
19
-
20
-
21
-
22
-
23
-
24
-
25
-
26
-
27
-
28
-
29
-
30
-
31
-
32
-
33
-
34
-
35
-
36
-
37
-
38
-
39
-
40
-
41
-
42
-
43
-
44
-
45
-
46
-
47
-
48
-
49
-
50
-
51
-
52
-
53
-
54
-
55
-
56
-
57
-
58
-
59
-
60
-
61
-
62
-
63
-
64
-
65
-
66
-
67
-
68
-
69
-
70
-
71
-
72
-
73
-
74
-
75
-
76
-
77
-
78
-
79
-
80
-
81
-
82
-
83
-
84
-
85
-
86
-
87
-
88
-
89
-
90
-
91
-
92
-
93
-
94
-
95
-
96
-
97
-
98
-
99
-
100
-
101
-
102
-
103
-
104
-
105
-
106
-
107
-
108
-
109
-
110
-
111
-
112
-
113
-
114
-
115
-
116
-
117
-
118
-
119
-
120
-
121
-
122
-
123
-
124
-
125
-
126
-
127
-
128
-
129
-
130
-
131
-
132
-
133
-
134
-
135
-
136
-
137
-
138
-
139
-
140
-
141
-
142
-
143
-
144
-
145
-
146
-
147
-
148
-
149
-
150
-
151
-
152
-
153
-
154
-
155
-
156
-
157
-
158
-
159
-
160
-
 161
161 -
 162
162 -
 163
163 -
 164
164 -
 165
165 -
 166
166 -
 167
167 -
 168
168 -
 169
169 -
 170
170 -
 171
171 -
172
-
173
-
174
-
175
-
176
-
177
-
178
-
179
-
180
-
181
-
182
-
183
-
184
-
185
-
186
-
187
-
188
-
189
-
190
-
191
-
192
-
193
-
194
-
195
-
196
-
197
-
198
-
199
-
200
-
201
-
202
-
203
-
204
-
205
-
206
-
207
-
208
-
209
-
210
-
211
-
212
-
213
-
214
-
215
-
216
-
217
-
218
-
219
-
220
-
221
-
222
-
223
-
224
-
225
-
226
-
227
-
228
-
229
-
230
 |
 |