Sharp AR M162 AR-M162 AR-M207 Operation Manual Suite
Sharp AR M162 - B/W Laser - All-in-One Manual
 |
View all Sharp AR M162 manuals
Add to My Manuals
Save this manual to your list of manuals |
Sharp AR M162 manual content summary:
- Sharp AR M162 | AR-M162 | AR-M207 Operation Manual Suite - Page 1
MODEL AR-M162 AR-M207 AR-M162 AR-M207 With the RSPF installed DIGITAL MULTIFUNCTIONAL SYSTEM OPERATION MANUAL (for general information and copier) Page PART 1: GENERAL INFORMATION • BEFORE USING THE PRODUCT 12 • TROUBLESHOOTING AND MAINTENANCE 24 • PERIPHERAL DEVICES AND SUPPLIES 40 - Sharp AR M162 | AR-M162 | AR-M207 Operation Manual Suite - Page 2
Sharp Copier Service Department Number WARNING: FCC Regulations state that any unauthorized changes or modifications to this equipment not expressly approved by the manufacturer could void the user's authority to operate this equipment. This operation manual is also used for the AR-M162 J / AR - Sharp AR M162 | AR-M162 | AR-M207 Operation Manual Suite - Page 3
Part 1: General Information 1 - Sharp AR M162 | AR-M162 | AR-M207 Operation Manual Suite - Page 4
2 - Sharp AR M162 | AR-M162 | AR-M207 Operation Manual Suite - Page 5
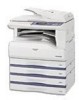
by model. The explanations and illustrations in this manual generally use the AR-M207 (with the optional RSPF installed). Model Appearance Copying speed Paper trays Optional trays AR-M162 16 copies/min. One (250 x 1) 250-sheet paper feed unit (AR-D24) AR-M207 20 copies/min. 2 x 250-sheet - Sharp AR M162 | AR-M162 | AR-M207 Operation Manual Suite - Page 6
MAINTENANCE TROUBLESHOOTING 25 ● MACHINE/COPYING PROBLEMS 25 INDICATORS AND DISPLAY MESSAGES .... 28 REMOVING MISFEEDS 29 ● ORIGINAL MISFEED IN THE SPF 29 ● MISFEED IN THE BYPASS TRAY 30 ● MISFEED IN THE MACHINE 31 ● MISFEED IN TRAY 1 33 ● MISFEED IN TRAY 2 34 REPLACING THE TONER CARTRIDGE - Sharp AR M162 | AR-M162 | AR-M207 Operation Manual Suite - Page 7
CONTENTS Part 2: Copier Operation 4 COPY FUNCTIONS NORMAL COPYING 45 ● MAKING A COPY DARKER OR LIGHTER .... copying 63 5 CONVENIENT COPY FUNCTIONS ROTATING THE IMAGE 90 DEGREES (Rotation copy 64 SORT MODE 64 COPYING MULTIPLE ORIGINALS ONTO A SINGLE SHEET OF PAPER (2 in 1 / 4 in 1 copy - Sharp AR M162 | AR-M162 | AR-M207 Operation Manual Suite - Page 8
in this area when removing misfed paper. • Do not look directly at cord from the outlet. • When moving the machine Driver's licenses • Do not touch the photoconductive drum. Scratches or smudges on the drum will cause dirty prints. • Store spare toner cartridges SHARP DEALER OR AUTHORIZED SERVICE - Sharp AR M162 | AR-M162 | AR-M207 Operation Manual Suite - Page 9
mm Europe: (3.7 µs ± 3.7 ns)/7 mm Max 0.8 mW At the production line, the output power of the scanner unit is adjusted to 0.8 MILLIWATT PLUS 10 % and is maintained constant by the operation of the Automatic Power Control (APC). Caution Use of controls or adjustments or performance of procedures - Sharp AR M162 | AR-M162 | AR-M207 Operation Manual Suite - Page 10
Environmental Choice Program guidelines. USB 2.0 compatible (dual function board (AR-EB9)) When connecting the machine by USB 2.0 (Hi-Speed mode), be sure to read "System requirements for USB 2.0 (Hi-Speed mode)" (see the "Key operator's guide") to verify that your system and the machine settings - Sharp AR M162 | AR-M162 | AR-M207 Operation Manual Suite - Page 11
scanner functions can be found in the respective manuals for those functions. The key operator programs are used by the administrator of the machine to enable or disable functions to suit the needs of your workplace. Software setup guide This explains how to install and configure the printer driver - Sharp AR M162 | AR-M162 | AR-M207 Operation Manual Suite - Page 12
as a printer or a scanner. • To use the machine as a printer or scanner, the printer driver or scanner driver must first be installed as explained in the "Software setup guide". • The scanning feature is only available when the computer is connected to the USB port and is running Windows 98/Me - Sharp AR M162 | AR-M162 | AR-M207 Operation Manual Suite - Page 13
optional facsimile expansion kit enables the plain-paper, Super G3 laser fax function to be used. Network connection (option) The optional network expansion kit (AR-NB3) can be installed to enable the machine to be used as a network printer and network scanner. Environment and people friendly design - Sharp AR M162 | AR-M162 | AR-M207 Operation Manual Suite - Page 14
Received faxes (when the fax option is installed) and print jobs are delivered to this tray. (11) Operation panel Contains operation keys and indicator lights. (12) Front cover Open to remove paper misfeeds or replace the toner cartridge. (13) Tray 1 Tray 1 can hold approximately 250 sheets of copy - Sharp AR M162 | AR-M162 | AR-M207 Operation Manual Suite - Page 15
To replace the toner cartridge, pull out the toner cartridge while pushing on this lever. (22) Toner cartridge Contains toner. (23) Document feeder tray (when the SPF is installed) Place the original(s) that you wish to scan face up here. Up to 40 sheets can be placed. (24) Original guides (when the - Sharp AR M162 | AR-M162 | AR-M207 Operation Manual Suite - Page 16
printing. (4) [SCAN] key / indicator Press to select scan mode. (To connect a computer to the USB port on the machine and use the scanner function, see the "Operation manual (for printer and scanner)". To use the machine as a network scanner, see the "Operation manual (for network scanner)" that - Sharp AR M162 | AR-M162 | AR-M207 Operation Manual Suite - Page 17
you have finished scanning the original pages and are ready to start copying. (Page 64) (26) [START] key ( ) / indicator Copying is possible when this indicator is on. Press the key to start copying. (27) [CA] key Clears all selected settings and returns the machine to the default settings. (Page 18 - Sharp AR M162 | AR-M162 | AR-M207 Operation Manual Suite - Page 18
(6) (7) * The display shown is the AR-M207 (when the optional RSPF is installed) paper is automatically selected. (7) Paper tray display The selected paper tray is highlighted. OPERATION IN COPY, PRINT, SCAN, AND FAX MODES Some operations out of paper or toner, or when the drum cartridge reaches - Sharp AR M162 | AR-M162 | AR-M207 Operation Manual Suite - Page 19
and warm-up will start. Once the copier has finished warming up, the message display will clear function). When the settings return to the default settings, any functions that were selected are canceled. The auto clear time can be changed in the key operator programs. (See the "Key operator's guide - Sharp AR M162 | AR-M162 | AR-M207 Operation Manual Suite - Page 20
's guide".) In the default state the display shown below appears. The default state of the display may vary depending on settings in the key operator programs. Ready to copy. A4 AUTO 100% 8 1 2 x 1 1 AUTO * The screen is that of the AR-M207 (when the RSPF is installed). LOADING PAPER The - Sharp AR M162 | AR-M162 | AR-M207 Operation Manual Suite - Page 21
market, and some cannot be used with this machine. Before using special paper, contact a SHARP service center. • Before using other than SHARP recommended paper, make a test copy to see if the paper is suitable. LOADING PAPER Make sure that the machine is not copying or printing, and then follow - Sharp AR M162 | AR-M162 | AR-M207 Operation Manual Suite - Page 22
. • Do not use paper that has already been printed on by a laser printer or plain paper fax machine. This may cause smudges or unclean images. Envelopes Do not use the following envelopes, as misfeeds will occur. • Envelopes with metal tabs, clasps, strings, holes, or windows. • Envelopes with rough - Sharp AR M162 | AR-M162 | AR-M207 Operation Manual Suite - Page 23
of paper or out of toner, the paper size setting can be changed during copying, printing, and fax printing. See "PAPER" paper that can be loaded in the paper trays. The paper size cannot be set for the bypass tray. 1 Press the [SPECIAL FUNCTION] key. DUPLEX SPECIAL FUNCTION DUPLEX SCAN DUPLEX SCAN - Sharp AR M162 | AR-M162 | AR-M207 Operation Manual Suite - Page 24
key. 5 Press the [OK] key. DUPLEX SPECIAL FUNCTION DUPLEX SCAN DUPLEX SCAN ACC. The special function screen will appear. SPECIAL FUNCTION SPECIAL MODES ORIG. SIZE ENTER PAPER function will not operate. 6 Press the [ ] key. You will return to the paper size setting screen. PAPER SIZE SET 8 - Sharp AR M162 | AR-M162 | AR-M207 Operation Manual Suite - Page 25
be viewed in the display. This function is enabled in the key operator programs. (For the counts in copy, print, and scan modes, see the "Key operator's guide". For the counts in fax mode, see the "Operation manual (for facsimile)" that accompanies the optional facsimile expansion kit.) NUMBER OF - Sharp AR M162 | AR-M162 | AR-M207 Operation Manual Suite - Page 26
the toner cartridge, and cleaning the machine, as well as troubleshooting for the copy function. For troubleshooting for the fax function, printer function, and scanner function, see the respective manuals for each function. TROUBLESHOOTING MACHINE/COPYING PROBLEMS The machine does not operate...25 - Sharp AR M162 | AR-M162 | AR-M207 Operation Manual Suite - Page 27
MACHINE/COPYING PROBLEMS Check the following troubleshooting list before requesting service as many problems can be fixed by the user. If you are unable to solve the problem by checking the list, turn off the power switch, unplug the power cord. Problems related to general use of the - Sharp AR M162 | AR-M162 | AR-M207 Operation Manual Suite - Page 28
TROUBLESHOOTING AND MAINTENANCE Problem The paper size used for the copy is different from the selected paper size (part of the image is cut off or too much of the page is blank). Wrinkles appear in the paper or the image disappears in places. Paper misfeed. Cause and solution The original was - Sharp AR M162 | AR-M162 | AR-M207 Operation Manual Suite - Page 29
TROUBLESHOOTING AND MAINTENANCE Problem The original size is not automatically selected or the copy is not made on paper that matches the size of the original. Copies are smudged or dirty. White or black lines appear on copies. A tray's paper size setting cannot be set. A copy job stops before it - Sharp AR M162 | AR-M162 | AR-M207 Operation Manual Suite - Page 30
clear the message, write down the 2-digit main code and 2-digit sub-code (" - "), turn off the power, and promptly contact your SHARP service center. The toner cartridge must be replaced soon. Check the toner cartridge. Check to see if the toner cartridge has been installed properly. Remove paper - Sharp AR M162 | AR-M162 | AR-M207 Operation Manual Suite - Page 31
message " Clear paper path." and the location of the misfeed will appear. Check the location and remove the misfeed. Note The paper may tear when you remove a misfeed. In this event, be sure to remove all torn pieces of paper from the machine, taking care not to touch the photoconductive drum (the - Sharp AR M162 | AR-M162 | AR-M207 Operation Manual Suite - Page 32
document feeder tray and press the [START] key ( ). MISFEED IN THE BYPASS TRAY 1 Carefully remove the misfed paper from the bypass tray. 2 Grasp the side cover handle and gently open and close the side cover. The message " Clear paper path." will be cleared and copying will be possible. Note If - Sharp AR M162 | AR-M162 | AR-M207 Operation Manual Suite - Page 33
TROUBLESHOOTING AND MAINTENANCE MISFEED IN THE MACHINE To remove a paper misfeed from the machine, the bypass tray 3 Close the front cover and the side cover. The message " Clear paper path." will be cleared and copying will be possible. 2 Turn the roller rotating knob in the direction of the - Sharp AR M162 | AR-M162 | AR-M207 Operation Manual Suite - Page 34
" Clear paper path." will be cleared and paper. Doing so may cause a burn or injury. Caution • Do not touch the photoconductive drum (green portion) when removing the misfed paper. Doing so may damage the drum and cause smudges on copies. • Take care not to allow unfixed toner on the misfed paper - Sharp AR M162 | AR-M162 | AR-M207 Operation Manual Suite - Page 35
TROUBLESHOOTING AND MAINTENANCE Misfeed in C 1 Lower (1) in the illustration, open the fusing unit paper guide, and remove the misfed paper. Be careful not to tear the misfed paper during removal. 3 Close the side cover. The message " Clear paper path." will be cleared and copying will be possible - Sharp AR M162 | AR-M162 | AR-M207 Operation Manual Suite - Page 36
paper during removal. 2 x 250-sheet paper feed unit (AR-D25) 3 If there was no misfed paper in step 2, pull out tray 2 and remove the misfed paper. Be careful not to tear the misfed paper during removal. Side cover 4 Gently close the side cover. The message " Clear paper path." will be cleared - Sharp AR M162 | AR-M162 | AR-M207 Operation Manual Suite - Page 37
toner cartridge lock release lever, insert the toner cartridge along the guides all the way in. 2 If there is any dirt or dust on the toner cartridge, remove it before installing the cartridge. 2 Pull the toner cartridge out while pressing on the toner cartridge lock release lever. Toner cartridge - Sharp AR M162 | AR-M162 | AR-M207 Operation Manual Suite - Page 38
output in copy, print, and fax modes and the total scan count in scanner mode, hold down the [COPY] key when the machine is in the standby state. The counts will appear while the key is held down. The total output count and the total scan count can be used as a guideline for cleaning. When - Sharp AR M162 | AR-M162 | AR-M207 Operation Manual Suite - Page 39
, or the scanner for originals coming image 1 Open the SPF and take out the glass cleaner. Black lines White lines 2 Clean the original scanning PAPER FEED ROLLER If misfeeds occur frequently when feeding postcards, envelopes, or heavy paper through the bypass tray, wipe the surface of the paper - Sharp AR M162 | AR-M162 | AR-M207 Operation Manual Suite - Page 40
TROUBLESHOOTING AND MAINTENANCE CLEANING THE TRANSFER CHARGER If white or black lines appear in copies or the image is blotchy, the transfer or three times. If the sheet metal on the transfer charger is smudged with toner, wipe it with a soft, clean cloth. Note Slide the charger cleaner from - Sharp AR M162 | AR-M162 | AR-M207 Operation Manual Suite - Page 41
PQR DUPLEX SPECIAL FUNCTION DUPLEX SCAN SPECIAL FUNCTION SPECIAL MODES ORIG. SIZE ENTER PAPER SIZE SET DISPLAY CONTRAST 4 Adjust the contrast with the [ ] or [ ] key. To reset the contrast to the default setting, press the [C] key. 5 Press the [SPECIAL FUNCTION] key. SPECIAL FUNCTION You will - Sharp AR M162 | AR-M162 | AR-M207 Operation Manual Suite - Page 42
equipment and supplies, contact your dealer or SHARP service. OPTIONAL EQUIPMENT Convenient optional equipment can be installed AR-NB3) must be installed. *2 The facsimile expansion kit (AR-FX11) must be installed. AR-M162 No Yes Standard Yes Yes Yes Yes Yes Yes Yes*2 Yes Yes*1 Yes*1 Yes*1 AR - Sharp AR M162 | AR-M162 | AR-M207 Operation Manual Suite - Page 43
on AR-M162: 16 pages/min. When installed on AR-M207: 20 pages/min. Weight 11.1 lbs. (5.0 kg) 12.0 lbs. (5.4 kg) Dimensions 22-61/64" (W) x 17-9/64" (D) x 5-1/4" (H) (583 mm (W) x 435 mm (D) x 133 mm (H)) *1 Two-sided scanning is not possible. *2 During one-sided copying 3 250-SHEET PAPER - Sharp AR M162 | AR-M162 | AR-M207 Operation Manual Suite - Page 44
product that are to be replaced by the user are paper and toner cartridge. GENUINE SUPPLIES For best copying results, be sure to use only SHARP Genuine Supplies which are designed, engineered and tested to maximize the life and performance of SHARP copiers. Look for the Genuine Supplies label on - Sharp AR M162 | AR-M162 | AR-M207 Operation Manual Suite - Page 45
Part 2: Copier Operation 43 - Sharp AR M162 | AR-M162 | AR-M207 Operation Manual Suite - Page 46
44 - Sharp AR M162 | AR-M162 | AR-M207 Operation Manual Suite - Page 47
been enabled (page 23), enter your 5-digit account number. Copying from the document glass paper, see "LOADING PAPER" (page 18). Note • If the auto paper select function has been disabled in the key operator programs (see the "Key operator's guide"), use the [PAPER] key to select the desired paper - Sharp AR M162 | AR-M162 | AR-M207 Operation Manual Suite - Page 48
copy settings to the default settings. The setting for "Auto clear" can be changed in the key operator programs. (See the "Key operator's guide".) • To cancel a copy job in progress, press the [C] key. • Differences in copy conditions may cause the position of the printed copy image to vary even the - Sharp AR M162 | AR-M162 | AR-M207 Operation Manual Suite - Page 49
52) is enabled or if a paper tray is selected with the [PAPER] key. Auto paper select resumes operation when the [CA] key is pressed or when "Auto clear" activates. Auto paper select mode can be disabled in the key operator programs. (See the "Key operator's guide".) Removing the document cover To - Sharp AR M162 | AR-M162 | AR-M207 Operation Manual Suite - Page 50
the "Key operator's guide".) 3 Adjust the exposure level as needed with the [ ] or [ ] key. EXPOSURE AUTO AUTO TEXT PHOTO • The exposure level cannot be adjusted when "AUTO" is selected. • For a darker image, press the [ ] key. For a lighter image, press the [ ] key. • The default exposure levels - Sharp AR M162 | AR-M162 | AR-M207 Operation Manual Suite - Page 51
default setting) can be set. • A single copy can be made even if "0" is displayed. Note • If you enter the wrong number, press the [C] key and enter the correct number. • The limit for the number of copies can be changed in the key operator programs. (See the "Key operator's guide".) Important - Sharp AR M162 | AR-M162 | AR-M207 Operation Manual Suite - Page 52
original size was not correctly detected, set the original size manually. Perform the following steps after placing the document in the [ ] key. GH PQR DUPLEX SPECIAL FUNCTION DUPLEX SCAN SPECIAL FUNCTION SPECIAL MODES ORIG. SIZE ENTER PAPER SIZE SET DISPLAY CONTRAST 3 Press the [OK] key. BACK - Sharp AR M162 | AR-M162 | AR-M207 Operation Manual Suite - Page 53
paper in the bypass tray and place the original on the document glass. 2 Touch the [PAPER] key and then select the bypass tray. POSURE PAPER the [ ] or [ ] key, and then select the original size with the [ ] or [ ] key. GH PQR DUPLEX SPECIAL FUNCTION DUPLEX SCAN Note • Any number from 2-1/2" to - Sharp AR M162 | AR-M162 | AR-M207 Operation Manual Suite - Page 54
is selected for copying onto a paper size larger than 8-1/2" x 11" (A4), the image will not be rotated. • Rotation of the image can be disabled in the key operator programs when reducing or enlarging a original. (See the "Key operator's guide".) • If the message "Image edge loss." is displayed, part - Sharp AR M162 | AR-M162 | AR-M207 Operation Manual Suite - Page 55
in the "Key operator's guide".)) • To cancel a ratio setting, return the ratio to 100% with the [ ] or [ ] key. • The [ZOOM] key can be pressed to return the ratio to 100%. 4 Press the [OK] key. BACK OK You will return to the base screen. GHI 5 Make sure that the desired paper tray is selected - Sharp AR M162 | AR-M162 | AR-M207 Operation Manual Suite - Page 56
the document glass. 2 Press the [SPECIAL FUNCTION] key. DUPLEX SPECIAL FUNCTION DUPLEX SCAN DUPLEX SCAN ACC. The special function screen will appear. SPECIAL FUNCTION SPECIAL MODES ORIG. SIZE ENTER PAPER SIZE SET DISPLAY CONTRAST 3 Press the [OK] key. BACK OK GHI The special modes screen will - Sharp AR M162 | AR-M162 | AR-M207 Operation Manual Suite - Page 57
function has been enabled, the appropriate copy paper size will be automatically selected based on the original size and the selected copy ratios. Image rotation will take place if necessary. 11 Select any other copy settings as needed and press the [START] key ( ). WXYZ @.-_ READ-END Note If the - Sharp AR M162 | AR-M162 | AR-M207 Operation Manual Suite - Page 58
following types of automatic two-sided copying. The copy paper is turned over automatically, allowing two-sided copying to be accomplished with ease. Two-sided copy type Model One-sided originals to two-sided copies (using the SPF) AR-M162 AR-M207 Page No Yes*1 57 One-sided originals to - Sharp AR M162 | AR-M162 | AR-M207 Operation Manual Suite - Page 59
then adjust the original guides to the width of key, or with the [DUPLEX] key. GH PQR DUPLEX SPECIAL FUNCTION DUPLEX SCAN COPY MODE 1 to 1 1 to 2 2 to 2 BINDING CHANGE OFF 4 If you wish to have the orientation of the image on the back of the copy paper be opposite the orientation of the image - Sharp AR M162 | AR-M162 | AR-M207 Operation Manual Suite - Page 60
"1 to 2" with the [ ] or [ ] key, or with the [DUPLEX] key. GH PQR DUPLEX SPECIAL FUNCTION DUPLEX SCAN COPY MODE 1 to 1 1 to 2 2 to 2 BINDING CHANGE OFF 4 If you wish to have the orientation of the image on the back of the copy paper be opposite the orientation of the image on the front, set - Sharp AR M162 | AR-M162 | AR-M207 Operation Manual Suite - Page 61
ORIGINALS (ONLY WHEN USING THE RSPF) • Paper sizes that can be used are 11" guides to the width of your originals and key. BACK OK You will return to the base screen. GHI 2 Press the [DUPLEX] key. O % OUTPUT DUPLEX SPECIAL FUNCTI MAT ORIGINAL SIZE DUPLEX SCAN CAST ORIGINAL SIZE DUPLEX SCAN - Sharp AR M162 | AR-M162 | AR-M207 Operation Manual Suite - Page 62
THE RSPF) • Paper sizes that can be the original guides to the image, set "BINDING CHANGE" to "ON" with the [ ] or [ ] key. COPY MODE 1 to 2 2 to 2 2 to 1 BINDING CHANGE ON 2 Press the [DUPLEX] key. O % OUTPUT DUPLEX SPECIAL FUNCTI MAT ORIGINAL SIZE DUPLEX SCAN CAST ORIGINAL SIZE DUPLEX SCAN - Sharp AR M162 | AR-M162 | AR-M207 Operation Manual Suite - Page 63
manually. Example: Copying original A and original B onto both sides of the paper 1 2 1 If you are using the AR-M207 The AR paper before using it. Curled paper may cause misfeeds, creases, or a poor-quality image. 4 Select the bypass tray with the [PAPER] key and then press the [START] key - Sharp AR M162 | AR-M162 | AR-M207 Operation Manual Suite - Page 64
to the right. 2 Press the [SPECIAL FUNCTION] key. DUPLEX SPECIAL FUNCTION DUPLEX SCAN DUPLEX SCAN ACC. The special function screen will appear. SPECIAL FUNCTION SPECIAL MODES ORIG. SIZE ENTER PAPER SIZE SET DISPLAY CONTRAST 3 Press the [OK] key. BACK OK GHI The special modes screen will - Sharp AR M162 | AR-M162 | AR-M207 Operation Manual Suite - Page 65
scanner, and fax transmission are also not possible. 1 Press the [INTERRUPT] key ( ). If the [INTERRUPT] key ( ) is pressed, copying will stop and the settings will temporarily return to the default be disabled in the key operator programs. (See the "Key operator's guide".) (A): Copies made before - Sharp AR M162 | AR-M162 | AR-M207 Operation Manual Suite - Page 66
be used when the dual function board (AR-EB9) is installed. Select convenient copy functions after pressing the [COPY] key to select copy mode. ROTATING THE IMAGE 90 DEGREES (Rotation copy) When "Auto paper select mode" or "automatic ratio selection" are in operation and the original is placed in - Sharp AR M162 | AR-M162 | AR-M207 Operation Manual Suite - Page 67
to no sort in the key operator programs. (See the "Key operator's guide".) If the first original is placed on the document glass, no sort mode will be automatically selected. 2 Press the [OUTPUT] key. OM AUTO % OUTPUT DUPLEX SPEC RESS FORMAT ORIGINAL SIZE DUPLEX SCAN RESS BROADCAST ORIGINAL SIZE - Sharp AR M162 | AR-M162 | AR-M207 Operation Manual Suite - Page 68
the SPF, reduction is possible to 50%. Certain combinations of original size, paper size, and number of images may result in images being cut off. • Even if "Rotation copy" is disabled in the key operator programs, the images may be rotated if needed depending on the orientation of the originals and - Sharp AR M162 | AR-M162 | AR-M207 Operation Manual Suite - Page 69
, go to the next step. 13 When the START indicator lights, replace the original with the next original and then press the [START] key ( ). Repeat step 13 until all originals have been scanned. • Copies will be output each time two originals for 2 in 1 copy or four originals for 4 in 1 copy have been - Sharp AR M162 | AR-M162 | AR-M207 Operation Manual Suite - Page 70
operate even if the condition for rotate copying is met. • The default margin shift setting can be changed in the key operator programs. (See the "Key operator's guide FUNCTION] key. DUPLEX SPECIAL FUNCTION DUPLEX SCAN DUPLEX SCAN ACC. SPECIAL FUNCTION SPECIAL MODES ORIG. SIZE ENTER PAPER SIZE SET - Sharp AR M162 | AR-M162 | AR-M207 Operation Manual Suite - Page 71
size original. • Note that if the width of the erasure is too large, the edge of the image may be partially erased. • The default setting for the erasure width can be changed. (See the "Key operator's guide".) 1 Place the original in the document feeder tray or on the document glass. 2 Press the - Sharp AR M162 | AR-M162 | AR-M207 Operation Manual Suite - Page 72
(0 mm), the printed result is the same as when "OFF" is selected. 8 Press the [OK] key. OK You will return to the base screen. 9 Select other copy settings as needed and press the [START] key ( ). WXYZ To cancel an edge erase setting, return to the edge erase @.-_ settings screen and select - Sharp AR M162 | AR-M162 | AR-M207 Operation Manual Suite - Page 73
sheet of paper. This function creates 2 in 1 images of the front and back side of the card and centers them on the paper. Original key operator programs "CARD SHOT DEFAULT" in the "Key operator's guide". 5 6 Select "X" (width) with the [ ] or [ ] key and enter the width with the [ ] or [ ] key - Sharp AR M162 | AR-M162 | AR-M207 Operation Manual Suite - Page 74
CONVENIENT COPY FUNCTIONS 8 Press the [START] key ( ). WXYZ The front side of the card is scanned. @.-_ READ-END 9 Turn the original over on the document glass. 10 Press the [START] key ( ). Copying will start after both sides of the original have been scanned. 72 - Sharp AR M162 | AR-M162 | AR-M207 Operation Manual Suite - Page 75
Digital Multifunctional System AR-M162 AR-M207 Type Desktop Photoconductive type OPC drum paper trays (250 sheets each) + bypass tray (100 sheets) Fusing system Heat rollers Developer system Dry development Resolution Scanning: 600 x 300 dpi, output: 600 x 600 dpi (AUTO/TEXT mode) Scanning - Sharp AR M162 | AR-M162 | AR-M207 Operation Manual Suite - Page 76
kg) (Not including toner cartridge) Approx. 75.7 lbs. (34.3 kg) (Not including toner cartridge) 23-15/64" paper, and the storage conditions of the paper. Printer function / scanner function / fax function specifications See the "Operation manual (for printer and scanner)" and the "Operation manual - Sharp AR M162 | AR-M162 | AR-M207 Operation Manual Suite - Page 77
1, 2003 MSDS No. F-01211 1.PRODUCT AND COMPANY IDENTIFICATION Product Name : AR-202NT / AR-202T / AR-202ST / AR-202FT / AR-202ST-C / AR-203ST-C / AR-016T/ AR-016ST / AR-016FT / AR-016RT (Black Toner) Supplier Identification : Sharp Corporation 22-22 Nagaike-cho, Abeno-ku, Osaka, Japan Local - Sharp AR M162 | AR-M162 | AR-M207 Operation Manual Suite - Page 78
from exposure based on animal tests performed using toner. When used as intended according to instructions, studies do not indicate any symptoms of None Environmental Precautions : None Methods for Cleaning Up : Wipe off with paper or cloth. Do not use vacuum cleaner when a large amount is - Sharp AR M162 | AR-M162 | AR-M207 Operation Manual Suite - Page 79
performed in animal models other than rats did not show any association between carbon black and lung tumors. Moreover, a two-year cancer bioassay using a typical toner preparation containing carbon black demonstrated no association between toner exposure and tumor development in rats. 77 - Sharp AR M162 | AR-M162 | AR-M207 Operation Manual Suite - Page 80
Page : 4/4 Date Revised : Aug.18, 2003 Date Issued : Jun. 1, 2003 MSDS No. F-01211 : In a study in rats of chronic inhalation exposure to a typical toner, a mild to moderate degree of lung fibrosis was observed in 92% of the rats in the high concentration (16mg/m3) exposure group, and a minimal to - Sharp AR M162 | AR-M162 | AR-M207 Operation Manual Suite - Page 81
Page : 1/4 Date Issued :Jun. 1, 2003 MSDS No. F-31211 1.PRODUCT AND COMPANY IDENTIFICATION Product Name : AR-202ND / AR-202DV / AR-202SD / AR-202SD-C (Black Developer) Supplier Identification : Sharp Corporation 22-22 Nagaike-cho, Abeno-ku, Osaka, Japan Local suppliers are listed below - Sharp AR M162 | AR-M162 | AR-M207 Operation Manual Suite - Page 82
from exposure based on animal tests performed using toner. When used as intended according to instructions, studies do not indicate any symptoms of None Environmental Precautions : None Methods for Cleaning Up : Wipe off with paper or cloth. Do not use vacuum cleaner when a large amount is - Sharp AR M162 | AR-M162 | AR-M207 Operation Manual Suite - Page 83
performed in animal models other than rats did not show any association between carbon black and lung tumors. Moreover, a two-year cancer bioassay using a typical toner preparation containing carbon black demonstrated no association between toner exposure and tumor development in rats. 81 - Sharp AR M162 | AR-M162 | AR-M207 Operation Manual Suite - Page 84
F-31211 : In a study in rats of chronic inhalation exposure to a typical toner, a mild to moderate degree of lung fibrosis was observed in 92% of the Mohr, S.Takenaka, and R.Mermelstein(1991) Pulmonary Response to Toner upon Chronic Inhalation Exposure in Rats. Fundamental and Applied Toxicology - Sharp AR M162 | AR-M162 | AR-M207 Operation Manual Suite - Page 85
key 15, 23 Arrow keys 15 Auditing mode 23 Auto clear 17, 46 Auto paper select mode 47 Auto power shut-off mode 17 Auto tray switching 22, 49 [AUTO%] key 15 B [BACK] key 14 Base screen 18 Bypass tray 13, 18, 20, 61 Bypass tray extension 13, 20 Bypass tray guides 13, 20 Bypass tray paper - Sharp AR M162 | AR-M162 | AR-M207 Operation Manual Suite - Page 86
63, 65 [OK] key 14 ONLINE indicator 14 Operation in copy, print, scan, and fax modes ..........16 Operation panel 12, 14 Original guides 13, 46 Original misfeed 29 [OUTPUT] key 15 P Paper 18 [PAPER] key 15 Parallel port 12 Part names and functions 12 Photoconductive drum 13 Power off 17 - Sharp AR M162 | AR-M162 | AR-M207 Operation Manual Suite - Page 87
page copy 62 Interrupt copying 63 Making a copy darker or lighter 48 Manual ratio selection (preset copy ratios/zoom)......52 Normal copying - Copying from the 54 Copying, starting Document glass 45 SPF 46 Troubleshooting Misfeed removal - Bypass tray 30 - In the machine 31 - SPF 29 - Tray 1 - Sharp AR M162 | AR-M162 | AR-M207 Operation Manual Suite - Page 88
- Sharp AR M162 | AR-M162 | AR-M207 Operation Manual Suite - Page 89
- Sharp AR M162 | AR-M162 | AR-M207 Operation Manual Suite - Page 90
- Sharp AR M162 | AR-M162 | AR-M207 Operation Manual Suite - Page 91
the hardware, software or firmware embodied in or used in conjunction with this Product. Your sole remedy, in the event that you encounter any difficulties with this Product, is against the authorized dealer from which you purchased the Product. AR-M162 Digital Multifunctional System AR-M207 Digital - Sharp AR M162 | AR-M162 | AR-M207 Operation Manual Suite - Page 92
AR-M162/AR-M207 SHARP ELECTRONICS CORPORATION Sharp Plaza, Mahwah, New Jersey 07430-1163. www.sharp-usa.com SHARP ELECTRONICS OF CANADA LTD. 335 Britannia Road East, Mississauga, Ontario, L4Z 1W9 SHARP CORPORATION This manual has been printed using a vegetable-based soy oil ink to help protect the - Sharp AR M162 | AR-M162 | AR-M207 Operation Manual Suite - Page 93
OPERATION MANUAL (for printer and scanner) DIGITAL MULTIFUNCTIONAL SYSTEM Page • INTRODUCTION 1 • CONTENTS 2 • PRINT 3 • PRINTER SHARING 11 • SCAN 15 • KEY OPERATOR PROGRAMS ...26 • TROUBLESHOOTING .........28 • SPECIFICATIONS 32 - Sharp AR M162 | AR-M162 | AR-M207 Operation Manual Suite - Page 94
This manual describes the printer and scanner functions of the digital multifunctional system. Note • For information on loading paper, replacing toner cartridges, clearing paper misfeeds, handling peripheral devices, and other copier-related information, please refer to "Operation manual (for - Sharp AR M162 | AR-M162 | AR-M207 Operation Manual Suite - Page 95
TO THE PAPER....8 ● ROTATING THE PRINT IMAGE 180 DEGREES .....9 ● PRINTING A WATERMARK 9 OUTLINE OF THE PRINT STATUS WINDOW ... 10 4 KEY OPERATOR PROGRAMS KEY OPERATOR PROGRAM LIST 26 USING THE KEY OPERATOR PROGRAMS...... 27 5 TROUBLESHOOTING TROUBLESHOOTING 28 ● PRINTING PROBLEMS 28 ● SCANNING - Sharp AR M162 | AR-M162 | AR-M207 Operation Manual Suite - Page 96
you wish to print. 4 Make sure that "SHARP AR-XXXX" is selected as the printer. If you need to change any print settings, click the [Preferences] button ([Properties] button in Windows 95/98/Me/NT 4.0). The printer driver setup screen will appear. Windows 2000 does not have the [Preferences] button - Sharp AR M162 | AR-M162 | AR-M207 Operation Manual Suite - Page 97
"CONFIGURING THE PRINTER DRIVER" in "3. TROUBLESHOOTING AND USEFUL INFORMATION" in the "Software setup guide". When printing, be sure to specify a tray other than "Auto Select" in "Paper Source" in the "Paper" tab of the printer driver setup screen. HOW [BYPASS TRAY] AND [BYPASS MANUAL] DIFFER IN - Sharp AR M162 | AR-M162 | AR-M207 Operation Manual Suite - Page 98
Settings] and then click [Printers]. 1 2 Click the [SHARP AR-XXXX] printer driver icon and select [Properties] from the [File] menu. Note In Windows NT 4.0, select [Document Defaults] to open the printer driver setup screen. 3 In Windows 95/98/Me, click the [Setup] tab. 4 Click the [Printing - Sharp AR M162 | AR-M162 | AR-M207 Operation Manual Suite - Page 99
help file for the printer driver. Note The settings and the image of the machine will vary depending on the model. If a tray or job separator tray option is installed, see "CONFIGURING THE PRINTER DRIVER" in "3. TROUBLESHOOTING AND USEFUL INFORMATION" in the "Software setup guide" to configure the - Sharp AR M162 | AR-M162 | AR-M207 Operation Manual Suite - Page 100
PRINT TWO-SIDED PRINTING (ONLY FOR MODELS THAT SUPPORT TWO-SIDED PRINTING) On models that have the two-sided printing function, both sides of the paper can be printed on. To use this function, open the printer driver setup screen and select [2-Sided (Book)] or [2-Sided (Tablet)] from "Document - Sharp AR M162 | AR-M162 | AR-M207 Operation Manual Suite - Page 101
" is selected. Note ☞ PRINTING MULTIPLE PAGES ON ONE PAGE (page 7) 1 Click the [Paper] tab in the printer driver setup screen. 2 Select the original size (Ledger or A3) of the print image in "Paper Size". or 4 Select the size of the paper (Letter or A4) that is loaded in the machine from "Fit to - Sharp AR M162 | AR-M162 | AR-M207 Operation Manual Suite - Page 102
PRINT 1 Note The procedure for loading paper is explained in the "Operation manual (for general information and copier)". PRINTING A WATERMARK You can print a watermark such as "CONFIDENTIAL" on your document. To print a watermark, open the printer driver setup screen, click the [Watermarks] tab - Sharp AR M162 | AR-M162 | AR-M207 Operation Manual Suite - Page 103
icons The status icons appear to alert you to printer errors. Nothing appears when printing is taking place normally. The icons are explained below. Follow the instructions in the status window to solve the problem. Icon Print Status An error has occurred that requires immediate attention. An - Sharp AR M162 | AR-M162 | AR-M207 Operation Manual Suite - Page 104
connected to the machine to print to the machine. SHARING THE PRINTER USING WINDOWS NETWORKING The machine can be used as a shared printer in a Windows 95/98/Me/NT 4.0/2000/XP network environment. Note that the Windows network environment must already be established. Client Print server Shared - Sharp AR M162 | AR-M162 | AR-M207 Operation Manual Suite - Page 105
folder and continue the setup procedure from Step 6. 6 Click [Printers and Other Hardware] in the [Control Panel], and click [Printers and Faxes]. In operating systems other than Windows XP, double-click the [Printers] icon. 7 Click the [SHARP AR-XXXX] printer driver icon and select [Sharing - Sharp AR M162 | AR-M162 | AR-M207 Operation Manual Suite - Page 106
CLIENT SETTINGS Follow the procedure below to install the printer driver on the client. Note If your operating system is Windows NT 4.0, refer to "Settings in Windows NT 4.0" (page 14). 1 Click the [start] button and then click [Control Panel]. In Windows 95/98/Me/2000, click the [Start] button and - Sharp AR M162 | AR-M162 | AR-M207 Operation Manual Suite - Page 107
. For the procedure for installing the printer driver, see "1. INSTALLING THE SOFTWARE (THAT ACCOMPANIES THE MACHINE)" in the "Software setup guide". 1 Click the [Start] button, select [Settings] and then click [Printers]. 2 Click the [SHARP AR-XXXX] printer driver icon and select [Properties] from - Sharp AR M162 | AR-M162 | AR-M207 Operation Manual Suite - Page 108
"Software setup guide". Scanning from a TWAIN*1-compliant or WIA*2-compliant application Scanning from the "Scanner and Camera Wizard" (Windows XP) Using the machine to begin scanning*3 Place the original in the scanning position ☞For more information, see "4. COPY FUNCTIONS" in the "Operation - Sharp AR M162 | AR-M162 | AR-M207 Operation Manual Suite - Page 109
WIA driver. ☞SCANNING FROM A WIA-COMPLIANT APPLICATION (WINDOWS XP) (page 20) • Depending on your system, [SHARP MFP TWAIN G 1.0 (32-32)] or [WIA-SHARP AR-XXXX 1.0 (32-32)] may appear in the above select source screen. 4 Select [Acquire Image] from the [File] menu. The scanner driver setup screen - Sharp AR M162 | AR-M162 | AR-M207 Operation Manual Suite - Page 110
and the image is acquired into the application that you are using. In the application, assign a file name and save the file. Note To cancel a scanning job after the [Scan] button has been clicked, press the [Esc] key on your keyboard or the [C] key ( ) or [CA] key ( ) on the operation panel. SCAN - Sharp AR M162 | AR-M162 | AR-M207 Operation Manual Suite - Page 111
SCAN SCANNER DRIVER SETTINGS The scanner driver setup screen consists of the "Set-up screen", which lets you select scan settings, and the "Preview screen", which shows the scanned image. For details on the scan settings, click the [Help] button in the preview screen to display Help. Set-up Screen - Sharp AR M162 | AR-M162 | AR-M207 Operation Manual Suite - Page 112
is displayed to automatically set the scanning area to the entire preview image. Click the [Auto Scan Area Adjustment] button to automatically set the scanning area to the entire preview image. Preview image Preview window (5) [Help] button Click to display the help file for the scanner driver. 19 - Sharp AR M162 | AR-M162 | AR-M207 Operation Manual Suite - Page 113
" in the "Operation manual (for general information and copier)". 2 Start Paint and then select [From Scanner or Camera] from the [File] menu. The scan screen of the WIA driver will appear. 3 Select the paper source and picture type, and click the [Preview] button. • The preview image will appear - Sharp AR M162 | AR-M162 | AR-M207 Operation Manual Suite - Page 114
on placing an original for scanning, see "4. COPY FUNCTIONS" in the "Operation manual (for general information and copier)". 2 Click the [start] button, the [Control Panel], [Printers and Other Hardware], and then [Scanners and Cameras]. 5 Select the "Picture type" and "Paper source", and click the - Sharp AR M162 | AR-M162 | AR-M207 Operation Manual Suite - Page 115
then click the [Next] button. If you are ready to end the session, click [Nothing. I'm finished working with these pictures]. 8 Click the [Finish] button. The "Scanner and Camera Wizard" closes and the scanned image is saved in the specified folder. 22 - Sharp AR M162 | AR-M162 | AR-M207 Operation Manual Suite - Page 116
. • The key operator programs are being used. • The tray paper size is being set. • During copying or printing • During scanning of an original for a fax transmission (when the fax option is installed) • If the machine is in copy mode, press the [SCAN] key to switch to scanner mode and clear the - Sharp AR M162 | AR-M162 | AR-M207 Operation Manual Suite - Page 117
utility that allows the scanner function to be used by means of the [SCAN] key on the machine. The Button Manager software allows you to assign a destination application and scan settings to each of the six destinations on the machine. To scan using the machine's operation panel, settings must be - Sharp AR M162 | AR-M162 | AR-M207 Operation Manual Suite - Page 118
[All Programs] ([Programs] in other than Windows XP), select [Sharp Button Manager G], and then click [Button scanned image. If [PDF] is selected for the file format, the image quality may be slightly degraded. 4 Select scanning conditions such as "Color Mode" and "Scanning Side" in the "Scan Setup - Sharp AR M162 | AR-M162 | AR-M207 Operation Manual Suite - Page 119
"Key operator's guide". For the initial key operator code set at the factory, see "PROGRAMMING A KEY OPERATOR CODE" in the "Key operator's guide". KEY OPERATOR PROGRAM LIST The key operator programs for the printer and scanner functions are shown in the following table. Factory default settings - Sharp AR M162 | AR-M162 | AR-M207 Operation Manual Suite - Page 120
key operator code entry screen will appear. KEY OPERATOR CODE: ----- 4 Use the numeric keys to enter the key operator code. OK ABC DEF GHI JKL MNO PQRS TUV WXYZ FUNCTION @.-_ ACC. #-C READ-END MODE SELECT KEY OP. # CHANGE COPIER PRINTER SCANNER • " " will appear for each digit entered - Sharp AR M162 | AR-M162 | AR-M207 Operation Manual Suite - Page 121
printer driver port setting is not correct. Set the port correctly. Printing is disabled. → If "CANCEL JOBS OF INVALID ACCOUNTS" is enabled in the key operator programs, printing will not be possible. Consult the key operator. Page 3 3 - 5 Software setup guide 32 Software setup guide Key operator - Sharp AR M162 | AR-M162 | AR-M207 Operation Manual Suite - Page 122
-down list is the same as the size of the paper loaded in the tray. The image orientation setting in the printer driver is not correct. → Click the [Paper] tab in the printer driver setup screen and make sure the "Image Orientation" setting is correct. Paper is not loaded properly. → Make sure the - Sharp AR M162 | AR-M162 | AR-M207 Operation Manual Suite - Page 123
the dual function board. Install the standard print driver as explained in "1. INSTALLING THE SOFTWARE (THAT ACCOMPANIES THE MACHINE)" in the "Software setup guide" and select the standard driver when printing. SCANNING PROBLEMS Problem Poor scanning quality. 30 Cause and solution The document - Sharp AR M162 | AR-M162 | AR-M207 Operation Manual Suite - Page 124
TROUBLESHOOTING Problem Poor scanning quality. Unable to scan the image. Scanner transfer speed is slow when the dual function board is installed. Cause and solution The brightness and contrast settings are not suitable. → If you are scanning with a TWAIN-compliant application and the resulting - Sharp AR M162 | AR-M162 | AR-M207 Operation Manual Suite - Page 125
: AR-M206/AR-M207: 20 pages/min, AR-M161/AR-M162/AR-M165: 16 pages/min When the dual function board is not installed: 12 pages/min Resolution 600 dpi Page memory AR-M165/AR-M206/AR-M207: 32 MB, AR-M161/AR-M162: 16 MB Memory IMC Memory*2 16 MB Emulation SHARP GDI / SPLC (Sharp Printer Language - Sharp AR M162 | AR-M162 | AR-M207 Operation Manual Suite - Page 126
.) Drop out color Yes Supported operating systems Windows 98/Windows Me Windows 2000 Professional/Windows XP Home Edition/Windows XP Professional (For more information, see "1. INSTALLING THE SOFTWARE (THAT ACCOMPANIES THE MACHINE)" in the "Software setup guide".) Void area Top and bottom - Sharp AR M162 | AR-M162 | AR-M207 Operation Manual Suite - Page 127
OPERATION MANUAL (for printer and scanner) SHARP CORPORATION ARM207-EN-PRINTER - Sharp AR M162 | AR-M162 | AR-M207 Operation Manual Suite - Page 128
MODEL AR-FX11 FACSIMILE EXPANSION KIT OPERATION MANUAL Page • BEFORE USING THE FAX FUNCTION 7 • BASIC OPERATIONS 17 • ADVANCED TRANSMISSION METHODS 32 • TRANSMISSION USING F-CODES 48 • CONVENIENT METHODS OF USE 60 • PROGRAMMING 62 • TROUBLESHOOTING 86 • KEY OPERATOR PROGRAMS - Sharp AR M162 | AR-M162 | AR-M207 Operation Manual Suite - Page 129
or network operator, if you are not sure whether your network operates according to TBR 21. ■ Important Notice for New Zealand Users General "The does it imply that any product is compatible with all of Telecom's network services. In particular the higher speeds which this modem is capable of, can - Sharp AR M162 | AR-M162 | AR-M207 Operation Manual Suite - Page 130
as loading paper, clearing misfeeds, and handling peripheral units, see the "Operation manual (for general information and copier)". For other functions, see the following manuals as appropriate: Copier function: See the "Operation manual (for general information and copier)". Printer function: See - Sharp AR M162 | AR-M162 | AR-M207 Operation Manual Suite - Page 131
MANUALLY SETTING THE SCANNING SIZE OPERATIONS SENDING A FAX 18 ● BASIC PROCEDURE FOR SENDING FAXES......18 ● TRANSMISSION BY AUTO-DIALLING (RAPID DIALLING AND GROUP DIALLING 20 ● SENDING A FAX BY SPEED DIALLING........20 ● SEARCHING FOR A PROGRAMMED DESTINATION (USING THE [ADDRESS] KEY SUPPORTING - Sharp AR M162 | AR-M162 | AR-M207 Operation Manual Suite - Page 132
KEYS 83 ● INITIAL PROCEDURE FOR ENTERING CHARACTERS 84 7 TROUBLESHOOTING WHEN OPERATION .....89 PROBLEMS AND SOLUTIONS 90 8 KEY OPERATOR PROGRAMS ● KEY OPERATOR PROGRAM LIST 92 ● KEY OPERATOR PROGRAM MENU 93 PROCEDURE FOR USING THE KEY OPERATOR PROGRAMS 94 ● INITIAL PROCEDURE 94 KEY OPERATOR - Sharp AR M162 | AR-M162 | AR-M207 Operation Manual Suite - Page 133
the machine as shown. Insert the other end of the telephone line cord into a telephone line jack. LINE jack Insert the plug firmly until is idle. If the power is turned off while the machine is in operation, a paper jam may occur. If settings are being configured, the settings will be cancelled - Sharp AR M162 | AR-M162 | AR-M207 Operation Manual Suite - Page 134
power switch is kept continuously off. • When the battery dies, please contact your local Sharp dealer or authorised service representative for assistance in disposing of this battery. The machine will not operate once the battery dies. Please note In the event of a thunderstorm, remove the power - Sharp AR M162 | AR-M162 | AR-M207 Operation Manual Suite - Page 135
any of your telephone equipment is not operating properly, you should immediately remove it from to spill any liquids on the machine. NOTICE FOR USERS IN AUSTRALIA AND NEW ZEALAND Your fax machine and the installed and used in accordance with the instructions, may cause interference. However, there - Sharp AR M162 | AR-M162 | AR-M207 Operation Manual Suite - Page 136
and fax number of the user of the machine is programmed in "OWN PASSCODE SET" (page 96) in the key operator programs. (Only one name name and number by printing out the "Key Operator List" in the key operator Note programs. (See "LIST PRINT" on page 95.) Paper sizes that can be used for fax mode - Sharp AR M162 | AR-M162 | AR-M207 Operation Manual Suite - Page 137
numerical settings. One digit is cleared each time the key is pressed. When an original is being scanned, this key can also be used to cancel scanning. 8 (8) [CA] key This is used to cancel a transmission or programming operation. When pressed during an operation, the operation is cancelled and - Sharp AR M162 | AR-M162 | AR-M207 Operation Manual Suite - Page 138
auto power shut-off function is activated, All lights except the mode key lights go off. For the information on the auto power shut-off function, see the "Operation manual (for general information and copier)." • For information on the keys and lights which are used for the copy function and other - Sharp AR M162 | AR-M162 | AR-M207 Operation Manual Suite - Page 139
is displayed by pressing the [FAX] key when the print mode, copy mode, or scan mode screen appears. The base screen of fax mode (1) Stand-by. 96% (6) (2) MAY 10 There are two modes for receiving faxes: automatic reception and manual reception. This shows the currently selected reception mode. (3) - Sharp AR M162 | AR-M162 | AR-M207 Operation Manual Suite - Page 140
" ". If you enter an incorrect digit, press the [C] key and re-enter the correct digit. • After you enter your account number key operator programs (see the "Key operator's guide" in the "Operation manual (for general information and copier)".) is enabled, the message "Please see your key operator - Sharp AR M162 | AR-M162 | AR-M207 Operation Manual Suite - Page 141
", A4, A4R if the machine uses inch-based paper sizes)) can also be faxed. • There are restrictions on originals that can be scanned using the SPF. For more information, see "NORMAL COPYING" in the "Operation manual (for general information and copier)". * Long originals Depending on the resolution - Sharp AR M162 | AR-M162 | AR-M207 Operation Manual Suite - Page 142
to fax originals that cannot be scanned using the SPF such as thick the SPF. 2 Adjust the original guides on the document feeder tray to the 30 sheets of 90 g/m2 (24 lbs.) paper, thickness 4 mm (5/32") or less). the [FAX] key, wait until the machine has returned to normal operation, and then place - Sharp AR M162 | AR-M162 | AR-M207 Operation Manual Suite - Page 143
from the actual original size when scanning a two-sided original in the RSPF, Note a scanning error or a cut-off image may result. 1 Press the [ORIGINAL SIZE] key. PY AUTO 2-SIDED TIO IMAGE OUTPUT COPY SPEC ESS FORMAT ORIGINAL SIZE DUPLEX SCAN BROADCAST The original size selection screen - Sharp AR M162 | AR-M162 | AR-M207 Operation Manual Suite - Page 144
Press the [RESOLUTION] key. 3 Press the [OK] key. PAPER COPY AUT COPY EXPOSURE SELECT RATIO IMAG SCAN COLOUR MODE RESOLUTION default resolution setting is "STANDARD" and the default exposure setting is "AUTO". The default settings for the resolution and exposure can be changed in the key operator - Sharp AR M162 | AR-M162 | AR-M207 Operation Manual Suite - Page 145
36 37 38 39 40 K L M N O The programmed user names appear. XXXXXX 1234567890 MEMORY AUTO CONT AUTO A4R STANDARD • [SPEED] key, entering a 3-digit number (000 to 299), and pressing the [START] key ( ). is displayed. Redialling. 100% :0123456789 MANUAL AUTO CONT AUTO A4R STANDARD • ON - Sharp AR M162 | AR-M162 | AR-M207 Operation Manual Suite - Page 146
without being stored in memory, The default transmission setting can be set to "MEMORY TX" or "DIRECT TX" using "SEND MODE" (page 101) in the key operator programs. To manually switch between "MEMORY TX" and "DIRECT TX", use the [COMM. SETTING] key. (See "Faxing by direct transmission" on - Sharp AR M162 | AR-M162 | AR-M207 Operation Manual Suite - Page 147
correctly, press the [ORIGINAL SIZE] key. PY AUTO 2-SIDED TIO IMAGE OUTPUT COPY SPEC ESS FORMAT ORIGINAL SIZE DUPLEX SCAN BROADCAST ORIGINAL SIZE AB AUTO A4 A4R When the [ORIGINAL SIZE] key is pressed, the size selection screen appears. See "MANUALLY SETTING THE SCANNING SIZE" (page 14) to - Sharp AR M162 | AR-M162 | AR-M207 Operation Manual Suite - Page 148
scanned scanning key operator programs.) 8 After the last page is scanned, press the [READ-END] key key is pressed, press the [C] or [CA] key. To cancel a transmission job that is already stored, press the [FAX STATUS] key and cancel the job as explained on page 26. • A job number (3 digits scanned - Sharp AR M162 | AR-M162 | AR-M207 Operation Manual Suite - Page 149
If an original has been placed, scanning of the original will begin automatically without the need to press the [START] key in step 6 on page 19. PROCEDURE FOR SENDING FAXES" 3 Enter the 3-digit Speed Dial number with numeric keys. (page 18). 2 Press the [SPEED] key. 47 48 49 50 V W XYZ SP - Sharp AR M162 | AR-M162 | AR-M207 Operation Manual Suite - Page 150
Press the [ADDRESS] key. PAPER COPY AUTO OSURE SELECT RATIO IMAGE OUTP KEY WORDS UR MODE RESOLUTION key is pressed, press the [C] or [CA] key. To cancel a transmission job that is already stored, press the [FAX STATUS] key and cancel the job as explained on page 26. • A job number (3 digits - Sharp AR M162 | AR-M162 | AR-M207 Operation Manual Suite - Page 151
x 11", 8-1/2" x 11"R, A4, A4R if the machine uses inch-based paper sizes)). Otherwise a scanning error or cut-off image may result. 1 Make sure that the machine is in fax mode. SCAN When the machine is in fax mode, the [FAX] key indicator is LINE DATA COPY EXP FAX lit. If the indicator is not - Sharp AR M162 | AR-M162 | AR-M207 Operation Manual Suite - Page 152
OPERATIONS Transmission settings (memory transmission mode and direct transmission mode) Transmission modes include memory transmission, where the original is temporarily scanned not possible, you can press the [COMM. SETTING] key to switch from memory transmission to direct transmission. When - Sharp AR M162 | AR-M162 | AR-M207 Operation Manual Suite - Page 153
timer transmission (page 34), F-code relay broadcast transmission (page 59), redial (page 102), image rotation (page 100), duplex scanning, dual pages, and others. • When a fax is sent by direct transmission or manual transmission, the fax is sent after the connection with the receiving machine is - Sharp AR M162 | AR-M162 | AR-M207 Operation Manual Suite - Page 154
also supports error correction mode (ECM) and is set to automatically resend any part of a fax that is distorted due to noise on the line. *2 The settings can be changed in the key operator programs. (See "RING TIMEOUT IN AUTO TX" (page 103) and "RECALL SET (ERR)" (page 102).) Image rotation - Sharp AR M162 | AR-M162 | AR-M207 Operation Manual Suite - Page 155
scanned ("READING" appears in the message display) or before the key is pressed ([READ-END] key ( ) when scanning the original from the document glass), the [C] or [CA] key the [ ] key in the screen of step 2, select "NO", and press the [OK] key. • You can check cancelled operations in the Activity - Sharp AR M162 | AR-M162 | AR-M207 Operation Manual Suite - Page 156
OPERATIONS Cancelling a stored transmission job If you do not wish to cancel a stored transmission job and only wish to check its status, press the [BACK] key instead of the [C] key in step 4 to exit. 1 Press the [FAX STATUS] key. 5 Select "YES" with the [ ] or [ ] key time of scanning appears. - Sharp AR M162 | AR-M162 | AR-M207 Operation Manual Suite - Page 157
key operator programs. • If a extension phone is not connected to the machine, use automatic reception. • In order to receive faxes, paper must be loaded in the paper tray. See "LOADING PAPER" in the "Operation manual (for general information and copier)" to load appropriate paper the key operator - Sharp AR M162 | AR-M162 | AR-M207 Operation Manual Suite - Page 158
If the machine runs out of paper or toner, or a paper misfeed occurs, or if the the upper right of the [FAX] key blinks. You can also use the paper must be loaded in the paper tray. Load appropriate paper as explained in "LOADING PAPER" in the "Operation manual (for general information and copier - Sharp AR M162 | AR-M162 | AR-M207 Operation Manual Suite - Page 159
AND OFF" in the "Operation manual (for general information and copier)"), the machine returns to normal operation in order to print the FUNCTION] key. Begin the following procedure from the base screen of Fax mode. 2-SIDED COPY SPECIAL FUNCTION DUPLEX SCAN Press the [SPECIAL FUNCTION] key to - Sharp AR M162 | AR-M162 | AR-M207 Operation Manual Suite - Page 160
OPERATIONS 6 Select "ON" with the [ ] or [ ] key. FAX PRINT HOLD ON OFF To disable fax print hold, select "OFF". 7 Press the [OK] key. mode. 2-SIDED COPY SPECIAL FUNCTION Press the [SPECIAL FUNCTION] key to display the special function menu. DUPLEX SCAN ACC. (To select fax mode, see step 1 on - Sharp AR M162 | AR-M162 | AR-M207 Operation Manual Suite - Page 161
operation. The original to be transmitted is scanned cleared from key is pressed for a broadcast transmission, the broadcast transmission will have five destinations. Beep Sender PAPER COPY AUTO 2-SIDED E SELECT RATIO IMAGE OUTPUT COPY DE RESOLUTION ADDRESS FORMAT ORIGINAL SIZE DUPLEX SCAN - Sharp AR M162 | AR-M162 | AR-M207 Operation Manual Suite - Page 162
key. PER COPY AUTO 2-SID LECT RATIO IMAGE keys or press an auto-dial key (Rapid key, Speed Dial number, or group key) to select the first destination. (Page 20) To clear a mistake when WXYZ entering a full number with the numeric keys, press the [C] key 26 27 28 29 to clear one digit - Sharp AR M162 | AR-M162 | AR-M207 Operation Manual Suite - Page 163
cleared from memory. • To perform a timer transmission, the original must be scanned into memory. It is not possible to leave the original in the SPF or on the document glass and have it scanned at the specified time of transmission. • The date and time is set in the machine using the key operator - Sharp AR M162 | AR-M162 | AR-M207 Operation Manual Suite - Page 164
key. OK The selected day is set. 9 Perform the desired fax operation. The steps that follow will depend on the type of operation. The following operations can be performed as a timer operation A timer job number is automatically assigned to the operation. This number can be used to cancel a stored - Sharp AR M162 | AR-M162 | AR-M207 Operation Manual Suite - Page 165
if the other machine is a Super G3 or G3 machine and supports the polling function. For information on polling and polling memory using F- scanned into memory Group keys and the broadcast transmission function (page 32) can be used to successively poll multiple fax machines in a single operation - Sharp AR M162 | AR-M162 | AR-M207 Operation Manual Suite - Page 166
number of the other machine with the numeric keys, press a Rapid key, or specify a Speed Dial number (a group key cannot be used). To clear a mistake when WXYZ entering a full number with the numeric keys, press the [C] key 26 27 28 29 to clear one digit at a time. A B C 31 32 33 34 - Sharp AR M162 | AR-M162 | AR-M207 Operation Manual Suite - Page 167
or passcode (page 48) cannot be selected. 1 Perform steps 1 to 3 of the polling procedure (page 37). 2 Select "SERIAL POLLING" with the [ ] or [ ] key. GH PQR 2-SIDED COPY SPECIAL FUNCTION SENDING OPTIONS POLLING SERIAL POLLING SUB ADDRESS TX About the steps that follow See steps 5 to 8 of the - Sharp AR M162 | AR-M162 | AR-M207 Operation Manual Suite - Page 168
MANUAL. (See "SETTING THE Note RECEPTION MODE" on page 61.) Scanning a document into polling memory (the Public Box) This section explains how to scan to append the new document, select "ADD" with the [ ] or [ ] key, press the [OK] key, and then go to step 7. (2) If you wish to replace the previous - Sharp AR M162 | AR-M162 | AR-M207 Operation Manual Suite - Page 169
the [ ] or [ ] key. SELECT SENDING 1 TIME REPEAT If you select "1 TIME", the document data is automatically cleared from memory after your machine is your machine. Note To cancel scanning To cancel scanning of a document while scanning is in progress, press the [C] key. To erase the documents in - Sharp AR M162 | AR-M162 | AR-M207 Operation Manual Suite - Page 170
when they are no longer needed. 1 Follow steps 2 to 6 of "Scanning a document into polling memory (the Public Box)" (page 39) and then follow the program passcode numbers, see "POLLING PASSCODE # MODE" (page 107) in the key operator programs. Note • If you do not use the polling security function, the - Sharp AR M162 | AR-M162 | AR-M207 Operation Manual Suite - Page 171
data or inside the document data in the key operator programs (see "PRINT STATION # IN RCVD DATA" on page 101). The factory default setting is outside the document data. Length of scanned data Length of transmitted data Length of scanned data Length of transmitted data Direction of transmission - Sharp AR M162 | AR-M162 | AR-M207 Operation Manual Suite - Page 172
glass (page 13) and perform the transmission operation. If you have more originals to scan after pressing the [START] key ( ) and scanning the first original, change originals and press the [START] key ( ). Repeat until all originals have been scanned. Press the key. (See steps 6 to 8 of "Using the - Sharp AR M162 | AR-M162 | AR-M207 Operation Manual Suite - Page 173
PM T O : SERVICE CENTRE FROM : SBC CO operator programs to always add a cover sheet to transmissions (see "AUTO COVER SHEET" on page 103). Selecting a cover sheet / message 1 In Fax mode, press the [SPECIAL FUNCTION] key. 2-SIDED COPY SPECIAL FUNCTION DUPLEX SCAN When the [SPECIAL FUNCTION] key - Sharp AR M162 | AR-M162 | AR-M207 Operation Manual Suite - Page 174
and then press the [START] key ( ). WXYZ @.-_ READ-END PAPER COP DATA COPY EXPOSURE SELECT RAT SCAN COLOUR MODE RESOLUTION ADDR FAX PROGRAM the [START] key ( ) in step 5. These settings include the original size (see "MANUALLY SETTING THE SCANNING SIZE" on page 14), duplex scanning (see "FAXING - Sharp AR M162 | AR-M162 | AR-M207 Operation Manual Suite - Page 175
key (see "If received data cannot be printed" on page 29) to blinks. 2) Printing not possible because of paper or toner problem Other machine Your machine 3) "Transfer" instruction number of the forwarding destination is programmed in the key operator programs (see "RECEIVED DATA FW. STATION SET" - Sharp AR M162 | AR-M162 | AR-M207 Operation Manual Suite - Page 176
key. BACK OK GHI 5 Select "TRANSFER" with the [ ] or [ ] key key operator programs and begins forwarding the fax or faxes. Note • To cancel a forwarding operation Press the [FAX STATUS] key is busy or a transmission error occurs, recall attempts will problem occurred and all following pages - Sharp AR M162 | AR-M162 | AR-M207 Operation Manual Suite - Page 177
SUPPORTING F-CODES This machine supports the "F-code" standard as established by the ITU-T*. Operations Sharp fax machine; however, F-Code communication makes it possible to perform these operations with fax machines of other manufacturers that support services that support F- 20 digits. Product Planning - Sharp AR M162 | AR-M162 | AR-M207 Operation Manual Suite - Page 178
location of the memory box and the term "passcode" for the password that allows communication; however, other fax machines of other manufacturers may attempt to create a box when 10 boxes have already been created for that operation type, a message will appear and you will not be able to create the - Sharp AR M162 | AR-M162 | AR-M207 Operation Manual Suite - Page 179
using an F-code, see page 36. • To create an F-code polling memory box, see "PROGRAMMING F-CODE PUBLIC (POLLING MEMORY) BOXES" (page 77) and "Scanning a document into polling memory (the Public Box)" (page 39). • Unlike regular polling, the other machine's fax number is not used as a passcode for - Sharp AR M162 | AR-M162 | AR-M207 Operation Manual Suite - Page 180
and clearing document data in a box" on page 52.) Note When using F-code polling memory, do not set the reception mode to manual reception. Scanning a document 4 3 Press the [OK] key. BACK OK GHI 4 Select the name of the polling memory box with the [ ] or [ ] key. SEL S.A. POLL BX Document - Sharp AR M162 | AR-M162 | AR-M207 Operation Manual Suite - Page 181
data in an F-code polling memory box by printing the data and for clearing the data are generally the same as in "Printing documents in the Public through 4 of "Scanning a document into polling memory (the Public Box)" on page 39. 2 Select "S.A.M-POLL ORIG" with the [ ] or [ ] key. GH PQR 2-SIDED - Sharp AR M162 | AR-M162 | AR-M207 Operation Manual Suite - Page 182
] key. 2-SIDED COPY SPECIAL FUNCTION DUPLEX SCAN When the [SPECIAL FUNCTION] key is keys, or press a Rapid key, or dial a Speed Dial number (a group key cannot be used). To clear a mistake when WXYZ entering a number with the numeric keys, press the [C] key 26 27 28 29 to clear one digit - Sharp AR M162 | AR-M162 | AR-M207 Operation Manual Suite - Page 183
be a space. • If you make a mistake, press the [C] key and re-enter the correct digit(s). • If the other machine has not programmed a passcode, omit machine will print the received document. Note • To cancel the operation During communication: Cancel as explained in "Cancelling a fax transmission - Sharp AR M162 | AR-M162 | AR-M207 Operation Manual Suite - Page 184
. Your machine When data is printed 4-1) Enter print passcode. (4-digit number) Sub-address Passcode 2) Check sub-address and passcode Match code confidential transmission. Note • This machine does not support Sharp's previous confidential transmission function, which uses the programmed - Sharp AR M162 | AR-M162 | AR-M207 Operation Manual Suite - Page 185
] key. 2-SIDED COPY SPECIAL FUNCTION DUPLEX SCAN When the [SPECIAL FUNCTION] key is keys, or press a Rapid key, or dial a Speed Dial number (a group key cannot be used). To clear a mistake when WXYZ entering a number with the numeric keys, press the [C] key 26 27 28 29 to clear one digit - Sharp AR M162 | AR-M162 | AR-M207 Operation Manual Suite - Page 186
F-code confidential memory box are printed out by entering the 4-digit print passcode (0000 to 9999) that was programmed when the box was created. Note • Make sure that a Transaction Report is set to print out in the key operator programs so that you will be informed when a confidential document - Sharp AR M162 | AR-M162 | AR-M207 Operation Manual Suite - Page 187
called "relay request transmission". Note • This machine does not support Sharp's previous relay broadcast function, which uses the programmed sender's receiving machines can be stored using the numeric keys, Rapid keys, Speed Dial numbers, and group keys. Auto-dial destinations that already have a - Sharp AR M162 | AR-M162 | AR-M207 Operation Manual Suite - Page 188
programmed end receiving machines. The document data is automatically cleared after transmission to all end receiving machines is completed. Transmission RELAY REQUEST FUNCTION (your machine requests a relay broadcast) Ask the operator of the other F-code machine (the relay machine) to create an - Sharp AR M162 | AR-M162 | AR-M207 Operation Manual Suite - Page 189
be activated from an extension phone connected to the machine. (Remote operation) If you connect a combination telephone/answering machine to the machine, The number of rings can be changed to any number from 0 to 9 in the key operator programs. (See "#OF RINGS AT. RX" on page 104.) • If you cannot - Sharp AR M162 | AR-M162 | AR-M207 Operation Manual Suite - Page 190
3 Replace the extension phone. Note The one-digit number that is used to activate fax reception from an extension phone (initially set to "5") is called the "remote reception number". You can change this number to any number from 0 to 9 in the key operator programs. (See "REMOTE RECEPTION" on page - Sharp AR M162 | AR-M162 | AR-M207 Operation Manual Suite - Page 191
-dial number or program. Note To cancel a storing, editing, or deleting operation, press the [CA] key. You will return to the base screen. STORING, EDITING, AND DELETING AUTO-DIAL NUMBERS (RAPID KEYS, SPEED DIAL NUMBERS, AND GROUP KEYS) Auto dial numbers are stored in the auto dial storing screen - Sharp AR M162 | AR-M162 | AR-M207 Operation Manual Suite - Page 192
MNO PQRS TUV WXYZ FUNCTION @.-_ ENTER DIAL # 07 : ACC. #-C READ-END Up to 50 digits can be entered for the fax number. If you need to insert a pause between any of the digits, press the [REDIAL/PAUSE] key. The pause appears as a hyphen (-). To set the duration of the pause, see "PAUSE TIME - Sharp AR M162 | AR-M162 | AR-M207 Operation Manual Suite - Page 193
F-code A sub-address and passcode can be stored for F-code communication. (See below.) • Chain Dialling You can enable or disable Chain Dialling for a Rapid key or Speed Dial number. (Page 65) • Transmission speed You can set the transmission speed to 33,600 bps (maximum speed), 14,400 bps (high - Sharp AR M162 | AR-M162 | AR-M207 Operation Manual Suite - Page 194
a number is set as a Chain Dial number, the destination fax number entered in step 8 on page 63 can be up to 48 digits long. 1 Select "CHAIN DIAL" with the [ ] or [ ] key. OTHERS SUB ADDRESS CHAIN DIAL TX SPEED [START]:ENTER • If checkmark appears to the left of "CHAIN DIAL", it is already - Sharp AR M162 | AR-M162 | AR-M207 Operation Manual Suite - Page 195
Selecting the right international transmission mode can help alleviate these problems. • If errors frequently occur when sending a fax to a foreign country return the transmission speed setting to "33,600 bps (maximum speed)", press the key. 5 Return to step 13 on page 64. 66 Note If you select - Sharp AR M162 | AR-M162 | AR-M207 Operation Manual Suite - Page 196
document to multiple destinations in a single operation (page 32), it is convenient to program those destinations into a group key. 2 Enter a group name (see the destination in a Rapid key or Speed Dial number and then store the destination in the group key. Up to 50 digits can be entered for the - Sharp AR M162 | AR-M162 | AR-M207 Operation Manual Suite - Page 197
key or Speed Dial number cannot be edited or cleared in the following cases: • The Rapid key key, and then enter the correct digit(s) with the numeric keys. To delete a digit, move the cursor to the digit that you wish to delete with the [ ] or [ ] key and then press the [C] key. 7 Press the [OK] key - Sharp AR M162 | AR-M162 | AR-M207 Operation Manual Suite - Page 198
Dial number 1 In step 3 on page 68, select "DELETE" with the [ ] or [ ] key. GH PQR 2-SIDED COPY SPECIAL FUNCTION RAPID/SPEED CHANGE DELETE 2 Press a Rapid key ([01] to [50]) or the [SPEED] key. • To delete a Rapid key, press the Rapid key that you wish to delete ([01] to [50]). 26 27 28 29 - Sharp AR M162 | AR-M162 | AR-M207 Operation Manual Suite - Page 199
. ENTER RX STATION : 50,012345678 [START]:SET • To delete a number entered with the numeric keys, select a digit of the number with the [ ] or [ ] key and press the [C] key. The entire number including the selected digit will be deleted. To add a number, select the place where you wish to add the - Sharp AR M162 | AR-M162 | AR-M207 Operation Manual Suite - Page 200
31 32 33 34 35 F G H I J 36 37 38 39 40 K L M N O 4 Select "DELETE" with the [ ] or [ ] key. SBC CO. DELETE NO DELETE [#]:DETAIL Note If you select "NO DELETE", you can press the key to check the destination name. If you are deleting the destination, check the destination name - Sharp AR M162 | AR-M162 | AR-M207 Operation Manual Suite - Page 201
use the settings for a transmission by means of a simple operation (see "USING A PROGRAM" on page 45). * Transmission appears. Select a program that has not been stored, or clear the program (page 73) and then select it. 7 Press the [OK] key. 8 Enter a program name (see "ENTERING CHARACTERS" on - Sharp AR M162 | AR-M162 | AR-M207 Operation Manual Suite - Page 202
. • See steps 10 and 11 of "STORING A PROGRAM". • If you do not wish to edit the stored settings, press the [START] key ( ) and then press the [BACK] key to exit. [DELETING PROGRAMS] Before deleting a program, print the "PROGRAM LIST" to check the contents. (Page 81) To delete a previously stored - Sharp AR M162 | AR-M162 | AR-M207 Operation Manual Suite - Page 203
) and then program the new box. 1 In Fax mode, press the [SPECIAL FUNCTION] key. Begin the following procedure from the base screen of Fax mode. 2-SIDED COPY SPECIAL FUNCTION DUPLEX SCAN When the [SPECIAL FUNCTION] key is pressed, the function menu screen appears. ACC. (To select fax mode, see - Sharp AR M162 | AR-M162 | AR-M207 Operation Manual Suite - Page 204
key. 12 Enter a passcode (maximum 20 digits) with the numeric keys. See steps 5 and 6 on page 65. 13 Enter the print passcode (4 digits) with the numeric keys print passcode. If you forget the passcode, consult your Sharp dealer. 14 Press the [OK] key. OK BACK OK GHI 9 Enter a name for the - Sharp AR M162 | AR-M162 | AR-M207 Operation Manual Suite - Page 205
when entering a number with the numeric keys, press the [C] key to clear one digit at a time. • A destination selected with a Rapid key, Speed Dial number, or group key is indicated by an icon and a number. To clear an entry, press the [C] key. 14 Press the [OK] key and then dial the fax number of - Sharp AR M162 | AR-M162 | AR-M207 Operation Manual Suite - Page 206
document data for remote transmission when polled by a machine that supports F-Code communication. Up to 10 boxes can be programmed. To key. 11 Enter a sub-address (maximum 20 digits) with the numeric keys. See steps 3 and 4 on page 65. 12 Enter a passcode (maximum 20 digits) with the numeric keys - Sharp AR M162 | AR-M162 | AR-M207 Operation Manual Suite - Page 207
9 on page 75. • If you do not wish to edit the name, go to the next step. 16 Press the [OK] key. 17 Edit the sub-address (maximum 20 digits) with the numeric keys. • See steps 3 and 4 on page 65. • If you do not need to edit the sub-address, press the [OK - Sharp AR M162 | AR-M162 | AR-M207 Operation Manual Suite - Page 208
76. • If you do not wish to edit the name, go to the next step. 14 Press the [OK] key. OK 15 Edit the sub-address and passcode (maximum 20 digits) with the numeric keys. • See steps 3 to 6 on page 65. • If you do not need to edit the sub-address and passcode - Sharp AR M162 | AR-M162 | AR-M207 Operation Manual Suite - Page 209
). • If you do not wish to edit the name, go to the next step. 80 14 Press the [OK] key. OK 15 Edit the sub-address and passcode (maximum 20 digits) with the numeric keys. • See steps 3 to 6 on page 65. • If you do not need to edit the sub-address and passcode - Sharp AR M162 | AR-M162 | AR-M207 Operation Manual Suite - Page 210
the number of pages received. 1 In Fax mode, press the [SPECIAL FUNCTION] key. Begin the following procedure from the base screen of Fax mode. 2-SIDED COPY SPECIAL FUNCTION DUPLEX SCAN When the [SPECIAL FUNCTION] key is pressed, the function selection menu ACC. appears. (To select fax mode, see - Sharp AR M162 | AR-M162 | AR-M207 Operation Manual Suite - Page 211
are normally the first 10 characters of the name entered for a destination. • Search characters are used when storing and using auto dial keys and numbers. • When a destination name includes a symbol, the symbol cannot be stored as a search character. • Search characters can be edited. CHANGING TO - Sharp AR M162 | AR-M162 | AR-M207 Operation Manual Suite - Page 212
To enter characters, use the character entry keys on the operation panel. The characters entered by each key and key functions are as follows. Character entry key A B C D E F G H I J K L M N O you press the key. Numeric Use to enter numbers 1 through 0. [C] (CLEAR) Clears the character selected - Sharp AR M162 | AR-M162 | AR-M207 Operation Manual Suite - Page 213
. The character directly to the left of the cursor is cleared. If the cursor is over a character, that character is cleared. Entering numbers (example: 123) 1 Enter "1", "2", and "3" with the numeric keys. OK ABC DEF GHI JKL MNO PQRS TUV WXYZ ENTER NAME 123 FUNCTION ACC. #-C @.-_ READ-END - Sharp AR M162 | AR-M162 | AR-M207 Operation Manual Suite - Page 214
. CHARACTER 1/ 2 2 Select the special character that you wish to enter with the keys. GH SPEC. CHARACTER PQR 2-SIDED COPY SPECIAL FUNCTION 1/ 2 To move to the next page, move the cursor to the bottom line and press the [ ] key. To move back to the previous page, move the cursor to the top line - Sharp AR M162 | AR-M162 | AR-M207 Operation Manual Suite - Page 215
be changed in the key operator programs. (See "LIST SETTING - PRINT SELECTION" on page 95.) • Normal transmission: ALWAYS PRINTS / ERROR ONLY /NEVER PRINTS • Broadcast transmission: ALWAYS PRINTS /ERROR ONLY/NEVER PRINTS • Original image print setting*: ALWAYS PRINTS / ERROR ONLY /NEVER PRINTS - Sharp AR M162 | AR-M162 | AR-M207 Operation Manual Suite - Page 216
TROUBLESHOOTING Sending The power was turned off or a power failure occurred. The image memory became full during substitute reception to memory. The transmitted document digits of line error code: Error code from 00 to 31. Last 4 digits of line error code: Code for use by service technicians - Sharp AR M162 | AR-M162 | AR-M207 Operation Manual Suite - Page 217
. Add paper. - 13 "LOADING PAPER" in the "Operation manual (for general information and copier)" Remove paper from the output tray and press [OK]. Clear paper path. The paper tray is open. The upper part of the job separator is full of paper. A job separator error occurred. A paper misfeed - Sharp AR M162 | AR-M162 | AR-M207 Operation Manual Suite - Page 218
operation if a problem occurs in the machine. If a problem occurs in fax mode, the following display appears. Message display Call for service. code:xx xx. Main code Sub code Action Turn off the power and then turn it back on. If the error is not cleared, note the 2-digit main code and the 2-digit - Sharp AR M162 | AR-M162 | AR-M207 Operation Manual Suite - Page 219
to the fax function. For problems related to general operation of the machine, see "TROUBLESHOOTING" in the "Operation manual (for general information and copier)". Problem The machine does not operate. Dialling is not possible. Cannot send a fax. The transmitted image prints out blank at the - Sharp AR M162 | AR-M162 | AR-M207 Operation Manual Suite - Page 220
? Is the machine's clock set to the correct time? Does an error message appear regarding adding paper, replenishing toner, or a misfeed? (This means that printing is not possible.) Was the wrong side of the original scanned in the transmitting machine? Is the original faint? Were line conditions - Sharp AR M162 | AR-M162 | AR-M207 Operation Manual Suite - Page 221
, and network scanner function, see the respective manuals for those functions. For key operator programs for general use of the machine, see the "Key operator's guide" in the "Operation manual (for general information and copier)". To use the key operator programs, the key operator code must be - Sharp AR M162 | AR-M162 | AR-M207 Operation Manual Suite - Page 222
the settings that are explained beginning on page 95. Some programs contain an additional level of settings (a settings screen). Level 1 Level 2 Level 3 Key Operator Code FAX SETTINGS LIST PRINT/SET LIST PRINT LIST SETTING INITIAL SETTING PAUSE TIME OWN PASSCODE SET SPEAKER VOLUME TX/RX END - Sharp AR M162 | AR-M162 | AR-M207 Operation Manual Suite - Page 223
FUNCTION DISPLAY CONTRAST TOTAL COUNT KEY OPE. PRG. MODE SELECT COPIER PRINTER SCANNER FAX To use a key operator program for copy mode, select "COPIER". 6 Press the [OK] key. OK 3 Press the [OK] key. BACK OK GHI 4 Enter the five-digit key operator code with the numeric keys. OK ABC DEF GHI - Sharp AR M162 | AR-M162 | AR-M207 Operation Manual Suite - Page 224
with the [ ] or [ ] key and then press the [OK] key. • If you selected "TRANSMISSION", select "ALWAYS PRINTS", "ERROR ONLY", or "NEVER PRINTS". • If you selected "BROADCAST", select "ALWAYS PRINTS", "ERROR ONLY", or "NEVER PRINTS". • If you selected "ORIGINAL IMAGE PRINT SETTING", select "ALWAYS - Sharp AR M162 | AR-M162 | AR-M207 Operation Manual Suite - Page 225
SETTING These programs are used to change the default settings (initially set at the factory) for digit with the [ ] or [ ] key (the cursor should be over the digit), and then enter the correct digit. OWN PASSCODE SET Use this setting to program the fax number of the machine and the name of the user - Sharp AR M162 | AR-M162 | AR-M207 Operation Manual Suite - Page 226
82) for the procedure for entering letters. Note To clear the programmed fax number and name, follow these steps: (1) Select "DELETE" in step 4 and then press the [OK] key. (2) Select "DELETE" with the [ ] or [ ] key and then press the [OK] key. SPEAKER VOLUME This setting is used to adjust the - Sharp AR M162 | AR-M162 | AR-M207 Operation Manual Suite - Page 227
this program is enabled, the operator must enter a valid 5-digit account number in order to key and then press the [OK] key. • The setting (auditing mode) is enabled and a checkmark appears in the checkbox. • If this procedure is performed when the setting is enabled, the checkmark will be cleared - Sharp AR M162 | AR-M162 | AR-M207 Operation Manual Suite - Page 228
KEY OPERATOR PROGRAMS 6 Enter an account name (up to 18 characters) and then press the [OK] key. • See "ENTERING CHARACTERS" (page 82) for the procedure for entering letters. • Press the [OK] key with the numeric keys, and then press the [OK] key. • For the year, enter the last two digits of the - Sharp AR M162 | AR-M162 | AR-M207 Operation Manual Suite - Page 229
KEY OPERATOR PROGRAMS 3 Select "AUTO SUMMER TIME SETTING" with the [ ] or [ ] key and then press the [OK] key. • The setting is turned on and a checkmark appears in the checkbox. • If this procedure is performed when the setting is turned on, the checkmark is cleared and the setting turned off. - Sharp AR M162 | AR-M162 | AR-M207 Operation Manual Suite - Page 230
is used to select whether the default mode for sending faxes is memory have been scanned. Note that this setting does not apply to manual transmission. ( cleared and quick on-line disabled. PRINT STATION # IN RCVD DATA This setting lets you select the position (inside or outside the original image - Sharp AR M162 | AR-M162 | AR-M207 Operation Manual Suite - Page 231
the machine will not re-attempt the call when a fax is sent by manual transmission. RECALL SET (ERR) When sending a fax, this setting is used is broken due to the line error. • If you made a mistake in step 5, move the cursor to the mistake with the [ ] or [ ] keys and enter the correct number. • - Sharp AR M162 | AR-M162 | AR-M207 Operation Manual Suite - Page 232
. A cover sheet cannot be added when scanning a document into the public box or F- polling, F-code relay broadcast transmission, or manual transmission. Normally this setting is disabled (a press the [OK] key. RCV. FUNCTION These programs are used to change the default settings (initially set at - Sharp AR M162 | AR-M162 | AR-M207 Operation Manual Suite - Page 233
size. If necessary, the image is split onto multiple sheets of paper. 1 Follow steps 1 through 6 of "INITIAL PROCEDURE" (page 94). 2 Select "RCV. FUNCTION" with the [ ] or [ ] key and then press the [OK] key. 3 Select "RECEIVED DATA PRINT CONDITION" with the [ ] or [ ] key and then press the [OK - Sharp AR M162 | AR-M162 | AR-M207 Operation Manual Suite - Page 234
the setting is enabled, the checkmark will be cleared and the setting disabled. Note This program only operates when the fax number of the machine that is to receive the forwarded faxes is programmed. RECEIVED DATA FW. STATION SET When a problem prevents the machine from printing a received fax - Sharp AR M162 | AR-M162 | AR-M207 Operation Manual Suite - Page 235
used, less space is available on the paper to print the fax image, and thus a received fax is key and then press the [OK] key. 3 Select "ENTER JUNK FAX #" with the [ ] or [ ] key and then press the [OK] key. 4 Select "ENTER" with the [ ] or [ ] key and then press the [OK] key. 5 Enter a 2-digit - Sharp AR M162 | AR-M162 | AR-M207 Operation Manual Suite - Page 236
KEY OPERATOR PROGRAMS POLLING SECURITY These settings are used for the public [ ] keys and enter the correct number. 6 Enter the passcode number (up to 20 digits) and then press the [OK] key. If you make a mistake, press the [C] key and then re-enter the correct number. Note To clear a passcode - Sharp AR M162 | AR-M162 | AR-M207 Operation Manual Suite - Page 237
"SPECIFICATIONS" in the "Operation manual (for general information and copier)". Applicable telephone line Compression method Transmission mode Scanning method Scanning resolution (supports ITU-T standards) Printing method Transmission speed Transmission time*1 Paper size Effective recording width - Sharp AR M162 | AR-M162 | AR-M207 Operation Manual Suite - Page 238
Cancelling a stored transmission job 27 Clearing document data - F-code public 23 Disable fax print hold 100 Document glass 13 Dual page scan 43 Duplex reception 105 E Earlier output 28, 106 ECM dialling 16 I Image rotation 25 Index print 106 Initial setting 96 K Key operator programs 92 - Sharp AR M162 | AR-M162 | AR-M207 Operation Manual Suite - Page 239
95 - Key ope. list 95 - Mem. polling list 81 - Public (polling memory) boxes 40 - Timer list 81 - Transaction report 86, 95 Problems and solutions Cancelling 26 - Image rotation 25 - Quick on-line transmission 25 - Two-sided original 22 Transmission error 25 Transmission settings 23 - Sharp AR M162 | AR-M162 | AR-M207 Operation Manual Suite - Page 240
Group keys 69 - Programs 73 - Rapid keys 68 - Speed Dial numbers 68 Exposure setting 15 Original scanning size Troubleshooting Alarm sounds 88 Communication activity report, viewing 88 Problems and solutions 90 Receiving party is busy 25 Transaction report is printed 86 Transmission error - Sharp AR M162 | AR-M162 | AR-M207 Operation Manual Suite - Page 241
- Sharp AR M162 | AR-M162 | AR-M207 Operation Manual Suite - Page 242
- Sharp AR M162 | AR-M162 | AR-M207 Operation Manual Suite - Page 243
AR-FX11 PRINTED IN CHINA 2004K KS1 TINSE1364QSZZ - Sharp AR M162 | AR-M162 | AR-M207 Operation Manual Suite - Page 244
MODEL AR-NB3 NETWORK EXPANSION KIT OPERATION MANUAL (for network scanner) Page •INTRODUCTION 1 •CONTENTS 2 •BEFORE USING THE NETWORK SCANNER FUNCTION 3 •HOW TO USE THE NETWORK SCANNER FUNCTION 15 •KEY OPERATOR PROGRAMS ... 32 •TROUBLESHOOTING .......... 34 •SPECIFICATIONS 38 - Sharp AR M162 | AR-M162 | AR-M207 Operation Manual Suite - Page 245
function, please refer to the "Operation manual (for network printer)" in the network expansion kit (AR-NB3). • For information on installing the drivers and software cited in this manual, see the separate "Software setup guide". • For information on the operating system, please refer to your - Sharp AR M162 | AR-M162 | AR-M207 Operation Manual Suite - Page 246
IN THE WEB PAGE ([Passwords 14 3 KEY OPERATOR PROGRAMS KEY OPERATOR PROGRAM LIST 32 USING THE KEY OPERATOR PROGRAMS.. 33 4 TROUBLESHOOTING TROUBLESHOOTING 34 ● MAXIMUM RESOLUTION 35 ● DISPLAY MESSAGES 35 ● IF YOUR E-MAIL IS RETURNED 35 ● IMPORTANT POINTS WHEN USING SCAN TO E-MAIL 36 CHECKING - Sharp AR M162 | AR-M162 | AR-M207 Operation Manual Suite - Page 247
is called "Scan to Desktop" in this manual.) *Before Scan to Desktop can be performed, the software in the CD-ROM that accompanies the network expansion kit (AR-NB3) must be installed. For the procedure for installing the software, see the "Sharpdesk installation guide". 3. The scanned image can be - Sharp AR M162 | AR-M162 | AR-M207 Operation Manual Suite - Page 248
SCANNER FEATURE To use the Network Scanner various function settings that can be operated remotely over the network from the your computer. Supported browsers: Internet Explorer 5.5 or later (Windows)/ 5.1 or your Web browser. ☞ABOUT THE WEB PAGE (FOR USERS) (page 5) 3 Click [Help] under the - Sharp AR M162 | AR-M162 | AR-M207 Operation Manual Suite - Page 249
of TCP/IP, NetWare, AppleTalk, and NetBEUI. (3) Image Send Management This is the base screen for storing, editing, and deleting destination information. • Destination (page 6) Store destinations for Scan to FTP, Scan to FTP (Hyperlink), Scan to Desktop, and Scan to E-mail. You can also edit or - Sharp AR M162 | AR-M162 | AR-M207 Operation Manual Suite - Page 250
USING THE NETWORK SCANNER FUNCTION STORING DESTINATIONS To store scanning destinations, click [Destination] in the Web page menu frame. This screen can also be used to edit or delete stored destinations. (Page 10) A total of 200 destinations* can be stored, including E-mail, FTP, Desktop, and Group - Sharp AR M162 | AR-M162 | AR-M207 Operation Manual Suite - Page 251
BEFORE USING THE NETWORK SCANNER FUNCTION Storing destinations for Scan to FTP 1 Click [Destination] in the menu frame of the image data is stored. FTP destination information Item Name (Required) Initial (Optional) Custom Index Hostname or IP Address (required)*1 User Name (Optional) Password - Sharp AR M162 | AR-M162 | AR-M207 Operation Manual Suite - Page 252
THE NETWORK SCANNER FUNCTION Storing destinations for Scan to Desktop The destination for Scan to Desktop is stored by the Sharp Network Scanner Tool Setup Wizard when "Network Scanner Tool" is installed in your computer. For this reason, there is no need to store the Scan to Desktop destination in - Sharp AR M162 | AR-M162 | AR-M207 Operation Manual Suite - Page 253
BEFORE USING THE NETWORK SCANNER FUNCTION Storing Groups (Scan to E-mail) You can send a scanned image to multiple e-mail destinations in a single Scan to E-mail operation. If you frequently transmit to a fixed group of destinations, you can store the destinations as a group. Note Up to 100 - Sharp AR M162 | AR-M162 | AR-M207 Operation Manual Suite - Page 254
BEFORE USING THE NETWORK SCANNER FUNCTION Editing and deleting programmed transmission destinations To edit or be printed. • Print individual list: Shows the information programmed in e-mail, FTP, desktop, and group destinations. • Print group list: Shows only the information programmed in group - Sharp AR M162 | AR-M162 | AR-M207 Operation Manual Suite - Page 255
time is set correctly when performing Scan to E-mail. This setting does not appear on models that have the fax function. If your model has the fax function, see the "Operation manual (for facsimile)" to set the time at the operation panel of the machine. (4) Quick Setup (page 13) This is used to - Sharp AR M162 | AR-M162 | AR-M207 Operation Manual Suite - Page 256
. For explanations of each of the items, click [Help] in the menu frame. 1 Click [Network Scanning] in the menu frame. The Network Scanning setup page appears. 2 Select the transmission methods that you wish to use. Select the scanner delivery methods that you want to use. In the "Enable - Sharp AR M162 | AR-M162 | AR-M207 Operation Manual Suite - Page 257
for Scan to FTP (Scan to FTP (Hyperlink)) or Scan to Desktop. LDAP window. Note If you need to configure advanced settings for the SMTP, DNS, and LDAP servers, follow the procedures below. • Configuring SMTP and DNS server settings Click [Services] in the menu frame to display the services setup - Sharp AR M162 | AR-M162 | AR-M207 Operation Manual Suite - Page 258
SCANNER FUNCTION PROTECTING INFORMATION PROGRAMMED IN THE WEB PAGE ([Passwords]) The settings and information programmed in the Web page can be protected by establishing passwords (click [Passwords] in the menu frame). The administrator must change the factory default password to a new password - Sharp AR M162 | AR-M162 | AR-M207 Operation Manual Suite - Page 259
scanned image can be sent to an e-mail recipient. (Scan to E-mail) Note Before Scan to Desktop can be performed, the software in the CD-ROM that accompanied the network expansion kit (AR-NB3) must be installed. (For the procedure for installing the software, see the "Sharpdesk installation guide - Sharp AR M162 | AR-M162 | AR-M207 Operation Manual Suite - Page 260
on page 18. This key is also used to cancel a resolution, paper size, or special function setting that was selected at the time of transmission. (8) [MODE SELECT] keys (step 1 on page 20) Use these keys to change current operation mode. (9) [SCAN] key Press to switch to scan mode. The initial screen - Sharp AR M162 | AR-M162 | AR-M207 Operation Manual Suite - Page 261
(2) When scanning an original (3) When configuring and storing settings Note • When the auto power shut-off function activates, all lights except the mode key indicators go off. For information on auto power shut-off, see the "Operation manual (for general information and copier)". • For - Sharp AR M162 | AR-M162 | AR-M207 Operation Manual Suite - Page 262
USE THE NETWORK SCANNER FUNCTION SCAN MODE (BASE SCREEN) The base screen of scan mode is displayed by pressing the [SCAN] key from the base screen of copy mode, print mode, or fax mode. If a screen appears asking you what type of connection you are using after you press the [SCAN] key, select Note - Sharp AR M162 | AR-M162 | AR-M207 Operation Manual Suite - Page 263
not been programmed for scan mode, enter your account number for scan mode after you press the [SCAN] key to change to scan mode. • When "ACC. # SECURITY" is enabled in the key operator programs (see the "Key operator's guide"), the message "Please see your key operator for assistance" will appear - Sharp AR M162 | AR-M162 | AR-M207 Operation Manual Suite - Page 264
scan mode. Enter your account number (five digits) with the numeric keys. (Page 19) 2 Place the original(s) in the document feeder tray or on the document glass. For detailed information on placing an original, see "4. COPY FUNCTIONS" of the "Operation manual (for general information and copier - Sharp AR M162 | AR-M162 | AR-M207 Operation Manual Suite - Page 265
original as explained in "REMOVING MISFEEDS" in "2. TROUBLESHOOTING AND MAINTENANCE" in the "Operation manual (for general information and copier)". • When performing a Scan to E-mail transmission, note the following points: Be careful not to send image data files that are too large. Your mail - Sharp AR M162 | AR-M162 | AR-M207 Operation Manual Suite - Page 266
as needed with the [ ] or [ ] key and select the desired destination with the [ ] or [ ] key. GH PQR DUPLEX SPECIAL FUNCTION DUPLEX SCAN USER PPD SALES SUPPORT [ ]:SELECT ON/OFF • The [USER] tab changes as follows each time you press the [ ] key: [USER]→[ABCD]→[EFGHI]→[JKLMN]→[OPQRST] →[UVWXYZ - Sharp AR M162 | AR-M162 | AR-M207 Operation Manual Suite - Page 267
SCANNER FUNCTION "ADDRESS ENTRY" 1 Perform steps 1 to 6 of "BASIC TRANSMISSION PROCEDURE" (page 20). 2 Press the [ADDRESS] key OSURE PAPER mistake, press the [C] key and to clear the mistake. 6 Press the [OK] key. OK The base screen appears. Ready to scan. 2 [email protected] COLOR 150dpi PDF - Sharp AR M162 | AR-M162 | AR-M207 Operation Manual Suite - Page 268
HOW TO USE THE NETWORK SCANNER FUNCTION "ADDRESS SEARCH" search 1 Perform steps 1 to 6 of "BASIC TRANSMISSION PROCEDURE" (page 20). 2 Press the [ADDRESS] key OSURE PAPER ZOOM AUTO % OUTP R MODE RESOLUTION ADDRESS FORMAT ORIGINA GRAM RESOLUTION ADDRESS BROADCAST ORIGINA DESTINATION SELECT ADDRESS - Sharp AR M162 | AR-M162 | AR-M207 Operation Manual Suite - Page 269
" of the "Operation manual (for general information and copier)". 3 Check the original size. OM AUTO % OUTPUT DUPLEX SPEC ESS FORMAT ORIGINAL SIZE DUPLEX SCAN ESS BROADCAST ORIGINAL SIZE DUPLEX SCAN ORIGINAL SIZE INCH 11x17 8 1 2 x 1 4 8 1 2 x 1 1 Press the [ORIGINAL SIZE] key to open - Sharp AR M162 | AR-M162 | AR-M207 Operation Manual Suite - Page 270
set the original size manually. Perform the following steps after loading the document in the document feeder tray or on the document glass. 1 Press the [ORIGINAL SIZE] key. OM AUTO % OUTPUT DUPLEX SPEC ESS FORMAT ORIGINAL SIZE DUPLEX SCAN ESS BROADCAST ORIGINAL SIZE DUPLEX SCAN The original size - Sharp AR M162 | AR-M162 | AR-M207 Operation Manual Suite - Page 271
cancel a manual original size setting, press the [CA] key. If default setting for the color mode is "COLOR". To change the color mode, follow these steps. 1 Press the [COLOR MODE] key. DATA COPY EXPOSURE PAPER ZOO SCAN monochrome image is needed. B/W : Select this mode when you wish to scan a - Sharp AR M162 | AR-M162 | AR-M207 Operation Manual Suite - Page 272
To set the file creation method, press the [ ] or [ ] key. FORMAT PDF PDF G3 SINGLE 1PAGE 1FILE Note • When the file type is set to "JPEG", the file creation method can only be set to "SINGLE". • To open the scanned image without using the software program in the accompanied CD-ROM, the recipient - Sharp AR M162 | AR-M162 | AR-M207 Operation Manual Suite - Page 273
. The factory default setting for the threshold value is "128". To change the threshold value, follow these steps: Note The threshold value can only be adjusted when the color mode is set to "B/W". (Page 27) 1 Press the [SPECIAL FUNCTION] key in scan mode. Perform this operation from the DUPLEX - Sharp AR M162 | AR-M162 | AR-M207 Operation Manual Suite - Page 274
factory default setting for the void area is "ON" (enabled). If you need to change the void area setting, follow these steps. Void area: 7/64" (2.5 mm) from the top and bottom edges 1/8" (3.0 mm) from the left and right edges 1 Press the [SPECIAL FUNCTION] key in scan mode. Perform this operation - Sharp AR M162 | AR-M162 | AR-M207 Operation Manual Suite - Page 275
THE NETWORK SCANNER FUNCTION IMAGE ORIENTATION AND STANDARD scanned image will be rotated 90° when viewed on a computer. Document glass SPF Scanning result ENTERING CHARACTERS Characters are entered by pressing the numeric keys on the operation panel. The letters entered with each numeric key - Sharp AR M162 | AR-M162 | AR-M207 Operation Manual Suite - Page 276
see "PROGRAMMING A KEY OPERATOR CODE" in the "Key operator's guide". KEY OPERATOR PROGRAM LIST The key operator programs for the network and printer functions are shown in the following table. Factory default settings are indicated in bold. Mode SCANNER Program DISABLE USB SCAN Settings YES, NO - Sharp AR M162 | AR-M162 | AR-M207 Operation Manual Suite - Page 277
SELECT KEY OP. # CHANGE COPIER PRINTER SCANNER • " " will appear for each digit will enter. • The mode selection screen will appear. 5 Select the desired mode with the [ ] or [ ] key. MODE SELECT KEY OP. # CHANGE COPIER PRINTER SCANNER 6 Press the [OK] key. OK SCANNER DISABLE USB SCAN INITIAL - Sharp AR M162 | AR-M162 | AR-M207 Operation Manual Suite - Page 278
TROUBLESHOOTING If a problem or question arises, try to solve the situation using the following information before contacting your authorized SHARP dealer. Image transmission problems are explained here. For image scanning problems, see the "Operation manual (for general information and copier - Sharp AR M162 | AR-M162 | AR-M207 Operation Manual Suite - Page 279
on. Consult with your network administrator to make sure that no problems exist on the network or in the server. If the error is not cleared after turning the power off and on, turn off the power and contact your dealer. The scanned image was not sent because a connection to the server could not be - Sharp AR M162 | AR-M162 | AR-M207 Operation Manual Suite - Page 280
TROUBLESHOOTING IMPORTANT POINTS WHEN USING SCAN TO E-MAIL Be careful not to send image data files that are too large. Your mail server's system administrator may have placed a limit on the amount of data that can be sent in - Sharp AR M162 | AR-M162 | AR-M207 Operation Manual Suite - Page 281
while holding down the status button on the network expansion kit. Network scanner destination information and scanning settings will remain after the network expansion kit is reset, however, the network settings and network printer settings will revert to the factory default settings. 4 37 - Sharp AR M162 | AR-M162 | AR-M207 Operation Manual Suite - Page 282
of the machine, refer to the "Operation manual (for general information and copier)". Type Scanning resolution (Primary scanning x Secondary scanning) Interface Network protocol Supported client PC operating systems File formats Color scanner 75x75, 100x100, 150x150, 200x200, 300x300, 400x400 - Sharp AR M162 | AR-M162 | AR-M207 Operation Manual Suite - Page 283
OPERATION MANUAL (for network scanner) SHARP CORPORATION ARNB3-EN1-SCANNER - Sharp AR M162 | AR-M162 | AR-M207 Operation Manual Suite - Page 284
MODEL AR-NB3 NETWORK EXPANSION KIT OPERATION MANUAL (for network printer) Page • INTRODUCTION 1 • CONTENTS 2 • PRINTING FROM WINDOWS ....3 • PRINTER UTILITIES (WINDOWS) ...14 • PRINTING FROM A MACINTOSH....17 • WEB FUNCTIONS OF THE MACHINE....20 • KEY OPERATOR PROGRAMS ...31 • TROUBLESHOOTING - Sharp AR M162 | AR-M162 | AR-M207 Operation Manual Suite - Page 285
, please refer to the "Operation manual (for network scanner)" in the network expansion kit (AR-NB3). • For information on installing the drivers and software cited in this manual, please refer to the separate "Software setup guide". • For information on the operating system, please refer to your - Sharp AR M162 | AR-M162 | AR-M207 Operation Manual Suite - Page 286
MANUAL] DIFFER IN THE "PAPER SOURCE" SETTINGS 4 ● AUDITING MODE 5 OPENING THE PRINTER DRIVER FROM THE [START] BUTTON 6 PRINTER DRIVER SETTINGS 7 ● TWO-SIDED PRINTING (ONLY FOR MODELS THAT SUPPORT TWO-SIDED PRINTING) .....8 ● PRINTING MULTIPLE PAGES ON ONE PAGE ...10 ● FITTING THE PRINT IMAGE - Sharp AR M162 | AR-M162 | AR-M207 Operation Manual Suite - Page 287
"Print" dialog box will appear. 4 Make sure that "SHARP AR-XXXX" is selected as the printer. If you need to change any print settings, click the [Preferences] button ([Properties] button in Windows 95/98/Me/NT 4.0). The printer driver setup screen will appear. 2 Start WordPad and open the document - Sharp AR M162 | AR-M162 | AR-M207 Operation Manual Suite - Page 288
image will be automatically rotated 90 Note degrees to enable correct printing on the paper. (Other than the bypass tray) HOW [BYPASS TRAY] AND [BYPASS MANUAL] DIFFER IN THE "PAPER SOURCE" SETTINGS There are two bypass tray settings in "Paper Source" in the [Paper] tab of the printer driver setup - Sharp AR M162 | AR-M162 | AR-M207 Operation Manual Suite - Page 289
PRINTING FROM WINDOWS AUDITING MODE When "AUDITING MODE" is enabled in the key operator programs, a 5-digit account number must be entered in the printer driver setup screen in order to print. Account numbers are stored in the key operator programs. (See the "Key operator's guide".) To open the - Sharp AR M162 | AR-M162 | AR-M207 Operation Manual Suite - Page 290
click [Printers and Faxes]. In Windows 2000, click [Printers]. 3 Click the [SHARP AR-XXXX] printer driver icon and select [Properties] from the [File] menu. Note In Windows NT 4.0, select [Document Defaults] to open the printer driver setup screen. 3 In Windows 95/98/Me, click the [Setup] tab - Sharp AR M162 | AR-M162 | AR-M207 Operation Manual Suite - Page 291
file for the printer driver. Note • The settings and the image of the machine will vary depending on the model. If a tray or job separator tray option is installed, see "CONFIGURING THE PRINTER DRIVER" in "3. TROUBLESHOOTING AND USEFUL INFORMATION" in the "Software setup guide" to configure the - Sharp AR M162 | AR-M162 | AR-M207 Operation Manual Suite - Page 292
PRINTING FROM WINDOWS TWO-SIDED PRINTING (ONLY FOR MODELS THAT SUPPORT TWO-SIDED PRINTING) On models that have the two-sided printing function, both sides of the paper can be printed on. To use this function, open the printer driver setup screen and select [2-Sided (Book)] or [2-Sided (Tablet)] from - Sharp AR M162 | AR-M162 | AR-M207 Operation Manual Suite - Page 293
of each sheet of paper (four pages total on one sheet) so that the sheets can be folded down the center and bound to create a pamphlet. This function is convenient when you wish to compile printed pages into a pamphlet. To use this function, open the printer driver setup screen and select [Tiled - Sharp AR M162 | AR-M162 | AR-M207 Operation Manual Suite - Page 294
PRINTING FROM WINDOWS PRINTING MULTIPLE PAGES ON ONE PAGE This feature allows you to reduce and print two, four, six, eight, nine or sixteen document pages on a single sheet of paper. To use this function, open the printer driver setup screen and select the number of pages per sheet (2-Up, 4-Up, 6- - Sharp AR M162 | AR-M162 | AR-M207 Operation Manual Suite - Page 295
WINDOWS FITTING THE PRINT IMAGE TO THE PAPER The printer driver can adjust the size of the print image to match the size of the paper [Paper] tab in the printer driver setup screen. 2 Select the original size (Ledger or A3) of the print image in "Paper Size". or Select the size of the paper ( - Sharp AR M162 | AR-M162 | AR-M207 Operation Manual Suite - Page 296
ABCD Note The procedure for loading paper is explained in the "Operation manual (for general information and copier)". PRINTING A WATERMARK You can print a watermark such as "CONFIDENTIAL" on your document. To print a watermark, open the printer driver setup screen, click the [Watermarks] tab, and - Sharp AR M162 | AR-M162 | AR-M207 Operation Manual Suite - Page 297
PRINTING FROM WINDOWS PRINTING TEXT AND LINES IN BLACK Color text and driver setup screen and click on the [Text To Black] checkbox in the [Advanced] tab. Print data Printing result Text To Black Text To Black 1 ABCD EFGH ABCD EFGH ABCD EFGH Note • When using the PCL6 printer driver, - Sharp AR M162 | AR-M162 | AR-M207 Operation Manual Suite - Page 298
THE SOFTWARE (FOR OPTIONS)" in the "Software setup guide". • To use the Printer Administration Utility in Windows 95, a system file must be updated. See "2. INSTALLING THE SOFTWARE (FOR OPTIONS)" in the "Software setup guide" and view the detailed information in the "Software Selection" window of - Sharp AR M162 | AR-M162 | AR-M207 Operation Manual Suite - Page 299
Monitor Click the [start] button, point to [All Programs] ([Programs] in operating systems other than Windows XP/Server 2003) and then [SHARP Printer Status Monitor]. Select [Printer Status Monitor]. Printer Administration Utility Click the [start] button, point to [All Programs] ([Programs] in - Sharp AR M162 | AR-M162 | AR-M207 Operation Manual Suite - Page 300
PRINTER UTILITIES (WINDOWS) CHECKING THE PRINTER STATUS The Printer Status Monitor allows you to check whether or not toner and paper remain in the machine. 1 Right-click the [Printer Status Monitor] icon ( ) on the task bar, and select [SHARP AR-XXXX Status] from the pop-up menu. 2 Check the - Sharp AR M162 | AR-M162 | AR-M207 Operation Manual Suite - Page 301
kit (AR-PK1/N) must be installed and the machine must be connected to a network. To install the PPD file and configure the printer driver settings, see "2. INSTALLING THE SOFTWARE (FOR OPTIONS)" in the "Software setup guide". Before printing, make sure that the correct size of paper for your - Sharp AR M162 | AR-M162 | AR-M207 Operation Manual Suite - Page 302
Features] menu of the Print Window. Note The settings vary depending on the operating system version, the printer driver version, and the application. 6 Click the [Print] button . Printing begins. IF THE TRAY RUNS OUT OF PAPER DURING PRINTING Add paper to the tray that ran out or to the bypass - Sharp AR M162 | AR-M162 | AR-M207 Operation Manual Suite - Page 303
select [On] in "Account Number" in [Job Control] in the Print window, and enter your 5-digit account number in the box at right. Account numbers are programmed in the key operator programs. (See the "Key operator's guide".) Caution • When auditing mode is enabled, a print job may not be printed - Sharp AR M162 | AR-M162 | AR-M207 Operation Manual Suite - Page 304
. In the user Web pages, users can monitor the machine, directly print a file specified on a computer, and select printer configuration settings. In the administrator Web pages, the administrator can configure the machine's e-mail settings, settings for print by e-mail, and passwords. Only the - Sharp AR M162 | AR-M162 | AR-M207 Operation Manual Suite - Page 305
and key operator settings, and various font lists can be printed. (5) Condition Settings Configure basic printer settings and printer language settings. ☞PRINTER DEFAULT SETTINGS (page 23) (6) Admin Mode To open the Web pages for the administrator, click here and then enter the administrator's user - Sharp AR M162 | AR-M162 | AR-M207 Operation Manual Suite - Page 306
be directly printed without using the printer driver by specifying the file's address. paper, select this checkbox. (Only for models that support the two-sided printing.) Account Number When "AUDITING MODE" is enabled in the key operator programs, enter your 5-digit account number. Factory default - Sharp AR M162 | AR-M162 | AR-M207 Operation Manual Suite - Page 307
settings in the above screens. If a setting is available in the printer driver, use the printer driver to configure the setting. Configuring the printer condition settings 1 Click [Condition Settings] in the menu frame. The "Default Settings" screen of the [Condition Settings] appears. If you wish - Sharp AR M162 | AR-M162 | AR-M207 Operation Manual Suite - Page 308
Default Paper Source Auto, Tray 1, Tray 2*, Tray 3*, Tray 4*, Bypass (Manual paper is not in any of the trays, the printed image is formed in accordance with this setting. *Factory default setting is A4 in some regions. Set the default paper (Only for models that support two-sided printing.) This - Sharp AR M162 | AR-M162 | AR-M207 Operation Manual Suite - Page 309
password can be established for the administrator and one password can be established for users. ☞PROTECTING INFORMATION PROGRAMMED IN THE WEB PAGE ([PASSWORDS]) (page 26) (3) Key Operator kit" (page 37) (7) Services Configure information concerning the e-mail system. ☞SMTP setup (page 29) (8) Print - Sharp AR M162 | AR-M162 | AR-M207 Operation Manual Suite - Page 310
are case sensitive). • Be sure to enter the same password in "Confirm Password" as you did in "New Password". 2 Enter the current password in "Admin Password". When establishing a password for the first time, enter "Sharp" in "Admin Password". Be sure to enter "S" in upper case Caution and - Sharp AR M162 | AR-M162 | AR-M207 Operation Manual Suite - Page 311
a file from a computer that does not have the printer driver installed, as the user can simply send the file to the machine as an Setup" page appears. 3 Enter the information regarding the e-mail environment. For detailed information, Click [Help] in the upper right-hand corner of the window - Sharp AR M162 | AR-M162 | AR-M207 Operation Manual Suite - Page 312
in the key operator programs 1 Click [Key operator programs] in the menu frame. The "Default Settings" screen of the [Key operator programs] Select the printer language. When [Auto] is selected, the language is automatically selected from the data sent to the printer. Unless errors occur frequently - Sharp AR M162 | AR-M162 | AR-M207 Operation Manual Suite - Page 313
send information on machine use (print count, copy count, etc.) and error conditions (paper misfeed, out of paper, out of toner, etc.) via e-mail to the administrator of the machine or the dealer. Information setup Machine identification information for the status and alert e-mail functions is - Sharp AR M162 | AR-M162 | AR-M207 Operation Manual Suite - Page 314
] in the menu frame. The "Status Message Setup" screen will appear. Alerts message setup Use the alert message function to send alert information, such as empty toner and paper and trouble including paper misfeeds, to specified destinations when such problems occur. The destinations can be set for - Sharp AR M162 | AR-M162 | AR-M207 Operation Manual Suite - Page 315
the "Key operator's guide". For the initial key operator code set at the factory, see "PROGRAMMING A KEY OPERATOR CODE" in the "Key operator's guide". KEY OPERATOR PROGRAM LIST The key operator programs for the network and printer functions are shown in the following table. Factory default settings - Sharp AR M162 | AR-M162 | AR-M207 Operation Manual Suite - Page 316
key operator code entry screen will appear. KEY OPERATOR CODE: ----- 4 Use the numeric keys to enter the key operator code. OK ABC DEF GHI JKL MNO PQRS TUV WXYZ FUNCTION @.-_ ACC. #-C READ-END MODE SELECT KEY OP. # CHANGE COPIER PRINTER SCANNER • " " will appear for each digit entered - Sharp AR M162 | AR-M162 | AR-M207 Operation Manual Suite - Page 317
KEY OPERATOR PROGRAMS SPECIAL SETTINGS IP address settings This program is used to set the "IP ADDRESS", "SUBNETMASK", and "DEFAULT GATEWAY". The following screen appears when this program is selected. IP ADDRESS SETTINGS IP ADDRESS 0 0 0 0 1 Enter the IP address, subnet mask, and default gateway. - Sharp AR M162 | AR-M162 | AR-M207 Operation Manual Suite - Page 318
TROUBLESHOOTING This chapter explains what to do when the machine does not connect to the network or when problems occur during printing. For problems related to the machine such as running out of paper or paper misfeeds, see the "Operation manual (for general information and copier - Sharp AR M162 | AR-M162 | AR-M207 Operation Manual Suite - Page 319
Printing is not possible if the printer driver port setting is not correct. Set the port correctly. Software setup guide "CANCEL JOBS OF INVALID ACCOUNTS" is enabled. → Enter a correct account number in the printer driver before printing (consult your key operator). 5, 19 The printed page limit - Sharp AR M162 | AR-M162 | AR-M207 Operation Manual Suite - Page 320
TROUBLESHOOTING Problem The printed image is skewed or it runs off the paper. Cause and solution The paper size set in the printer driver is not the same as the paper size loaded in the tray. → Make sure that the paper size setting matches the size of the paper loaded in the tray. If the [Fit to - Sharp AR M162 | AR-M162 | AR-M207 Operation Manual Suite - Page 321
while holding down the status button on the network expansion kit. Network scanner destination information and scanning settings will remain after the network expansion kit is reset, however, the network settings and network printer settings will revert to the factory default settings. 6 37 - Sharp AR M162 | AR-M162 | AR-M207 Operation Manual Suite - Page 322
*2 300 dpi can only be selected when using the PCL6 or PCL5e printer driver. *3 For information on machine and dual function board memory, see the "Operation manual (for general information and copier)". *4 Available only if the PS3 expansion kit (AR-PK1/N) is installed. As a part of our policy of - Sharp AR M162 | AR-M162 | AR-M207 Operation Manual Suite - Page 323
PRINTER DRIVER SPECIFICATIONS Function PCL6 PCL5e PS Windows PPD Macintosh Short Side No Source Selection Paper size Custom Paper Size Yes 1 size Yes Image No No Yes Yes Yes Negative Image No No Yes Yes Yes Fonts Other functions Fit To Page Resident fonts Selectable download - Sharp AR M162 | AR-M162 | AR-M207 Operation Manual Suite - Page 324
AR-NB3 (for network printer) SHARP CORPORATION ARNB3-EN-PRINTER - Sharp AR M162 | AR-M162 | AR-M207 Operation Manual Suite - Page 325
SOFTWARE SETUP GUIDE DIGITAL MULTIFUNCTIONAL SYSTEM Page • INTRODUCTION 1 • CONTENTS 5 • INSTALLING THE SOFTWARE (THAT ACCOMPANIES THE MACHINE) 7 • INSTALLING THE SOFTWARE (FOR OPTIONS) 20 • TROUBLESHOOTING AND USEFUL INFORMATION 39 - Sharp AR M162 | AR-M162 | AR-M207 Operation Manual Suite - Page 326
windows that appear in this manual may vary depending on your computer type and settings. • In some regions the "Key operator's guide" cited in this manual is a separate manual, and in other regions the "Key operator's guide" is included in the "Operation manual (for general information and copier - Sharp AR M162 | AR-M162 | AR-M207 Operation Manual Suite - Page 327
the PCL5e and PCL6 printer drivers, and the PS printer driver, troubleshooting, and key operator programs for the printer and network functions. Using the network scanner function • Operation manual (for network scanner) This is an online manual that can be found in the "Software CD-ROM (1)" that - Sharp AR M162 | AR-M162 | AR-M207 Operation Manual Suite - Page 328
expansion kit (AR-NB3). For Windows ■ CD-ROM provided standard with the machine There are two CD-ROMs that are provided with the machine. "Software CD-ROM (1)" • MFP driver (Printer driver / Scanner driver) • Button Manager • Sharpdesk (Desktop Document Management Software) "Software CD-ROM - Sharp AR M162 | AR-M162 | AR-M207 Operation Manual Suite - Page 329
expansion kit • PCL5e and PCL6 drivers, and PS driver • Printer Status Monitor • Printer Administration Utility • NICManager • Macintosh PPD File 3. "Sharpdesk" CD-ROM • Sharpdesk (Desktop Document Management Software) • Network Scanner Tool • SHARP TWAIN AR/DM (TWAIN driver) • OmniPage Pro Trial - Sharp AR M162 | AR-M162 | AR-M207 Operation Manual Suite - Page 330
to install Sharpdesk, see the "Sharpdesk installation guide" that accompanies the machine. Sharpdesk (Desktop Document Management Software) Sharpdesk is used to manage images scanned from the machine and files created in various software programs. Network Scanner Tool This is a utility that helps - Sharp AR M162 | AR-M162 | AR-M207 Operation Manual Suite - Page 331
(FOR OPTIONS) INSTALLATION FOR A NETWORK CONNECTION 20 SETUP IN A WINDOWS ENVIRONMENT HARDWARE AND SOFTWARE REQUIREMENTS 21 SETTING THE IP ADDRESS OF THE MACHINE 21 INSTALLING THE SOFTWARE ...24 ● INSTALLING THE PRINTER DRIVER (STANDARD INSTALLATION 24 ● CUSTOM INSTALLATION...26 ● USING THE - Sharp AR M162 | AR-M162 | AR-M207 Operation Manual Suite - Page 332
.2 TO 10.3.4 ...35 ● MAC OS X v10.1.5...37 ● MAC OS 8.6 TO 9.2.2...38 3 TROUBLESHOOTING AND USEFUL INFORMATION TROUBLESHOOTING ...39 CONFIGURING THE PRINTER DRIVER 42 INSTALLING ACROBAT READER...42 CHECKING THE IP ADDRESS ...43 HARDWARE AND SOFTWARE REQUIREMENTS 43 CONNECTING TO A COMPUTER ...44 6 - Sharp AR M162 | AR-M162 | AR-M207 Operation Manual Suite - Page 333
AND USEABLE SOFTWARE The software that can be installed varies depending on your operating system version and type of connection to the machine. Windows 98/Me/2000/XP USB 2.0 connection*1 Windows 95/98/Me/NT 4.0/2000/XP Parallel connection MFP Driver Printer driver Scanner driver Available - Sharp AR M162 | AR-M162 | AR-M207 Operation Manual Suite - Page 334
Installer is preparing..." message appears, the software components below will be automatically installed. Follow the on-screen instructions. • MFP Driver • Button Manager • Sharpdesk Note If the language selection screen appears after you double click the [Setup] icon, select the language that - Sharp AR M162 | AR-M162 | AR-M207 Operation Manual Suite - Page 335
"Key operator's guide". • If you are using Windows 2000/XP If a warning message regarding the Windows logo test or digital signature appears, be sure to click the [Continue Anyway] or [Yes] button. Note If the dual function board is installed, the "AR-XXXX (EB)" printer driver and scanner driver - Sharp AR M162 | AR-M162 | AR-M207 Operation Manual Suite - Page 336
then click the [Yes] button. 6 Read the message in the "Welcome" window and then click the [Next] button. 8 If you wish to install the MFP driver, click the [MFP Driver (Printer/Scanner)] button. To view information on the software, click the [Display Readme] button. 9 Click the [Next] button. 10 - Sharp AR M162 | AR-M162 | AR-M207 Operation Manual Suite - Page 337
"Key operator's guide". 15 Installation of the scanner driver begins. (only when using a USB cable). "SHARP AR-XXXX" will appear in the "Found New Hardware Wizard" dialog box. Select [Install the software automatically (Recommended)], click the [Next] button, and follow the on-screen instructions - Sharp AR M162 | AR-M162 | AR-M207 Operation Manual Suite - Page 338
, click the [MFP Driver (Printer/Scanner)] button. To view information on the software, click the [Display Readme] button. When the interface selection screen appears, select [USB]. 6 Click the [Next] button. 12 Caution If you are using Windows 2000 If you are using Windows 2000 and a warning - Sharp AR M162 | AR-M162 | AR-M207 Operation Manual Suite - Page 339
. Follow the on-screen instructions. Caution If you are using Windows 2000 If a warning message regarding the digital signature appears, be sure to click the [Yes] button. Note If the dual function board is installed, the "AR-XXXX (EB)" printer driver and scanner driver will be installed. This - Sharp AR M162 | AR-M162 | AR-M207 Operation Manual Suite - Page 340
the MFP driver, click the [MFP Driver (Printer/Scanner)] button. To view information on the software, click the [Display Readme] button. 7 Installation of the MFP driver (printer driver) begins (if "MFP Driver" was selected in Step 5). Follow the on-screen instructions. If you are using Windows 95 - Sharp AR M162 | AR-M162 | AR-M207 Operation Manual Suite - Page 341
information on the software, click the [Display Readme] button. • Follow the on-screen instructions. Note • In Windows 95/NT 4.0, the [Button Manager] button does not appear. • In Windows 98/Me/2000, do not select the [Button Manager] button (Button Manager is not supported when a parallel cable - Sharp AR M162 | AR-M162 | AR-M207 Operation Manual Suite - Page 342
METHOD 2". 4 Click the [MFP Driver (Printer/Scanner)] button. To view information on the software, click the [Display Readme] button. 6 The files required for installation of the MFP driver are copied (if "MFP Driver" was selected in Step 4). Follow the on-screen instructions. When you are asked - Sharp AR M162 | AR-M162 | AR-M207 Operation Manual Suite - Page 343
, select model name of your machine and click the [Next] button. Follow the on-screen instructions. Caution If you are using Windows 2000/XP. If a warning message regarding the Windows logo test or digital signature appears, be sure to click the [Continue Anyway] or [Yes] button. 11 Click the - Sharp AR M162 | AR-M162 | AR-M207 Operation Manual Suite - Page 344
setting window of Button Manager. • For the default settings for destinations SC1 to SC6 and the procedures for configuring Button Manager settings, see "Scanning from the Operation Panel of the Machine" and "Button Manager Settings" in "Operation Manual (for printer and scanner)" in the "Software - Sharp AR M162 | AR-M162 | AR-M207 Operation Manual Suite - Page 345
setting window of Button Manager. • For the default settings for destinations SC1 to SC6 and the procedures for configuring Button Manager settings, see "Scanning from the Operation Panel of the Machine" and "Button Manager Settings" in "Operation Manual (for printer and scanner)" in the "Software - Sharp AR M162 | AR-M162 | AR-M207 Operation Manual Suite - Page 346
client type network, see "Operation Manual (for printer and scanner)" on the "Software CD-ROM (1)" that accompanies the machine. Computer running Windows Computer running Windows For the procedure for installing the printer driver, see "USING THE MACHINE AS A SHARED PRINTER VIA A SERVER" (pages 28 - Sharp AR M162 | AR-M162 | AR-M207 Operation Manual Suite - Page 347
SETUP IN A WINDOWS ENVIRONMENT HARDWARE AND SOFTWARE REQUIREMENTS Before installing the software, see "HARDWARE AND SOFTWARE REQUIREMENTS" on page 43 to make sure your computer meets the hardware and software requirements. SETTING THE IP ADDRESS OF THE MACHINE Before installing the printer driver, - Sharp AR M162 | AR-M162 | AR-M207 Operation Manual Suite - Page 348
then click the [Print Server Card Setup] button. 15 Enter your password in the password entry screen and click the [OK] button. • The Print Server Card Setup window will appear. • The password for the machine has been initially set to "Sharp". • If the [Guest user] checkbox is selected, the settings - Sharp AR M162 | AR-M162 | AR-M207 Operation Manual Suite - Page 349
17 Configure the settings and then click the [Update] button. SETUP IN A WINDOWS ENVIRONMENT Be sure to ask your network administrator for the correct IP address, subnet mask, and default gateway to be entered. 18 Your changes to the settings appear. 2 Make sure that the changes are correct - Sharp AR M162 | AR-M162 | AR-M207 Operation Manual Suite - Page 350
double-click the [CD-ROM] icon ( ). In Windows 95/98/Me/NT 4.0/2000, double-click [My Computer] and then double-click the [CD-ROM] icon. 3 Double-click the [Setup] icon ( ). 6 Click the [Printer Driver] button. To view information on the software, click the [Display Readme] button. Note If the - Sharp AR M162 | AR-M162 | AR-M207 Operation Manual Suite - Page 351
. Installation of the printer driver begins. Caution If you are using Windows 2000/XP/Server 2003 If a warning message regarding the Windows logo test or digital signature appears, be sure to click the [Continue Anyway] or [Yes] button. 14 When "The installation of the SHARP software is complete - Sharp AR M162 | AR-M162 | AR-M207 Operation Manual Suite - Page 352
SETUP IN A WINDOWS ENVIRONMENT CUSTOM INSTALLATION If you wish to install the display font or specify the machine's IP address by direct entry when installing the printer driver, select [Custom installation]. 1 Insert the network expansion kit "Software CD-ROM (1)" into your computer's CD-ROM - Sharp AR M162 | AR-M162 | AR-M207 Operation Manual Suite - Page 353
. Installation of the printer driver begins. Caution If you are using Windows 2000/XP/Server 2003 If a warning message regarding the Windows logo test or digital signature appears, be sure to click the [Continue Anyway] or [Yes] button. 17 When "The installation of the SHARP software is complete - Sharp AR M162 | AR-M162 | AR-M207 Operation Manual Suite - Page 354
double-click the [CD-ROM] icon ( ). In Windows 95/98/Me/NT 4.0/2000, double-click [My Computer] and then double-click the [CD-ROM] icon. 3 Double-click the [Setup] icon ( ). 6 Click the [Printer Driver] button. To view information on the software, click the [Display Readme] button. Note If the - Sharp AR M162 | AR-M162 | AR-M207 Operation Manual Suite - Page 355
the printer to be shared (the machine) by browsing the network in the window that appears. 13 Follow the on-screen instructions. Note PRINTER DRIVER" (page 42) to check the printer driver settings. Note If you installed the PS printer driver, the PS display font can be installed from the "PRINTER - Sharp AR M162 | AR-M162 | AR-M207 Operation Manual Suite - Page 356
SETUP IN A WINDOWS ENVIRONMENT INSTALLING THE PS DISPLAY FONTS The fonts used by the PS printer driver are contained in the "PRINTER UTILITIES" CD-ROM that accompanied the PS3 expansion kit (AR-PK1/N). Install these fonts as needed for the PS printer driver. 1 Insert the PS3 expansion kit (AR-PK1 - Sharp AR M162 | AR-M162 | AR-M207 Operation Manual Suite - Page 357
screen instructions. When you are asked to specify the path of the PPD file, enter the path as follows. (Substitute the letter of your CD-ROM drive for "R" in the following paths.) Operating system PPD file path Windows 95/98/Me R:\Drivers\Printer \EnglishA*\PPD\9XME Windows NT 4.0 R:\Drivers - Sharp AR M162 | AR-M162 | AR-M207 Operation Manual Suite - Page 358
SETUP IN A MACINTOSH ENVIRONMENT HARDWARE AND SOFTWARE REQUIREMENTS Before installing the PPD file for Macintosh, see "HARDWARE AND SOFTWARE REQUIREMENTS" on page 43 to make sure your computer meets the hardware and software requirements. Operating system Mac OS 8.6 to 9.2.2, 10.1.5 and 10.2 to - Sharp AR M162 | AR-M162 | AR-M207 Operation Manual Suite - Page 359
in which your operating system is installed. 9 Click the [Install] button. Installation of the PPD file begins. Note If you are using Mac OS X v10.3 to 10.3.4 , the "Authenticate" window will appear. Enter the password and click the [OK] button. 10 When the message "The software was successfully - Sharp AR M162 | AR-M162 | AR-M207 Operation Manual Suite - Page 360
SETUP IN A MACINTOSH ENVIRONMENT INSTALLATION IN MAC OS 8.6 TO 9.2.2 1 Insert the network expansion kit "Software CD-ROM (1)" into your computer's CD-ROM drive. 2 Double-click the [CD-ROM] icon ( ) on the desktop the window that PRINTER UTILITIES" CD-ROM that accompanies the PS3 expansion kit (AR - Sharp AR M162 | AR-M162 | AR-M207 Operation Manual Suite - Page 361
click the [Printer Setup Utility] icon. • The "Printer List" window appears. Note If this is the first time you are installing a printer driver on your varies depending on your machine). 8 Select [Sharp] in the [Printer Model] menu. The PPD file selection window appears. 9 Select the PPD file for - Sharp AR M162 | AR-M162 | AR-M207 Operation Manual Suite - Page 362
SETUP IN A MACINTOSH ENVIRONMENT 10 Click the [Add] button. The machine is added to the list of printers. 11 Click the name of the machine in the "Printer List" window, and select [Show Info] from the [Printers] menu. The "Printer info" window will appear. 12 Select [Installable Options] from the - Sharp AR M162 | AR-M162 | AR-M207 Operation Manual Suite - Page 363
the [Go] menu. SETUP IN A MACINTOSH ENVIRONMENT 7 Click the machine's model name in the list. 3 Double-click the [Utilities] folder. 4 Double-click the [Print Center] icon ( ). The "Printer List" window appears. Note If this is the first time you are installing a printer driver on your computer - Sharp AR M162 | AR-M162 | AR-M207 Operation Manual Suite - Page 364
manually when you return to the "Chooser" dialog box. (1) Verify that the machine is selected in the "Select a PostScript Printer" list, and then click the [Setup Select a PostScript Printer" list, and then click the [Setup] button and the [Configure] button. 6 Configure the printer driver based on - Sharp AR M162 | AR-M162 | AR-M207 Operation Manual Suite - Page 365
. Troubleshooting information can also be found in the README files for each of the software programs. To view a README file for a software program, click the [Display Readme] button in the software selection window that appears during installation. Removing the software To remove a printer driver - Sharp AR M162 | AR-M162 | AR-M207 Operation Manual Suite - Page 366
Panel], and then click [Performance and Maintenance]. In Windows 98/Me/2000, click the [Start] button, select manual for USB troubleshooting or contact your computer manufacturer. 4 Once you have verified that the USB port is enabled, see "INSTALLING THE SOFTWARE" (page 7) to install the MFP driver - Sharp AR M162 | AR-M162 | AR-M207 Operation Manual Suite - Page 367
click the [OK] button. If "AR-XXXX Scanner" and "SHARP AR-XXXX" appear, select and delete both these items. If "Other devices" does not appear, close Note the "Device Manager" window. 4 To install the MFP driver, see "INSTALLING THE SOFTWARE" (page 7). 5 Click the [SHARP AR-XXXX] icon and select - Sharp AR M162 | AR-M162 | AR-M207 Operation Manual Suite - Page 368
2 Click the "SHARP AR-XXXX" printer driver icon and select [Set as Default Printer]. 3 Click the [SHARP AR-XXXX] printer driver icon and select [Properties] from the [File] menu. If you are using Windows NT 4.0/2000/XP/Server 2003, go to step 5. 4 In Windows 95/98/Me, click the [Setup] tab. 5 Click - Sharp AR M162 | AR-M162 | AR-M207 Operation Manual Suite - Page 369
, click the "Display Readme" button in the Software Selection window of the installer. *3 USB is not supported. *4 Administrator's rights are required to install the software. *5 The MFP driver, Button Manager, and other software on the "Software CD-ROM (1)" that is provided standard with the - Sharp AR M162 | AR-M162 | AR-M207 Operation Manual Suite - Page 370
programs must be set to "Hi-Speed". For more information, see the "Key operator's guide". • Use the machine's "Hi-Speed" mode only when using a computer that is running Windows 2000/XP/Server 2003. • Even when the Microsoft USB 2.0 driver is used, it may not be possible to obtain full USB 2.0 speed - Sharp AR M162 | AR-M162 | AR-M207 Operation Manual Suite - Page 371
- Sharp AR M162 | AR-M162 | AR-M207 Operation Manual Suite - Page 372
SOFTWARE SETUP GUIDE SHARP CORPORATION This manual has been printed using a vegetable-based soy oil ink to help protect the environment. Printed on 100% post-consumer recycled paper PRINTED IN JAPAN 2004L DSC1 TINSE1339QSZZ
-
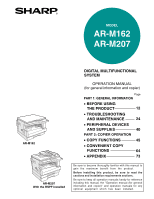 1
1 -
 2
2 -
 3
3 -
 4
4 -
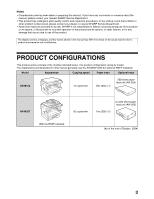 5
5 -
 6
6 -
 7
7 -
8
-
9
-
10
-
11
-
12
-
13
-
14
-
15
-
16
-
17
-
18
-
19
-
20
-
21
-
22
-
23
-
24
-
25
-
26
-
27
-
28
-
29
-
30
-
31
-
32
-
33
-
34
-
35
-
36
-
37
-
38
-
39
-
40
-
41
-
42
-
43
-
44
-
45
-
46
-
47
-
48
-
49
-
50
-
51
-
52
-
53
-
54
-
55
-
56
-
57
-
58
-
59
-
60
-
61
-
62
-
63
-
64
-
65
-
66
-
67
-
68
-
69
-
70
-
71
-
72
-
73
-
74
-
75
-
76
-
77
-
78
-
79
-
80
-
81
-
82
-
83
-
84
-
85
-
86
-
87
-
88
-
89
-
90
-
91
-
92
-
93
-
94
-
95
-
96
-
97
-
98
-
99
-
100
-
101
-
102
-
103
-
104
-
105
-
106
-
107
-
108
-
109
-
110
-
111
-
112
-
113
-
114
-
115
-
116
-
117
-
118
-
119
-
120
-
121
-
122
-
123
-
124
-
125
-
126
-
127
-
128
-
129
-
130
-
131
-
132
-
133
-
134
-
135
-
136
-
137
-
138
-
139
-
140
-
141
-
142
-
143
-
144
-
145
-
146
-
147
-
148
-
149
-
150
-
151
-
152
-
153
-
154
-
155
-
156
-
157
-
158
-
159
-
160
-
161
-
162
-
163
-
164
-
165
-
166
-
167
-
168
-
169
-
170
-
171
-
172
-
173
-
174
-
175
-
176
-
177
-
178
-
179
-
180
-
181
-
182
-
183
-
184
-
185
-
186
-
187
-
188
-
189
-
190
-
191
-
192
-
193
-
194
-
195
-
196
-
197
-
198
-
199
-
200
-
201
-
202
-
203
-
204
-
205
-
206
-
207
-
208
-
209
-
210
-
211
-
212
-
213
-
214
-
215
-
216
-
217
-
218
-
219
-
220
-
221
-
222
-
223
-
224
-
225
-
226
-
227
-
228
-
229
-
230
-
231
-
232
-
233
-
234
-
235
-
236
-
237
-
238
-
239
-
240
-
241
-
242
-
243
-
244
-
245
-
246
-
247
-
248
-
249
-
250
-
251
-
252
-
253
-
254
-
255
-
256
-
257
-
258
-
259
-
260
-
261
-
262
-
263
-
264
-
265
-
266
-
267
-
268
-
269
-
270
-
271
-
272
-
273
-
274
-
275
-
276
-
277
-
278
-
279
-
280
-
281
-
282
-
283
-
284
-
285
-
286
-
287
-
288
-
289
-
290
-
291
-
292
-
293
-
294
-
295
-
296
-
297
-
298
-
299
-
300
-
301
-
302
-
303
-
304
-
305
-
306
-
307
-
308
-
309
-
310
-
311
-
312
-
313
-
314
-
315
-
316
-
317
-
318
-
319
-
320
-
321
-
322
-
323
-
324
-
325
-
326
-
327
-
328
-
329
-
330
-
331
-
332
-
333
-
334
-
335
-
336
-
337
-
338
-
339
-
340
-
341
-
342
-
343
-
344
-
345
-
346
-
347
-
348
-
349
-
350
-
351
-
352
-
353
-
354
-
355
-
356
-
357
-
358
-
359
-
360
-
361
-
362
-
363
-
364
-
365
-
366
-
367
-
368
-
369
-
370
-
371
-
372
 |
 |
Be sure to become thoroughly familiar with this manual to
gain the maximum benefit from the product.
Before installing this product, be sure to read the
cautions and installation requirements sections.
Be sure to keep all operation manuals handy for reference
including this manual, the "Operation manual (for general
information and copier)" and operation manuals for any
optional equipment which has been installed.
MODEL
AR-M162
AR-M207
DIGITAL MULTIFUNCTIONAL
SYSTEM
OPERATION MANUAL
(for general information and copier)
PART 1: GENERAL INFORMATION
•
BEFORE USING
THE PRODUCT
•
TROUBLESHOOTING
AND MAINTENANCE
•
PERIPHERAL DEVICES
AND SUPPLIES
PART 2: COPIER OPERATION
•
COPY FUNCTIONS
•
CONVENIENT COPY
FUNCTIONS
•
APPENDIX
12
24
40
45
64
73
Page
AR-M162
AR-M207
With the RSPF installed