Sharp AR M162 AR-M162 AR-M207 Operation Manual Suite - Page 233
Of Rings At. Rx, Tray Selection, Received Data Print Condition, Auto Rcv Reduce To Regular Size
 |
View all Sharp AR M162 manuals
Add to My Manuals
Save this manual to your list of manuals |
Page 233 highlights
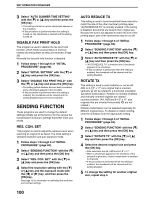
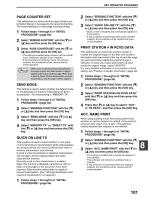
KEY OPERATOR PROGRAMS #OF RINGS AT. RX When the reception mode is set to auto, this program is used to select the number of rings on which the machine automatically receives a call and begins fax reception. (See "RECEIVING A FAX" on page 28.) Any number of rings from 0 to 9 can be selected. Normally "2" is selected. 1 Follow steps 1 through 6 of "INITIAL PROCEDURE" (page 94). 2 Select "RCV. FUNCTION" with the [ ] or [ ] key and then press the [OK] key. 3 Select "#OF RINGS AT. RX" with the [ ] or [ ] key and then press the [OK] key. 4 Enter the number of rings (0 to 9) with the numeric keys and then press the [OK] key. The number of rings can be set to any number from 0 to 9. If the number of rings is set to 0, the Note machine will receive faxes without ringing. TRAY SELECTION This setting is used to select which output trays can be used for received faxes. All output trays are initially enabled. 1 Follow steps 1 through 6 of "INITIAL PROCEDURE" (page 94). 2 Select "RCV. FUNCTION" with the [ ] or [ ] key and then press the [OK] key. 3 Select "TRAY SELECTION" with the [ ] or [ ] key and then press the [OK] key. 4 Select the tray that you wish to enable with the [ ] or [ ] key and then press the [OK] key. • The selected tray is enabled and a checkmark appears in the checkbox. • If this procedure is performed when the tray is enabled, the checkmark will be cleared and the tray disabled. 5 To enable another tray, repeat step 4. To exit, press the [BACK] key. Note • The trays that can be enabled will vary depending on the options that are installed. • The trays cannot all be disabled. RECEIVED DATA PRINT CONDITION This setting determines the selection condition for paper when printing received documents. Select either of the two conditions below. "REDUCTION" is normally selected. • "REDUCTION" Each received image is printed at actual size when possible. When not possible, the image is automatically reduced before printing. • "DIVISION" Each received image is printed at actual size. If necessary, the image is split onto multiple sheets of paper. 1 Follow steps 1 through 6 of "INITIAL PROCEDURE" (page 94). 2 Select "RCV. FUNCTION" with the [ ] or [ ] key and then press the [OK] key. 3 Select "RECEIVED DATA PRINT CONDITION" with the [ ] or [ ] key and then press the [OK] key. 4 Select "REDUCTION" or "DIVISION" with the [ ] or [ ] key and then press the [OK] key. AUTO RCV REDUCE TO REGULAR SIZE When you receive a fax that includes the sender's name and number, the received image is slightly larger than the standard size*. This setting lets you select whether or not the received image is automatically reduced before printing to fit the standard size. Normally this setting is enabled. * Standard sizes are sizes such as A4 and B5. 1 Follow steps 1 through 6 of "INITIAL PROCEDURE" (page 94). 2 Select "RCV. FUNCTION" with the [ ] or [ ] key and then press the [OK] key. 3 Select "AUTO RCV REDUCE TO REGULAR SIZE" with the [ ] or [ ] key and then press the [OK] key. • The setting is enabled and a checkmark appears in the checkbox. • If this procedure is performed when the setting is enabled, the checkmark will be cleared and the setting disabled. Note • If this setting is disabled (no reduction) and the received data print condition is set to division, the image may be clipped. • If auto receive reduce is disabled, an image larger than the standard size will be cut off. However, the image will be clearer because it will be printed at the same size as the original. 104
-
 1
1 -
2
-
3
-
4
-
5
-
6
-
7
-
8
-
9
-
10
-
11
-
12
-
13
-
14
-
15
-
16
-
17
-
18
-
19
-
20
-
21
-
22
-
23
-
24
-
25
-
26
-
27
-
28
-
29
-
30
-
31
-
32
-
33
-
34
-
35
-
36
-
37
-
38
-
39
-
40
-
41
-
42
-
43
-
44
-
45
-
46
-
47
-
48
-
49
-
50
-
51
-
52
-
53
-
54
-
55
-
56
-
57
-
58
-
59
-
60
-
61
-
62
-
63
-
64
-
65
-
66
-
67
-
68
-
69
-
70
-
71
-
72
-
73
-
74
-
75
-
76
-
77
-
78
-
79
-
80
-
81
-
82
-
83
-
84
-
85
-
86
-
87
-
88
-
89
-
90
-
91
-
92
-
93
-
94
-
95
-
96
-
97
-
98
-
99
-
100
-
101
-
102
-
103
-
104
-
105
-
106
-
107
-
108
-
109
-
110
-
111
-
112
-
113
-
114
-
115
-
116
-
117
-
118
-
119
-
120
-
121
-
122
-
123
-
124
-
125
-
126
-
127
-
128
-
129
-
130
-
131
-
132
-
133
-
134
-
135
-
136
-
137
-
138
-
139
-
140
-
141
-
142
-
143
-
144
-
145
-
146
-
147
-
148
-
149
-
150
-
151
-
152
-
153
-
154
-
155
-
156
-
157
-
158
-
159
-
160
-
161
-
162
-
163
-
164
-
165
-
166
-
167
-
168
-
169
-
170
-
171
-
172
-
173
-
174
-
175
-
176
-
177
-
178
-
179
-
180
-
181
-
182
-
183
-
184
-
185
-
186
-
187
-
188
-
189
-
190
-
191
-
192
-
193
-
194
-
195
-
196
-
197
-
198
-
199
-
200
-
201
-
202
-
203
-
204
-
205
-
206
-
207
-
208
-
209
-
210
-
211
-
212
-
213
-
214
-
215
-
216
-
217
-
218
-
219
-
220
-
221
-
222
-
223
-
224
-
225
-
226
-
227
-
 228
228 -
 229
229 -
 230
230 -
 231
231 -
 232
232 -
 233
233 -
 234
234 -
 235
235 -
 236
236 -
 237
237 -
 238
238 -
239
-
240
-
241
-
242
-
243
-
244
-
245
-
246
-
247
-
248
-
249
-
250
-
251
-
252
-
253
-
254
-
255
-
256
-
257
-
258
-
259
-
260
-
261
-
262
-
263
-
264
-
265
-
266
-
267
-
268
-
269
-
270
-
271
-
272
-
273
-
274
-
275
-
276
-
277
-
278
-
279
-
280
-
281
-
282
-
283
-
284
-
285
-
286
-
287
-
288
-
289
-
290
-
291
-
292
-
293
-
294
-
295
-
296
-
297
-
298
-
299
-
300
-
301
-
302
-
303
-
304
-
305
-
306
-
307
-
308
-
309
-
310
-
311
-
312
-
313
-
314
-
315
-
316
-
317
-
318
-
319
-
320
-
321
-
322
-
323
-
324
-
325
-
326
-
327
-
328
-
329
-
330
-
331
-
332
-
333
-
334
-
335
-
336
-
337
-
338
-
339
-
340
-
341
-
342
-
343
-
344
-
345
-
346
-
347
-
348
-
349
-
350
-
351
-
352
-
353
-
354
-
355
-
356
-
357
-
358
-
359
-
360
-
361
-
362
-
363
-
364
-
365
-
366
-
367
-
368
-
369
-
370
-
371
-
372
 |
 |
