Xerox 3635MFP Systems Administrator Guide - Page 27
Con Dynamic IPv4 Addressing using the Machine User Interface, Information Checklist - drivers
 |
UPC - 095205741049
View all Xerox 3635MFP manuals
Add to My Manuals
Save this manual to your list of manuals |
Page 27 highlights
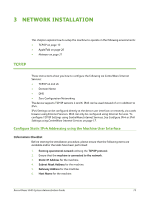
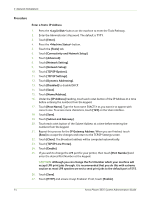
TCP/IP 28. Touch [Save]. DNS/DDNS Configuration 29. Touch [TCP/IP Settings]. 30. Touch [DNS Configuration]. This feature will be inaccessible (greyed out) if TCP/IP protocol is not enabled. 31. Touch the [Domain Name] keyboard button. 32. Touch the [Clear Text] button to remove the default name before entering the new name. 33. Touch [Save]. 34. Touch [Close]. 35. Touch [Preferred DNS Server]. 36. Touch each octet button of the DNS Server IP Address at a time before entering the numbers from the keypad. 37. Touch [Alternate DNS Servers] (if required). 38. Touch each octet button of the DNS Server IP Address(es) at a time before entering the numbers from the keypad. NOTE: If DHCP is enabled, the Alternate DNS server information is not available as a feature summary. 39. Touch [Save]. Enable Dynamic DNS Registration NOTE: If your DNS server does not support dynamic updates, then this function does not need to be enabled. 40. Touch [Dynamic DNS Registration]. 41. Click on [Enable], then [Save]. 42. Touch [Close]. 43. Follow the steps in Chapter 4, LPR Printing, Install Printer Driver on page 37. Configure Dynamic IPv4 Addressing using the Machine User Interface Information Checklist Before starting the installation procedure, please ensure that the following items are available and/or the tasks have been performed: 1. Existing operational network utilising the TCP/IP protocol. 2. DHCP or BOOTP Server should be available on the network. 3. Machine should be connected to the network via Ethernet Cable. Xerox Phaser 3635 System Administration Guide 15
-
 1
1 -
2
-
3
-
4
-
5
-
6
-
7
-
8
-
9
-
10
-
11
-
12
-
13
-
14
-
15
-
16
-
17
-
18
-
19
-
20
-
21
-
 22
22 -
 23
23 -
 24
24 -
 25
25 -
 26
26 -
 27
27 -
 28
28 -
 29
29 -
 30
30 -
 31
31 -
 32
32 -
33
-
34
-
35
-
36
-
37
-
38
-
39
-
40
-
41
-
42
-
43
-
44
-
45
-
46
-
47
-
48
-
49
-
50
-
51
-
52
-
53
-
54
-
55
-
56
-
57
-
58
-
59
-
60
-
61
-
62
-
63
-
64
-
65
-
66
-
67
-
68
-
69
-
70
-
71
-
72
-
73
-
74
-
75
-
76
-
77
-
78
-
79
-
80
-
81
-
82
-
83
-
84
-
85
-
86
-
87
-
88
-
89
-
90
-
91
-
92
-
93
-
94
-
95
-
96
-
97
-
98
-
99
-
100
-
101
-
102
-
103
-
104
-
105
-
106
-
107
-
108
-
109
-
110
-
111
-
112
-
113
-
114
-
115
-
116
-
117
-
118
-
119
-
120
-
121
-
122
-
123
-
124
-
125
-
126
-
127
-
128
-
129
-
130
-
131
-
132
-
133
-
134
-
135
-
136
-
137
-
138
-
139
-
140
-
141
-
142
-
143
-
144
-
145
-
146
-
147
-
148
-
149
-
150
-
151
-
152
-
153
-
154
-
155
-
156
-
157
-
158
-
159
-
160
-
161
-
162
-
163
-
164
-
165
-
166
-
167
-
168
-
169
-
170
-
171
-
172
-
173
-
174
-
175
-
176
-
177
-
178
-
179
-
180
-
181
-
182
-
183
-
184
-
185
-
186
-
187
-
188
-
189
-
190
-
191
-
192
-
193
-
194
-
195
-
196
-
197
-
198
-
199
-
200
-
201
-
202
-
203
-
204
-
205
-
206
-
207
-
208
-
209
-
210
-
211
-
212
 |
 |