Xerox 3635MFP Systems Administrator Guide - Page 52
Raw TCP/IP Printing (Port 9100), Raw TCP/IP Printing] - windows 7 drivers
 |
UPC - 095205741049
View all Xerox 3635MFP manuals
Add to My Manuals
Save this manual to your list of manuals |
Page 52 highlights
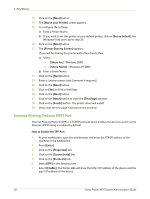
4 Print Drivers 13. Click on the [OK] button to install the printer driver. 14. Click on the [Have Disk] button and browse to the location of the printer driver and click on the [OK] button. 15. Select the Printer Model and Click on the [OK] button. 16. Click on [Yes] if you wish to make this the default printer. 17. Click on the [Next] button. 18. Click on the [Finish] button. Raw TCP/IP Printing (Port 9100) Raw TCP/IP is a printing protocol that is similar to LPR printing. Also known as a direct TCP/IP connection or sockets interface, it sends information directly to the machine and does not require a Line Printer Daemon (LPD). The advantages are that connections stay open for multiple print files and spooling is not needed, therefore, printing is faster and more reliable than LPD printing. Raw TCP/IP printing is contained in Windows 2000 and other third-party applications and operating systems. Raw TCP/IP Printing is enabled by default for port 9100. Information Checklist See Chapter 3, Configure Static IPv4 Addressing using the Machine User Interface, Information Checklist on page 13. How to Configure Port 9100 1. At your workstation, open the Web browser and enter the TCP/IP address of the machine in the Address bar. 2. Press [Enter]. 3. Click on the [Properties] tab. 4. Click on the [Connectivity] link. 5. Click on the [Protocols] link. 6. Select [Raw TCP/IP Printing] in the directory tree. 7. Click the [Enabled] checkbox to enable the Protocol. 8. Enter the required port number (1 - 65535). 9. Click on [Apply] to accept the changes or [Undo] to return the settings to their previous values. NOTE: The settings are not applied until you restart the machine. 10. Click on the [Status] tab. 11. Click on the [Reboot Machine] button and click on [OK] to reboot machine. The network controller takes approximately 60 seconds to reboot and network connectivity will be unavailable during this time. 40 Xerox Phaser 3635 System Administration Guide
-
 1
1 -
2
-
3
-
4
-
5
-
6
-
7
-
8
-
9
-
10
-
11
-
12
-
13
-
14
-
15
-
16
-
17
-
18
-
19
-
20
-
21
-
22
-
23
-
24
-
25
-
26
-
27
-
28
-
29
-
30
-
31
-
32
-
33
-
34
-
35
-
36
-
37
-
38
-
39
-
40
-
41
-
42
-
43
-
44
-
45
-
46
-
 47
47 -
 48
48 -
 49
49 -
 50
50 -
 51
51 -
 52
52 -
 53
53 -
 54
54 -
 55
55 -
 56
56 -
 57
57 -
58
-
59
-
60
-
61
-
62
-
63
-
64
-
65
-
66
-
67
-
68
-
69
-
70
-
71
-
72
-
73
-
74
-
75
-
76
-
77
-
78
-
79
-
80
-
81
-
82
-
83
-
84
-
85
-
86
-
87
-
88
-
89
-
90
-
91
-
92
-
93
-
94
-
95
-
96
-
97
-
98
-
99
-
100
-
101
-
102
-
103
-
104
-
105
-
106
-
107
-
108
-
109
-
110
-
111
-
112
-
113
-
114
-
115
-
116
-
117
-
118
-
119
-
120
-
121
-
122
-
123
-
124
-
125
-
126
-
127
-
128
-
129
-
130
-
131
-
132
-
133
-
134
-
135
-
136
-
137
-
138
-
139
-
140
-
141
-
142
-
143
-
144
-
145
-
146
-
147
-
148
-
149
-
150
-
151
-
152
-
153
-
154
-
155
-
156
-
157
-
158
-
159
-
160
-
161
-
162
-
163
-
164
-
165
-
166
-
167
-
168
-
169
-
170
-
171
-
172
-
173
-
174
-
175
-
176
-
177
-
178
-
179
-
180
-
181
-
182
-
183
-
184
-
185
-
186
-
187
-
188
-
189
-
190
-
191
-
192
-
193
-
194
-
195
-
196
-
197
-
198
-
199
-
200
-
201
-
202
-
203
-
204
-
205
-
206
-
207
-
208
-
209
-
210
-
211
-
212
 |
 |