Samsung SPH-D710 User Guide - Page 101
Add a Contact, Microsoft Exchange ActiveSync
 |
View all Samsung SPH-D710 manuals
Add to My Manuals
Save this manual to your list of manuals |
Page 101 highlights
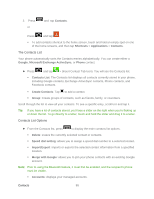
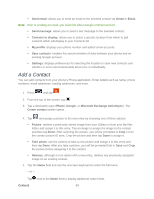
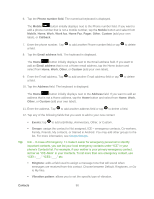
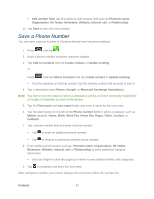
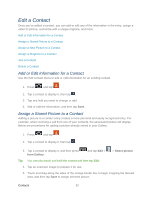
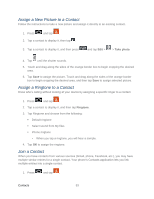
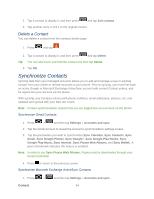
Send email: allows you to send an email to the selected contact via Gmail or Email. Note: Prior to sending an email, you must first add a Google or Email account. Send message: allows you to send a text message to the selected contact. Contacts to display: allows you to select a specific location from which to pull contacts which will display in your Contacts list. My profile: displays your phone number and added email accounts. Sync contacts: enables the synchronization of data between your phone and an existing Google account. Settings: displays preferences for selecting the location to save new contacts and whether or not to send namecards all at once or individually. Add a Contact You can add contacts from your phone's Phone application. Enter details such as name, phone numbers, email addresses, mailing addresses, and more. 1. Press and tap . 2. From the top of the screen, tap . 3. Tap a destination type (Phone, Google, or Microsoft Exchange ActiveSync). The Create contact screen opens. 4. Tap and assign a picture to the new entry by choosing one of three options: Picture: retrieve a previously stored image from your Gallery or from your My files folder and assign it to this entry. Tap an image to assign the image to the contact and then tap Done. After selecting the picture, you will be prompted to Crop it to fit the contact picture ID area. Crop the picture and then tap Done to assign it. Take photo: use the camera to take a new picture and assign it to this entry and then tap Done. After you take a picture, you will be prompted first to Save and Crop the picture before assigning it to the contact. Remove: although not an option with a new entry, deletes any previously assigned image on an existing contact. 5. Tap the Name field and use the onscreen keyboard to enter the full name. - or - Tap next to the Name field to display additional name fields. Contacts 89
-
 1
1 -
2
-
3
-
4
-
5
-
6
-
7
-
8
-
9
-
10
-
11
-
12
-
13
-
14
-
15
-
16
-
17
-
18
-
19
-
20
-
21
-
22
-
23
-
24
-
25
-
26
-
27
-
28
-
29
-
30
-
31
-
32
-
33
-
34
-
35
-
36
-
37
-
38
-
39
-
40
-
41
-
42
-
43
-
44
-
45
-
46
-
47
-
48
-
49
-
50
-
51
-
52
-
53
-
54
-
55
-
56
-
57
-
58
-
59
-
60
-
61
-
62
-
63
-
64
-
65
-
66
-
67
-
68
-
69
-
70
-
71
-
72
-
73
-
74
-
75
-
76
-
77
-
78
-
79
-
80
-
81
-
82
-
83
-
84
-
85
-
86
-
87
-
88
-
89
-
90
-
91
-
92
-
93
-
94
-
95
-
 96
96 -
 97
97 -
 98
98 -
 99
99 -
 100
100 -
 101
101 -
 102
102 -
 103
103 -
 104
104 -
 105
105 -
 106
106 -
107
-
108
-
109
-
110
-
111
-
112
-
113
-
114
-
115
-
116
-
117
-
118
-
119
-
120
-
121
-
122
-
123
-
124
-
125
-
126
-
127
-
128
-
129
-
130
-
131
-
132
-
133
-
134
-
135
-
136
-
137
-
138
-
139
-
140
-
141
-
142
-
143
-
144
-
145
-
146
-
147
-
148
-
149
-
150
-
151
-
152
-
153
-
154
-
155
-
156
-
157
-
158
-
159
-
160
-
161
-
162
-
163
-
164
-
165
-
166
-
167
-
168
-
169
-
170
-
171
-
172
-
173
-
174
-
175
-
176
-
177
-
178
-
179
-
180
-
181
-
182
-
183
-
184
-
185
-
186
-
187
-
188
-
189
-
190
-
191
-
192
-
193
-
194
-
195
-
196
-
197
-
198
-
199
-
200
-
201
-
202
-
203
-
204
-
205
-
206
-
207
-
208
-
209
-
210
-
211
-
212
-
213
-
214
-
215
-
216
-
217
-
218
-
219
-
220
-
221
-
222
 |
 |