Samsung SPH-D710 User Guide - Page 103
Save a Phone Number
 |
View all Samsung SPH-D710 manuals
Add to My Manuals
Save this manual to your list of manuals |
Page 103 highlights
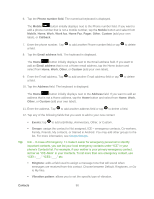
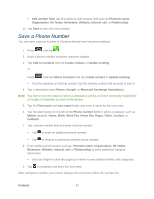
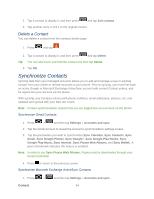
Add another field: tap this button to add another field such as Phonetic name, Organization, IM, Notes, Nickname, Website, Internet call, or Relationship. 13. Tap Save to save the new contact. Save a Phone Number You can save a phone number to Contacts directly from the phone dialpad. 1. Press and tap . 2. Enter a phone number using the onscreen dialpad. 3. Tap Add to Contacts and tap Create contact or Update existing. or Press and tap Add to Contacts and tap Create contact or Update existing. If you're updating an existing contact, tap the existing contact and proceed to step 5. 4. Tap a destination type (Phone, Google, or Microsoft Exchange ActiveSync). Note: You will not see the option to select a destination unless you have previously established a Google or Corporate account on the phone. 5. Tap the First name and Last name fields, and enter a name for the new entry. 6. Tap the label button (to the left of the Phone number field) to select a category such as Mobile (default), Home, Work, Work Fax, Home Fax, Pager, Other, Custom, or Callback. 7. Tap a phone number field and enter a phone number. Tap to enter an additional phone number Tap to remove a previously entered phone number. 8. Enter additional information such as: Phonetic name, Organization, IM, Notes, Nickname, Website, Internet call, or Relationship to input additional category information. Use your finger to slide the page up or down to see additional fields and categories. 9. Tap to complete and store the new entry. After saving the number, your phone displays the new entry within the Contact list. Contacts 91
-
 1
1 -
2
-
3
-
4
-
5
-
6
-
7
-
8
-
9
-
10
-
11
-
12
-
13
-
14
-
15
-
16
-
17
-
18
-
19
-
20
-
21
-
22
-
23
-
24
-
25
-
26
-
27
-
28
-
29
-
30
-
31
-
32
-
33
-
34
-
35
-
36
-
37
-
38
-
39
-
40
-
41
-
42
-
43
-
44
-
45
-
46
-
47
-
48
-
49
-
50
-
51
-
52
-
53
-
54
-
55
-
56
-
57
-
58
-
59
-
60
-
61
-
62
-
63
-
64
-
65
-
66
-
67
-
68
-
69
-
70
-
71
-
72
-
73
-
74
-
75
-
76
-
77
-
78
-
79
-
80
-
81
-
82
-
83
-
84
-
85
-
86
-
87
-
88
-
89
-
90
-
91
-
92
-
93
-
94
-
95
-
96
-
97
-
 98
98 -
 99
99 -
 100
100 -
 101
101 -
 102
102 -
 103
103 -
 104
104 -
 105
105 -
 106
106 -
 107
107 -
 108
108 -
109
-
110
-
111
-
112
-
113
-
114
-
115
-
116
-
117
-
118
-
119
-
120
-
121
-
122
-
123
-
124
-
125
-
126
-
127
-
128
-
129
-
130
-
131
-
132
-
133
-
134
-
135
-
136
-
137
-
138
-
139
-
140
-
141
-
142
-
143
-
144
-
145
-
146
-
147
-
148
-
149
-
150
-
151
-
152
-
153
-
154
-
155
-
156
-
157
-
158
-
159
-
160
-
161
-
162
-
163
-
164
-
165
-
166
-
167
-
168
-
169
-
170
-
171
-
172
-
173
-
174
-
175
-
176
-
177
-
178
-
179
-
180
-
181
-
182
-
183
-
184
-
185
-
186
-
187
-
188
-
189
-
190
-
191
-
192
-
193
-
194
-
195
-
196
-
197
-
198
-
199
-
200
-
201
-
202
-
203
-
204
-
205
-
206
-
207
-
208
-
209
-
210
-
211
-
212
-
213
-
214
-
215
-
216
-
217
-
218
-
219
-
220
-
221
-
222
 |
 |
