HP C7280 User Guide - Page 118
Scan an original to a computer, Scan an original to a memory card or storage device - photosmart windows 7
 |
UPC - 883585105137
View all HP C7280 manuals
Add to My Manuals
Save this manual to your list of manuals |
Page 118 highlights
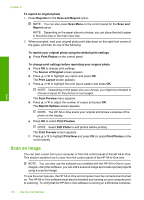
Scan look for the HP All-in-One icon in the system tray at the lower right side of the screen, near the time. NOTE: Closing the HP Digital Imaging Monitor icon in the Windows system tray can cause the HP All-in-One to lose some of its scan functionality. If this happens, you can restore full functionality by restarting your computer or by starting the HP Photosmart Software. This section contains the following topics: • Scan an original to a computer • Scan an original to a memory card or storage device Scan an original to a computer You can scan originals placed on the glass by using the control panel. To scan to a computer 1. Load your original print side down on the right front corner of the glass. 2. Press Scan Menu. 3. Press to highlight Scan to Computer, and then press OK. 4. If the HP All-in-One is connected to one or more computers on a network, do the following: a. Press OK to select Select Computer. A list of the computers connected to the HP All-in-One appears on the display. NOTE: The Select Computer menu might list computers with a USB connection in addition to those connected through the network. b. Press OK to select the default computer, or press to select a different computer, and then press OK. The Scan To menu appears on the display, listing the applications on the selected computer. If the HP All-in-One is connected directly to a computer with a USB cable, proceed to step 5. 5. Press OK to select the default application to receive the scan, or press to select a different application, and then press OK. A preview image of the scan appears on your computer, where you can edit it. 6. Make any edits to the preview image, and then click Accept when you are finished. Related topics • "Control panel features" on page 13 • "Scan Menu" on page 17 Scan an original to a memory card or storage device You can send the scanned image as a JPEG image to the memory card that is currently inserted or a storage device that is currently attached to the front USB port. This enables Scan an image 117
-
 1
1 -
2
-
3
-
4
-
5
-
6
-
7
-
8
-
9
-
10
-
11
-
12
-
13
-
14
-
15
-
16
-
17
-
18
-
19
-
20
-
21
-
22
-
23
-
24
-
25
-
26
-
27
-
28
-
29
-
30
-
31
-
32
-
33
-
34
-
35
-
36
-
37
-
38
-
39
-
40
-
41
-
42
-
43
-
44
-
45
-
46
-
47
-
48
-
49
-
50
-
51
-
52
-
53
-
54
-
55
-
56
-
57
-
58
-
59
-
60
-
61
-
62
-
63
-
64
-
65
-
66
-
67
-
68
-
69
-
70
-
71
-
72
-
73
-
74
-
75
-
76
-
77
-
78
-
79
-
80
-
81
-
82
-
83
-
84
-
85
-
86
-
87
-
88
-
89
-
90
-
91
-
92
-
93
-
94
-
95
-
96
-
97
-
98
-
99
-
100
-
101
-
102
-
103
-
104
-
105
-
106
-
107
-
108
-
109
-
110
-
111
-
112
-
 113
113 -
 114
114 -
 115
115 -
 116
116 -
 117
117 -
 118
118 -
 119
119 -
 120
120 -
 121
121 -
 122
122 -
 123
123 -
124
-
125
-
126
-
127
-
128
-
129
-
130
-
131
-
132
-
133
-
134
-
135
-
136
-
137
-
138
-
139
-
140
-
141
-
142
-
143
-
144
-
145
-
146
-
147
-
148
-
149
-
150
-
151
-
152
-
153
-
154
-
155
-
156
-
157
-
158
-
159
-
160
-
161
-
162
-
163
-
164
-
165
-
166
-
167
-
168
-
169
-
170
-
171
-
172
-
173
-
174
-
175
-
176
-
177
-
178
-
179
-
180
-
181
-
182
-
183
-
184
-
185
-
186
-
187
-
188
-
189
-
190
-
191
-
192
-
193
-
194
-
195
-
196
-
197
-
198
-
199
-
200
-
201
-
202
-
203
-
204
-
205
-
206
-
207
-
208
-
209
-
210
-
211
-
212
-
213
-
214
-
215
-
216
-
217
-
218
-
219
-
220
-
221
-
222
-
223
-
224
-
225
-
226
-
227
-
228
-
229
-
230
-
231
-
232
-
233
-
234
-
235
-
236
-
237
-
238
-
239
-
240
-
241
-
242
-
243
-
244
-
245
-
246
-
247
-
248
-
249
-
250
-
251
-
252
-
253
-
254
-
255
-
256
-
257
-
258
-
259
-
260
-
261
-
262
-
263
-
264
-
265
-
266
-
267
-
268
-
269
-
270
-
271
-
272
-
273
-
274
-
275
-
276
-
277
-
278
-
279
-
280
-
281
-
282
-
283
-
284
-
285
-
286
-
287
-
288
-
289
-
290
-
291
-
292
-
293
-
294
-
295
-
296
-
297
-
298
-
299
-
300
-
301
-
302
-
303
-
304
-
305
-
306
-
307
-
308
-
309
 |
 |