HP C7280 User Guide - Page 171
Information on ink cartridges and the print head - scanner software
 |
UPC - 883585105137
View all HP C7280 manuals
Add to My Manuals
Save this manual to your list of manuals |
Page 171 highlights
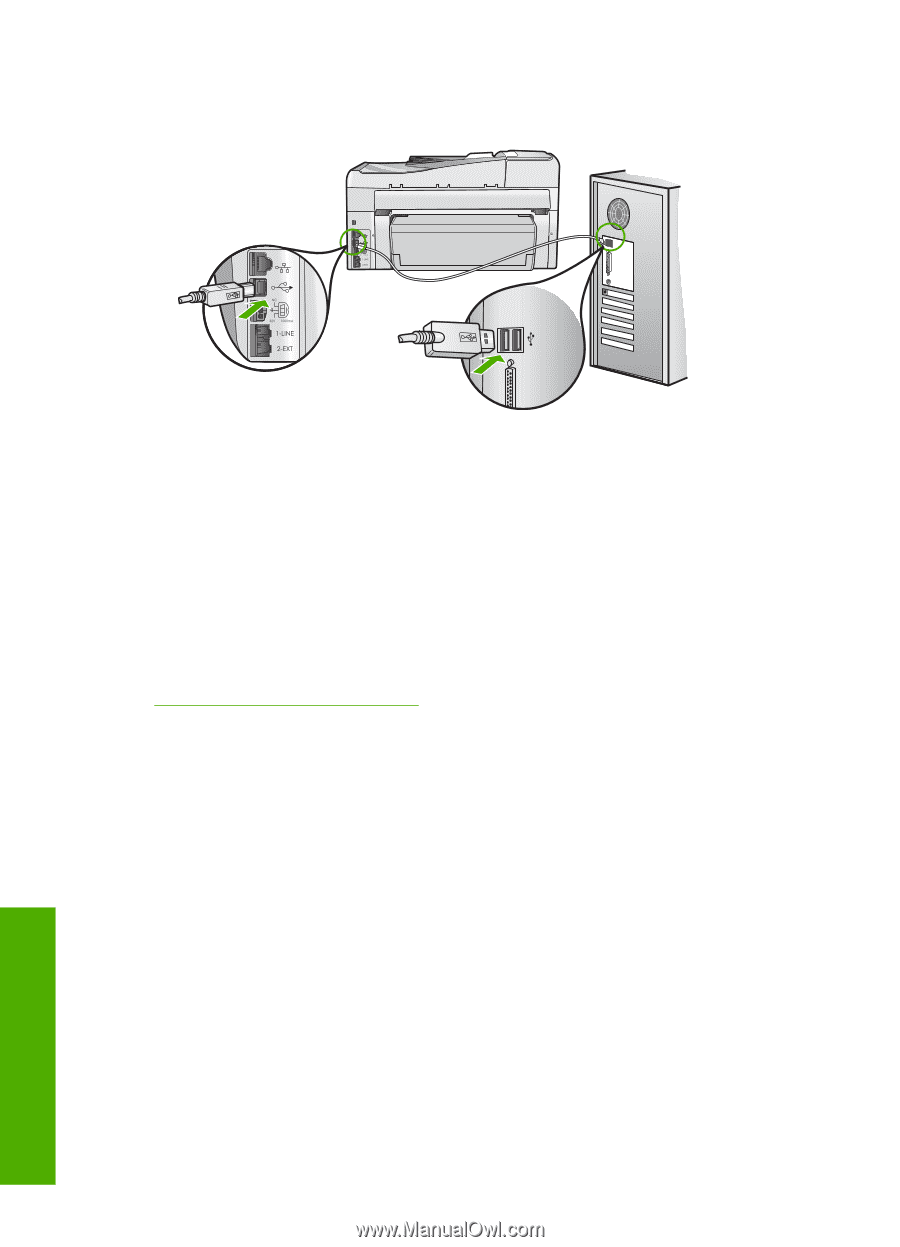
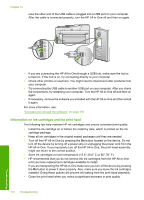
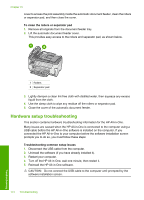
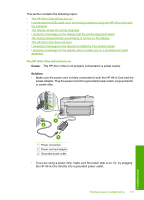
Chapter 15 sure the other end of the USB cable is plugged into a USB port on your computer. After the cable is connected properly, turn the HP All-in-One off and then on again. • If you are connecting the HP All-in-One through a USB hub, make sure the hub is turned on. If the hub is on, try connecting directly to your computer. • Check other printers or scanners. You might need to disconnect older products from your computer. • Try connecting the USB cable to another USB port on your computer. After you check the connections, try restarting your computer. Turn the HP All-in-One off and then on again. • If necessary, remove the software you installed with the HP All-in-One and then install it again. For more information, see: "Uninstall and reinstall the software" on page 181 Information on ink cartridges and the print head The following tips help maintain HP ink cartridges and ensure consistent print quality. • Install the ink cartridge on or before the install by date, which is printed on the ink cartridge package. • Keep all ink cartridges in the original sealed packages until they are needed. • Turn off the HP All-in-One by pressing the On button located on the device. Do not turn off the device by turning off a power strip or unplugging the power cord from the HP All-in-One. If you improperly turn off the HP All-in-One, the print head assembly might not return to the correct position. • Store ink cartridges at room temperature (15.6°-26.6° C or 60°-78° F). • HP recommends that you do not remove the ink cartridges from the HP All-in-One until you have replacement cartridges available to install. If you are transporting the HP All-in-One make sure you turn off the device by pressing the On button to power it down properly. Also, make sure you leave the ink cartridges installed. Doing these actions will prevent ink leaking from the print head assembly. • Clean the print head when you notice a significant decrease in print quality. 170 Troubleshooting Troubleshooting
-
 1
1 -
2
-
3
-
4
-
5
-
6
-
7
-
8
-
9
-
10
-
11
-
12
-
13
-
14
-
15
-
16
-
17
-
18
-
19
-
20
-
21
-
22
-
23
-
24
-
25
-
26
-
27
-
28
-
29
-
30
-
31
-
32
-
33
-
34
-
35
-
36
-
37
-
38
-
39
-
40
-
41
-
42
-
43
-
44
-
45
-
46
-
47
-
48
-
49
-
50
-
51
-
52
-
53
-
54
-
55
-
56
-
57
-
58
-
59
-
60
-
61
-
62
-
63
-
64
-
65
-
66
-
67
-
68
-
69
-
70
-
71
-
72
-
73
-
74
-
75
-
76
-
77
-
78
-
79
-
80
-
81
-
82
-
83
-
84
-
85
-
86
-
87
-
88
-
89
-
90
-
91
-
92
-
93
-
94
-
95
-
96
-
97
-
98
-
99
-
100
-
101
-
102
-
103
-
104
-
105
-
106
-
107
-
108
-
109
-
110
-
111
-
112
-
113
-
114
-
115
-
116
-
117
-
118
-
119
-
120
-
121
-
122
-
123
-
124
-
125
-
126
-
127
-
128
-
129
-
130
-
131
-
132
-
133
-
134
-
135
-
136
-
137
-
138
-
139
-
140
-
141
-
142
-
143
-
144
-
145
-
146
-
147
-
148
-
149
-
150
-
151
-
152
-
153
-
154
-
155
-
156
-
157
-
158
-
159
-
160
-
161
-
162
-
163
-
164
-
165
-
 166
166 -
 167
167 -
 168
168 -
 169
169 -
 170
170 -
 171
171 -
 172
172 -
 173
173 -
 174
174 -
 175
175 -
 176
176 -
177
-
178
-
179
-
180
-
181
-
182
-
183
-
184
-
185
-
186
-
187
-
188
-
189
-
190
-
191
-
192
-
193
-
194
-
195
-
196
-
197
-
198
-
199
-
200
-
201
-
202
-
203
-
204
-
205
-
206
-
207
-
208
-
209
-
210
-
211
-
212
-
213
-
214
-
215
-
216
-
217
-
218
-
219
-
220
-
221
-
222
-
223
-
224
-
225
-
226
-
227
-
228
-
229
-
230
-
231
-
232
-
233
-
234
-
235
-
236
-
237
-
238
-
239
-
240
-
241
-
242
-
243
-
244
-
245
-
246
-
247
-
248
-
249
-
250
-
251
-
252
-
253
-
254
-
255
-
256
-
257
-
258
-
259
-
260
-
261
-
262
-
263
-
264
-
265
-
266
-
267
-
268
-
269
-
270
-
271
-
272
-
273
-
274
-
275
-
276
-
277
-
278
-
279
-
280
-
281
-
282
-
283
-
284
-
285
-
286
-
287
-
288
-
289
-
290
-
291
-
292
-
293
-
294
-
295
-
296
-
297
-
298
-
299
-
300
-
301
-
302
-
303
-
304
-
305
-
306
-
307
-
308
-
309
 |
 |