HP Deskjet 320 Solutions Guide - Page 165
damp cloth.
 |
View all HP Deskjet 320 manuals
Add to My Manuals
Save this manual to your list of manuals |
Page 165 highlights
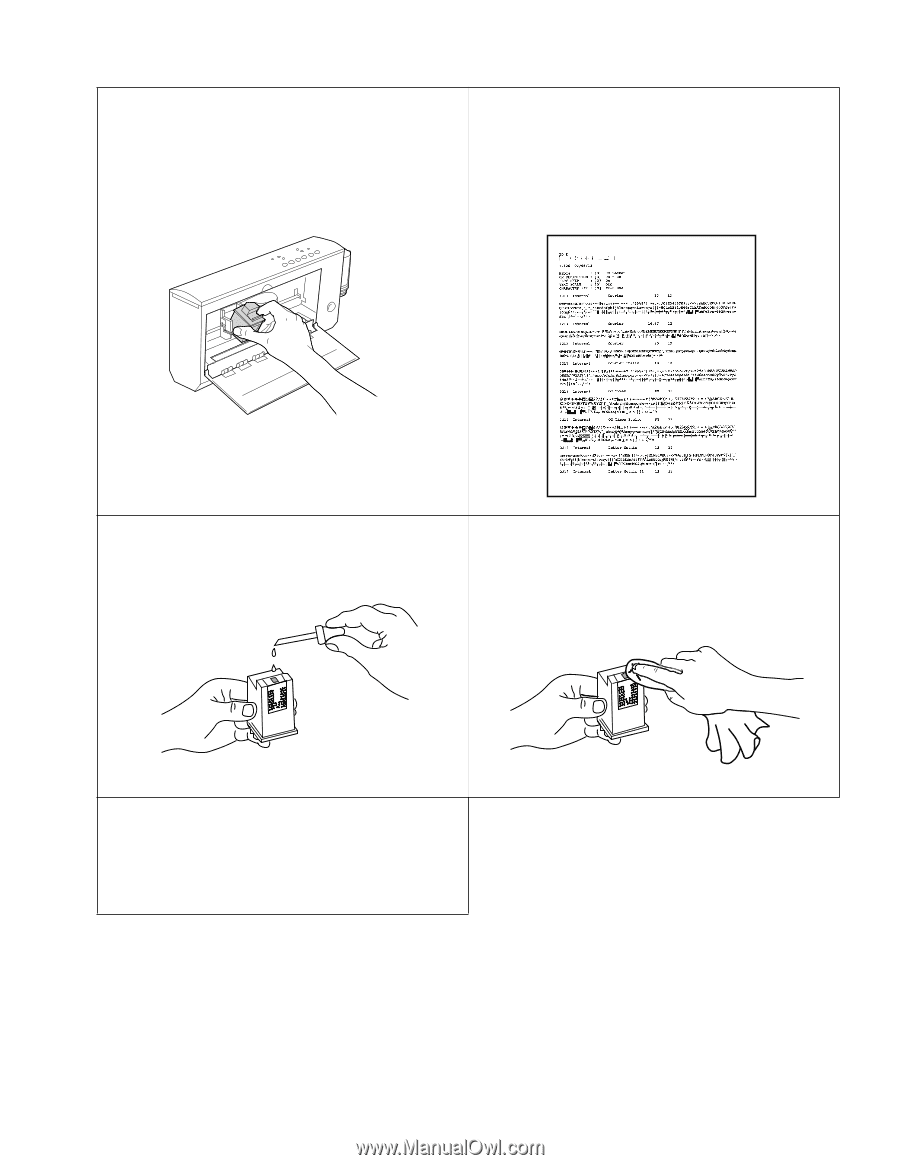
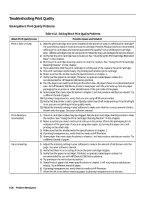
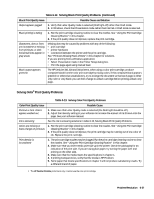
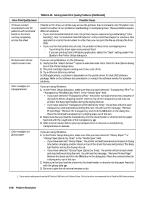
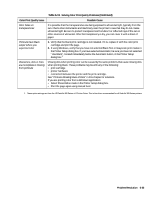
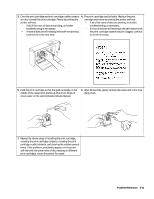
3. Once the print cartridge and print cartridge cradle contacts 4. The print cartridge may be faulty. Replace the print are dry, reinstall the print cartridge. Retest by printing the cartridge and retest by printing the printer self-test. printer self-test. - If all of the rows of dots are printing, no further - If all of the rows of dots are printing, no further troubleshooting is necessary. troubleshooting is necessary. - If rows of dots are still missing in the self-test printout, - If rows of dots are still missing in the self-test printout, the print cartridge nozzles may be clogged, continue continue on to the next step. on to the next step. 5. Hold the print cartridge so that the gold rectangle, in the middle of the raised end, points up. Place two drops of clean water on the gold rectangle (shaded below). DJP601 6. After 60 seconds, gently remove the water with a lint-free damp cloth. . 7. Repeat the above steps of installing the print cartridge, cleaning the print cartridge contacts, cleaning the print cartridge cradle contacts, and clearing the nozzles several times. If the problem consistently appears in the printer self-test with the same rows of dots missing on different print cartridges, return the printer for repair. Problem Resolution 6-41
-
 1
1 -
2
-
3
-
4
-
5
-
6
-
7
-
8
-
9
-
10
-
11
-
12
-
13
-
14
-
15
-
16
-
17
-
18
-
19
-
20
-
21
-
22
-
23
-
24
-
25
-
26
-
27
-
28
-
29
-
30
-
31
-
32
-
33
-
34
-
35
-
36
-
37
-
38
-
39
-
40
-
41
-
42
-
43
-
44
-
45
-
46
-
47
-
48
-
49
-
50
-
51
-
52
-
53
-
54
-
55
-
56
-
57
-
58
-
59
-
60
-
61
-
62
-
63
-
64
-
65
-
66
-
67
-
68
-
69
-
70
-
71
-
72
-
73
-
74
-
75
-
76
-
77
-
78
-
79
-
80
-
81
-
82
-
83
-
84
-
85
-
86
-
87
-
88
-
89
-
90
-
91
-
92
-
93
-
94
-
95
-
96
-
97
-
98
-
99
-
100
-
101
-
102
-
103
-
104
-
105
-
106
-
107
-
108
-
109
-
110
-
111
-
112
-
113
-
114
-
115
-
116
-
117
-
118
-
119
-
120
-
121
-
122
-
123
-
124
-
125
-
126
-
127
-
128
-
129
-
130
-
131
-
132
-
133
-
134
-
135
-
136
-
137
-
138
-
139
-
140
-
141
-
142
-
143
-
144
-
145
-
146
-
147
-
148
-
149
-
150
-
151
-
152
-
153
-
154
-
155
-
156
-
157
-
158
-
159
-
 160
160 -
 161
161 -
 162
162 -
 163
163 -
 164
164 -
 165
165 -
 166
166 -
 167
167 -
 168
168 -
 169
169 -
 170
170 -
171
-
172
-
173
-
174
-
175
-
176
-
177
-
178
-
179
-
180
-
181
-
182
-
183
-
184
-
185
-
186
-
187
-
188
-
189
-
190
-
191
-
192
-
193
-
194
-
195
-
196
-
197
-
198
-
199
-
200
-
201
-
202
 |
 |