HP Deskjet 320 Solutions Guide - Page 46
Changing the Printer Settings
 |
View all HP Deskjet 320 manuals
Add to My Manuals
Save this manual to your list of manuals |
Page 46 highlights
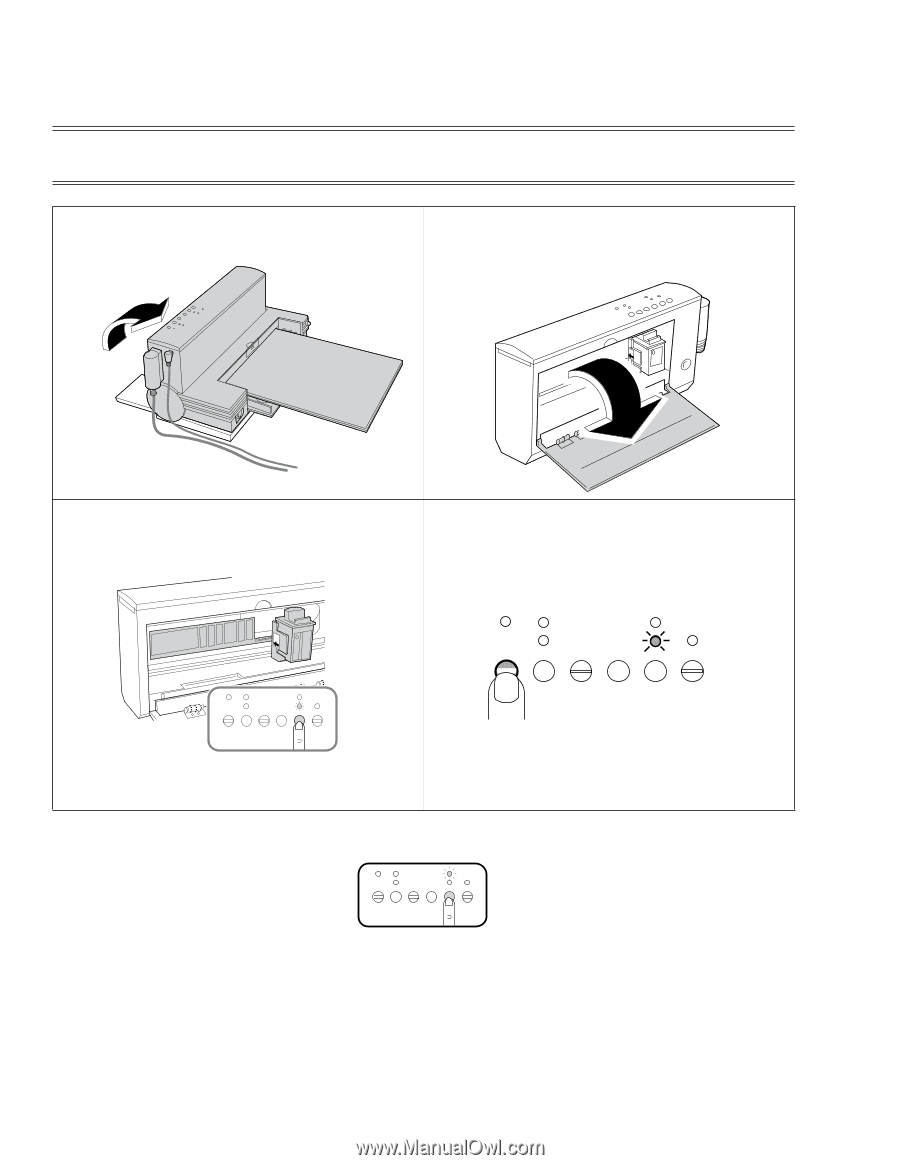
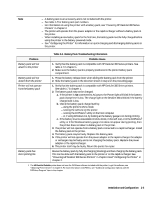
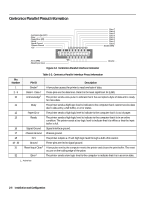
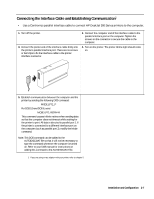
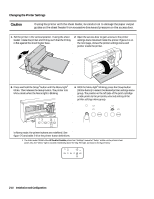
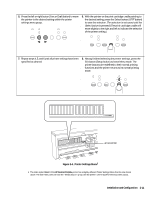
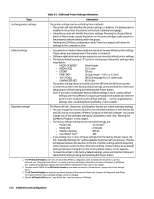
Changing the Printer Settings Caution If using the printer with the sheet feeder, be careful not to damage the paper output guides on the sheet feeder from excessive downward pressure on the access door. 1. Set the printer in the vertical position. If using the sheet feeder, rotate the printer and IN tray such that the IN tray is flat against the sheet feeder base. 2. Open the access door to gain access to the printer settings menu mounted inside the printer. Figure 2-4, on the next page, shows the printer settings menu and pointer inside the printer. 3. Press and hold the Setup1 button until the Menu light1 blinks. Then release the Setup button. The printer is in Menu mode when the Menu light is blinking. + 4. With the Menu light1 blinking, press the Group button (Online button) to select the desired printer settings menu group. The pointer on the left side of the print cartridge cradle points to the presently selected setting of the printer settings menu group. DJP906 In Menu mode, the printer buttons are redefined. See figure 2-3 and table 2-4 for the printer button definitions. 1. The older model C2614A of the HP DeskJet Portable printer has "Settings" instead of "Setup" written on the printer's front panel. Also, the "Menu" light is located immediately above the Chg. Pen light, as shown in the figure below: 2-10 Installation and Configuration
-
 1
1 -
2
-
3
-
4
-
5
-
6
-
7
-
8
-
9
-
10
-
11
-
12
-
13
-
14
-
15
-
16
-
17
-
18
-
19
-
20
-
21
-
22
-
23
-
24
-
25
-
26
-
27
-
28
-
29
-
30
-
31
-
32
-
33
-
34
-
35
-
36
-
37
-
38
-
39
-
40
-
 41
41 -
 42
42 -
 43
43 -
 44
44 -
 45
45 -
 46
46 -
 47
47 -
 48
48 -
 49
49 -
 50
50 -
 51
51 -
52
-
53
-
54
-
55
-
56
-
57
-
58
-
59
-
60
-
61
-
62
-
63
-
64
-
65
-
66
-
67
-
68
-
69
-
70
-
71
-
72
-
73
-
74
-
75
-
76
-
77
-
78
-
79
-
80
-
81
-
82
-
83
-
84
-
85
-
86
-
87
-
88
-
89
-
90
-
91
-
92
-
93
-
94
-
95
-
96
-
97
-
98
-
99
-
100
-
101
-
102
-
103
-
104
-
105
-
106
-
107
-
108
-
109
-
110
-
111
-
112
-
113
-
114
-
115
-
116
-
117
-
118
-
119
-
120
-
121
-
122
-
123
-
124
-
125
-
126
-
127
-
128
-
129
-
130
-
131
-
132
-
133
-
134
-
135
-
136
-
137
-
138
-
139
-
140
-
141
-
142
-
143
-
144
-
145
-
146
-
147
-
148
-
149
-
150
-
151
-
152
-
153
-
154
-
155
-
156
-
157
-
158
-
159
-
160
-
161
-
162
-
163
-
164
-
165
-
166
-
167
-
168
-
169
-
170
-
171
-
172
-
173
-
174
-
175
-
176
-
177
-
178
-
179
-
180
-
181
-
182
-
183
-
184
-
185
-
186
-
187
-
188
-
189
-
190
-
191
-
192
-
193
-
194
-
195
-
196
-
197
-
198
-
199
-
200
-
201
-
202
 |
 |