HP Deskjet 320 Solutions Guide - Page 67
Attaching the Printer to the Desktop Sheet Feeder, Positions for the Printer and Desktop Sheet
 |
View all HP Deskjet 320 manuals
Add to My Manuals
Save this manual to your list of manuals |
Page 67 highlights
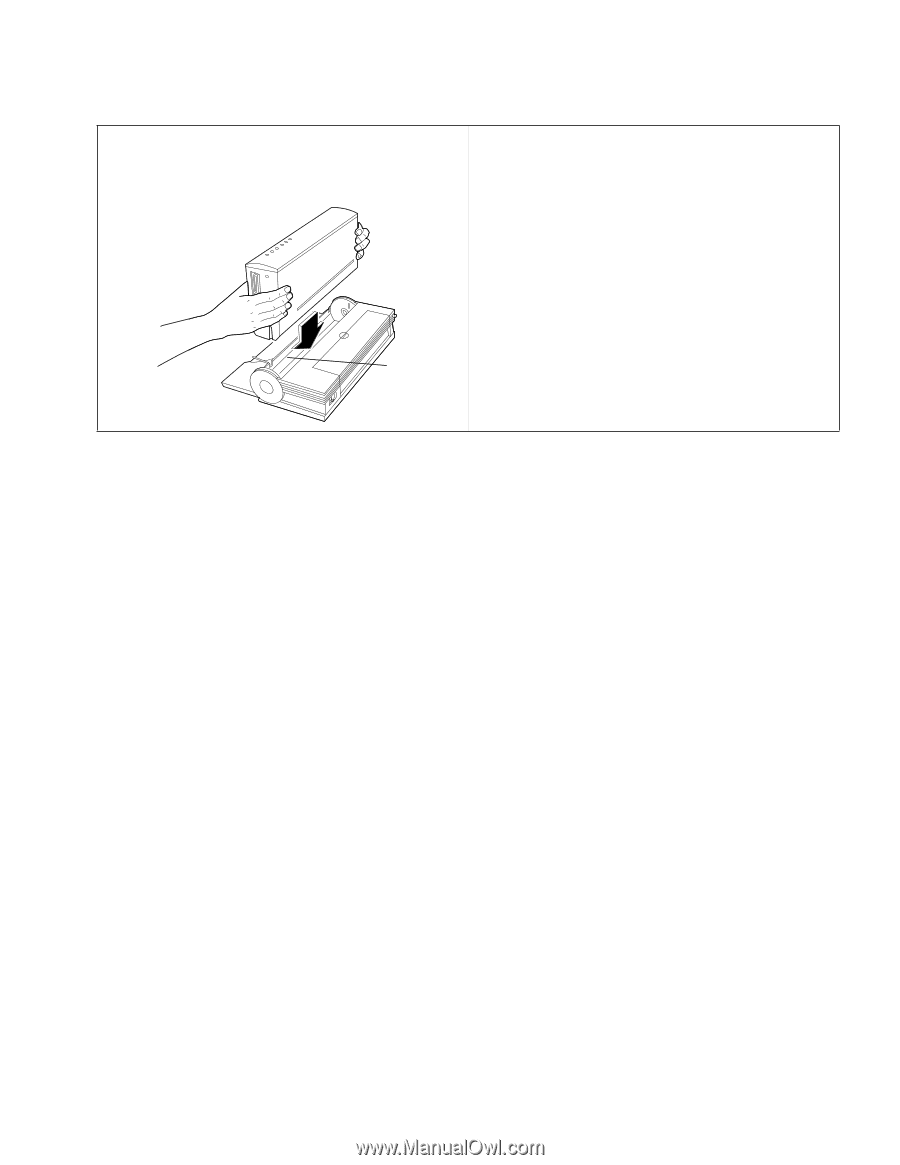
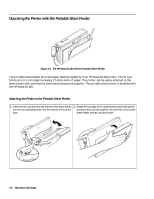
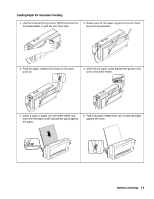
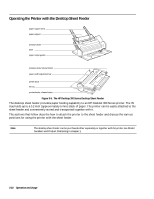
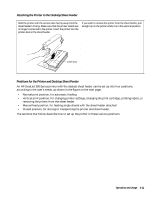
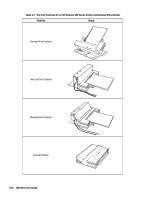
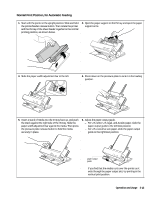
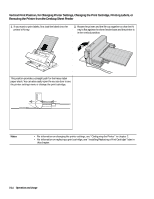
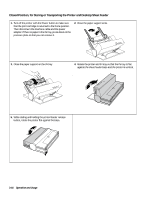
Attaching the Printer to the Desktop Sheet Feeder Hold the printer with the access door facing away from the sheet feeder's IN tray. Make sure that the printer stands are no longer connected to the printer. Insert the printer into the printer dock in the sheet feeder. If you wish to remove the printer from the sheet feeder, pull straight up on the printer while it is in this vertical position. printer dock Positions for the Printer and Desktop Sheet Feeder An HP DeskJet 300 Series printer with the deskjet sheet feeder can be set up into four positions, according to the user's needs, as shown in the figure on the next page: • Normal print position, for automatic feeding • Vertical print position, for changing printer settings, changing the print cartridge, printing labels, or removing the printer from the sheet feeder • Manual feed position, for feeding single sheets with the sheet feeder attached • Closed position, for storing or transporting the printer and sheet feeder. The sections that follow describe how to set up the printer in these various positions. Operation and Usage 3-11
-
 1
1 -
2
-
3
-
4
-
5
-
6
-
7
-
8
-
9
-
10
-
11
-
12
-
13
-
14
-
15
-
16
-
17
-
18
-
19
-
20
-
21
-
22
-
23
-
24
-
25
-
26
-
27
-
28
-
29
-
30
-
31
-
32
-
33
-
34
-
35
-
36
-
37
-
38
-
39
-
40
-
41
-
42
-
43
-
44
-
45
-
46
-
47
-
48
-
49
-
50
-
51
-
52
-
53
-
54
-
55
-
56
-
57
-
58
-
59
-
60
-
61
-
 62
62 -
 63
63 -
 64
64 -
 65
65 -
 66
66 -
 67
67 -
 68
68 -
 69
69 -
 70
70 -
 71
71 -
 72
72 -
73
-
74
-
75
-
76
-
77
-
78
-
79
-
80
-
81
-
82
-
83
-
84
-
85
-
86
-
87
-
88
-
89
-
90
-
91
-
92
-
93
-
94
-
95
-
96
-
97
-
98
-
99
-
100
-
101
-
102
-
103
-
104
-
105
-
106
-
107
-
108
-
109
-
110
-
111
-
112
-
113
-
114
-
115
-
116
-
117
-
118
-
119
-
120
-
121
-
122
-
123
-
124
-
125
-
126
-
127
-
128
-
129
-
130
-
131
-
132
-
133
-
134
-
135
-
136
-
137
-
138
-
139
-
140
-
141
-
142
-
143
-
144
-
145
-
146
-
147
-
148
-
149
-
150
-
151
-
152
-
153
-
154
-
155
-
156
-
157
-
158
-
159
-
160
-
161
-
162
-
163
-
164
-
165
-
166
-
167
-
168
-
169
-
170
-
171
-
172
-
173
-
174
-
175
-
176
-
177
-
178
-
179
-
180
-
181
-
182
-
183
-
184
-
185
-
186
-
187
-
188
-
189
-
190
-
191
-
192
-
193
-
194
-
195
-
196
-
197
-
198
-
199
-
200
-
201
-
202
 |
 |