HP Deskjet 320 Solutions Guide - Page 69
Normal Print Position, for Automatic Feeding
 |
View all HP Deskjet 320 manuals
Add to My Manuals
Save this manual to your list of manuals |
Page 69 highlights
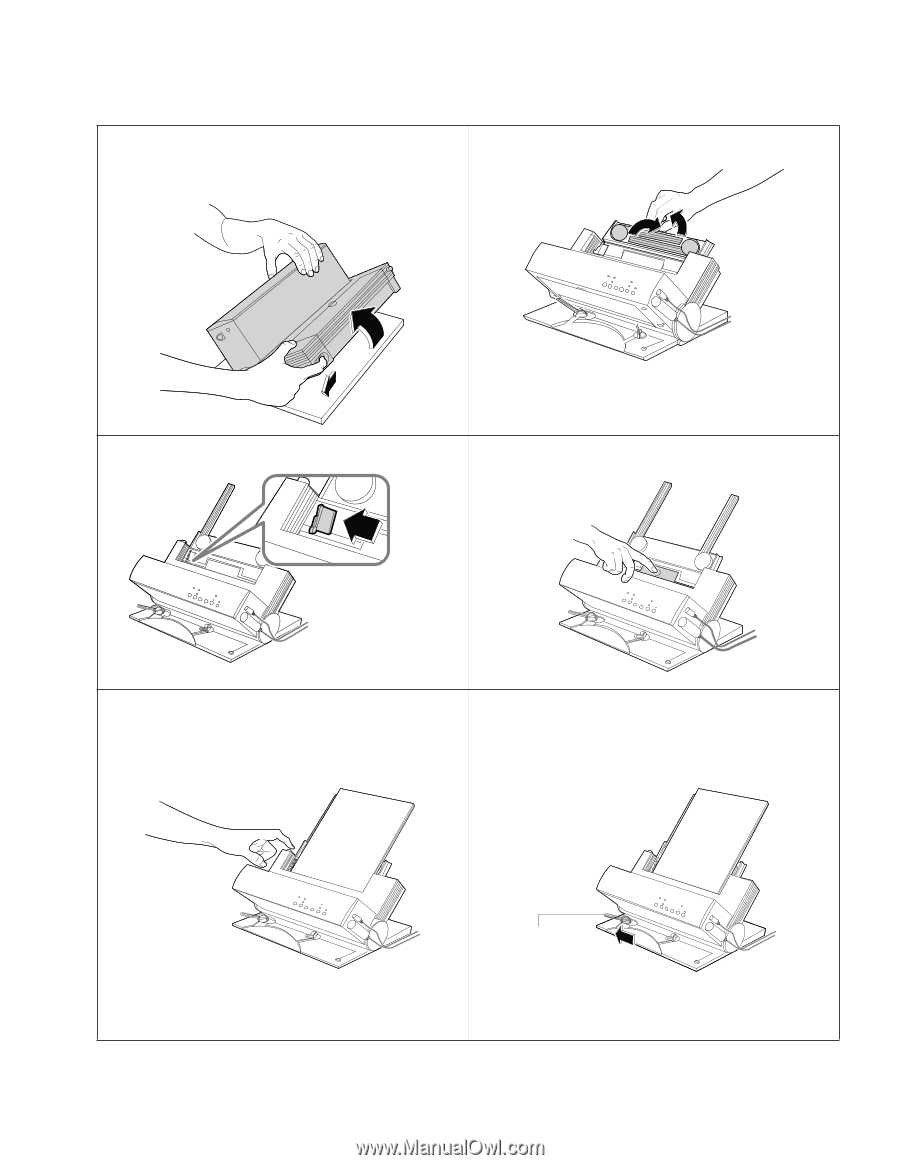
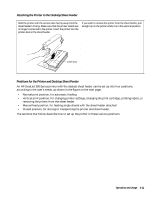
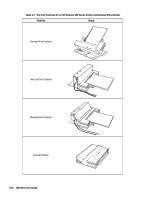
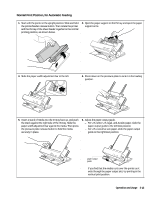
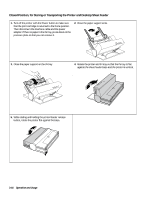
Normal Print Position, for Automatic Feeding 1. Start with the printer in the upright position. Slide and hold the printer/feeder release button. Then rotate the printer and the IN tray of the sheet feeder together to the normal printing position, as shown below. 2. Open the paper support on the IN tray and open the paper support arms. ‚ƒ 3. Slide the paper width adjustment bar to the left. 4. Press down on the pressure plate to lock it in the loading position. 5. Insert a stack of media into the IN tray face up, and push the stack against the right side of the IN tray. Slide the paper width adjustment bar against the media. Then press the pressure plate release button to hold the media securely in place. 6. Adjust the paper output guide. - For U.S. letter, U.S. legal, and A4 size paper, slide the paper output guide to the leftmost position. - For U.S. executive size paper, slide the paper output guide to the rightmost position. paper output guide If you find that the media curls over the printer as it exits through the paper output slot, try printing in the vertical print position. Operation and Usage 3-13
-
 1
1 -
2
-
3
-
4
-
5
-
6
-
7
-
8
-
9
-
10
-
11
-
12
-
13
-
14
-
15
-
16
-
17
-
18
-
19
-
20
-
21
-
22
-
23
-
24
-
25
-
26
-
27
-
28
-
29
-
30
-
31
-
32
-
33
-
34
-
35
-
36
-
37
-
38
-
39
-
40
-
41
-
42
-
43
-
44
-
45
-
46
-
47
-
48
-
49
-
50
-
51
-
52
-
53
-
54
-
55
-
56
-
57
-
58
-
59
-
60
-
61
-
62
-
63
-
 64
64 -
 65
65 -
 66
66 -
 67
67 -
 68
68 -
 69
69 -
 70
70 -
 71
71 -
 72
72 -
 73
73 -
 74
74 -
75
-
76
-
77
-
78
-
79
-
80
-
81
-
82
-
83
-
84
-
85
-
86
-
87
-
88
-
89
-
90
-
91
-
92
-
93
-
94
-
95
-
96
-
97
-
98
-
99
-
100
-
101
-
102
-
103
-
104
-
105
-
106
-
107
-
108
-
109
-
110
-
111
-
112
-
113
-
114
-
115
-
116
-
117
-
118
-
119
-
120
-
121
-
122
-
123
-
124
-
125
-
126
-
127
-
128
-
129
-
130
-
131
-
132
-
133
-
134
-
135
-
136
-
137
-
138
-
139
-
140
-
141
-
142
-
143
-
144
-
145
-
146
-
147
-
148
-
149
-
150
-
151
-
152
-
153
-
154
-
155
-
156
-
157
-
158
-
159
-
160
-
161
-
162
-
163
-
164
-
165
-
166
-
167
-
168
-
169
-
170
-
171
-
172
-
173
-
174
-
175
-
176
-
177
-
178
-
179
-
180
-
181
-
182
-
183
-
184
-
185
-
186
-
187
-
188
-
189
-
190
-
191
-
192
-
193
-
194
-
195
-
196
-
197
-
198
-
199
-
200
-
201
-
202
 |
 |