Brother International PEDESIGN 8.0 Users Manual - English
Brother International PEDESIGN 8.0 Manual
 |
View all Brother International PEDESIGN 8.0 manuals
Add to My Manuals
Save this manual to your list of manuals |
Brother International PEDESIGN 8.0 manual content summary:
- Brother International PEDESIGN 8.0 | Users Manual - English - Page 1
Instruction Manual - Brother International PEDESIGN 8.0 | Users Manual - English - Page 2
Brother USB Writer PE-Design complies designed to provide reasonable protection against harmful interference in a residential installation. This equipment generates, uses, and can radiate radio frequency energy and, if not installed and used in accordance with the instructions B digital apparatus - Brother International PEDESIGN 8.0 | Users Manual - English - Page 3
, please read this Instruction Manual carefully, and then keep it in a safe place together with your warranty. Please read before using this product For designing beautiful embroidery patterns • This system allows you to create a wide variety of embroidery patterns and supports a wider range of - Brother International PEDESIGN 8.0 | Users Manual - English - Page 4
software provides digitizing and editing capabilities, allowing you the creative freedom to design original embroidery. Easily turn illustrations, photos and lettering into custom embroidery designs. ■ Layout ready-made designs ■ Large-sized patterns (☞p. 15) (☞p. 176 in the Instruction Manual - Brother International PEDESIGN 8.0 | Users Manual - English - Page 5
■ Photo Stitch function (☞p. 24, p. 127) Embroidery can easily be created from photos taken with a digital camera. Photo Stitch 1 (Color) Photo Stitch 1 (Sepia) Photo Stitch 1 (Mono) Photo Stitch 2 (Color) Photo Stitch 2 (Mono) ■ Combining with background images (☞p. 42) ■ Creating custom - Brother International PEDESIGN 8.0 | Users Manual - English - Page 6
What You Can Do With PE-DESIGN Make Vivid Embroidery From Any Illustration or Photo With Layout & Editing, images and photos can be automatically converted into embroidery patterns that can be sewn with the desired stitches. ■ Auto Punch function (☞p. 20, p. 126) Illustration and images can - Brother International PEDESIGN 8.0 | Users Manual - English - Page 7
software includes 10 stitches for region sewing and 5 stitches for line sewing. By changing the stitches and colors, the same design can Embroidery can be created using not only the built-in fonts, but also the TrueType fonts on your computer. ■ Monograms (☞p. 90, p. 171 in the Instruction Manual - Brother International PEDESIGN 8.0 | Users Manual - English - Page 8
Sew Types The sewing attributes for each sew type are first set to their default settings; however, by changing the settings of the sewing attributes, you can create custom stitching. c For more details, refer to "Line sewing attributes" on page 98 and "Region sewing attributes" on page 101. Line - Brother International PEDESIGN 8.0 | Users Manual - English - Page 9
Cross Stitch Radial Stitch Piping Stitch Stippling Stitch Concentric Circle Stitch Spiral Stitch Piping Stitch (motif setting) Stippling Stitch (motif setting) b Memo: The stitching for the programmable fill stitch and the motif stitch depends on the selected stitch pattern. c For more details, - Brother International PEDESIGN 8.0 | Users Manual - English - Page 10
Create embroidery patterns Design Database (☞p. 187 in the Instruction Manual (PDF format)) Manage design files • Search for files • Open files • Organize files • Convert files • Write to cards • Automatically convert images to embroidery designs • Custom lettering • Custom designs • Digitize Edit - Brother International PEDESIGN 8.0 | Users Manual - English - Page 11
added to the settings available for region sewing of text and manual punching patterns. - The density for underlay stitching of regions can Merge: The overlapping regions of the shapes are merged. ● Designs can be created that combine embroidery with an image used in the background. Print the image - Brother International PEDESIGN 8.0 | Users Manual - English - Page 12
● Embroidery hoop sizes 200 × 200 mm(7.3/4 × 7.3/4 inches) and 200 × 300 mm(7.3/4 × 11.3/4 inches) have been added to the Design Page Property dialog box. ● File formats have been added to those available for images that can be opened as templates or original images. - GIF(.gif) format is supported - Brother International PEDESIGN 8.0 | Users Manual - English - Page 13
Table of Contents Instruction Manual (Basic) New Features of Version 8 9 Table of Contents 11 How To Use Manuals 13 Support/Service 14 Online Registration 14 Checking for the Latest Version of the Program 14 Tutorial 15 1. Importing Embroidery Patterns 15 2. Automatically Converting an - Brother International PEDESIGN 8.0 | Users Manual - English - Page 14
Table of Contents Instruction Manual (Advanced) Tutorial (Advanced 171 Entering Monograms 171 Creating Appliqués 174 Creating Split Embroidery Designs 176 Creating Design for Multi-Position Hoops......182 Managing Embroidery Design Files (Design Database 187 Design Database Window 187 - Brother International PEDESIGN 8.0 | Users Manual - English - Page 15
PE-DESIGN operations, an advanced tutorial, tips and techniques, and lists of menus/tools for each application are provided. In addition, this manual contains a troubleshooting section. Refer to this section if you have any problems while using this software. ■ Opening the Instruction Manual (PDF - Brother International PEDESIGN 8.0 | Users Manual - English - Page 16
Support/Service Contact Technical Support if you have a problem. Please check the company web site (http:// www.brother.com/) to find the technical Support in your area. To view the FAQ and information for software updates, visit the Brother Solutions Center at (http://solutions.brother.com/). a - Brother International PEDESIGN 8.0 | Users Manual - English - Page 17
patterns. 6 Print and Stitch (☞ p. 42) Create an original design by combining a printed image and an embroidery pattern. 1. Importing Embroidery Patterns Sample embroidery patterns are provided with this software. These embroidery patterns can be imported into the Layout & Editing, written to an - Brother International PEDESIGN 8.0 | Users Manual - English - Page 18
, then PE-DESIGN 8, then PE-DESIGN 8 (Layout & Editing). 3 Click Category selector. Move the scroll bar until Floral3 appears, and then click it. 1. Click 2. Drag 3. Click 4 Drag the flower to import it into the Design Page, as shown in the illustration. Step 2 Importing embroidery patterns Now - Brother International PEDESIGN 8.0 | Users Manual - English - Page 19
embroidery patterns, click the pattern to be moved, and then position the pointer over the pattern. When the shape of the pointer changes to , drag the pattern to the desired location. 2 Click File, then Write to Card. Tutorial the Instruction Manual (PDF format). Step 3 Transferring the design to - Brother International PEDESIGN 8.0 | Users Manual - English - Page 20
Tutorial a Note: Precautions for using the card writer module/original cards • The . • Correctly insert or remove the original card according to the Instruction Manual for the embroidery machine. c For details on saving embroidery patterns, refer to "Saving the embroidery design" on page 22. 18 - Brother International PEDESIGN 8.0 | Users Manual - English - Page 21
Tutorial Tutorial 2. Automatically Converting an Image to an Embroidery Design An embroidery pattern can be created from a digital camera photo, a scanned illustration , or clip art image. Using the Image to Stitch Wizard in Layout & Editing, an image can be converted to an embroidery this manual in - Brother International PEDESIGN 8.0 | Users Manual - English - Page 22
this application. 1 Click Image, then Input, then from File. 2 Double-click the Documents (My Documents)\ PE-DESIGN8\Tutorial\Tutorial_2 folder to open it. When this application is installed, the PEDESIGN 8 folder is installed in the Documents (My Documents) folder. When an image is imported for - Brother International PEDESIGN 8.0 | Users Manual - English - Page 23
image, and then drag the image to the desired position. Tutorial → The image appears in the work area. Step 2 Automatically converting the image to an embroidery pattern Next, the image will automatically be converted to an embroidery pattern. 1 Click Image, then Image to Stitch Wizard. b Memo - Brother International PEDESIGN 8.0 | Users Manual - English - Page 24
Tutorial 3 Check the Result View of the conversion, and then click Finish. Step 3 Displaying a preview of the embroidery Preview the finished embroidery key. → The generated embroidery pattern is displayed. Step 4 Saving the embroidery design Once the embroidery design is finished, you may want - Brother International PEDESIGN 8.0 | Users Manual - English - Page 25
can be found in the ClipArt folder, which can be found in the folder where PE-DESIGN was installed. (For example, click the drive where PE-DESIGN was installed, then Program Files, then Brother, then PE-DESIGN 8, then ClipArt.) Try these image samples for great results. c For details on transferring - Brother International PEDESIGN 8.0 | Users Manual - English - Page 26
Layout & Editing" on page 20. Select the Tutorial_2 folder, and then select girl2-face.bmp as the image. Step 2 Automatically converting the image to an embroidery pattern Next, the image will automatically be converted to an embroidery pattern. 1 Click Image, then Image to Stitch Wizard. 24 - Brother International PEDESIGN 8.0 | Users Manual - English - Page 27
Tutorial Tutorial 2 Click Photo Stitch 1, then Color, and then click Next. b Memo: The Sepia choice means you can create sepia tone or grayscale tone embroidery. The selection of mono is for black-and-white monotone embroidery. c "If Photo Stitch 1 (Sepia) is selected" on page 129, "If Photo - Brother International PEDESIGN 8.0 | Users Manual - English - Page 28
selected image. 9 Click Finish. → The generated embroidery pattern is displayed. c For details on saving embroidery patterns, refer to "Saving the embroidery design" on page 22. For details on transferring designs to original cards, refer to "Transferring the design to an original card" on page 17 - Brother International PEDESIGN 8.0 | Users Manual - English - Page 29
Tutorial Tutorial Cross Stitch Function Cross Stitch embroidery patterns can be created from images. For Sepia choice means you can create sepia tone or grayscale tone embroidery. c "If Cross Stitch (Sepia) is selected" on page 136. 3 Click Next. In this dialog box, the cross size and the number - Brother International PEDESIGN 8.0 | Users Manual - English - Page 30
Tutorial 4 Click Finish. In this dialog box, stitches can be added, generated embroidery design is displayed. c For details on saving embroidery patterns, refer to "Saving the embroidery design" on page 22. For details on transferring designs to original cards, refer to "Transferring the design to - Brother International PEDESIGN 8.0 | Users Manual - English - Page 31
Tutorial Tutorial 3. Drawing Shapes to Create an Embroidery Design This section will describe how to draw various shapes and combine them to create an embroidery design. The Shape tools in Layout & Editing allow you to draw various shapes. Using these tools, we will draw the stem, leaves, flower - Brother International PEDESIGN 8.0 | Users Manual - English - Page 32
Tutorial (4) Click in the Line sew type selector, and then click Zigzag Stitch. b Memo: The color, sewing attributes and size can also be changed after the shape is drawn. (6) While holding down the Shift key, drag the pointer in the Design Page, as shown in the illustration. (5) Click the start - Brother International PEDESIGN 8.0 | Users Manual - English - Page 33
Tutorial Tutorial down the Shift key, drag the pointer in the Design Page, as shown in the illustration. (2) (3) Align, then Top. b Memo: Multiple embroidery patterns can be selected in any of the following , while holding down the Ctrl key, click the next pattern. • Drag the pointer to draw a selection - Brother International PEDESIGN 8.0 | Users Manual - English - Page 34
Tutorial 3 Select the patterns where hole sewing is to be applied. (1) Click . (2) Click the yellow circle, then while holding down the Ctrl key, click the flower - Brother International PEDESIGN 8.0 | Users Manual - English - Page 35
Tutorial Tutorial (3) Drag the Density slider to specify 5.0 line/ mm. (4) Drag the red arrow in Direction area to 90 degrees. (7) Move the slider to specify 7.6 x 7.6 mm. (3) (4) (2) The - Brother International PEDESIGN 8.0 | Users Manual - English - Page 36
a point. (1) Click , then . This completes the pattern. c For details on saving embroidery patterns, refer to "Saving the embroidery design" on page 22. For details on transferring designs to original cards, refer to "Transferring the design to an original card" on page 17. (2) Click the shape for - Brother International PEDESIGN 8.0 | Users Manual - English - Page 37
Tutorial 4. Entering Text In this example, we will create an embroidery pattern for text. From Layout & Editing, various embroidery patterns can be created for text. Built-in fonts: This software is provided with 35 built-in fonts. TrueType fonts: TrueType fonts installed on your computer can - Brother International PEDESIGN 8.0 | Users Manual - English - Page 38
Tutorial 4 Drag the pointer in the Design Page, as shown in the illustration. 4 Click OK. → The text appears in the Design Page. Step 2 Entering text 1 Click , then . 2 Click the Design Page. 3 From the keyboard, type in "ABCDE". The entered text appears. b Memo: The character font, size, color - Brother International PEDESIGN 8.0 | Users Manual - English - Page 39
be arranged in a variety of ways. Tutorial c "Specifying text arrangement" on page 87. • The text can be arranged on an arc using a different method. c "Transforming text" on page 84. c For details on saving embroidery patterns, refer to "Saving the embroidery design" on page 22. For details on - Brother International PEDESIGN 8.0 | Users Manual - English - Page 40
it to an embroidery pattern. 3 While holding down the Shift key, drag a handle to reduce the size of the image. 1 Click Image, then Input, then from File. 2 Import the file tulip.bmp. Select the file tulip.bmp by clicking the Documents (My Documents) folder, then PE-DESIGN 8, then Tutorial, then - Brother International PEDESIGN 8.0 | Users Manual - English - Page 41
6 Click Finish. Tutorial 3 Click , then . Tutorial → An embroidery pattern of the tulip is created. Step 2 Adding text and adjusting character spacing 1 Click , then of the tulip. . Click the bottom edge 4 Click the text, - Brother International PEDESIGN 8.0 | Users Manual - English - Page 42
Tutorial Step 3 Adding an oval and adjusting the text 1 Click , then . 5 Place the pointer over the oval or text so that the shape of the pointer - Brother International PEDESIGN 8.0 | Users Manual - English - Page 43
Tutorial Tutorial Step 4 Importing and rotating an embroidery pattern Now, we will import the embroidery pattern for the butterfly, and then adjust its angle. 1 Click File, then Import. 2 Click . Design Library view button 5 Drag a rotation handle that appeared to adjust the angle of the - Brother International PEDESIGN 8.0 | Users Manual - English - Page 44
image (Bear_Background.jpg) and the embroidery pattern of the bear (Bear.pes) provided with this software. 3 Import the file Bear_Background.jpg. Select the file Bear_Background.jpg by clicking the Documents (My Documents) folder, then PE-DESIGN 8, then Tutorial, then Tutorial_6. 1 Start up Layout - Brother International PEDESIGN 8.0 | Users Manual - English - Page 45
Documents (My Documents) folder, then PE-DESIGN 8, then Tutorial, then Tutorial_6. (3) Click , and then drag the rotation handle to adjust the angle of the pattern. (4) Drag or a handle to adjust the size of the pattern. (3) Tutorial (4) c "Importing embroidery designs" on page 48. 6 Enter the - Brother International PEDESIGN 8.0 | Users Manual - English - Page 46
Tutorial 2 Specify the print settings. (1) Select the printer to be used. this type of printer is being used, clear the Print a flipped image check box. For details, refer to the instructions for the printer being used. (1) (2) (2) 4 Check the image position. If any part of the image extends - Brother International PEDESIGN 8.0 | Users Manual - English - Page 47
Tutorial Tutorial Step 3 Printing the positioning sheet Print a sheet for aligning the image and the embroidery. 1 Specify the print iron-on transfer sheets, refer to the instructions for the iron-on transfer sheets. 2 Hoop the fabric in the embroidery frame. (2) 2 Click Print. 3 Specify - Brother International PEDESIGN 8.0 | Users Manual - English - Page 48
pattern. b Memo: • For details on using the embroidery machine, refer to the Operation Manual included with the machine. • Six patterns of completed samples for Print and Stitch are provided in the following folder. Documents (My Documents)\ PE-DESIGN 8\Sample\Layout & Editing\ Print and Stitch 46 - Brother International PEDESIGN 8.0 | Users Manual - English - Page 49
the dialog box to its original attached position, drag it to the right side of the window or double-click its title bar. Opening/Importing Embroidery Designs b Memo: Multiple files can be opened in Layout & Editing. In addition, data can be copied and pasted between files that are open at the same - Brother International PEDESIGN 8.0 | Users Manual - English - Page 50
(Layout & Editing) Opening a Layout & Editing file An embroidery design that has previously been saved as a Layout & Editing file (.pes file) can be opened. Toolbar button: 1. Click , or click File, then Open. 2. Select the drive and the folder. • If the Preview check box is selected, - Brother International PEDESIGN 8.0 | Users Manual - English - Page 51
be imported, and then click Import, or doubleclick the file icon. → The embroidery design is displayed in the Design Page. b Memo: • The design can be imported by dragging its file icon from the Import dialog box to the Design Page. • Multiple files cannot be selected to be imported at the same time - Brother International PEDESIGN 8.0 | Users Manual - English - Page 52
Arranging Embroidery Designs (Layout & Editing) Importing embroidery design from Design Center An embroidery design in Design Center can be imported directly into the Layout & Editing Design Page. c "Manually Creating Embroidery Patterns From Images (Design Center)" on page 153. Toolbar button: - Brother International PEDESIGN 8.0 | Users Manual - English - Page 53
or you can zoom out to work on any part of the embroidery pattern that cannot be viewed in the work area. After clicking on the Tool Box, appear. Click the button for the desired operation. : Click in the Design Page to display the area enlarged. To zoom in on a specific area - Brother International PEDESIGN 8.0 | Users Manual - English - Page 54
To deselect the pattern, select a different pattern, click a blank area of the Design Page, or click any other button in the Tool Box. 3. To select an Press the Tab key to select the next pattern in the order that they were created. ■ Selecting all embroidery patterns 1. Click on the Tool Box. - Brother International PEDESIGN 8.0 | Users Manual - English - Page 55
page 237 in the Instruction Manual (PDF format). ■ Scaling numerically 1. Select the patterns. 2. Click Edit, then Numerical Setting, then Size. 3. To change the width and height proportionally, select the Maintain aspect ratio check box. Arranging Embroidery Designs (Layout & Editing) 2. Drag the - Brother International PEDESIGN 8.0 | Users Manual - English - Page 56
Arranging Embroidery Designs (Layout & Editing) Flipping patterns horizontally or vertically Toolbar button: , 1. Select the pattern(s). 2. Click Edit, then Mirror, then Horizontal, or click . Click Edit, then Mirror, then Vertical, or click . Rotating patterns ■ Rotating manually Toolbar - Brother International PEDESIGN 8.0 | Users Manual - English - Page 57
Arranging Embroidery Designs (Layout & Editing) Arranging Embroidery Designs (Layout & Editing) ■ Rotating numerically 1. Select the pattern(s). 2. Click Edit, then Numerical Setting, then Rotate. 3. Type or select the desired rotation angle. b Memo: • An angle can - Brother International PEDESIGN 8.0 | Users Manual - English - Page 58
Arranging Embroidery Designs (Layout & Editing) Reshaping Embroidery Patterns Selecting points 1. Click on the Tool Box. → the or key. • Hold down the Shift key while pressing the or key. → The next point toward the start point is added to the selection. → To deselect a point, press - Brother International PEDESIGN 8.0 | Users Manual - English - Page 59
Arranging Embroidery Designs (Layout & Editing) Moving points 1. Select the point. c "Selecting points" on page 56. 2. Drag the point to the new location. Selected point Drag b Memo: • All of the selected points move in the same direction. • To move the point of a broken line, a curve, a manual - Brother International PEDESIGN 8.0 | Users Manual - English - Page 60
Arranging Embroidery Designs (Layout & Editing) Inserting points 2. Click Edit, then Delete, or press the Delete key to remove the point. New points can be inserted in order to - Brother International PEDESIGN 8.0 | Users Manual - English - Page 61
is smoothed out. 2. Click Edit, then Point, then To Cusp. → The path is transformed to a pointed one at the selected point. Arranging Embroidery Designs (Layout & Editing) 3. Drag the path to adjust it. Symmetrically adjusting the control handles of a point 1. Select the point where the control - Brother International PEDESIGN 8.0 | Users Manual - English - Page 62
Embroidery Designs a Note: The entry and exit points of stitch data, text, and manual punching patterns cannot be edited. This is the entry point for the outline for the outline stitching. Stitching continues from this point to the next pattern. This is the entry point for the inside region stitching - Brother International PEDESIGN 8.0 | Users Manual - English - Page 63
Arranging Embroidery Designs (Layout & Editing) Arranging Embroidery Designs (Layout & Editing) a Note: • Only entry and exit retained. In addition, the positions of the entry and the exit points can be manually changed with the Entry/ Exit/Center point tool. ■ Moving the center point The center - Brother International PEDESIGN 8.0 | Users Manual - English - Page 64
Arranging Embroidery Designs (Layout means patterns created with Shape tools or Text tools or Manual Punch tools. Selecting stitch points of stitch pattern 1. Click way that embroidery pattern points are selected. c "Selecting points" on page 56. • To select all stitch points in the next color, press - Brother International PEDESIGN 8.0 | Users Manual - English - Page 65
of the Design Page), otherwise manual punching data, refer to "Grouping/ Ungrouping embroidery patterns" on page 55. a Note: The Stitch to Block command cannot be used with some stitch pattern imported from embroidery cards. c "Enlarging/Reducing Stitch Patterns" on page 237 in the Instruction Manual - Brother International PEDESIGN 8.0 | Users Manual - English - Page 66
the Design Page to specify each corner of the enclosure around the area to be cut off. → The dotted line that is drawn when you move the pointer changes to a solid line when the next point is stitch data is selected or if grouped embroidery data containing data other than stitch data is selected. - Brother International PEDESIGN 8.0 | Users Manual - English - Page 67
Display, then Realistic Preview. → A realistic preview of the embroidery design appears. 2. If necessary, specify settings for Thread Width, Contrast the next time that the Realistic Preview function is select (when the realistic preview is not displayed). c "Displaying a preview of the embroidery" - Brother International PEDESIGN 8.0 | Users Manual - English - Page 68
. The Stitch Simulator dialog box appears, and the embroidery design is cleared from the Design Page. 2. Click to begin the stitching simulation. beginning of the previous color. : Advances to the beginning of the next color. : Reverses the stitching by the number of stitches specified in - Brother International PEDESIGN 8.0 | Users Manual - English - Page 69
frame. 2. Drag the corner to adjust the display area frame to the desired size. Arranging Embroidery Designs (Layout & Editing) ■ Moving the display area frame The part of the design displayed in the Design Page can be selected from the Reference Window. 1. Move the pointer over the display area - Brother International PEDESIGN 8.0 | Users Manual - English - Page 70
then type or select the desired width and height for the Design Page. c "Creating Split Embroidery Designs" on page 176 in the Instruction Manual (PDF format). 3. From the Page selector, select the desired color for the Design Page. 4. From the Background selector, select the desired color for the - Brother International PEDESIGN 8.0 | Users Manual - English - Page 71
Arranging Embroidery Designs (Layout & Editing) Arranging Embroidery Designs (Layout & Editing) Changing Application Settings Changing the grid settings A grid of dotted lines or solid lines can be displayed or hidden, and the spacing for - Brother International PEDESIGN 8.0 | Users Manual - English - Page 72
Arranging Embroidery Designs (Layout & Editing) Drawing Shapes Rectangles, rectangles with rounded corners, and curved patterns (regular circles, ovals, arcs, fan shapes, and arc & strings) can be drawn by - Brother International PEDESIGN 8.0 | Users Manual - English - Page 73
Arranging Embroidery Designs (Layout & Editing) Arranging Embroidery Designs (Layout & Editing) Drag the pointer to draw a rectangle with corners of Arc the currently specified radius. Example 1 Edge radius: 0.0 mm Example 2 Edge radius: 20.0 mm - Brother International PEDESIGN 8.0 | Users Manual - English - Page 74
Arranging Embroidery Designs (Layout & Editing) Fan Click at start point. Move to end of shapes appear. 2. Click the button for the shape to be drawn. 3. Drag the pointer in the Design Page. The point where you start dragging is considered a corner of an imaginary rectangle around the shape. The - Brother International PEDESIGN 8.0 | Users Manual - English - Page 75
Arranging Embroidery Designs (Layout & Editing) Arranging Embroidery Designs (Layout & Editing) End point Start button for the shape to be drawn. → The Sewing Attributes bar appears. 3. Click in the Design Page or drag the pointer to draw the line. ■ Straight lines/curves Although the procedure for - Brother International PEDESIGN 8.0 | Users Manual - English - Page 76
Arranging Embroidery Designs (Layout & Editing) 2. Click in the Design Page to specify the next point. b Memo: To remove the last point that was entered, click the right mouse button, or press the BackSpace key. 3. Continue clicking to specify every - Brother International PEDESIGN 8.0 | Users Manual - English - Page 77
Embroidery Designs (Layout & Editing) Arranging Embroidery Designs this, select the first two grouped objects and the next one object and repeat the hole sewing setting. enclosed within the other pattern, and not contain text, manual punching patterns or stitch data. Invalid 2. Click Sew, then - Brother International PEDESIGN 8.0 | Users Manual - English - Page 78
Arranging Embroidery Designs (Layout & Editing) • When partially overlapped • When enclosed ■ Merging Overlapped patterns can be merged together. When this is applied to multiple patterns, the color and sew - Brother International PEDESIGN 8.0 | Users Manual - English - Page 79
will appear as shown below. Satin stitch Fill stitch Arranging Embroidery Designs (Layout & Editing) If a manual punching pattern is created using the above image as a guide, the stitching will appear as shown below. Satin stitch Fill stitch The lines drawn in the - Brother International PEDESIGN 8.0 | Users Manual - English - Page 80
Arranging Embroidery Designs (Layout & Editing) The following example shows how the Manual Punch tools are used to draw a beard over image of the reindeer (Rudolph.bmp), which is used as a template. The template and finished pattern are provided in the following folder. Documents (My Documents)\PE- - Brother International PEDESIGN 8.0 | Users Manual - English - Page 81
as a block. 7. Click in the Design Page to specify points 16 through 23. A 17 D B C 16 18 20 19 E 22 21 23 b Memo: • If the shape cannot be drawn with the Manual Punch tools as desired, points can be edited to adjust the shape. c "Reshaping Embroidery Patterns" on page 56. • Line sewing - Brother International PEDESIGN 8.0 | Users Manual - English - Page 82
Arranging Embroidery Designs (Layout & Editing) Adding Text Entering text/Small text 1. Click on the Tool characters are not available with the selected font or if the text cannot be converted to an embroidery pattern, an error message appears. Click OK to close the message and return to the Edit - Brother International PEDESIGN 8.0 | Users Manual - English - Page 83
• Sew at a speed slower than what is used when embroidering normal designs. (For details on adjusting the thread tension and sewing speed, refer to the Instruction Manual provided with your embroidery machine.) • For best results when sewing small font patterns, do not cut the jump stitches between - Brother International PEDESIGN 8.0 | Users Manual - English - Page 84
PE-DESIGN was installed appear as user-defined fonts after the fonts listed in the table above. The UD icon appears on custom fonts. c "Creating Custom Fonts (Font Creator)" on page 225 in the Instruction Manual fonts may not be converted correctly into an embroidery pattern due to the shape of the - Brother International PEDESIGN 8.0 | Users Manual - English - Page 85
Arranging Embroidery Designs (Layout & Editing) Arranging Embroidery Designs (Layout & Editing) ■ Text Size 1. Click in the the text as needed. 5. Click OK. → The edited text is displayed in the Design Page. c "Entering text/Small text" on page 80. Rotate angle 0 degree Rotates the characters. - Brother International PEDESIGN 8.0 | Users Manual - English - Page 86
Arranging Embroidery Designs (Layout & Editing) 0.0 mm Character Sets the spacing Spacing between all characters. 2.0 or vertically. Vertical b Memo: • Vertical text will be displayed vertically on the Design Page. • Both Kerning and Character Spacing set the spacing between characters. Character - Brother International PEDESIGN 8.0 | Users Manual - English - Page 87
you release the mouse button, the character size is changed. → The new size is displayed on the Sewing Attributes bar. Arranging Embroidery Designs (Layout & Editing) 3 1 Rotation handle 2 Size handle 3 Vertical offset handle b Memo: • Multiple points can be selected and the selected points can be - Brother International PEDESIGN 8.0 | Users Manual - English - Page 88
Arranging Embroidery Designs (Layout & Editing) ■ Changing the character spacing 1. Place the pointer onto the character body other than the handles and drag the character horizontally. ■ Changing the vertical - Brother International PEDESIGN 8.0 | Users Manual - English - Page 89
can be arranged along a path. c "Drawing Shapes" on page 70. Toolbar button: 1. Select the text or small text and a path. Arranging Embroidery Designs (Layout & Editing) 3. When you release the mouse button, the character angle is changed. → When the Text Attribute Setting dialog box is opened - Brother International PEDESIGN 8.0 | Users Manual - English - Page 90
Arranging Embroidery Designs (Layout & Editing) Horizontal Alignment Sets the distribution of characters along the path. Vertical Alignment Sets the distance between the text and the path. Text Orientation - Brother International PEDESIGN 8.0 | Users Manual - English - Page 91
Click Text, then Convert to Outline Object. → The selected text is converted to outlines. Arranging Embroidery Designs (Layout & Editing) 3. To change the font style, select the desired style from the Font Text Converted to Outline Object)" on page 240 in the Instruction Manual (PDF format). 89 - Brother International PEDESIGN 8.0 | Users Manual - English - Page 92
Arranging Embroidery Designs (Layout & Editing) Entering Monograms The monogram function allows of the Edit Monogram Letters dialog box. 8. Click OK. → The monogram is displayed in the Design Page with the selected decorative pattern. 9. Click on the Tool Box, select the decorative pattern, and - Brother International PEDESIGN 8.0 | Users Manual - English - Page 93
The Edit Monogram Letters dialog box appears, where the characters of the selected monogram pattern are displayed in the text field. Arranging Embroidery Designs (Layout & Editing) 2. Click the desired font. → The setting is applied to all monogram patterns that you will create, until the setting - Brother International PEDESIGN 8.0 | Users Manual - English - Page 94
Arranging Embroidery Designs (Layout & Editing) 4. Click OK. → The edited monogram pattern is displayed in the Design Page. c "Entering Monograms" on page 90. ■ Editing single characters The thread color, character size, character spacing and vertical offset for each letter in a monogram can - Brother International PEDESIGN 8.0 | Users Manual - English - Page 95
Embroidery Designs (Layout & Editing) Arranging Embroidery Designs that element appears. In the following instructions, we will refer to the elements of Punch color: Sets the thread color for outlines, inside regions, text and manual punching patterns. c "Color" on page 95. Special colors c "Special - Brother International PEDESIGN 8.0 | Users Manual - English - Page 96
Arranging Embroidery Designs (Layout & Editing) Setting the thread color and sew type All it is not possible to switch on and off sewing of the inside region. Manual punching patterns: You can set a color and a sew type for manual punching patterns. b Memo: • The color and sew type are applied to - Brother International PEDESIGN 8.0 | Users Manual - English - Page 97
Arranging Embroidery Designs (Layout & Editing) ■ Color Click this button to set the thread color for outlines, inside regions, texts and manual punching patterns. 1. Click the Color button. • Palette mode • List mode b Memo: At the top of the Thread Color dialog box for TrueType font character - Brother International PEDESIGN 8.0 | Users Manual - English - Page 98
Arranging Embroidery Designs (Layout & Editing) APPLIQUE POSITION marks the position on the backing . ■ Sew type Use these to set the sew type for outlines, inside regions, text, and manual punching patterns. 1. Click in a sew type selector. → The available settings that appear differ depending - Brother International PEDESIGN 8.0 | Users Manual - English - Page 99
Arranging Embroidery Designs (Layout & Editing) Arranging Embroidery Designs (Layout & Editing) 1 Click to return to the default displayed under Line sew or Region sew. → The settings are applied to the embroidery pattern each time the settings are changed. c For details on the different sewing - Brother International PEDESIGN 8.0 | Users Manual - English - Page 100
Arranging Embroidery Designs (Layout & Editing) ■ Line sewing attributes The available attributes differ depending on the selected sew type. Zigzag stitch Under sewing Zigzag width To specify underlay stitching, - Brother International PEDESIGN 8.0 | Users Manual - English - Page 101
Arranging Embroidery Designs (Layout & Editing) Arranging Embroidery Designs (Layout & Editing) Motif stitch Select a pattern for the motif stitch. Click to display the Browse dialog box. Select a folder, and then select the desired pattern (. - Brother International PEDESIGN 8.0 | Users Manual - English - Page 102
Arranging Embroidery Designs (Layout & Editing) E/V stitch E Stitch 1 2 3 Run time(s) Stroke time(s) Select the E stitch or the V stitch. 1 Interval Specify the distance between strokes. Narrow 2 Stroke width Specify the - Brother International PEDESIGN 8.0 | Users Manual - English - Page 103
differ depending on the selected sew type. Satin stitch Arranging Embroidery Designs (Layout & Editing) To specify underlay stitching, select conditions. • The sewing direction is set to Variable • Text and manual punching patterns Click Pattern to set the gradation pattern. c "Creating a - Brother International PEDESIGN 8.0 | Users Manual - English - Page 104
Arranging Embroidery Designs (Layout & Editing) Direction Specify the sewing direction course. This cannot be specified for text and manual punching patterns. Constant: Sews at a fixed angle. Drag or select a value to specify the angle. Variable:Automatically varies the sewing direction according - Brother International PEDESIGN 8.0 | Users Manual - English - Page 105
Arranging Embroidery Designs (Layout & Editing) Arranging Embroidery Designs (Layout & Editing) Fill stitch Under sewing Density Direction c "Satin stitch" on page 101. Stitch Type Specify the shape of the returning ends of the stitching. - Brother International PEDESIGN 8.0 | Users Manual - English - Page 106
Arranging Embroidery Designs (Layout & Editing) Programmable fill 1 2 Direction row Offset column Base Sewing Stitch Type Step Pitch Frequency Select a pattern for the programmable fill stitch. Click to display - Brother International PEDESIGN 8.0 | Users Manual - English - Page 107
Arranging Embroidery Designs (Layout & Editing) Arranging Embroidery Designs (Layout & Editing) Piping stitch Stitching is created to run through the length of blocks. Specify the sewing angle. Direction Drag or select a value to specify the angle. This cannot be specified for manual punching - Brother International PEDESIGN 8.0 | Users Manual - English - Page 108
Arranging Embroidery Designs (Layout & Editing) Motif stitch Motif Select the pattern to be used for the motif stitch. Pattern1 only: Only pattern 1 is used. Pattern2 only: Only pattern 2 - Brother International PEDESIGN 8.0 | Users Manual - English - Page 109
Arranging Embroidery Designs (Layout & Editing) Arranging Embroidery Designs (Layout & Editing) Cross stitch Size Times Specify the horizontal and vertical size of the grid pattern. Smaller In Expert mode, specify the value in millimeters - Brother International PEDESIGN 8.0 | Users Manual - English - Page 110
Stitch is selected as the region sew type for the manual punching pattern, feathered edge settings can be specified. Feathered When the check box is selected, a feathered edge is applied to the embroidery pattern in the Design Page. Check the preview, and then select the edge where the feathered - Brother International PEDESIGN 8.0 | Users Manual - English - Page 111
Arranging Embroidery Designs (Layout & Editing) Arranging Embroidery Designs (Layout & Editing) ■ Region sewing attributes Notes a preview of the embroidery" on page 65 and on "Creating Custom Stitch Patterns (Programmable Stitch Creator)" on page 205 in the Instruction Manual (PDF format). Saving - Brother International PEDESIGN 8.0 | Users Manual - English - Page 112
Arranging Embroidery Designs (Layout & Editing) ■ Deleting a group of settings from the list 1. can also be used on a different computer. Simply copy sastu.txt from the Settings folder in the PE-DESIGN 8 folder (program folder) on the original computer to the Settings folder at the same path on the - Brother International PEDESIGN 8.0 | Users Manual - English - Page 113
Arranging Embroidery Designs (Layout & Editing) ■ Deleting a chart 1. From the User Thread Chart selector, select the items are added to the list in the user thread chart. Arranging Embroidery Designs (Layout & Editing) a Note: If no chart is selected, the editing operation cannot be performed - Brother International PEDESIGN 8.0 | Users Manual - English - Page 114
Arranging Embroidery Designs (Layout & Editing) ■ Adding a new item 1. Click New Item. 2. To create a new color, click Mix. 5. Click OK to add the new item to the user thread - Brother International PEDESIGN 8.0 | Users Manual - English - Page 115
user thread chart can also be used on a different computer. Simply copy chart2.btc from the Color folder in the PEDESIGN 8 folder (application folder) on the original computer to the Color folder at the same path on the destination computer. Arranging Embroidery Designs (Layout & Editing) 113 - Brother International PEDESIGN 8.0 | Users Manual - English - Page 116
Arranging Embroidery Designs (Layout & Editing) Editing Regions Applying and editing Stamps Stamps can be applied to regions of objects drawn with the Rectangle, Circle or Arc tools, Shape tools, Outline tools, Text tools and the Manual Punch tools and that have the satin stitch, fill stitch and - Brother International PEDESIGN 8.0 | Users Manual - English - Page 117
Pattern. 3. To change the thread color, click . Select a color in the Thread Color dialog box that appeared, and then click OK. Arranging Embroidery Designs (Layout & Editing) • To change the stamp pattern, select a different pattern in the Stamp Attribute Setting dialog box, and then click Apply - Brother International PEDESIGN 8.0 | Users Manual - English - Page 118
Arranging Embroidery Designs (Layout & Editing) 5. Move the sliders to adjust the density of the gradation pattern. b Memo: The preview area shows the setting changes that you make. 6. To - Brother International PEDESIGN 8.0 | Users Manual - English - Page 119
key while clicking the frames for the desired patterns. In addition, multiple frames can be selected by dragging the pointer over them. Arranging Embroidery Designs (Layout & Editing) b Memo: • When multiple patterns are combined into one frame, appears to the left of the number of that frame - Brother International PEDESIGN 8.0 | Users Manual - English - Page 120
Arranging Embroidery Designs (Layout & Editing) Editing the sewing order Changing colors changed. The thread colors can also be changed in stitch patterns. The procedure for changing colors in an embroidery pattern is described below. c "Memo" on page 49. 1. Select a pattern in the Sewing Order/ - Brother International PEDESIGN 8.0 | Users Manual - English - Page 121
Arranging Embroidery Designs (Layout & Editing) Arranging Embroidery Designs (Layout & Editing) Changing sewing attributes Click . → appears at the bottom of the frame. → The embroidery pattern is locked. To unlock the embroidery pattern, select the frame, and then click again. b Memo: - Brother International PEDESIGN 8.0 | Users Manual - English - Page 122
(For example, click the drive where PE-DESIGN was installed, then Program Files, then Brother, then PE-DESIGN 8, then ClipArt.) 120 a Note: If no TWAIN device is installed, there will be no names displayed in the Sources list. First, install the driver software for the TWAIN device. 4. Click Select - Brother International PEDESIGN 8.0 | Users Manual - English - Page 123
Arranging Embroidery Designs (Layout & Editing) Arranging Embroidery Designs (Layout & Editing) a Note: For information on using the driver interface, refer to the help manual for that interface, or contact the manufacturer of the interface. → When the image transfer between the scanner (or other - Brother International PEDESIGN 8.0 | Users Manual - English - Page 124
Arranging Embroidery Designs (Layout & Editing) Importing image data from the clipboard Image data can be imported into the Design Page from the Clipboard. This allows you to import an image without saving it first. 1. Click Image, then Input, then from Clipboard. a Note: This can - Brother International PEDESIGN 8.0 | Users Manual - English - Page 125
is rotated in the specified direction. Deleting an image: 1. Press the Delete key, or click Edit, then Delete. → The image will be deleted from the Design Page. Arranging Embroidery Designs (Layout & Editing) b Memo: The status bar shows the dimensions (width and height) of the image. 123 - Brother International PEDESIGN 8.0 | Users Manual - English - Page 126
Arranging Embroidery Designs (Layout & Editing) Saving the image data The image can be saved as a file or outputted to the Clipboard. ■ Saving the data. ■ Outputting to the Clipboard 1. Click Image, then Output, then to Clipboard. → The image data in the Design Page is copied onto the Clipboard. 124 - Brother International PEDESIGN 8.0 | Users Manual - English - Page 127
-by-step instructions for converting an image into an embroidery pattern. Toolbar button: 1. If no image is displayed in the Design Page, use type of embroidery, and then click Next. Auto Punch: Select this option to automatically extract the outline for creating the embroidery pattern. (Proceed - Brother International PEDESIGN 8.0 | Users Manual - English - Page 128
Arranging Embroidery Designs (Layout & Editing) Automatically converting an image to an embroidery pattern (Auto Punch) A tutorial describing basic operations is also available. c "Auto Punch Function" on page 20 ■ If Auto Punch is selected 1. Select the desired settings. b Memo: After changing - Brother International PEDESIGN 8.0 | Users Manual - English - Page 129
a photo to an embroidery pattern (Photo Stitch 1/Photo Stitch 2) ■ If Photo Stitch 1 (Color) is selected A tutorial describing basic operations is is displayed in the Design Page. → The image is automatically hidden. b Memo: The sew type settings of the created embroidery pattern can later be - Brother International PEDESIGN 8.0 | Users Manual - English - Page 130
an Image Tune dialog box. b Memo: Click Fit to Page to adjust the mask to the size of the Design Page. 5. Click Next. 6. Specify the settings for creating the embroidery pattern. • Move the Original - Sharp slider to adjust the sharpness of the image's outlines. A setting more towards Sharp makes - Brother International PEDESIGN 8.0 | Users Manual - English - Page 131
dialog box, click Update Preview. → The previewed image is updated. 4. Click Next. 5. Adjust the image size and position. c See step 4. on page 128. 8. Click Finish. → An embroidery pattern is created and displayed in the Design Page. → The image is automatically hidden. ■ If Photo Stitch 1 (Sepia - Brother International PEDESIGN 8.0 | Users Manual - English - Page 132
page 127. 3. Click Next. 4. Adjust the image size and position. c See step 4. on page 128. c "Sewing Option" and "Color Option" on page 131. 8. Click Update Preview. → The previewed image is updated. 9. Click Finish. → An embroidery pattern is created and displayed in the Design Page. → The image - Brother International PEDESIGN 8.0 | Users Manual - English - Page 133
same color as the Design Page. Default: Selected Select what parameter is given priority when converting to embroidery pattern. Stitch Quality: manually. Manual Select Appears when the Auto Select check box is cleared. Click this button to open the Manual Select dialog box, which lets you manually - Brother International PEDESIGN 8.0 | Users Manual - English - Page 134
Arranging Embroidery Designs (Layout & Editing) b Memo: About the Manual Select dialog box 4. Adjust the image size and position c See step 2. on page 127. 3. Click Next. 8. Click Finish. → An embroidery pattern is created and displayed in the Design Page. → The image is automatically hidden. 132 - Brother International PEDESIGN 8.0 | Users Manual - English - Page 135
pattern. Arranging Embroidery Designs (Layout & Editing) 2. In the image preview box, move the handles of the mask until it surrounds the desired part of the image. c See step 2. on page 127. 3. Click Next. 4. Adjust the image size and position. c See step 4. on page 128. c "Sewing Option - Brother International PEDESIGN 8.0 | Users Manual - English - Page 136
Arranging Embroidery Designs (Layout & Editing) Color Option Color You can select the settings have been changed. Automatically converting an image to a cross stitch pattern (Cross Stitch) A tutorial describing basic operations is also available. c "Cross Stitch Function" on page 27 ■ If Cross - Brother International PEDESIGN 8.0 | Users Manual - English - Page 137
Embroidery Designs (Layout & Editing) Arranging Embroidery Designs (Layout & Editing) b Memo: Colors that are crossed out are set to not be sewn. 3. Specify the settings for creating the embroidery results of the changes, click Retry. 4. Click Next. → The Edit Cross Stitch dialog box appears. - Brother International PEDESIGN 8.0 | Users Manual - English - Page 138
page 134. Manually create embroidery patterns from images (Design Center) ■ If Design Center is selected → Design Center starts up, and a Design Page is displayed with the image imported into it. c "Manually Creating Embroidery Patterns From Images (Design Center)" on page 153. 5. Click Next. 6. If - Brother International PEDESIGN 8.0 | Users Manual - English - Page 139
Embroidery Designs (Layout & Editing) Creating appliqués (Applique Wizard) The Applique Wizard provides instructions for easily creating appliqués. A tutorial describing basic operations is also available. c "Creating Appliqués" on page 174 in the Instruction Manual fabric as a guide for cutting it - Brother International PEDESIGN 8.0 | Users Manual - English - Page 140
type of a previous software version, saved .pes files can be opened with that version of the software; however, all saved design will be converted to stitch pattern. a Note: • Some patterns imported from embroidery cards cannot be exported. • Patterns designed on a custom-sized Design Page will be - Brother International PEDESIGN 8.0 | Users Manual - English - Page 141
on writing two or more files to an original card, refer to "Writing Embroidery Design Files to an Original Card" on page 194 in the Instruction Manual (PDF format). a Note: Be sure that the hoop size of the design does not exceed the hoop that will be used on the embroidering machine. Toolbar - Brother International PEDESIGN 8.0 | Users Manual - English - Page 142
while the current embroidery design is transferred to pes file. 1. Click File, then Property. → The File property dialog box appears. 2. To enter or change the information, type it in. 3. Click OK to save the entered information. b Memo: • The entered information will be saved to the file the next - Brother International PEDESIGN 8.0 | Users Manual - English - Page 143
Arranging Embroidery Designs (Layout & Editing) Arranging Embroidery Designs (Layout & Editing) Design Page (on your screen) Sewing area = Design Page area Printing For details on printing when combining print and embroidery, also refer to the tutorial. c "6. Print and Stitch" on page 42. ■ - Brother International PEDESIGN 8.0 | Users Manual - English - Page 144
is only available when Actual size is selected in the Print Setup dialog box and when the Design Page is set to the larger hoop sizes [300 × 200 mm (11 3/4" × 7 , refer to the instructions for your printer.) Print a sheet of paper for aligning the printed image and the embroidery: Select this option - Brother International PEDESIGN 8.0 | Users Manual - English - Page 145
" on page 143 and "Checking embroidery design information" on page 137. ■ Printing You can print the Design Page together with its sewing information. 1. Click File, then Print. 2. Select the necessary settings. 3. Click OK to begin printing. 4. Follow the instructions for the printer to finish - Brother International PEDESIGN 8.0 | Users Manual - English - Page 146
Arranging Embroidery Designs (Layout & Editing) 144 - Brother International PEDESIGN 8.0 | Users Manual - English - Page 147
& Editing" on page 152" and "Transferring the design to an original card" on page 17". This section describes the basic operations performed in Design Center. For details on the procedures or settings, refer to "Manually Creating Embroidery Patterns From Images (Design Center)" on page 153. Basic - Brother International PEDESIGN 8.0 | Users Manual - English - Page 148
convert it to a line image. 1 Click , and then select All Programs, then PE-DESIGN 8, then Tools, then Design Center. 5 In the Cut out to Line Image dialog box, click the colors to be used for the outlines (embroidery lines). → The selected color appears in a box on the right side, and appears - Brother International PEDESIGN 8.0 | Users Manual - English - Page 149
dialog box, refer to "Changing settings for converting to outlines" on page 158. → The line image is converted to a figure handle image. Basic Design Center Operations b Memo: To draw vertical or horizontal lines, hold down the Shift key while moving the pointer. b Memo: • If lines are drawn - Brother International PEDESIGN 8.0 | Users Manual - English - Page 150
outline. ■ Adding lines to the figure handle image 1 Click on the Tool Box. 2 Click in the Design Page to specify the start point, and then click in the Design Page to specify the next point. → A line is drawn connecting the two points. Continue clicking to draw additional lines. Handle b Memo - Brother International PEDESIGN 8.0 | Users Manual - English - Page 151
Basic Design Center Operations ■ Reshaping outlines 1 Click on the Tool Box. 2 Click an outline. → The selected line appears in pink, lines Two points can be connected to form a line. 1 Perform steps 1 and 2 in "Reshaping outlines" to select a line. Basic Design Center Operations 149 - Brother International PEDESIGN 8.0 | Users Manual - English - Page 152
Basic Design Center Operations 2 While holding down the Alt key, drag the selected Stage We are now going to apply sewing attributes to the different parts of the outline to create the embroidery pattern. ■ Using the Reference Window This allows you to select colors while checking the colors in the - Brother International PEDESIGN 8.0 | Users Manual - English - Page 153
Basic Design Center Operations 6 When using , click the region where the For sewing attributes are to be applied. Region sew type selector 2 are to be applied. To change the sewing attributes, repeat steps 1 through 6. → The sewing attributes are specified. Basic Design Center Operations 151 - Brother International PEDESIGN 8.0 | Users Manual - English - Page 154
, such as the width of satin stitches and the run pitch, can be specified. c "Specifying sewing attributes" on page 165. ■ Importing into Layout & Editing The embroidery pattern created in Design Center can be imported into Layout & Editing, where it can be edited and combined with other - Brother International PEDESIGN 8.0 | Users Manual - English - Page 155
Manually Creating Embroidery Patterns From Images (Design Center) Manually Creating Embroidery Patterns From Images (Design Center) Design Center Window 1 2 3 6 5 4 1 Toolbar Provides shortcuts for the menu commands. 2 Sewing Attributes bar Sets the sewing attributes (color and sew type) of the - Brother International PEDESIGN 8.0 | Users Manual - English - Page 156
Manually Creating Embroidery Patterns From Images (Design Center) Original Image Stage Using the wizard This wizard provides a step-by-step guide for creating embroidery patterns. 1. Click File, then Wizard. → The How do you want to produce embroidery? dialog box appears. 123 4 5 4 Open PEM Click - Brother International PEDESIGN 8.0 | Users Manual - English - Page 157
Manually Creating Embroidery Patterns From Images (Design Center) Manually Creating Embroidery Patterns From Images (Design Center) Opening an image When you click the From Image button in the How do you want to produce embroidery? dialog box, the From Image dialog box appears. 1 3 2 4 1 Open - Brother International PEDESIGN 8.0 | Users Manual - English - Page 158
Manually Creating Embroidery Patterns From Images (Design Center) Line Image Stage After opening the image, want to use these tools to create outlines that are easier to draw by hand, for example, free-hand writing. For details on drawing and erasing outlines, refer to Step 2, "Line Image Stage", - Brother International PEDESIGN 8.0 | Users Manual - English - Page 159
Manually Creating Embroidery Patterns From Images (Design Center) 4. Click OK. Manually Creating Embroidery Patterns From Images (Design Center) b Memo: If you do not like the result, click to go back to the Original Image Stage, and then create the line image again. - Brother International PEDESIGN 8.0 | Users Manual - English - Page 160
Manually Creating Embroidery Patterns From Images (Design Center) Figure Handle Stage After creating the outline, which is simply a collection of Note: You will not be able to enlarge the image beyond the limits of the Design Page area. If necessary, click Design Page Property, and then change the - Brother International PEDESIGN 8.0 | Users Manual - English - Page 161
by clicking Pick Area, then dragging the pointer (+) to draw a selection frame around the area to be selected. 5. Click OK. Manually Creating Embroidery Patterns From Images (Design Center) a Note: If the outline data cannot be created from the image when moving from the Line Image Stage to the - Brother International PEDESIGN 8.0 | Users Manual - English - Page 162
Manually Creating Embroidery Patterns From Images (Design Center) Drawing a new figure handle image freehand An empty Design Page can be created in order to draw a figure handle image or to create patterns from outlines taken from a previously saved .pem file. 1. Click File, - Brother International PEDESIGN 8.0 | Users Manual - English - Page 163
Sew Setting Stage. To switch between displaying and hiding the Reference window, click Display, then Reference Window, or click , or press the shortcut key ( F11 ). Manually Creating Embroidery Patterns From Images (Design Center) 161 - Brother International PEDESIGN 8.0 | Users Manual - English - Page 164
Manually Creating Embroidery Patterns From Images (Design Center) ■ Zooming The Reference Window can be switched to display either the entire Design Page or only the embroidery pattern. 1. Click the Pan/Zoom tab, click . ■ Scaling the display area frame 1. Move the pointer over a corner of the - Brother International PEDESIGN 8.0 | Users Manual - English - Page 165
on the Sewing Attributes bar are applied to the region. Manually Creating Embroidery Patterns From Images (Design Center) b Memo: In the Sew Setting Stage, the colors of the Design Page and background can be changed from the Design Page Property dialog box (displayed by clicking Option, then - Brother International PEDESIGN 8.0 | Users Manual - English - Page 166
Manually Creating Embroidery Patterns From Images (Design Center) b Memo: • Although a region may seem closed, if the sewing attributes cannot be specified for the region, the region may not actually be closed. To - Brother International PEDESIGN 8.0 | Users Manual - English - Page 167
Manually Creating Embroidery Patterns From Images (Design Center) ■ Region sew / Line sew switches on/off region sewing; on/off line sewing. Sewing Attribute Setting dialog box when or on the Tool Box is selected. Manually Creating Embroidery Patterns From Images (Design Center) 165 - Brother International PEDESIGN 8.0 | Users Manual - English - Page 168
Manually Creating Embroidery Patterns From Images (Design Center) Beginner mode: For line sewing For region sewing Expert mode: For line sewing For region sewing : Click to return to the default setting. To - Brother International PEDESIGN 8.0 | Users Manual - English - Page 169
Manually Creating Embroidery Patterns From Images (Design Center) ■ Creating a gradation With a satin stitch, fill stitch or programmable fill stitch, stitch or radial stitch applied. The center point appears and can be moved. Manually Creating Embroidery Patterns From Images (Design Center) 167 - Brother International PEDESIGN 8.0 | Users Manual - English - Page 170
Manually Creating Embroidery Patterns From Images (Design Center) Preventing overlapping stitching of regions (hole Programmable Stitch Creator can be applied to regions in the Sew Setting Stage of Design Center. Some stamp patterns are provided with this application; however, by using Programmable - Brother International PEDESIGN 8.0 | Users Manual - English - Page 171
Manually Creating Embroidery Patterns From Images (Design Center) Manually Creating Embroidery Patterns From Images (Design Center) 3. To it to an embroidery machine. c "Importing into Layout & Editing" on page 152. a Note: If you select a file type of a previous software version, saved .pem - Brother International PEDESIGN 8.0 | Users Manual - English - Page 172
PE-DESIGN operations, an advanced tutorial, tips and techniques, and lists of menus/tools for each application are provided in the Instruction Manual (PDF format). In addition, this manual contains a troubleshooting section. Refer to this section if you have any problems while using this software - Brother International PEDESIGN 8.0 | Users Manual - English - Page 173
will go through each step of the basic operation. The sample file for this tutorial can be found at the following location. Documents(My Documents)\PE-DESIGN 8\Tutorial\Tutorial_7 Tutorial (Advanced) Step 1 Step 2 Step 3 Step 4 Creating monograms Changing the font and character size Changing - Brother International PEDESIGN 8.0 | Users Manual - English - Page 174
Tutorial (Advanced) 6 Click a decorative pattern to select it, and then click Select. 2 Change the font by clicking on the pulldown arrow and selecting a font. 7 Click OK. → The monogram is displayed in the Design 2 Changing the font and character size Next, we will change the font and character - Brother International PEDESIGN 8.0 | Users Manual - English - Page 175
Tutorial (Advanced) 2 To select a single character, click the point for the character that you want to select. 3 Click . Clicking a color in the over the selected pattern so that the shape of the pointer changes to , and then drag the pattern to the desired position. Tutorial (Advanced) 173 - Brother International PEDESIGN 8.0 | Users Manual - English - Page 176
Tutorial (Advanced) Creating Appliqués The Applique Wizard provides instructions Manual included with the machine. The sample file for this tutorial can be found at the following location. Documents(My Documents)\PE-DESIGN 8\Tutorial Then drag the pointer in the Design Page to the desired size. Step - Brother International PEDESIGN 8.0 | Users Manual - English - Page 177
Tutorial (Advanced) 3 The Applique Position, (guideline for attaching the appliqué piece) is set to be sewn automatically. 6 Click OK to finish the Applique Wizard and display the design in the Design Page. 4 Under Tack down, select whether (Yes) or not (No) the appliqué is to be basted onto the - Brother International PEDESIGN 8.0 | Users Manual - English - Page 178
be found at the following location. Documents(My Documents)\PE-DESIGN 8\Tutorial\Tutorial_9 Step 1 Step 2 Step 3 Step 4 Step 5 Step 6 Step 7 Specifying the Design Page size in Layout & Editing Creating the embroidery design Checking the embroidering order Attaching stabilizer to the fabric Marking - Brother International PEDESIGN 8.0 | Users Manual - English - Page 179
Tutorial (Advanced) Step 2 Creating the embroidery design For this example, we will use one of the lace embroidery patterns provided with the software. 1 Click File, then Import or click . Step 3 Checking the embroidering order Before the embroidery pattern is sewn, check the embroidering order to - Brother International PEDESIGN 8.0 | Users Manual - English - Page 180
Tutorial (Advanced) a Note: Before an embroidery pattern created in a custom Design Page is saved or transferred to an original card, running stitches are added at the edges of the design sections so that the design sections can easily be aligned during sewing. This alignment stitching appears in - Brother International PEDESIGN 8.0 | Users Manual - English - Page 181
Tutorial (Advanced) 4 Place the template on the fabric, and mark points A, B, C and D. fabric. a Note: • The intersection of the horizontal and vertical line indicates the center of the embroidery hoop. • While carefully considering how the fabric will be hooped, place the template on the fabric, - Brother International PEDESIGN 8.0 | Users Manual - English - Page 182
, then carefully align the fabric onto the sticky surface using the embroidery sheet as a guide. • Tip: The fabric can be hooped more easily if double 4 Remove the embroidery hoop from the embroidery machine, and then remove the fabric from the hoop. 5 Hoop the fabric for the next design section. c - Brother International PEDESIGN 8.0 | Users Manual - English - Page 183
design section is embroidered, alignment stitching is sewn on the left side and at the top. Make sure that this alignment stitching aligns with the alignment stitching sewn in step 3 and in step 2. 6 Continue hooping the fabric and embroidering until the entire embroidery design is sewn. Tutorial - Brother International PEDESIGN 8.0 | Users Manual - English - Page 184
the orientation of the design. When creating the design, each design section can only be as large as the sewing area of the embroidery machine. The sample file for this tutorial can be found at the following location. Documents(My Documents)\PE-DESIGN 8\Tutorial\Tutorial_10 Step 1 Step 2 Step - Brother International PEDESIGN 8.0 | Users Manual - English - Page 185
will appear when continuing to the next step. Step 3 Optimizing hoop changes With the Optimize hoop change function, the sewing order of patterns in a Design Page for multi-position hoops is automatically optimized, therefore reducing the risk of the embroidery being sewn incorrectly or the fabric - Brother International PEDESIGN 8.0 | Users Manual - English - Page 186
Tutorial (Advanced) 1 Click Sew, then Optimize hoop change. b Memo: • A check mark appears hoop installation order, click Previous or Next. At this time, the corresponding pattern and hoop position appear in the Design Page. a Note: If a pattern is larger than the embroidery area or if a pattern is - Brother International PEDESIGN 8.0 | Users Manual - English - Page 187
Tutorial (Advanced) ■ Saving the design The entire design is saved as a single file (.pes). b Memo: If the file size or the number of color changes is larger than the specified number, or if one of the patterns does not completely fit within an embroidery area, the message "Please change the object - Brother International PEDESIGN 8.0 | Users Manual - English - Page 188
Tutorial (Advanced) ■ Printing a Design Page for a multiposition hoop If a Design Page for a multi-position hoop is selected, a complete image of the Design Page is printed on the first page, followed by an image of each design section and its sewing information (dimensions of the embroidery, the - Brother International PEDESIGN 8.0 | Users Manual - English - Page 189
. 12 Contents pane Displays thumbnails of all embroidery design in the selected folder. Starting Up Design Database 1. Click , then select All Programs, then PE-DESIGN 8, then Tools, then Design Database. 2. Click a folder in the folder pane. → All embroidery files in the folder are displayed in - Brother International PEDESIGN 8.0 | Users Manual - English - Page 190
file name, size, stitch count, sewing time, color count and modification date can be checked in the Property dialog box. With .pes file, additional information about the embroidery design can be viewed. a Note: • The displayed sewing time is an estimate. The actual sewing time depends on the machine - Brother International PEDESIGN 8.0 | Users Manual - English - Page 191
Embroidery Design Files (Design Database) Managing Embroidery Design Files (Design Database) Opening Embroidery Designs Opening files with Layout & Editing You can easily open any selected .pes file with Layout & Editing. 1. In the folder pane, select the folder containing the embroidery design - Brother International PEDESIGN 8.0 | Users Manual - English - Page 192
then press the Enter key. → The name of the folder changes to the one that was typed in. Moving/copying files to a different folder From Design Database, embroidery design can easily be moved from one folder to another. 1. In the folder pane, locate the folder where you want to move the - Brother International PEDESIGN 8.0 | Users Manual - English - Page 193
key. b Memo: When renaming a file, the file extension cannot be changed. Deleting files From Design Database, embroidery designs can easily be deleted. 1. In the folder pane, select the folder containing the embroidery design that you want to delete. 2. In the contents pane, select the name of the - Brother International PEDESIGN 8.0 | Users Manual - English - Page 194
The Search function allows you to quickly search for the desired embroidery design (.pes, .phc, .dst, .exp, .pcs, .hus, .vip, .shv, .jef, .sew, .csd, .xxx, or .pen) within the selected folder according to the various search conditions that you - Brother International PEDESIGN 8.0 | Users Manual - English - Page 195
Managing Embroidery Design Files (Design Database) Managing Embroidery Design Files (Design Database) Converting Embroidery Design Files to Different Formats Embroidery design files can easily be converted to a file of one of the other formats (.pes, .dst, .exp, .pcs, .hus, .vip, .shv, .jef, .sew - Brother International PEDESIGN 8.0 | Users Manual - English - Page 196
machine. Otherwise, the created original card will not work correctly with the embroidery machine. 4. Click , and then select the folder where the desired design file is saved. → All embroidery files in the selected folder are displayed in the contents pane. 5. In the contents pane, select - Brother International PEDESIGN 8.0 | Users Manual - English - Page 197
Data" in the contents pane. • To display the contents of the folder in the contents pane, click . Switch the display by clicking and . → The embroidery design in the writing list are written to the original card. a Note: Do not remove the card or unplug the USB cable while patterns are being - Brother International PEDESIGN 8.0 | Users Manual - English - Page 198
2. Click File, then Print Setup. 3. Under Print Layout, select whether each design is printed on a separate page, 4 designs are printed on a page or 12 designs are printed on a page. Instead of being printed, the catalog of embroidery designs can be outputted as an HTML file. 1. In the folder pane - Brother International PEDESIGN 8.0 | Users Manual - English - Page 199
containing the sewing information (file name, dimensions, number of stitches, number of colors, file path, file properties (.pes files only) and the names of thread colors and thread numbers) for selected embroidery designs can be outputted. 1. In the folder pane, select the folder containing the - Brother International PEDESIGN 8.0 | Users Manual - English - Page 200
Managing Embroidery Design Files (Design Database) 198 - Brother International PEDESIGN 8.0 | Users Manual - English - Page 201
and motif stitch patterns. (The bottom four buttons do not appear in Motif 4 mode.) 3 3 Preview window Shows how the pattern will be sewn. 4 Design Page The actual part of the work area that can be saved. 5 Work area Creating Fill/Stamp Stitch Pattern Existing programmable stitch patterns - Brother International PEDESIGN 8.0 | Users Manual - English - Page 202
then Open. 3 Select the pattern file wave1.pas in the Pattern folder where PE-DESIGN was installed. (For example, clicking the drive where PE-DESIGN was installed, then Program Files, then Brother, then PE-DESIGN 8, then Pattern) Click Open, or double-click the files icon. b Memo: • The horizontal - Brother International PEDESIGN 8.0 | Users Manual - English - Page 203
stamp, an embossed or engraved finish can be created in the embroidery pattern. In order to do this, the lines of the Design Page to specify point 1, and then double-click the Design Page to specify point 2. Next, click in the Design Page to specify point 3, and then double-click the Design - Brother International PEDESIGN 8.0 | Users Manual - English - Page 204
Stitch Creator Operations Step 5 Using the edited fill/stamp stitch patterns in Layout & Editing 1 Start up Layout & Editing. 2 Select an embroidery pattern. 3 From the Region sew type selector, select Prog. Fill Stitch. 4 Click Sew, then Sewing Attribute Setting. c "Layout & Editing Window - Brother International PEDESIGN 8.0 | Users Manual - English - Page 205
by changing the shape of a single line. These patterns can be applied in line sewing and region sewing in Layout & Editing, and region sewing in Design Center. 2 Drag the point. The line that moves turns green when moving a point. 203 - Brother International PEDESIGN 8.0 | Users Manual - English - Page 206
was saved in Step 4. 7 Click the created motif stitch pattern, and then click OK. → The pattern is applied to the outlines of the embroidery pattern. 8 If necessary, change any other sewing attributes. b Memo: A motif stitch pattern can be used when the motif stitch, piping stitch or stippling - Brother International PEDESIGN 8.0 | Users Manual - English - Page 207
Fill/stamp stitch patterns • These patterns can be used as stamp patterns and for sewing with the programmable fill stitch in Layout & Editing or Design Center. • These patterns can be created with a single line or with multiple lines. In addition, these patterns can be used to create an embossing - Brother International PEDESIGN 8.0 | Users Manual - English - Page 208
, be sure to select a folder that contains .pmf files. Opening an image in the background You can open a background image that can be used as a guide to draw a new fill/stamp and motif stitch pattern. There are many different types of files that can be opened. c "Image file formats" on page - Brother International PEDESIGN 8.0 | Users Manual - English - Page 209
a New Pattern You can begin with a blank work area in order to design a new stitch pattern. Toolbar button: Example of a pattern selected for a programmable points with the Edit Point tool, and then moving them to form custom designs. The blue square at the left edge of the work area indicates the - Brother International PEDESIGN 8.0 | Users Manual - English - Page 210
settings" on page 215. 1. Click . 2. Click in the work area to specify the start point 1. And then, click in the work area to specify the next point 2. 3. Continue clicking to specify every point, and then double-click the last point, or click the last point and press the Enter key. 2 1 b Memo - Brother International PEDESIGN 8.0 | Users Manual - English - Page 211
Creating Custom Stitch Patterns (Programmable Stitch Creator) Creating Custom Stitch Patterns (Programmable Stitch Creator) Editing a Pattern in Fill/Stamp Mode Selecting patterns Scaling patterns 1. Click . 2. Click the pattern that you want to select. → Handles appear around the pattern to - Brother International PEDESIGN 8.0 | Users Manual - English - Page 212
Creating Custom Stitch Patterns (Programmable Stitch Creator) 2. Click the broken line. → The points in the broken line appear as small white squares. b Memo: You can only select one broken line at a time. 3. To edit a point, click the point to select it. → The selected point appears as a small - Brother International PEDESIGN 8.0 | Users Manual - English - Page 213
still form a region, otherwise the embossing/ engraving effects are canceled. • .pas files with region settings applied cannot be used with versions of the software earlier than version 6, but .pas files created with an earlier version can be used as a base to create stamp files. b Memo: This type - Brother International PEDESIGN 8.0 | Users Manual - English - Page 214
Creating Custom Stitch Patterns (Programmable Stitch Creator) Creating a Pattern in Motif Mode In Motif mode, patterns are created by inserting points on the base line of the motif stitch, then moving them in order to change the shape of the stitch and give it the look of a single-stroke drawing. - Brother International PEDESIGN 8.0 | Users Manual - English - Page 215
Creating Custom Stitch Patterns (Programmable Stitch Creator) Creating Custom Stitch Patterns (Programmable Stitch Creator) Editing a Pattern in Motif Mode After creating a pattern, or after opening an existing motif file, you may want to change its shape or position. To do so, you can proceed in - Brother International PEDESIGN 8.0 | Users Manual - English - Page 216
Creating Custom Stitch Patterns (Programmable Stitch Creator) Saving Patterns Overwriting Once the pattern has been saved, changes can easily be saved so that the latest version can be retrieved later. Toolbar button: 1. Click , or click File, then Save. → The file is saved. Saving with a new - Brother International PEDESIGN 8.0 | Users Manual - English - Page 217
Creating Custom Stitch Patterns (Programmable Stitch Creator) Creating Custom Stitch Patterns (Programmable Stitch Creator) Changing the Settings Changing the grid settings The line spacing in the grid displayed in the work area can be adjusted. 1. Click Display, then Grid. → A submenu showing - Brother International PEDESIGN 8.0 | Users Manual - English - Page 218
Creating Custom Stitch Patterns (Programmable Stitch Creator) 216 - Brother International PEDESIGN 8.0 | Users Manual - English - Page 219
from created fonts to be selected. 3 Tool Box Used to select and create font pattern. 4 Preview window Shows how the stitch pattern will be sewn. 5 Design Page The actual part of the work area that can be saved. 6 Guidelines (fixed) The distance between the two guidelines becomes the height of the - Brother International PEDESIGN 8.0 | Users Manual - English - Page 220
Page guidelines The standard guidelines for creating fonts are shown in the Design Pages. The contents of each of the guidelines are as shown below. (E) Ascender Line (B) Capital Line (C) Mean Line (A) Base Line (D) Descender Line (F) Set Line (G) Set - Brother International PEDESIGN 8.0 | Users Manual - English - Page 221
Manually Creating Custom Font With Font Creator, custom font characters that can be used in Layout & Editing can be created and edited. Using these custom characters, original embroidery select All Programs, then PEDESIGN 8, then Tools, then (My documents), then PEDESIGN8, then Sample, then Font - Brother International PEDESIGN 8.0 | Users Manual - English - Page 222
pattern : Curved block-type pattern : Semi-automatically created straight block-type pattern : Running-type pattern : Feed-type pattern Click in the Design Page to specify points 1 (start point) through 4. 1 3 24 Click the Select character button, and then select the character to be created - Brother International PEDESIGN 8.0 | Users Manual - English - Page 223
can be prevented. 6 Click , then . And then click points 11 through 12. 11 Set Line Set Line Step 3 Creating other font character patterns Next, we will create another font character pattern. For this example, we will create a pattern for the letter "g". 1 Import file Small_g.bmp in the same - Brother International PEDESIGN 8.0 | Users Manual - English - Page 224
Basic Font Creator Operations 3 Adjust the character size and position in the same way that "T" was adjusted. Drag the triangle icons to move the blue reference lines so that they are aligned with the top and bottom of the character. Mean Line 20 18 22 24 19 17 21 23 Descender Line 4 Click , - Brother International PEDESIGN 8.0 | Users Manual - English - Page 225
pattern 1 Click File, then Save. 2 Select the MyFont folder in the folder where PE-DESIGN was installed. (For example, clicking the drive where PE-DESIGN was installed, then Program Files, then Brother, then PE-DESIGN 8, then MyFont) And then type in the file name. For this example, type in - Brother International PEDESIGN 8.0 | Users Manual - English - Page 226
Basic Font Creator Operations Step 5 Creating an embroidery pattern using the created font characters The created Click in the Font selector, and then select "My font1". → The text is displayed in the Design Page. c "Adding Text" on page 80. Fonts created in Font Creator appear with the icon in - Brother International PEDESIGN 8.0 | Users Manual - English - Page 227
Toolbar button: 1. Click , or click File, then Open. 2. Select the MyFont folder in the folder where PE-DESIGN was installed. (For example, clicking the drive where PE-DESIGN was installed, then Program Files, then Brother, then PE-DESIGN 8, then MyFont) Creating Custom Fonts (Font Creator) 225 - Brother International PEDESIGN 8.0 | Users Manual - English - Page 228
the upper-left corner is a space. Click this box to select a space. a Note: If any part of the character pattern extends off the Design Page when a different character is selected, a message appears. Before selecting a different character, edit the character pattern so that no part extends off the - Brother International PEDESIGN 8.0 | Users Manual - English - Page 229
background Existing image data or a TrueType font character can be displayed in the Design Page to be used as a template. Open an image of the selected character for the background image will be saved with the font file. The next time that the font file is opened, the background image is displayed - Brother International PEDESIGN 8.0 | Users Manual - English - Page 230
Creating Custom Fonts (Font Creator) • While working on a character in a font, the same TrueType font appears until a different template is selected for the background. Each time a different character is selected in the Select Character dialog box, the template of the character in the same TrueType - Brother International PEDESIGN 8.0 | Users Manual - English - Page 231
running-type punching patterns (line sewing). (Shortcut key: V ) : This is used for creating feed-type punching patterns (jump stitches). (Shortcut key: B ) c "Manually Creating Custom Font" on page 219. b Memo: • When entering points, you can switch between the various tools. This is very easy if - Brother International PEDESIGN 8.0 | Users Manual - English - Page 232
Creating Custom Fonts (Font Creator) Editing Font Character Patterns Selecting patterns Moving patterns 1. Click on the Tool Box. 2. Click the pattern. → Handles appear around the pattern to show that it is selected. 1. Move the pointer over a selected pattern(s). 2. Drag the pattern(s) to - Brother International PEDESIGN 8.0 | Users Manual - English - Page 233
Creating Custom Fonts (Font Creator) Editing the Points of a Font Character Pattern Editing points and reshaping patterns 1. Click on the Tool Box. 2. Click the pattern that you want to edit. → The points in the pattern appear as small white squares or circles. b Memo: • To select multiple - Brother International PEDESIGN 8.0 | Users Manual - English - Page 234
sewing order. To change the sewing order, click OK. Previewing the embroidery pattern A preview of the Font pattern can be viewed in the Preview window around it, and marching lines appear around the corresponding pattern in the Design Page. ■ Editing the sewing order The sewing order can be changed - Brother International PEDESIGN 8.0 | Users Manual - English - Page 235
then Browse Window. → The Browse window appears. Creating Custom Fonts (Font Creator) ■ Selecting characters A different character can be displayed in the Design Page by selecting a character in the Browse window. 1. Click , or click Display, then Browse Window. 2. Click a character, and then - Brother International PEDESIGN 8.0 | Users Manual - English - Page 236
in the file name. a Note: • Save the font created in the MyFont folder. (For example, clicking the drive where PE-DESIGN was installed, then Program Files, then Brother, then PE-DESIGN 8, then MyFont) The font will not be usable in the Layout & Editing if it's stored in a different folder. • If - Brother International PEDESIGN 8.0 | Users Manual - English - Page 237
Creating Custom Fonts (Font Creator) Changing the Settings Changing the drawing mode There are two drawing modes in Font Creator. • Fill mode Blocks appear filled in. In this mode, the overlapping positions of patterns can be viewed better. • Outline mode (Fill mode Off) Blocks do not appear - Brother International PEDESIGN 8.0 | Users Manual - English - Page 238
Creating Custom Fonts (Font Creator) Changing the grid settings The line spacing in the grid displayed in the work area can be adjusted. 1. Click Display, then Grid Setup. 2. To display the grid, select the Show Grid check box. To hide the grid, clear the Show Grid check box. 3. To input the font in - Brother International PEDESIGN 8.0 | Users Manual - English - Page 239
be enlarged/reduced after being converted to a manual punching pattern. With method 1, the stitching will This software allows you to create a wide variety of embroidery patterns and supports wider creating an embroidery pattern made of several different parts (in Layout & Editing or Design Center), - Brother International PEDESIGN 8.0 | Users Manual - English - Page 240
be cut at jump stitch. Depending on the embroidery machine being used, the thread may not be cut at jump stitch shorter than a set length. For details on the jump stitch trimming function, refer to the Instruction Manual provided with your embroidery machine. Stitching Jump stitch Stitching 238 - Brother International PEDESIGN 8.0 | Users Manual - English - Page 241
. 2. Sew at a speed slower than what is used when embroidering normal designs. (For details on adjusting the thread tension and sewing speed, refer to the Instruction Manual provided with your embroidery machine.) 3. Do not cut the jump stitches between the characters. (For details on setting the - Brother International PEDESIGN 8.0 | Users Manual - English - Page 242
Tips and Techniques Creating Outlined Characters (Using Text Converted to Outline Object) Outlined characters within a shape can be created by applying the Convert to Outline Object command to a character of a TrueType font. 1. Use a Shape tool to draw a shape. c For more details, refer to "Drawing - Brother International PEDESIGN 8.0 | Users Manual - English - Page 243
embroidery pattern from Japanese characters. 1. Select a Text tool, and then select a Japanese TrueType font (for example, "MS Gothic"). 2. Click in the Design view check box. Next, select Windows: support, and then click OK. 4) Complete the Windows® installation by following the instructions - Brother International PEDESIGN 8.0 | Users Manual - English - Page 244
Tips and Techniques 242 - Brother International PEDESIGN 8.0 | Users Manual - English - Page 245
73 Sets the pointer in manual punching mode. p. 78 Design Center Save Save As Opens a previously saved embroidery design. Ctrl + O Imports embroidery designs from Design Library, folder or original card. F8 Imports an embroidery pattern from Design Center. F7 Saves your embroidery design - Brother International PEDESIGN 8.0 | Users Manual - English - Page 246
p. 139 Used to enter comments in the .pes file being edited. Allows you to change the printing settings for previewed embroidery design and image. Allows you to preview your embroidery design and image before printing. Prints your embroidery design and image. Ctrl + P p. 140 p. 43 p. 141 p. 143 - Brother International PEDESIGN 8.0 | Users Manual - English - Page 247
Left Center Align Right Top Middle Bottom Select All Allows you to manually rotate the selected pattern(s) by an arbitrary angle. Resizes the selected pattern numerically. Moves the selected pattern to the center of the Design Page. Aligns the selected patterns on their left sides. Aligns the - Brother International PEDESIGN 8.0 | Users Manual - English - Page 248
Toolbar Purpose Shortcut key Reference Gives step-by-step instruction for creating embroidery pattern from image data. p. 125 Displays the template embroidery patterns. p. 75 p. 76 Divides the stitch data according to the various colors. p. 64 Converts stitch patterns into blocks (manual - Brother International PEDESIGN 8.0 | Users Manual - English - Page 249
a shape pattern to a stitch pattern. p. 62 Provides step-by-step instructions for easily creating appliqués. Sets the sewing area. p. 137 p. 140 Optimizes the sewing order of patterns in a Design Page for multi-position embroidery frames (100 × 172 mm or 130 × 300 mm). Optimizes the positions - Brother International PEDESIGN 8.0 | Users Manual - English - Page 250
displays its window up front. p. 217 p. 225 Design Property Design Page Property Edit User Thread Chart Displays a dialog box Instruction Manual. Shortcut key Reference F1 p. 13 Check for Updates Checks for the updated version on the Web. p. 14 Customer Support Opens the Customer Support - Brother International PEDESIGN 8.0 | Users Manual - English - Page 251
pens and erasers (when the right mouse button is held down) of different thicknesses. p. 147 Sets the pointer in zoom-in mode. Maximizes the selected Design Page to fit in the window. p. 147 Sets the pointer in zoom-out mode. ■ Figure Handle Stage Tool Box Purpose Sets the pointer in - Brother International PEDESIGN 8.0 | Users Manual - English - Page 252
Image New Figure Data Wizard Toolbar Purpose Shortcut key Reference Creates a new Design Page and switches to the Line Image Stage. Creates a new Design Page and switches to the Figure Handle Stage. Gives a step-by-step guide for creating pattern, according the type of data you want to create - Brother International PEDESIGN 8.0 | Users Manual - English - Page 253
Menus/Tools ■ Edit menu Menu Undo Toolbar Purpose Undoes the last operation. Shortcut key Reference Ctrl + Z Redo Cut Copy Duplicate Paste Delete Split Mirror Horizontal Vertical Cancels the effect of the last Undo. Ctrl + Shift + Z Removes the selected pattern from the screen while - Brother International PEDESIGN 8.0 | Users Manual - English - Page 254
front. F5 Starts up Programmable Stitch Creator and displays its window up front. p. 47 p. 199 p. 205 Design Page Property Allows you to change the size of the Design Page and the color of the Design Page and the background. p. 159 Select System Unit mm inch Allows you to change the system - Brother International PEDESIGN 8.0 | Users Manual - English - Page 255
the embroidery pattern from the Sew Setting Stage to Layout & Editing. p. 163 p. 152 ■ Help menu Menu Instruction Manual Toolbar Purpose Starts up the Instruction Manual. Shortcut key Reference F1 p. 13 Customer Support Opens the Customer Support Page on our Web site. p. 14 About Design - Brother International PEDESIGN 8.0 | Users Manual - English - Page 256
of menus ■ File menu Menu Open in Layout & Editing Import into Layout & Editing Toolbar Purpose Opens the embroidery design file with Layout & Editing. Imports the embroidery design file into Layout & Editing. Shortcut key Reference p. 189 p. 189 Create New Folder Creates a new folder in the - Brother International PEDESIGN 8.0 | Users Manual - English - Page 257
the embroidery design file(s) in the contents pane as large thumbnails. Small Thumbnails Lists the embroidery design file(s) Instruction Manual Customer support About Design Database Toolbar Purpose Starts up the Instruction Manual. Shortcut key Reference F1 p. 13 Opens the Customer Support - Brother International PEDESIGN 8.0 | Users Manual - English - Page 258
N p. 207 Open Template Open Save Save As Exit Opens a previously saved stitch pattern file. Opens a background image file that can be used as a guide to draw a new pattern for a programmable fill or motif stitch. Saves your work area on the disk. Saves the current stitch pattern under a new file - Brother International PEDESIGN 8.0 | Users Manual - English - Page 259
saving them in the Clipboard. Flips the selected line(s) up/down. Ctrl + V Delete Ctrl + H Flips the selected line(s) left/right. Ctrl + J p. 213 Allows you to manually rotate the selected line(s) by an arbitrary angle. Selects all of the lines. Ctrl + Y Ctrl + A Menus/Tools 257 - Brother International PEDESIGN 8.0 | Users Manual - English - Page 260
Bar Hides/displays the status bar. ■ Help menu Menu Instruction Manual Toolbar Purpose Starts up the Instruction Manual. Shortcut key Reference F1 p. 13 Customer support About Programmable Stitch Creator Opens the Customer Support Page on our Web site. Gives information about the version - Brother International PEDESIGN 8.0 | Users Manual - English - Page 261
Tool Box Purpose Sets the pointer in zoom mode. Sets the pointer in manual punching mode. Reference p. 229 List of menus ■ File menu Menu New Toolbar saved font file. Opens a background image file that can be used as a guide to draw a Font Pattern. Opens a TrueType font to be used as a - Brother International PEDESIGN 8.0 | Users Manual - English - Page 262
to a pointed path. Removes the selected point(s). Flips the selected pattern(s) up/down. Flips the selected pattern(s) left/right. Allows you to manually rotate the selected pattern(s) by an arbitrary angle. Aligns the selected patterns on their left sides. Aligns the selected patterns on their left - Brother International PEDESIGN 8.0 | Users Manual - English - Page 263
p. 233 p. 235 F6 F6 F6 p. 235 F6 F6 p. 217 ■ Help menu Menu Instruction Manual Toolbar Purpose Starts up the Instruction Manual. Shortcut key Reference F1 p. 13 Customer Support Opens the Customer Support Page on our Web site. p. 14 About Font Creator Gives information about the - Brother International PEDESIGN 8.0 | Users Manual - English - Page 264
the problem, contact your authorized dealer or Brother Customer Service. Problem Estimated Cause Solution Page The software the left does not correct the problem, go to the Web site mentioned under "Support/ Service". (Refer to page 14.) When trying to upgrade from an older version, the - Brother International PEDESIGN 8.0 | Users Manual - English - Page 265
111 thread colors from charts 112 Design Center 145, 249 Design Database 187, 254 Design Page Property 68, 159, 182 Design Page size 68, 159 multi-position hoops 182 Design Property 137 Display Small Thumbnails 191 displaying background images 215 embroidery patterns 191 images 123, 159 - Brother International PEDESIGN 8.0 | Users Manual - English - Page 266
images 122, 155 embroidery patterns 48, 189 from Design Center 50 from embroidery cards 195 images 120, 155 TWAIN images 120 Input from Clipboard 122 from File 120 from Portrait 121 from TWAIN device 120 inserting stitch points 63 Installation Guide 13 Instruction Manual 13 J Jump - Brother International PEDESIGN 8.0 | Users Manual - English - Page 267
Index O Online Registration 14 opening .pem files 154 .pes file 48 background images 206 Clipboard images 122, 155 embroidery patterns 48, 189 images 120, 155 Layout & Editing file 48 new Design Page 47 new figure handle images 154, 160 new line images 154, 157 new stitch pattern 207 - Brother International PEDESIGN 8.0 | Users Manual - English - Page 268
Index stamp attributes 114 stamps 168 Step Pitch 103, 104 Stippling stitch 7, 108 stitch patterns previewing 208 saving 214 stitch points deleting 63 inserting 63 moving 63 stitch simulator 66 Stitch to Block 63 String 71 T Template 19, 120, 178, 206, 226 Template Open 206 Text - Brother International PEDESIGN 8.0 | Users Manual - English - Page 269
English
-
 1
1 -
 2
2 -
 3
3 -
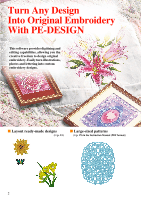 4
4 -
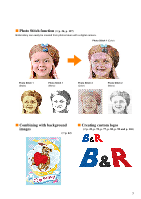 5
5 -
 6
6 -
 7
7 -
8
-
9
-
10
-
11
-
12
-
13
-
14
-
15
-
16
-
17
-
18
-
19
-
20
-
21
-
22
-
23
-
24
-
25
-
26
-
27
-
28
-
29
-
30
-
31
-
32
-
33
-
34
-
35
-
36
-
37
-
38
-
39
-
40
-
41
-
42
-
43
-
44
-
45
-
46
-
47
-
48
-
49
-
50
-
51
-
52
-
53
-
54
-
55
-
56
-
57
-
58
-
59
-
60
-
61
-
62
-
63
-
64
-
65
-
66
-
67
-
68
-
69
-
70
-
71
-
72
-
73
-
74
-
75
-
76
-
77
-
78
-
79
-
80
-
81
-
82
-
83
-
84
-
85
-
86
-
87
-
88
-
89
-
90
-
91
-
92
-
93
-
94
-
95
-
96
-
97
-
98
-
99
-
100
-
101
-
102
-
103
-
104
-
105
-
106
-
107
-
108
-
109
-
110
-
111
-
112
-
113
-
114
-
115
-
116
-
117
-
118
-
119
-
120
-
121
-
122
-
123
-
124
-
125
-
126
-
127
-
128
-
129
-
130
-
131
-
132
-
133
-
134
-
135
-
136
-
137
-
138
-
139
-
140
-
141
-
142
-
143
-
144
-
145
-
146
-
147
-
148
-
149
-
150
-
151
-
152
-
153
-
154
-
155
-
156
-
157
-
158
-
159
-
160
-
161
-
162
-
163
-
164
-
165
-
166
-
167
-
168
-
169
-
170
-
171
-
172
-
173
-
174
-
175
-
176
-
177
-
178
-
179
-
180
-
181
-
182
-
183
-
184
-
185
-
186
-
187
-
188
-
189
-
190
-
191
-
192
-
193
-
194
-
195
-
196
-
197
-
198
-
199
-
200
-
201
-
202
-
203
-
204
-
205
-
206
-
207
-
208
-
209
-
210
-
211
-
212
-
213
-
214
-
215
-
216
-
217
-
218
-
219
-
220
-
221
-
222
-
223
-
224
-
225
-
226
-
227
-
228
-
229
-
230
-
231
-
232
-
233
-
234
-
235
-
236
-
237
-
238
-
239
-
240
-
241
-
242
-
243
-
244
-
245
-
246
-
247
-
248
-
249
-
250
-
251
-
252
-
253
-
254
-
255
-
256
-
257
-
258
-
259
-
260
-
261
-
262
-
263
-
264
-
265
-
266
-
267
-
268
-
269
 |
 |

Instruction Manual