Brother International PEDESIGN 8.0 Users Manual - English - Page 142
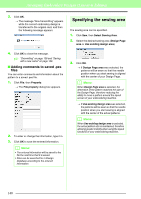
Specifying the sewing area, Adding comments to saved .pes, files
 |
View all Brother International PEDESIGN 8.0 manuals
Add to My Manuals
Save this manual to your list of manuals |
Page 142 highlights
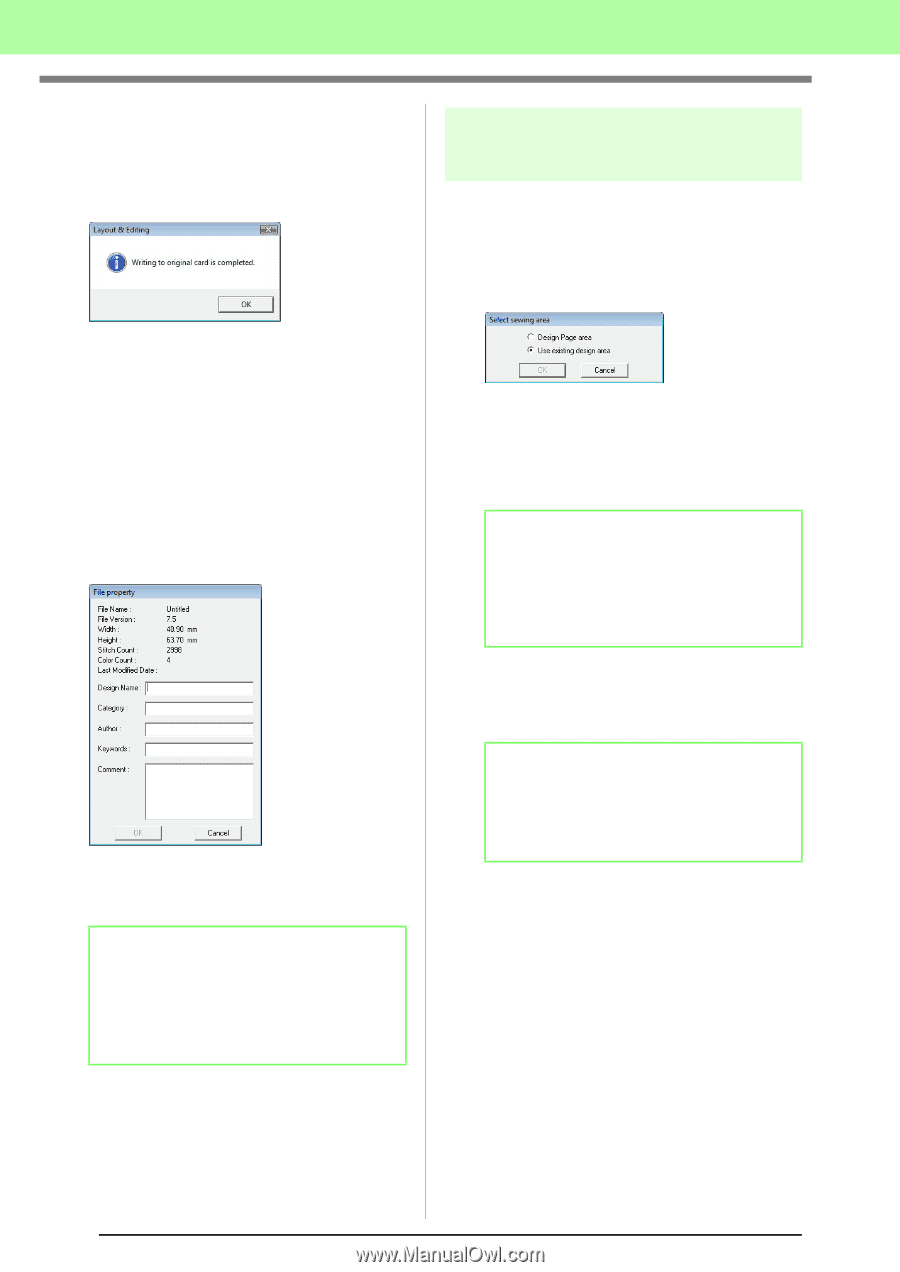
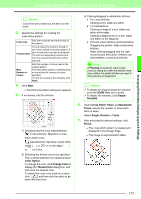
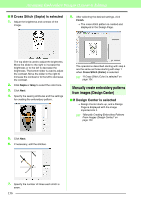
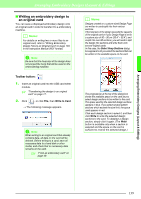
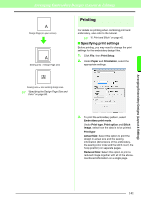
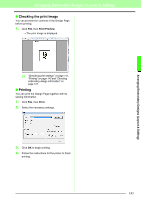
Arranging Embroidery Designs (Layout & Editing) 3. Click OK. → The message "Now transmitting" appears while the current embroidery design is transferred to the original card, and then the following message appears. Specifying the sewing area The sewing area can be specified. 1. Click Sew, then Select Sewing Area. 2. Select the desired sewing area (Design Page area or Use existing design area). 4. Click OK to close the message. c "Overwriting" on page 138 and "Saving with a new name" on page 138. ■ Adding comments to saved .pes files You can enter comments and information about the pattern to a saved .pes file. 1. Click File, then Property. → The File property dialog box appears. 2. To enter or change the information, type it in. 3. Click OK to save the entered information. b Memo: • The entered information will be saved to the file the next time that it is saved. • Files can be searched for in Design Database according to the entered information. 3. Click OK. → If Design Page area was selected, the patterns will be sewn so that the needle position when you start sewing is aligned with the center of your Design Page. b Memo: When Design Page area is selected, the dimension of the pattern matches the size of the Design Page, therefore reducing the ability to move a pattern around the layout screen of your embroidering machine. → If Use existing design area was selected, the patterns will be sewn so that the needle position when you start sewing is aligned with the center of the actual patterns. b Memo: When Use existing design area is selected, the actual pattern size is maintained, therefore allowing greater mobility when using the layout functions of your embroidering machine. 140
-
 1
1 -
2
-
3
-
4
-
5
-
6
-
7
-
8
-
9
-
10
-
11
-
12
-
13
-
14
-
15
-
16
-
17
-
18
-
19
-
20
-
21
-
22
-
23
-
24
-
25
-
26
-
27
-
28
-
29
-
30
-
31
-
32
-
33
-
34
-
35
-
36
-
37
-
38
-
39
-
40
-
41
-
42
-
43
-
44
-
45
-
46
-
47
-
48
-
49
-
50
-
51
-
52
-
53
-
54
-
55
-
56
-
57
-
58
-
59
-
60
-
61
-
62
-
63
-
64
-
65
-
66
-
67
-
68
-
69
-
70
-
71
-
72
-
73
-
74
-
75
-
76
-
77
-
78
-
79
-
80
-
81
-
82
-
83
-
84
-
85
-
86
-
87
-
88
-
89
-
90
-
91
-
92
-
93
-
94
-
95
-
96
-
97
-
98
-
99
-
100
-
101
-
102
-
103
-
104
-
105
-
106
-
107
-
108
-
109
-
110
-
111
-
112
-
113
-
114
-
115
-
116
-
117
-
118
-
119
-
120
-
121
-
122
-
123
-
124
-
125
-
126
-
127
-
128
-
129
-
130
-
131
-
132
-
133
-
134
-
135
-
136
-
 137
137 -
 138
138 -
 139
139 -
 140
140 -
 141
141 -
 142
142 -
 143
143 -
 144
144 -
 145
145 -
 146
146 -
 147
147 -
148
-
149
-
150
-
151
-
152
-
153
-
154
-
155
-
156
-
157
-
158
-
159
-
160
-
161
-
162
-
163
-
164
-
165
-
166
-
167
-
168
-
169
-
170
-
171
-
172
-
173
-
174
-
175
-
176
-
177
-
178
-
179
-
180
-
181
-
182
-
183
-
184
-
185
-
186
-
187
-
188
-
189
-
190
-
191
-
192
-
193
-
194
-
195
-
196
-
197
-
198
-
199
-
200
-
201
-
202
-
203
-
204
-
205
-
206
-
207
-
208
-
209
-
210
-
211
-
212
-
213
-
214
-
215
-
216
-
217
-
218
-
219
-
220
-
221
-
222
-
223
-
224
-
225
-
226
-
227
-
228
-
229
-
230
-
231
-
232
-
233
-
234
-
235
-
236
-
237
-
238
-
239
-
240
-
241
-
242
-
243
-
244
-
245
-
246
-
247
-
248
-
249
-
250
-
251
-
252
-
253
-
254
-
255
-
256
-
257
-
258
-
259
-
260
-
261
-
262
-
263
-
264
-
265
-
266
-
267
-
268
-
269
 |
 |