Brother International PEDESIGN 8.0 Users Manual - English - Page 171
Checking the stitching, Viewing embroidery patterns, in the Reference Window, Saving embroidery
 |
View all Brother International PEDESIGN 8.0 manuals
Add to My Manuals
Save this manual to your list of manuals |
Page 171 highlights
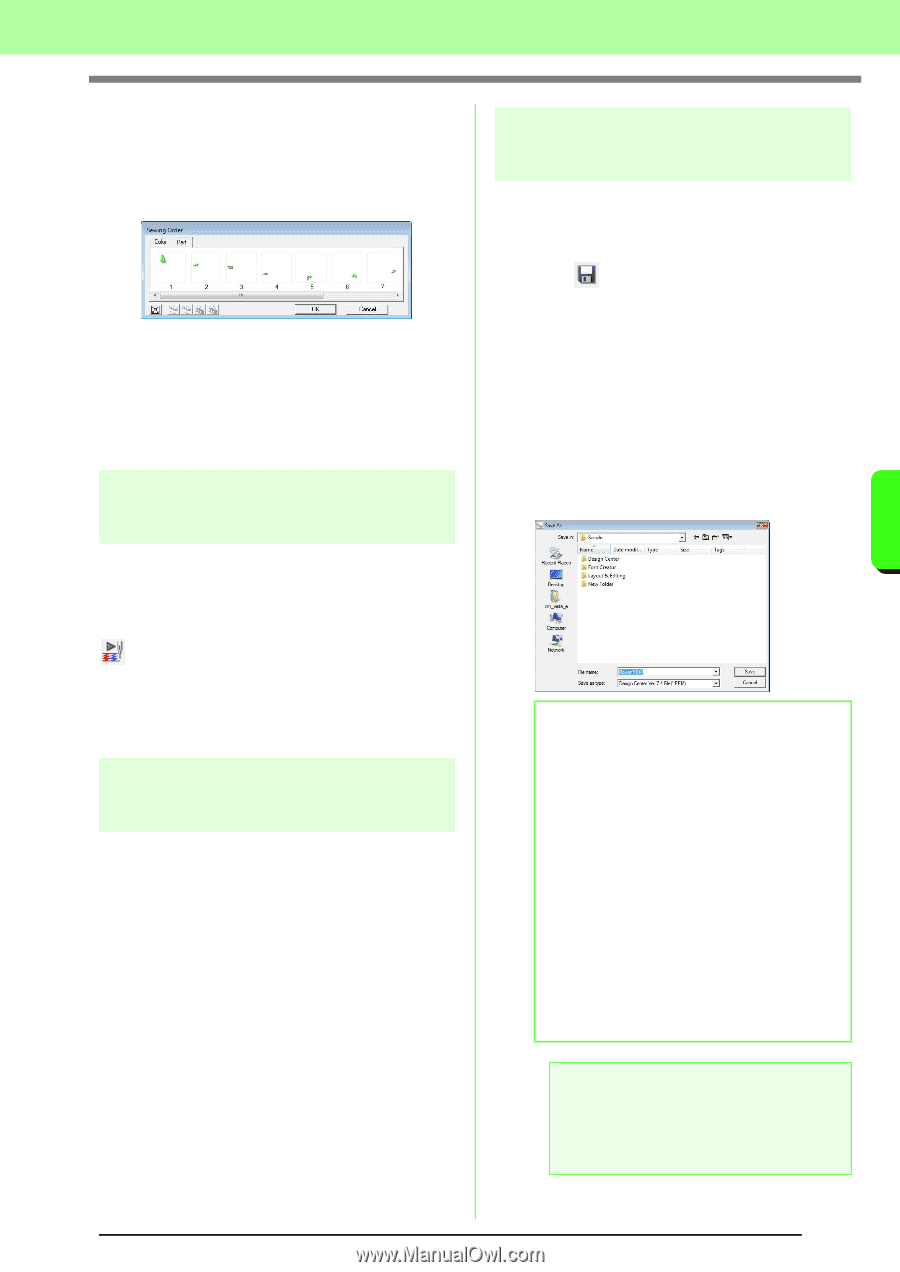
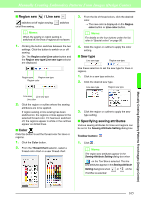
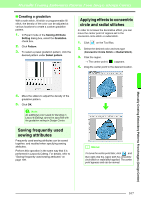
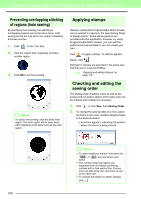
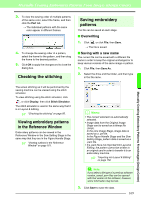
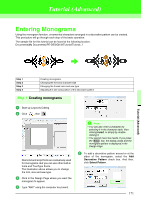
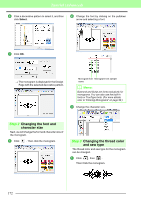
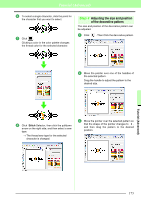
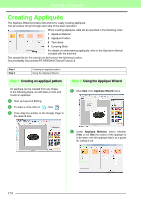
Manually Creating Embroidery Patterns From Images (Design Center) Manually Creating Embroidery Patterns From Images (Design Center) 3. To view the sewing order of multiple patterns of the same color, select the frame, and then click the Part tab. → The individual patterns with the same color appear in different frames. 4. To change the sewing order of a pattern, select the frame for the pattern, and then drag the frame to the desired position. 5. Click OK to apply the changes and to close the dialog box. Checking the stitching Saving embroidery patterns The file can be saved at each stage. ■ Overwriting 1. Click , or click File, then Save. → The file is saved. ■ Saving with a new name The current file can be saved with a different file name in order to keep the original unchanged or to keep various versions of the same image or pattern. 1. Click File, then Save As. 2. Select the drive and the folder, and then type in the file name. The actual stitching as it will be performed by the sewing machine can be viewed using the stitch simulator. To view stitching using the stitch simulator, click , or click Display, then click Stitch Simulator. The stitch simulator is used in the same way that it is in Layout & Editing. c "Checking the stitching" on page 66. Viewing embroidery patterns in the Reference Window Embroidery patterns can be viewed in the Reference Window in the Sew Setting Stage in the same way that they are in the Figure Handle Stage. c "Viewing outlines in the Reference Window" on page 161. b Memo: • The correct extension is automatically selected. • Image data from the Original Image Stage can be saved as a bitmap file (.bmp). In the Line Image Stage, image data is saved as a .pel file. In the Figure Handle Stage and the Sew Setting Stage, pattern data is saved as a .pem file. • If a .pem file is not imported into Layout & Editing, the pattern cannot be written to an original card in order to transfer it to an embroidery machine. c "Importing into Layout & Editing" on page 152. a Note: If you select a file type of a previous software version, saved .pem files can be opened with that version of the software; however, some information may be lost. 3. Click Save to save the data. 169
-
 1
1 -
2
-
3
-
4
-
5
-
6
-
7
-
8
-
9
-
10
-
11
-
12
-
13
-
14
-
15
-
16
-
17
-
18
-
19
-
20
-
21
-
22
-
23
-
24
-
25
-
26
-
27
-
28
-
29
-
30
-
31
-
32
-
33
-
34
-
35
-
36
-
37
-
38
-
39
-
40
-
41
-
42
-
43
-
44
-
45
-
46
-
47
-
48
-
49
-
50
-
51
-
52
-
53
-
54
-
55
-
56
-
57
-
58
-
59
-
60
-
61
-
62
-
63
-
64
-
65
-
66
-
67
-
68
-
69
-
70
-
71
-
72
-
73
-
74
-
75
-
76
-
77
-
78
-
79
-
80
-
81
-
82
-
83
-
84
-
85
-
86
-
87
-
88
-
89
-
90
-
91
-
92
-
93
-
94
-
95
-
96
-
97
-
98
-
99
-
100
-
101
-
102
-
103
-
104
-
105
-
106
-
107
-
108
-
109
-
110
-
111
-
112
-
113
-
114
-
115
-
116
-
117
-
118
-
119
-
120
-
121
-
122
-
123
-
124
-
125
-
126
-
127
-
128
-
129
-
130
-
131
-
132
-
133
-
134
-
135
-
136
-
137
-
138
-
139
-
140
-
141
-
142
-
143
-
144
-
145
-
146
-
147
-
148
-
149
-
150
-
151
-
152
-
153
-
154
-
155
-
156
-
157
-
158
-
159
-
160
-
161
-
162
-
163
-
164
-
165
-
 166
166 -
 167
167 -
 168
168 -
 169
169 -
 170
170 -
 171
171 -
 172
172 -
 173
173 -
 174
174 -
 175
175 -
 176
176 -
177
-
178
-
179
-
180
-
181
-
182
-
183
-
184
-
185
-
186
-
187
-
188
-
189
-
190
-
191
-
192
-
193
-
194
-
195
-
196
-
197
-
198
-
199
-
200
-
201
-
202
-
203
-
204
-
205
-
206
-
207
-
208
-
209
-
210
-
211
-
212
-
213
-
214
-
215
-
216
-
217
-
218
-
219
-
220
-
221
-
222
-
223
-
224
-
225
-
226
-
227
-
228
-
229
-
230
-
231
-
232
-
233
-
234
-
235
-
236
-
237
-
238
-
239
-
240
-
241
-
242
-
243
-
244
-
245
-
246
-
247
-
248
-
249
-
250
-
251
-
252
-
253
-
254
-
255
-
256
-
257
-
258
-
259
-
260
-
261
-
262
-
263
-
264
-
265
-
266
-
267
-
268
-
269
 |
 |