Brother International PEDESIGN 8.0 Users Manual - English - Page 210
Viewing the Pattern While Creating It, Creating a Pattern in Fill/Stamp Mode
 |
View all Brother International PEDESIGN 8.0 manuals
Add to My Manuals
Save this manual to your list of manuals |
Page 210 highlights
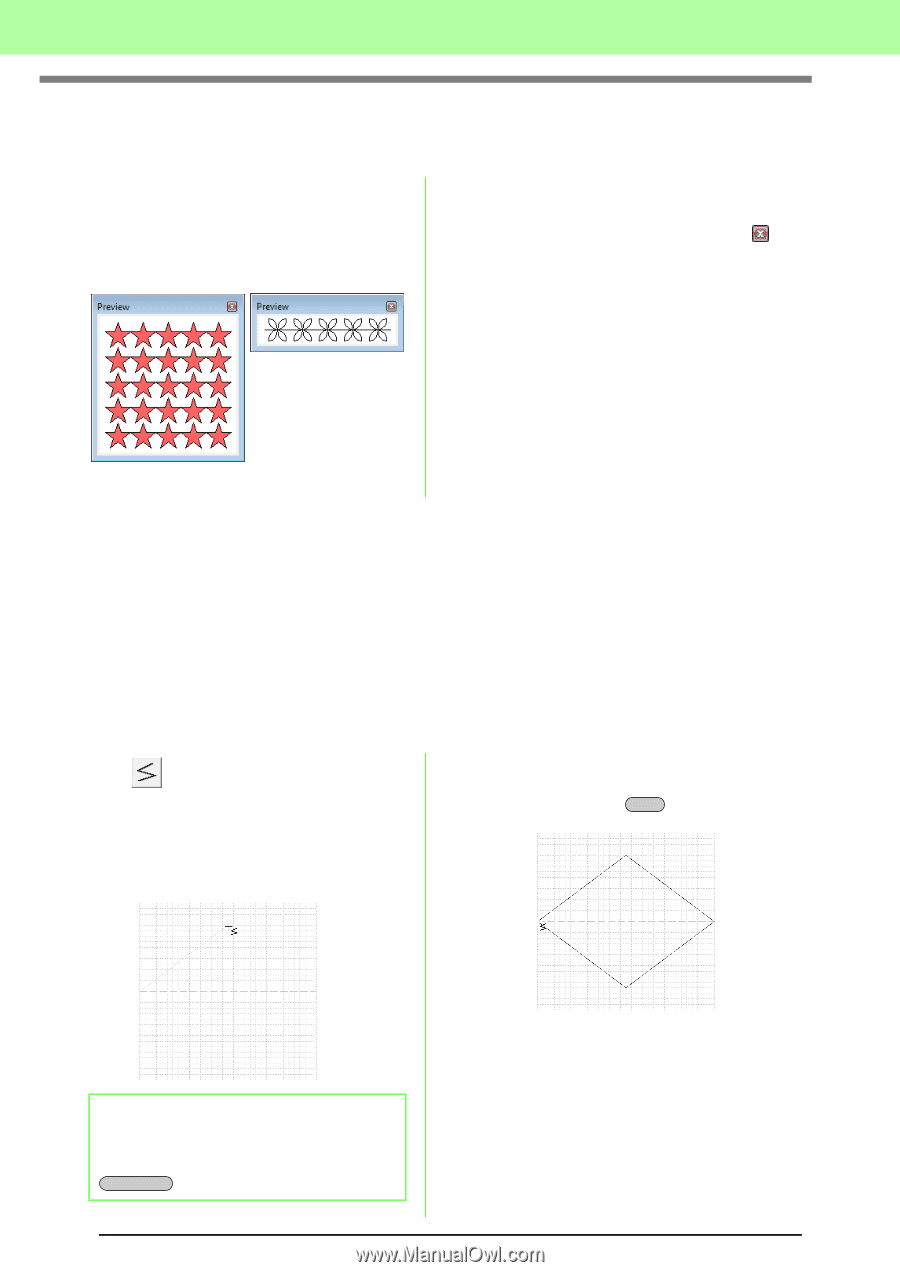
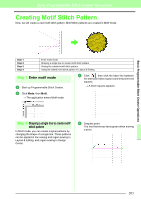
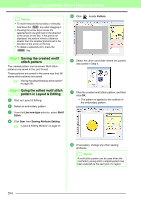
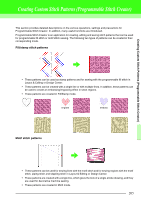
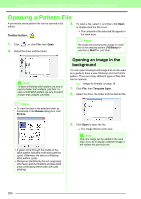
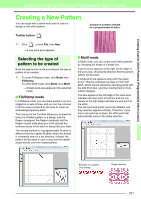
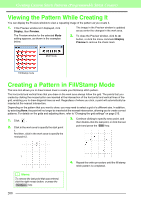
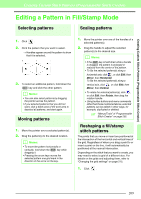
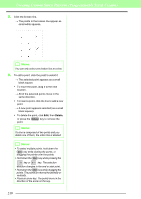
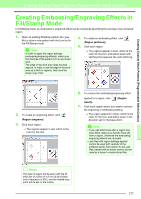
Creating Custom Stitch Patterns (Programmable Stitch Creator) Viewing the Pattern While Creating It You can display the Preview window to view a repeating image of the pattern as you create it. 1. If the Preview window isn't displayed, click Display, then Preview. The Preview window for the selected Mode setting appears, as shown in the examples below. The image in the Preview window is updated as you enter the changes in the work area. 2. To close the Preview window, click its button, or click the menu command Display Preview to remove the check mark. Motif mode Fill/Stamp mode Creating a Pattern in Fill/Stamp Mode The Line tool allows you to draw broken lines to create your fill/stamp stitch pattern. The horizontal and vertical lines that you draw on the work area always follow the grid. The points that you create by clicking the mouse button are inserted at the intersection of the horizontal and vertical lines of the grid, enabling you to draw diagonal lines as well. Regardless of where you click, a point will automatically be inserted at the nearest intersection. Depending on the pattern that you want to draw, you may need to select a grid of a different size. In addition, by selecting None, the point will no longer be inserted at the nearest intersection, allowing you to create curved patterns. For details on the grids and adjusting them, refer to "Changing the grid settings" on page 215. 1. Click . 2. Click in the work area to specify the start point 1. And then, click in the work area to specify the next point 2. 3. Continue clicking to specify every point, and then double-click the last point, or click the last point and press the Enter key. 2 1 b Memo: To remove the last point that was entered, click the right mouse button, or press the BackSpace key. 208 4. Repeat the entire procedure until the fill/stamp stitch pattern is completed.
-
 1
1 -
2
-
3
-
4
-
5
-
6
-
7
-
8
-
9
-
10
-
11
-
12
-
13
-
14
-
15
-
16
-
17
-
18
-
19
-
20
-
21
-
22
-
23
-
24
-
25
-
26
-
27
-
28
-
29
-
30
-
31
-
32
-
33
-
34
-
35
-
36
-
37
-
38
-
39
-
40
-
41
-
42
-
43
-
44
-
45
-
46
-
47
-
48
-
49
-
50
-
51
-
52
-
53
-
54
-
55
-
56
-
57
-
58
-
59
-
60
-
61
-
62
-
63
-
64
-
65
-
66
-
67
-
68
-
69
-
70
-
71
-
72
-
73
-
74
-
75
-
76
-
77
-
78
-
79
-
80
-
81
-
82
-
83
-
84
-
85
-
86
-
87
-
88
-
89
-
90
-
91
-
92
-
93
-
94
-
95
-
96
-
97
-
98
-
99
-
100
-
101
-
102
-
103
-
104
-
105
-
106
-
107
-
108
-
109
-
110
-
111
-
112
-
113
-
114
-
115
-
116
-
117
-
118
-
119
-
120
-
121
-
122
-
123
-
124
-
125
-
126
-
127
-
128
-
129
-
130
-
131
-
132
-
133
-
134
-
135
-
136
-
137
-
138
-
139
-
140
-
141
-
142
-
143
-
144
-
145
-
146
-
147
-
148
-
149
-
150
-
151
-
152
-
153
-
154
-
155
-
156
-
157
-
158
-
159
-
160
-
161
-
162
-
163
-
164
-
165
-
166
-
167
-
168
-
169
-
170
-
171
-
172
-
173
-
174
-
175
-
176
-
177
-
178
-
179
-
180
-
181
-
182
-
183
-
184
-
185
-
186
-
187
-
188
-
189
-
190
-
191
-
192
-
193
-
194
-
195
-
196
-
197
-
198
-
199
-
200
-
201
-
202
-
203
-
204
-
 205
205 -
 206
206 -
 207
207 -
 208
208 -
 209
209 -
 210
210 -
 211
211 -
 212
212 -
 213
213 -
 214
214 -
 215
215 -
216
-
217
-
218
-
219
-
220
-
221
-
222
-
223
-
224
-
225
-
226
-
227
-
228
-
229
-
230
-
231
-
232
-
233
-
234
-
235
-
236
-
237
-
238
-
239
-
240
-
241
-
242
-
243
-
244
-
245
-
246
-
247
-
248
-
249
-
250
-
251
-
252
-
253
-
254
-
255
-
256
-
257
-
258
-
259
-
260
-
261
-
262
-
263
-
264
-
265
-
266
-
267
-
268
-
269
 |
 |