Brother International PEDESIGN 8.0 Users Manual - English - Page 173
Tutorial (Advanced), Entering Monograms
 |
View all Brother International PEDESIGN 8.0 manuals
Add to My Manuals
Save this manual to your list of manuals |
Page 173 highlights
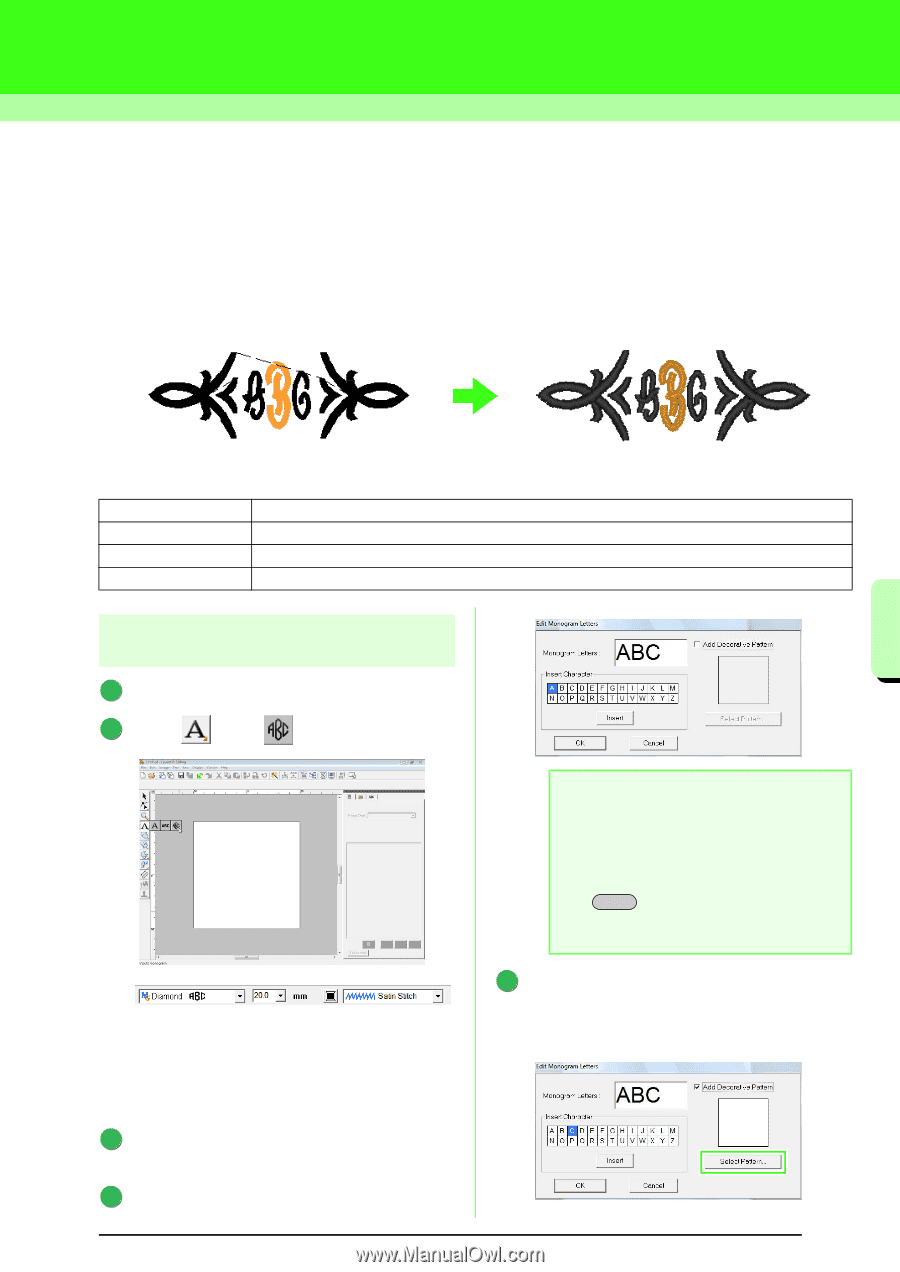
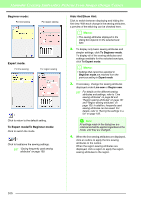
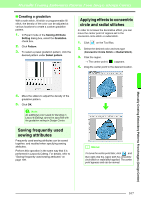
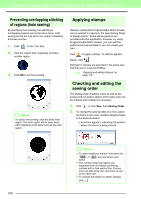
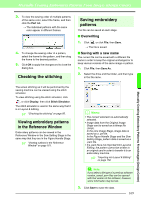
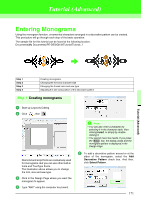
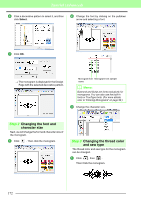
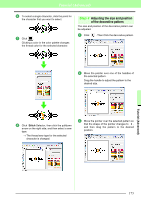
Tutorial (Advanced) Entering Monograms Using the monogram function, ornamented characters arranged in a decorative pattern can be created. This procedure will go through each step of the basic operation. The sample file for this tutorial can be found at the following location. Documents(My Documents)\PE-DESIGN 8\Tutorial\Tutorial_7 Tutorial (Advanced) Step 1 Step 2 Step 3 Step 4 Creating monograms Changing the font and character size Changing the thread color and sew type Adjusting the size and position of the decorative pattern Step 1 Creating monograms 1 Start up Layout & Editing. 2 Click , then . Diamond and script fonts are exclusively used for monograms. But you can use other built-in fonts and TrueType Fonts. The illustration above allows you to change the font, size and sew type. 3 Click in the Design Page where you want the monogram to appear. 4 Type "ABC" using the computer key board. a Note: • You can also enter a character by selecting it in the character table, then clicking Insert, or simply by doubleclicking it. • You cannot insert line feeds. If you press the Enter key, the dialog closes and the monogram pattern is displayed in the Design Page. 5 To add a decorative pattern around or at the sides of the monogram, select the Add Decorative Pattern check box. And then, click Select Pattern. 171
-
 1
1 -
2
-
3
-
4
-
5
-
6
-
7
-
8
-
9
-
10
-
11
-
12
-
13
-
14
-
15
-
16
-
17
-
18
-
19
-
20
-
21
-
22
-
23
-
24
-
25
-
26
-
27
-
28
-
29
-
30
-
31
-
32
-
33
-
34
-
35
-
36
-
37
-
38
-
39
-
40
-
41
-
42
-
43
-
44
-
45
-
46
-
47
-
48
-
49
-
50
-
51
-
52
-
53
-
54
-
55
-
56
-
57
-
58
-
59
-
60
-
61
-
62
-
63
-
64
-
65
-
66
-
67
-
68
-
69
-
70
-
71
-
72
-
73
-
74
-
75
-
76
-
77
-
78
-
79
-
80
-
81
-
82
-
83
-
84
-
85
-
86
-
87
-
88
-
89
-
90
-
91
-
92
-
93
-
94
-
95
-
96
-
97
-
98
-
99
-
100
-
101
-
102
-
103
-
104
-
105
-
106
-
107
-
108
-
109
-
110
-
111
-
112
-
113
-
114
-
115
-
116
-
117
-
118
-
119
-
120
-
121
-
122
-
123
-
124
-
125
-
126
-
127
-
128
-
129
-
130
-
131
-
132
-
133
-
134
-
135
-
136
-
137
-
138
-
139
-
140
-
141
-
142
-
143
-
144
-
145
-
146
-
147
-
148
-
149
-
150
-
151
-
152
-
153
-
154
-
155
-
156
-
157
-
158
-
159
-
160
-
161
-
162
-
163
-
164
-
165
-
166
-
167
-
 168
168 -
 169
169 -
 170
170 -
 171
171 -
 172
172 -
 173
173 -
 174
174 -
 175
175 -
 176
176 -
 177
177 -
 178
178 -
179
-
180
-
181
-
182
-
183
-
184
-
185
-
186
-
187
-
188
-
189
-
190
-
191
-
192
-
193
-
194
-
195
-
196
-
197
-
198
-
199
-
200
-
201
-
202
-
203
-
204
-
205
-
206
-
207
-
208
-
209
-
210
-
211
-
212
-
213
-
214
-
215
-
216
-
217
-
218
-
219
-
220
-
221
-
222
-
223
-
224
-
225
-
226
-
227
-
228
-
229
-
230
-
231
-
232
-
233
-
234
-
235
-
236
-
237
-
238
-
239
-
240
-
241
-
242
-
243
-
244
-
245
-
246
-
247
-
248
-
249
-
250
-
251
-
252
-
253
-
254
-
255
-
256
-
257
-
258
-
259
-
260
-
261
-
262
-
263
-
264
-
265
-
266
-
267
-
268
-
269
 |
 |