Samsung i750 User Guide - Page 70
Tools, Server, Sync with this server, Connection, Save password, Rules
 |
View all Samsung i750 manuals
Add to My Manuals
Save this manual to your list of manuals |
Page 70 highlights
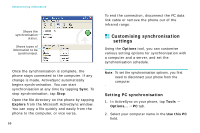
Synchronising information 1. In ActiveSync on your phone, tap Tools → Options... → Server tab. 2. In the Sync with this server field, enter the name of the Microsoft Exchange Server to which you want to connect. 3. Tap Options... 4. In the Connection tab, enter the user name, password, and domain name. If you want the device to save your password so that you need not enter it when connecting, tap the Save password check box. 5. If items change on both your phone and server, conflicts will arise during synchronisation. To change the rules for resolving, tap the Rules tab and select desired options in each field. 6. Tap . 7. Tap the This server uses an SSL connection check box to use an SSL (Secured Sockets Layer) protocol for server access. 8. Select the types of information, such as Calendar, Contacts, or Inbox, that you want to synchronise with the server. 9. To change synchronisation settings, select the type of information and tap Settings... Note that there are no synchronisation settings for Contacts. 10.When finished, tap . 11.Set up a work connection. 12.Begin synchronisation on your phone. 68
-
 1
1 -
2
-
3
-
4
-
5
-
6
-
7
-
8
-
9
-
10
-
11
-
12
-
13
-
14
-
15
-
16
-
17
-
18
-
19
-
20
-
21
-
22
-
23
-
24
-
25
-
26
-
27
-
28
-
29
-
30
-
31
-
32
-
33
-
34
-
35
-
36
-
37
-
38
-
39
-
40
-
41
-
42
-
43
-
44
-
45
-
46
-
47
-
48
-
49
-
50
-
51
-
52
-
53
-
54
-
55
-
56
-
57
-
58
-
59
-
60
-
61
-
62
-
63
-
64
-
 65
65 -
 66
66 -
 67
67 -
 68
68 -
 69
69 -
 70
70 -
 71
71 -
 72
72 -
 73
73 -
 74
74 -
 75
75 -
76
-
77
-
78
-
79
-
80
-
81
-
82
-
83
-
84
-
85
-
86
-
87
-
88
-
89
-
90
-
91
-
92
-
93
-
94
-
95
-
96
-
97
-
98
-
99
-
100
-
101
-
102
-
103
-
104
-
105
-
106
-
107
-
108
-
109
-
110
-
111
-
112
-
113
-
114
-
115
-
116
-
117
-
118
-
119
-
120
-
121
-
122
-
123
-
124
-
125
-
126
-
127
-
128
-
129
-
130
-
131
-
132
-
133
-
134
-
135
-
136
-
137
-
138
-
139
-
140
-
141
-
142
-
143
-
144
-
145
-
146
-
147
-
148
-
149
-
150
-
151
-
152
-
153
-
154
-
155
-
156
-
157
-
158
-
159
-
160
-
161
-
162
-
163
-
164
-
165
-
166
-
167
-
168
-
169
-
170
-
171
-
172
-
173
-
174
-
175
-
176
-
177
-
178
-
179
-
180
-
181
-
182
-
183
-
184
-
185
-
186
-
187
-
188
-
189
-
190
-
191
-
192
-
193
-
194
-
195
-
196
-
197
-
198
-
199
-
200
-
201
-
202
-
203
-
204
-
205
-
206
-
207
-
208
-
209
-
210
-
211
-
212
-
213
-
214
-
215
-
216
-
217
-
218
-
219
-
220
-
221
-
222
-
223
-
224
-
225
-
226
-
227
-
228
-
229
 |
 |