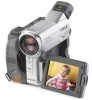
Sony DCR TRV33E Operating Instructions
Sony DCR TRV33E - PAL-Format MiniDV Digital Camcorder Manual
 |
UPC - 072874309039
View all Sony DCR TRV33E manuals
Add to My Manuals
Save this manual to your list of manuals |
Sony DCR TRV33E manual content summary:
- Sony DCR TRV33E | Operating Instructions - Page 1
Camera Recorder Operating Instructions Before operating the unit, please read this manual thoroughly, and retain it for future reference. Mode d'emploi Avant la mise en service de cet appareil, prière de lire attentivement le mode d'emploi et de le conserver pour toute référence future. DCR-TRV33E - Sony DCR TRV33E | Operating Instructions - Page 2
Sony service station. For the customers in Europe ATTENTION The electromagnetic fields at the specific frequencies may influence the picture and sound of this camcorder the USB cable again. Français Bienvenue! Nous vous félicitons pour l'achat de ce caméscope Handycam de Sony. Avec votre Handycam, - Sony DCR TRV33E | Operating Instructions - Page 3
, p. 96) 5 R6 (size AA) battery for Remote Commander (2) (Except for DCRTRV12E, p. 315) 6 Shoulder strap (1) 7 Lens cap (1) (p. 36) 8 Shoe cover (1) (p. 128) 9 "Memory Stick" (1) (DCR-TRV22E/ TRV33E only, p. 141) 0 USB cable (1) (p. 199) qa CD-ROM (SPVD-010 USB Driver) (1) (p. 206, 234) qs Cleaning - Sony DCR TRV33E | Operating Instructions - Page 4
on the "Memory Stick" using the USB cable (DCR-TRV22E/TRV33E only) (p. 201) •Capturing images on the computer from your camcorder using the USB cable (p. 217) •Converting an analog signal into digital to capture images onto the computer (DCR-TRV22E/TRV33E only) (p. 238) Capturing images on the - Sony DCR TRV33E | Operating Instructions - Page 5
/Rec Review (p. 50) •Data code (p. 54) •Tape PB ZOOM* (p. 94)/Memory PB ZOOM* (p. 186) •Zero set memory** (p. 96) •Title search** (p. 98) •Digital program editing (p. 109, 173*) * DCR-TRV22E/TRV33E only **Except for DCR-TRV12E Before you start reading this manual and operating your camcorder, check - Sony DCR TRV33E | Operating Instructions - Page 6
images fixes enregistrées sur le « Memory Stick » (DCR-TRV22E/TRV33E uniquement) (p. 179) •Visionnage d'images animées enregistrées sur un « Memory Stick » (DCR-TRV22E/TRV33E uniquement) (p. 182) Principales caractéristiques •Visionnage, à l'aide du câble USB, d'images animées enregistrées sur une - Sony DCR TRV33E | Operating Instructions - Page 7
de vue •End search (recherche de fin)/Edit search (recherche pour modification)/Rec Review (vérification d'enregistrement) (p. 50) •Code de données (p. 54) • sous votre caméscope. Les illustrations de ce mode d'emploi représentent le DCR-TRV33E. S'il s'agit d'un autre modèle, son nom est indiqué dans - Sony DCR TRV33E | Operating Instructions - Page 8
accessories 3 Main Features 4 Quick Start Guide Recording on tape 12 Recording on "Memory Stick" (DCR-TRV22E/TRV33E only) ...... 14 Getting Started Using this manual 20 Step 1 Preparing the power source ..... 24 Installing the battery pack 24 Charging the battery search/Rec Review 50 Playback - Sony DCR TRV33E | Operating Instructions - Page 9
only 236 Capturing images from an analog video unit on a computer - Signal convert function (DCR-TRV22E/ TRV33E only 238 Customizing Your Camcorder Changing the menu settings 240 Troubleshooting Types of trouble and how to correct trouble 262 Self-diagnosis display 270 Warning indicators 271 - Sony DCR TRV33E | Operating Instructions - Page 10
Guide de démarrage rapide Enregistrement sur cassette 16 Enregistrement sur un « Memory Stick » (DCR-TRV22E/TRV33E uniquement 18 Préparation Utilisation de ce manuel 20 Etape 1 Préparation de l'alimentation .... 24 Installation de la batterie 24 Recharge de la batterie search/Rec Review .... 50 - Sony DCR TRV33E | Operating Instructions - Page 11
Windows) (DCR-TRV22E/TRV33E uniquement 227 Raccordement de votre caméscope à un ordinateur à l'aide du câble USB (pour les utilisateurs de Macintosh) (DCR-TRV22E/TRV33E complémentaires Cassettes utilisables 284 A propos de la batterie « InfoLITHIUM 288 A propos de i.LINK 292 Utilisation - Sony DCR TRV33E | Operating Instructions - Page 12
English Quick Start Guide - Recording on tape Connecting the mains lead (p. 25) Use the battery pack when using your camcorder outdoors (p. 24). Open the DC IN jack cover. AC Adaptor (supplied) 2 3 1 Connect the plug with its v mark facing the battery. Inserting the cassette 1 Slide OPEN/ZEJECT - Sony DCR TRV33E | Operating Instructions - Page 13
operation buttons lightly with your finger supporting the LCD panel from the back side of it. Do not press the LCD screen with sharp objects. 1) DCR-TRV12E/TRV14E 2) DCR-TRV19E/TRV22E/TRV33E Do not pick up your camcorder by holding parts as illustrated. Viewfinder LCD panel Battery pack 13 - Sony DCR TRV33E | Operating Instructions - Page 14
Quick Start Guide - Recording on "Memory Stick" (DCR-TRV22E/TRV33E only) Connecting the mains lead (p. 25) Use the battery pack when using your camcorder outdoors (p. 24). Open the DC IN jack cover. AC Adaptor (supplied) 2 3 1 Connect the plug with its v mark facing the battery. Inserting the " - Sony DCR TRV33E | Operating Instructions - Page 15
Quick Start Guide Recording still images on the "Memory Stick" (p. 152) 1 Open the green button. POWER VCR OFF(CHG) CAMERA MEMORY 2 Press PLAY. The last recorded image is displayed. PLAY Do not pick up your camcorder by holding parts as illustrated. Viewfinder LCD panel Battery pack 15 - Sony DCR TRV33E | Operating Instructions - Page 16
Français Guide de démarrage rapide - Enregistrement sur cassette Raccordement du cordon d'alimentation (p. 25) Utilisez la batterie lors de l' (fourni) 2 3 1 Raccordez la fiche avec le signe v tourné vers la batterie. Insertion de la cassette 1 Faites glisser OPEN/ ZEJECT dans le sens de la fl - Sony DCR TRV33E | Operating Instructions - Page 17
Guide de démarrage rapide Enregistrement d'une image sur la cassette (p. 36) 1 Ouvrez le capuchon de l'objectif (p. 36). 3 Appuyez sur OPEN pour ouvrir le panneau LCD. L'image s'affiche à l'écran. 2 Réglez le commutateur POWER sur CAMERA ) CAMERA MEMORY DCR-TRV12E/TRV14E 2) DCR-TRV19E/TRV22E/TRV33E - Sony DCR TRV33E | Operating Instructions - Page 18
Guide de démarrage rapide - Enregistrement sur un « Memory Stick » (DCR-TRV22E/TRV33E uniquement) Raccordement du cordon d'alimentation (p. 25) Utilisez la batterie lors de l'utilisation du caméscope en extérieur (p. 24). Ouvrez le cache de la prise DC IN. Adaptateur secteur (fourni) 2 3 1 - Sony DCR TRV33E | Operating Instructions - Page 19
Guide de démarrage sur la position de déverrouillage (gauche). POWER VCR OFF(CHG) CAMERA MEMORY Viseur Lorsque le panneau LCD est fermé, déployez le viseur tout en appuyant sur le petit bouton vert. POWER VCR OFF(CHG) CAMERA MEMORY 2 Appuyez sur PLAY. La dernière image enregistrée s'affiche. - Sony DCR TRV33E | Operating Instructions - Page 20
Utilisation de ce manuel The instructions in this manual are for the 5 models listed in the table on the next page. Before you start reading this manual and operating your camcorder, check the model number by looking at the bottom of your camcorder. The DCR-TRV33E is the model used for illustration - Sony DCR TRV33E | Operating Instructions - Page 21
DCR-TRV Viewfinder/ Viseur MEMORY mark* (on the POWER switch)/ Marque MEMORY* (sur le commutateur POWER) VCR mark**/ Marque VCR** AUDIO/VIDEO jack/ Prise AUDIO/VIDEO S VIDEO jack/ Prise S VIDEO Memory Your camcorder is based on the DV format. You can use only mini DV cassettes with your camcorder. We - Sony DCR TRV33E | Operating Instructions - Page 22
on connecting other equipment When you connect your camcorder to other video equipment or a computer using the USB cable or i.LINK cable, observe the shape sur un téléviseur, il vous faut un modèle utilisant le système PAL. Précautions concernant les droits d'auteur Les programmes de télévision, les - Sony DCR TRV33E | Operating Instructions - Page 23
. Sometimes this malfunction cannot be repaired [a]. •Never leave your camcorder exposed to temperatures above 60°C (140°F), such as in a car parked in the sun or under direct sunlight [b]. •Be careful when placing the camera near a window or outdoors. Exposing the LCD screen, the finder or the - Sony DCR TRV33E | Operating Instructions - Page 24
che tout en maintenant BATT enfoncée. BATT If you use the viewfinder when a large capacity battery pack is installed If you install the NP-FM70/QM71/QM71D/ FM91/QM91/QM91D battery pack on your camcorder, extend the viewfinder, and lift up the viewfinder to a comfortable angle. Si vous utilisez le - Sony DCR TRV33E | Operating Instructions - Page 25
teint (pleine charge). Préparation 2 3 15 CHG lamp/ Voyant CHG POWER VCR OFF(CHG) CAMERA MEMORY After charging the battery pack Disconnect the AC Adaptor from the DC IN jack on your camcorder. Après la recharge de la batterie Débranchez l'adaptateur secteur de la prise DC IN du caméscope. 25 - Sony DCR TRV33E | Operating Instructions - Page 26
AC Adaptor near a wall socket. While using the AC Adaptor, if any trouble occurs with this unit, disconnect the plug from a wall socket as soon flashes in the following cases: - The battery pack is not properly installed. - Something is wrong with the battery pack. Remarque Empêchez les objets mé - Sony DCR TRV33E | Operating Instructions - Page 27
the LCD screen/ Enregistrement avec l'écran LCD Continuous/ Continu Typical*/ Normal* 90 45 150 75 310 160 365 190 550 290 DCR-TRV33E Battery pack/ Batterie NP-FM30 (supplied/fournie) NP-FM50 NP-FM70 NP-QM71/QM71D NP-FM91/QM91/QM91D Recording with the viewfinder/ Enregistrement avec le - Sony DCR TRV33E | Operating Instructions - Page 28
de lecture avec le panneau LCD fermé 150 240 495 580 865 DCR-TRV33E Battery pack/ Batterie NP-FM30 (supplied/fourni) NP-FM50 NP-FM70 NP-QM71/QM71D NP battery pack Note Approximate recording time and continuous playing time at 25°C (77°F). The battery life will be shorter if you use your camcorder - Sony DCR TRV33E | Operating Instructions - Page 29
est pas installée. - La batterie est défectueuse. - la batterie est vide. •Si le commutateur POWER est réglé sur OFF (CHG), l'indicateur BATTERY INFO ne s'affiche pas lorsque vous appuyez sur DISPLAY sur la télécommande (sauf pour le DCR-TRV12E). Informations relatives à la batterie Le numéro affich - Sony DCR TRV33E | Operating Instructions - Page 30
has been turned off. Notes •The AC Adaptor can supply power from a wall socket even if the battery pack is attached to your camcorder. •The DC IN jack has "source priority." This means that the battery pack cannot supply any power if the mains lead is connected to the DC IN jack, even - Sony DCR TRV33E | Operating Instructions - Page 31
built-in rechargeable battery installed in your camcorder will have been discharged (p. 299). In this case, charge the built-in rechargeable battery, then set the year, the month, the day, the hour and the minute. (1) Set the POWER switch to CAMERA or MEMORY (DCR-TRV22E/TRV33E only). (2) Press OPEN - Sony DCR TRV33E | Operating Instructions - Page 32
EXIT 7 4 17 30 EXEC RET. SETUP MENU CLOCK SET USB STREAM LANGUAGE DEMO MODE EXIT 4 7 2003 17:30:20 EXEC RET. EXEC RET. To return to FN (Function) Press EXIT. Note on the time indicator The internal clock of your camcorder uses a 24hour cycle. Pour revenir au menu FN (fonction) Appuyez - Sony DCR TRV33E | Operating Instructions - Page 33
camcorder has operation buttons on the LCD screen. Touch the LCD screen directly with your finger to operate each function. (1) Set the POWER switch to CAMERA See relevant pages of this manual for each function. 1) DCR-TRV12E/TRV14E 2) DCR-TRV19E/TRV22E/TRV33E 3) DCR-TRV22E/TRV33E 3 [a] L'écran LCD - Sony DCR TRV33E | Operating Instructions - Page 34
A DUB CTRL, REC CTRL2) 1) DCR-TRV12E/TRV14E 2) DCR-TRV19E/TRV22E/TRV33E 3) DCR-TRV22E/TRV33E only 1) DCR-TRV12E/TRV14E 2) DCR-TRV19E/TRV22E/TRV33E 3) DCR-TRV22E/TRV33E uniquement When the POWER switch is set to MEMORY (DCR-TRV22E/TRV33E only) During memory camera Lorsque le commutateur POWER est - Sony DCR TRV33E | Operating Instructions - Page 35
Notes •When using the touch panel, press operation buttons lightly with your finger supporting the LCD panel from the back side of it. •Do not press the LCD appear. You can control the display with DSPL/BATT INFO on your camcorder. When executing each item The green bar appears above the item. If - Sony DCR TRV33E | Operating Instructions - Page 36
Open the lens cap. (2) Prepare the power source (p. 24) and insert the cassette (p. 12). (3) Set the POWER switch to CAMERA while pressing the small green button. This sets your camcorder to standby. (4) Press OPEN to open the LCD panel. The picture appears on the screen. (5) Press START/STOP. Your - Sony DCR TRV33E | Operating Instructions - Page 37
camcorder automatically turns off. This is to save battery power and to prevent battery pack and tape wear. To return to standby, set the POWER switch to OFF (CHG) and then back to CAMERA. However, your camcorder scenes. Note on the LOCK switch (DCR-TRV22E/ TRV33E only) When you slide the LOCK switch - Sony DCR TRV33E | Operating Instructions - Page 38
the power is turned on. 9 Date The date appears about 5 seconds after the power is turned on. 38 1 Indicateur d'autonomie de la batterie 2 Mémoire de cassette Cet indicateur s'affiche lors de l'utilisation d'une cassette dotée de la fonction de mémoire de cassette. 3 Mode d'enregistrement 4 STBY - Sony DCR TRV33E | Operating Instructions - Page 39
: minutes : seconds) in CAMERA and "0:00:00:00" (hours DCR-TRV19E/TRV22E/TRV33E 3) Except for DCR-TRV12E After recording (1) Close the lens cap. (2) Set the POWER switch to OFF (CHG). (3) Close the LCD panel. (4) Eject the cassette. (5) Remove the power source. Indicateur d'autonomie de la batterie - Sony DCR TRV33E | Operating Instructions - Page 40
LCD screen You can turn the LCD panel over and move it back to your camcorder body with the LCD screen facing out. Lorsque vous réglez le panneau LCD, •If you turn the LCD panel over and move it back to your camcorder body when recording or recording standby, LCD B.L. (panel brightness) is fixed to - Sony DCR TRV33E | Operating Instructions - Page 41
Recording - Basics Recording a picture Enregistrement d'une image Shooting with the mirror mode This feature allows the camera subject to view him- or herself on the LCD screen. The subject uses this feature to check his or her own image on the LCD - Sony DCR TRV33E | Operating Instructions - Page 42
(4) Press OK to return to PAGE1/ PAGE2/PAGE3 in Step 1. 1) DCR-TRV12E/TRV14E 2) DCR-TRV19E/TRV22E/TRV33E 3) DCR-TRV22E/TRV33E Réglage de la luminosité de l'écran LCD (1) Lorsque vous réglez le commutateur POWER sur CAMERA, appuyez sur FN, puis sélectionnez PAGE2. Lorsque vous réglez le commutateur - Sony DCR TRV33E | Operating Instructions - Page 43
the brightness of the backlight when using the battery pack. Select VF B.L. in in the menu settings (p. 244). Even if you adjust VF B.L. The recorded picture will not be affected. The camera recording lamp (DCR-TRV12E/ TRV14E/TRV19E only) The camera recording lamp lights up in the viewfindrer during - Sony DCR TRV33E | Operating Instructions - Page 44
plus rapproché) W T W T To use zoom greater than 10× Zoom greater than 10× is performed digitally. Digital zoom can be set to 20× or 100× (DCRTRV12E)/120× (DCR-TRV14E/TRV19E/ TRV22E/TRV33E). To activate digital zoom, select the digital zoom power in D ZOOM in in the menu settings (p. 243). The - Sony DCR TRV33E | Operating Instructions - Page 45
telephoto position, or about 1 cm (about 1/2 inch) away in the wide-angle position. When the POWER switch is set to MEMORY (DCR-TRV22E/TRV33E only) You cannot use the digital zoom. Lorsque vous filmez tout près du sujet Si vous ne pouvez pas obtenir une image nette, déplacez le levier de puissance - Sony DCR TRV33E | Operating Instructions - Page 46
function. (1) Set the POWER switch to CAMERA or MEMORY1). (2) Press BACK LIGHT. The . indicator appears on the screen. 1) DCR-TRV22E/TRV33E only Prise de vue de sujets é éclairés à contre-jour Si vous appuyez sur MANUAL sous EXPOSURE (p. 82) ou SPOT METER (p. 83), la fonction de compensation de contre- - Sony DCR TRV33E | Operating Instructions - Page 47
the picture may be recorded in incorrect or unnatural colours. (1) Set the POWER switch to CAMERA or MEMORY1). (2) Slide NIGHTSHOT to ON. The and "NIGHTSHOT" indicators flash on the screen. 1) DCR-TRV22E/TRV33E only Prise de vue dans l'obscurité - Fonctions NightShot, Super NightShot et Colour Slow - Sony DCR TRV33E | Operating Instructions - Page 48
TRV33E only) Colour Slow Shutter enables you to record colour images in a dim place. (1) Set the POWER switch to CAMERA during recording with NightShot, focus manually. •Do not cover the infrared de la fonction Colour Slow Shutter (DCR-TRV22E/ TRV33E uniquement) La fonction Colour Slow Shutter vous - Sony DCR TRV33E | Operating Instructions - Page 49
(10 feet). While using Colour Slow Shutter, you cannot use the following functions (DCRTRV22E/TRV33E only): - Fader - Digital effect - PROGRAM AE - Manual exposure - Flexible Spot Meter In total darkness (DCR-TRV22E/TRV33E only) Colour Slow Shutter may not work normally. Lors de l'utilisation de la - Sony DCR TRV33E | Operating Instructions - Page 50
prises de vue - End search/Edit search/Rec Review You can use these buttons to check the recorded . (1) Set the POWER switch to CAMERA. (2) Press FN to display PAGE1. (3) Press END SCH. The last 5 seconds of the recorded section are played back and your camcorder returns to standby. To return to - Sony DCR TRV33E | Operating Instructions - Page 51
vers l'avant Rec Review (vérification d'enregistrement) Vous pouvez vérifier la dernière partie enregistrée. The section you have stopped most recently will be played back for a few seconds, and then your camcorder will return to standby. (1) Réglez le commutateur POWER sur CAMERA. (2) Appuyez sur - Sony DCR TRV33E | Operating Instructions - Page 52
also control playback using the Remote Commander supplied with your camcorder (except for DCR-TRV12E). (1) Set the POWER switch to PLAYER1)/ VCR2 Appuyez sur OK pour revenir à PAGE1. 1) DCR-TRV12E/TRV14E 2) DCR-TRV19E/TRV22E/TRV33E 3 4 1 POWER VCR OFF(CHG) CAMERA MEMORY 2 52 5 OK VOL The bar - Sony DCR TRV33E | Operating Instructions - Page 53
. To resume playback, press again. If the playback pause lasts more than 5 minutes, the camcorder automatically switches to the stop mode. If you leave the power on for a long time Your camcorder gets warm. This is not a malfunction. Lecture d'une cassette Pour revenir à FN Appuyez sur - Sony DCR TRV33E | Operating Instructions - Page 54
Lecture d'une cassette To display the screen indicators - Display function Press DSPL/BATT INFO on your camcorder, or DISPLAY on the Remote Commander supplied with your camcorder (except for DCR-TRV12E). The indicators disappear from the screen. To make the indicators appear, press DSPL/ BATT INFO - Sony DCR TRV33E | Operating Instructions - Page 55
press FN and select PAGE2. (3) Press DATA CODE. (4) Select CAM DATA or DATE DATA, then press OK. (5) Press EXIT. 1) DCR-TRV12E/TRV14E 2) DCR-TRV19E/TRV22E/TRV33E Utilisation de l'écran tactile (1) Réglez le commutateur POWER sur PLAYER1)/VCR2), puis lancez la lecture de la cassette. (2) En cours de - Sony DCR TRV33E | Operating Instructions - Page 56
POWER switch is set to OFF (CHG), no indicator appears (except for DCR-TRV12E). Pour éviter que les données diverses ne soient affichées Sé sauf pour le DCRTRV12E). Various settings Various settings shows your camcorder's recording information at the time of recording. During tape recording - Sony DCR TRV33E | Operating Instructions - Page 57
- Opérations de base Playing back tape Lecture d'une cassette Various playback modes To operate video control buttons, set the POWER switch to PLAYER1)/VCR2). 1) DCR-TRV12E/TRV14E 2) DCR-TRV19E/TRV22E/TRV33E Using the touch panel (1) Press FN and select PAGE3. (2) Press V SPD PLAY to display - Sony DCR TRV33E | Operating Instructions - Page 58
Video control buttons Marks on your camcorder are different from those on the Remote Commander supplied with your camcorder (except for DCRTRV12E). On your camcorder celles de la télécommande fournie avec votre caméscope (sauf pour le DCR-TRV12E). Sur votre caméscope : Pour lire la cassette ou la - Sony DCR TRV33E | Operating Instructions - Page 59
at the centre, or the top and bottom of the screen. This is not a malfunction. Slow playback Slow playback can be performed smoothly on your camcorder. However, this function does not work for an output signal from the DV Interface. Dans les divers modes de lecture •Le son est coupé. •Pendant - Sony DCR TRV33E | Operating Instructions - Page 60
When viewing the playback picture on the TV screen, we recommend that you power your camcorder from a wall socket using the AC Adaptor. Refer to the operating instructions of your TV. Open the jack cover. Connect your camcorder to the TV with the A/V connecting cable. Then set the TV/VCR selector on - Sony DCR TRV33E | Operating Instructions - Page 61
of the A/V connecting cable. However, you need to connect the red and white (audio) plugs. Connect the S video cable (optional) to the S video jacks on both your camcorder and the TV or the VCR. This connection produces higher quality DV format pictures. •There is no sound output when connecting - Sony DCR TRV33E | Operating Instructions - Page 62
Stick" during tape recording standby or tape recording (DCRTRV22E/TRV33E only) - Opérations d'enregistrement avancées - Enregistrement l'attente d'enregistrement sur cassette ou l'enregistrement sur cassette (DCR-TRV22E/ TRV33E uniquement) Insert a "Memory Stick" before the following operation - Sony DCR TRV33E | Operating Instructions - Page 63
d'enregistrement sur cassette ou l'enregistrement sur cassette (DCR-TRV22E/TRV33E uniquement) During tape recording The POWER switch should des images est de 640 × 480. •Lorsque le commutateur POWER est réglé sur CAMERA, la qualité de l'image ne peut pas être modifiée. Les images sont enregistrées - Sony DCR TRV33E | Operating Instructions - Page 64
sur un « Memory Stick » pendant l'attente d'enregistrement sur cassette ou l'enregistrement sur cassette (DCR-TRV22E/TRV33E uniquement) During and after recording still images on the "Memory Stick" Your camcorder continues recording on the tape. When you press PHOTO on the Remote Commander Your - Sony DCR TRV33E | Operating Instructions - Page 65
image on a tape - Tape Photo recording (DCRTRV12E/TRV14E/ TRV19E only) Enregistrement d'une image fixe sur une cassette - Enregistrement de photos sur cassette (DCR-TRV12E/TRV14E/ TRV19E uniquement) You can record still images such as photographs. You can record about 510 images in the SP mode and - Sony DCR TRV33E | Operating Instructions - Page 66
function When you play back the still image on other equipment, the image may fluctuate. When you press PHOTO on the Remote Commander (DCR-TRV14E/TRV19E only) Your camcorder immediately records the image that is on the screen when you press the button. To record still images on a tape during tape - Sony DCR TRV33E | Operating Instructions - Page 67
can record still images and moving pictures using the self-timer recording feature. You can also use the Remote Commander for this operation (except for DCR-TRV12E). Vous pouvez enregistrer des images fixes et des images animées à l'aide de la fonction de prise de vue par retardateur. Vous pouvez - Sony DCR TRV33E | Operating Instructions - Page 68
still images. When self-timer recording is finished The self-timer recording is automatically cancelled. When the POWER switch is set to MEMORY (DCR-TRV22E/TRV33E only) You can also record still images onto the "Memory Stick" with the self-timer (p. 168). Setting up a recording using the self-timer - Sony DCR TRV33E | Operating Instructions - Page 69
. (3) Sélectionnez WHT BAL sous , puis appuyez sur EXEC (p. 252). MANUAL SET PROGRAM AE P EFFECT FLASH MODE FLASH LVL WHT BAL AUTO SHTR EXIT EXIT. (4) Sélectionnez le mode souhaité, puis appuyez sur EXEC. 1) DCR-TRV22E/TRV33E uniquement HOLD : Lors de l'enregistrement d'un sujet ou d'un arrière - Sony DCR TRV33E | Operating Instructions - Page 70
Adjusting the white balance manually Réglage manuel de la balance des blancs battery pack for replacement. - You bring your camcorder from indoors to outdoors holding the exposure, or vice versa. Point your camcorder at the white subject for about 10 seconds after setting the POWER switch to CAMERA - Sony DCR TRV33E | Operating Instructions - Page 71
mode, you can watch pictures of normal images [d]. DCR-TRV33E only - If the zoom lever is set to picture played back in the wide mode on your camcorder [a]. Vous pouvez faire des prises de vue en format sur EXEC. To return to FN Press EXIT. CAMERA SET D ZOOM 16 : 9W I DE ON STEADYSHOT EDITSEARCH N. - Sony DCR TRV33E | Operating Instructions - Page 72
operate the following functions: - Recording still images on the "Memory Stick" during tape recording or tape recording standby (DCR-TRV22E/TRV33E only) - BOUNCE - OLD MOVIE (DCR-TRV22E/TRV33E only) •Pictures recorded on the tape in wide mode cannot be returned to normal size. Pour désactiver le - Sony DCR TRV33E | Operating Instructions - Page 73
couleur au noir et blanc. 1) You can use BOUNCE when D ZOOM in is set to OFF in the menu settings. 2) You can fade in only. 3) DCR-TRV22E/TRV33E only 1) Vous pouvez utiliser la fonction BOUNCE lorsque D ZOOM sous est réglé sur OFF dans les réglages de menu. 2) Entrées en fondu uniquement - Sony DCR TRV33E | Operating Instructions - Page 74
EXIT to return to FN. The fader indicator you selected flashes. (6) Press START/STOP. After the fade in/out is carried out, your camcorder automatically returns to the normal mode. Réglez le commutateur POWER sur . Effectuez cette opération à l'aide de l'écran tactile. (1) Pendant l'entrée en fondu - Sony DCR TRV33E | Operating Instructions - Page 75
following functions: - Super NightShot (DCR-TRV22E/TRV33E only) - Colour Slow Shutter (DCR-TRV22E/TRV33E only) - Digital effect (DCR-TRV22E/TRV33E only) - Interval Recording - Frame recording When you select OVERLAP, WIPE or DOT (DCR-TRV22E/TRV33E only) Your camcorder automatically stores the image - Sony DCR TRV33E | Operating Instructions - Page 76
menu. (3) Sélectionnez P EFFECT sous , puis appuyez sur EXEC (p. 252). MANUAL SET PROGRAM AE P EFFECT FLASH MODE FLASH LVL WHT BAL AUTO SHTR EXIT effect, you cannot use following functions: - BOUNCE - OLD MOVIE (DCR-TRV22E/TRV33E only) 76 (4) Sélectionnez le mode souhaité, puis appuyez sur EXEC. - Sony DCR TRV33E | Operating Instructions - Page 77
Using special effects - Digital effect (DCRTRV22E/TRV33E only) Utilisation des effets spéciaux - Effet numérique (DCRTRV22E/TRV33E uniquement) STILL You MOVIE You can add an old movie type atmosphere to pictures. Your camcorder automatically sets the 16:9WIDE mode, picture effect to SEPIA, and the - Sony DCR TRV33E | Operating Instructions - Page 78
only) Utilisation des effets spéciaux - Effet numérique (DCR-TRV22E/ TRV33E uniquement) The POWER switch should be set to . Operate by touching the panel. (1) Press FN and select PAGE2. (2) Press DIG EFFT. The screen to select a digital effect is displayed. (3) Press a desired mode. When you - Sony DCR TRV33E | Operating Instructions - Page 79
Digital effect (DCR-TRV22E/TRV33E only) Utilisation des effets spéciaux - Effet numérique (DCR-TRV22E/ TRV33E uniquement) To return to FN Press EXIT. To cancel digital the SLOW SHTR mode Auto focus may not be effective. Focus manually using a tripod. Pour revenir à FN Appuyez sur EXIT. Pour - Sony DCR TRV33E | Operating Instructions - Page 80
neon signs. LANDSCAPE** This mode is for when you record distant subjects such as mountains. Also it prevents your camcorder from focusing on glass or metal mesh in windows when you record a subject behind glass or a screen. SPOTLIGHT* Ce mode empêche que les visages des personnes n'apparaissent - Sony DCR TRV33E | Operating Instructions - Page 81
sur FN pour afficher PAGE1. (2) Appuyez sur MENU pour afficher le menu. (3) Sélectionnez PROGRAM AE sous , puis appuyez sur EXEC (p. 252). 1) DCR-TRV22E/TRV33E uniquement MANUAL SET PROGRAM AE P EFFECT FLASH MODE FLASH LVL WHT BAL AUTO SHTR EXIT AUTO SPOTLIGHT PORTRAIT SPORTS BEACH&SKI SUNSETMOON - Sony DCR TRV33E | Operating Instructions - Page 82
Appuyez sur AUTO sur l'écran EXPOSURE pour revenir à PAGE1. Note When you adjust the exposure manually, the following functions do not work: - Back light - Colour Slow Shutter (DCR-TRV22E/TRV33E only) 82 Remarque Lorsque vous ajustez manuellement l'exposition, les fonctions suivantes ne sont pas - Sony DCR TRV33E | Operating Instructions - Page 83
frame. The SPOT METER indicator flashes on the screen. The exposure of the point you selected is adjusted. (4) Press OK to return to PAGE1. 1) DCR-TRV22E/TRV33E only Cette fonction vous permet de faire la mise au point appropriée sur une zone précise du sujet, puis de fixer cette valeur et - Sony DCR TRV33E | Operating Instructions - Page 84
touching the panel. (1) Press FN to display PAGE1. (2) Press FOCUS. (3) Press MANUAL. The screen to adjust the focus appears. (4) Press T or t to sharpen focus. (5) Press OK to return to PAGE1. 1) DCR-TRV22E/TRV33E only 2 FOCUS AUTO MANU- AL Réglez le commutateur POWER sur ou 1). Effectuez - Sony DCR TRV33E | Operating Instructions - Page 85
Advanced Recording Operations Focusing manually To return to FN Press EXIT. To return to the autofocus On the FOCUS screen, press AUTO to return to PAGE1. To focus precisely It - Sony DCR TRV33E | Operating Instructions - Page 86
the frame. The SPOT FOCUS indicator flashes on the screen. The focus of the point you selected is adjusted. (4) Press OK to return to PAGE1. 1) DCR-TRV22E/TRV33E only Cette fonction vous permet de faire automatiquement la mise au point appropriée sur une zone précise du sujet, puis de fixer cette - Sony DCR TRV33E | Operating Instructions - Page 87
Advanced Recording Operations Interval Recording Enregistrement par intervalles You can make time-lapse recordings by setting your camcorder to automatically record and standby sequentially. You can achieve excellent recordings of flowers blooming, insects hatching, etc. with this function. - Sony DCR TRV33E | Operating Instructions - Page 88
Interval Recording Enregistrement par intervalles (8) Select a desired recording time, then press EXEC. The time: 0.5SEC y 1SEC y 1.5SEC y 2SEC (9) Press RET. (10) Select INT. REC to ON, then press EXEC. (11) Press EXIT to return to FN. The INTERVAL TAPE indicator flashes on the screen. (12) Press - Sony DCR TRV33E | Operating Instructions - Page 89
this effect, alternately move the subject a little and make frame recording. We recommend that you use a tripod, and operate your camcorder using the Remote Commander (except for DCR-TRV12E) to avoid camerashake. The POWER switch should be set to . Operate by touching the panel. (1) Press FN to - Sony DCR TRV33E | Operating Instructions - Page 90
camera brightness and fader on the touch panel when looking at the viewfinder. Turn the LCD panel over and move it back to your camcorder R r DOT* T WIPE* T OVERLAP* * DCR-TRV22E/TRV33E only ON: The LCD screen lights up. 1) DCR-TRV22E/TRV33E only Vous pouvez régler la luminosité et la transition - Sony DCR TRV33E | Operating Instructions - Page 91
viseur Viewfinder/ Viseur Advanced Recording Operations Opérations d'enregistrement avancées [a] When the POWER switch is set to CAMERA [b] When the POWER switch is set to MEMORY (DCR-TRV22E/TRV33E only) To make the buttons on the LCD screen disappear Press OK. Note When the POWER switch is set - Sony DCR TRV33E | Operating Instructions - Page 92
afficher le menu. (3) Sélectionnez P EFFECT sous , puis appuyez sur EXEC (p. 252). MANUAL SET P EFFECT EXIT OFF NEG. ART SEPIA B&W SOLARIZE EXEC RET. (4) Select a on the "Memory Stick" (DCR-TRV22E/TRV33E only) (p. 156, 170), or on a VCR using your camcorder as a player. Pictures processed by - Sony DCR TRV33E | Operating Instructions - Page 93
back tape with digital effect (DCR-TRV22E/TRV33E only) Lecture d'une cassette avec effets numériques (DCR-TRV22E/TRV33E uniquement) The input scenes using digital effect. •You cannot record images on the tape on your camcorder while you are processing the image using digital effect. Record images - Sony DCR TRV33E | Operating Instructions - Page 94
Enlarging images recorded on tape - Tape PB ZOOM (DCRTRV22E/TRV33E only) Agrandissement d'images enregistrées sur une cassette - PB ZOOM Cassette (DCR-TRV22E/TRV33E uniquement) Besides the operation described here, your camcorder can enlarge still images recorded on the "Memory Stick" (p. 186). - Sony DCR TRV33E | Operating Instructions - Page 95
using tape PB ZOOM. However, you can record images on the "Memory Stick" (DCR-TRV33E only, p. 156, 170), or on a VCR using your camcorder as a player. •You cannot record moving pictures on the "Memory Stick" on your camcorder when you have processed the picture using tape PB ZOOM. Images in tape PB - Sony DCR TRV33E | Operating Instructions - Page 96
Quickly locating a scene - Zero set memory (DCR-TRV14E/ TRV19E/TRV22E/TRV33E only) Recherche rapide d'une scène - Mémoire à zéro réglable (DCR-TRV14E/ TRV19E/TRV22E/TRV33E uniquement) Your camcorder automatically searches for a desired scene having the tape counter value of "0:00:00." Use the - Sony DCR TRV33E | Operating Instructions - Page 97
only) Recherche rapide d'une scène - Mémoire à zéro réglable (DCRTRV14E/TRV19E/TRV22E/TRV33E uniquement) Notes •When you press ZERO SET MEMORY before rewinding the tape, the zero set memory function will be cancelled. •There may be a discrepancy of - Sony DCR TRV33E | Operating Instructions - Page 98
only (2) Press . or > on the Remote Commander to select the title for playback. Your camcorder automatically starts playback of the scene having the title that you selected. 1) DCR-TRV14E 2) DCR-TRV19E/TRV22E/TRV33E Avant de commencer Réglez CM SEARCH sur ON sous dans les réglages de menu (le - Sony DCR TRV33E | Operating Instructions - Page 99
Searching the boundaries of recorded tape by title - Title search (DCR-TRV14E/TRV19E/ TRV22E/TRV33E only) Recherche de fin d'enregistrement à l'aide des titres - Recherche par titre (DCR-TRV14E/TRV19E/TRV22E/ TRV33E uniquement) 1 SEARCH MODE 2 TITLE SEARCH 3 HAPPY NEW YEAR! 4 PRESENT 5 GOOD - Sony DCR TRV33E | Operating Instructions - Page 100
only (2) Press . or > on the Remote Commander to select the date for playback. Your camcorder automatically starts playback at the beginning of the selected date. 1) DCR-TRV14E 2) DCR-TRV19E/TRV22E/TRV33E 100 • DATE SEARCH en utilisant la fonction de mémoire de cassette cSélectionnez la date - Sony DCR TRV33E | Operating Instructions - Page 101
Advanced Playback Operations Searching a recording by date - Date search (DCR-TRV14E/ TRV19E/TRV22E/TRV33E only) Recherche d'un enregistrement par date - Recherche par date (DCR-TRV14E/TRV19E/TRV22E/ TRV33E uniquement) 1 SEARCH MODE 2 DATE SEARCH 1 5 / 9 / 03 2 6 / 9 / 03 3 24 / 12 / 03 4 1 / 1 - Sony DCR TRV33E | Operating Instructions - Page 102
at the point where the date changes. Each time you press . or >, your camcorder searches for the previous or next date. 1) DCR-TRV14E 2) DCR-TRV19E/TRV22E/TRV33E To cancel searching Press x on the Remote Commander or on your camcorder. Note If one day's recording is less than 2 minutes, your - Sony DCR TRV33E | Operating Instructions - Page 103
PHOTO SEARCH T (2) Press . or > on the Remote Commander to select the date for playback. Your camcorder automatically starts playback of the photo having the date that you selected. 1) DCR-TRV14E 2) DCR-TRV19E Vous pouvez rechercher une image fixe enregistrée sur une cassette (PHOTO SEARCH). Vous - Sony DCR TRV33E | Operating Instructions - Page 104
> on the Remote Commander to select the photo for playback. Each time you press . or >, your camcorder searches for the previous or next photo. Your camcorder automatically starts playback of the photo. 1) DCR-TRV14E 2) DCR-TRV19E To stop searching Press x on the Remote Commander or on 104 your - Sony DCR TRV33E | Operating Instructions - Page 105
2) DCR-TRV19E 1 SEARCH MODE 2 PHOTO 00 SCAN Opérations de lecture avancées To stop scanning Press x on the Remote Commander or your camcorder. Pour mettre fin au balayage on Appuyez sur x sur la télécommande ou sur sur votre caméscope. If a tape has a blank section between recorded sections - Sony DCR TRV33E | Operating Instructions - Page 106
the VCR connected to your camcorder using your camcorder as a player. You can connect either the A/V connecting cable (supplied) or i.LINK cable (optional). If you connect with the i.LINK cable (optional), video and audio signals are transmitted in digital form for high-quality editing. Connecting - Sony DCR TRV33E | Operating Instructions - Page 107
, set it to input. Refer to the operating instructions of the VCR. (3) Play back the recorded tape on your camcorder. (4) Start recording on the VCR. Refer to the operating instructions of your VCR. 1) DCR-TRV12E/TRV14E 2) DCR-TRV19E/TRV22E/TRV33E When you have finished dubbing the tape Press x on - Sony DCR TRV33E | Operating Instructions - Page 108
audio is output. If your VCR has an S video jack See page 61 for details. About i.LINK See page 292 for details. Pictures processed by picture effect, digital effect* or PB ZOOM* These are not output through the DV Interface. * DCR-TRV22E/TRV33E only If you record a paused playback picture •The - Sony DCR TRV33E | Operating Instructions - Page 109
. You can set up to 20 programmes. Your camcorder can dub on the "Memory Stick" (DCR-TRV22E/TRV33E only). See page 173 for details. Vous pouvez dupliquer Switch the order/ Modification de l'ordre des images Before operating Digital program editing on the tape recorded on other equipment Step 1 - Sony DCR TRV33E | Operating Instructions - Page 110
switch should be set to 1)/ 2). Operate by touching the panel. 1) DCR-TRV12E/TRV14E 2) DCR-TRV19E/TRV22E/TRV33E (1) Turn the power of the connected VCR on. If the VCR has an input selector, set it to input. When you connect a video camera recorder, set its power switch to VCR/ VTR. (2) Press FN - Sony DCR TRV33E | Operating Instructions - Page 111
only desired scenes - Digital program editing (on tape) Copie de scènes précises - Montage numérique de programmes (sur cassette) (3) Press MENU to display the menu. (4) Select VIDEO EDIT in , then press EXEC (p. 251). (5) Select TAPE, then press EXEC (DCR- TRV22E/TRV33E only). (6) Press EDIT - Sony DCR TRV33E | Operating Instructions - Page 112
Digital program editing (on tape) (11) Select PAUSEMODE, then press EXEC. (12) Select the mode to cancel recording pause on the VCR, then press EXEC. The correct button depends on your VCR. Refer to the operating instructions the infrared rays emitter of your camcorder and face it towards the remote - Sony DCR TRV33E | Operating Instructions - Page 113
Editing Dubbing only desired scenes - Digital program editing (on tape) Copie de scènes précises - Montage function correctly, depending on the VCR. Set CONTROL to IR in the menu settings of your camcorder. Remarque En fonction du magnétoscope utilisé, il est possible que vous ne soyez pas en - Sony DCR TRV33E | Operating Instructions - Page 114
Digital program editing (on tape) Copie de scènes précises - Montage numérique de programmes (sur cassette) About the IR SETUP code The IR SETUP code is stored in the memory of your camcorder 3. Brand/Marque Sony Aiwa Akai Alba Digital program editing is not possible if the VCR does not support - Sony DCR TRV33E | Operating Instructions - Page 115
the PAUSEMODE again. •Place your camcorder at least 30 cm (12 in.) away from the VCR. •Refer to the operating instructions of your VCR. Step 3: camcorder (if inserted). The POWER switch should be set to 1)/ 2). Operate by touching the panel. 1) DCR-TRV12E/TRV14E 2) DCR-TRV19E/TRV22E/TRV33E - Sony DCR TRV33E | Operating Instructions - Page 116
Dubbing only desired scenes - Digital program editing (on tape) Copie de scènes précises - Montage numérique de programmes (sur cassette) (5) Calculate the average of 5 opening number values of 5 - Sony DCR TRV33E | Operating Instructions - Page 117
settings (p. 110). Video and audio are sent by digital signals. Operation 1: Making a Programme The POWER switch should be set to 1)/ 2). Operate by touching the panel. 1) DCR-TRV12E/TRV14E 2) DCR-TRV19E/TRV22E/TRV33E (1) Insert the cassette for playback into your camcorder, and insert the - Sony DCR TRV33E | Operating Instructions - Page 118
Dubbing only desired scenes - Digital program editing (on tape) Copie de scènes précises - Montage numérique de programmes (sur cassette) (8) Search for the end of the first scene you want to insert using the video control buttons on the screen, then pause playback. You can fine-adjust one frame - Sony DCR TRV33E | Operating Instructions - Page 119
Editing Dubbing only desired scenes - Digital program editing (on tape) Copie de scènes précises - Montage numérique de programmes (sur cassette) On a blank portion of the tape You cannot - Sony DCR TRV33E | Operating Instructions - Page 120
The POWER switch should be set to 1)/ 2). Operate by touching the panel. 1) DCR-TRV12E/TRV14E 2) DCR-TRV19E/TRV22E/TRV33E (1) When you use a digital video camera recorder, set the power switch of VCR to VCR/VTR. (2) Make sure your camcorder and the VCR are connected, and that the VCR is set to - Sony DCR TRV33E | Operating Instructions - Page 121
précises - Montage numérique de programmes (sur cassette) To end Digital program editing Your camcorder stops when the dubbing is complete. Then the display returns to VIDEO EDIT in the menu settings. Press END to end the video edit function. When the programme has not been set You cannot press - Sony DCR TRV33E | Operating Instructions - Page 122
a TV that has video/ audio outputs. Use your camcorder as a recorder. You can connect either the A/V connecting cable (supplied) (DCR-TRV22E/ TRV33E only) or i.LINK cable (optional). If you connect with the i.LINK cable (optional), video and audio signals are transmitted in digital form for high - Sony DCR TRV33E | Operating Instructions - Page 123
video jack (DCRTRV22E/TRV33E only) See page 61 for details. Note Your camcorder only records pictures for viewing on a PAL system based TV and VCR. See "Using your camcorder done. Si votre magnétoscope est de type mono (DCR-TRV22E/TRV33E uniquement) Raccordez la fiche jaune du cordon de liaison - Sony DCR TRV33E | Operating Instructions - Page 124
video or TV programmes (DCR-TRV19E/ TRV22E/TRV33E only) Enregistrement de vidéos ou de programmes télévisés (DCR-TRV19E/ TRV22E/TRV33E Insert the blank tape (or the tape you want to record over) into your camcorder. If you are recording the tape from the VCR, insert the recorded tape into - Sony DCR TRV33E | Operating Instructions - Page 125
à partir d'un magnétoscope - Montage par insertion (DCR-TRV19E/TRV22E/ TRV33E uniquement) You can insert a new scene with sound from the insert start point [a], then set the VCR to playback pause. (2) On your camcorder, locate the insert end point [c], then set it to playback pause. (3) Press ZERO - Sony DCR TRV33E | Operating Instructions - Page 126
only) Insertion d'une scène à partir d'un magnétoscope - Montage par insertion (DCR-TRV19E/ TRV22E/TRV33E uniquement) (4) On your camcorder, locate the insert start point [b]. (5) Press FN and select PAGE3. (6) Press REC CTRL. (7) Press REC PAUSE. (8) First press X on the VCR, and after a few - Sony DCR TRV33E | Operating Instructions - Page 127
only) The audio input to be recorded will take precedence over others in the following order: •MIC jack •Intelligent accessory shoe •AUDIO/VIDEO jack (DCR-TRV22E/TRV33E only) •Built-in microphone Dubbing with the built-in microphone No connection is necessary. (If no external microphone is connected - Sony DCR TRV33E | Operating Instructions - Page 128
the headphones or TV. Connecting the microphone (optional) to the intelligent accessory shoe Remove the shoe cover, then connect the microphone. L'image et és peuvent être contrôlés sur un téléviseur relié à la prise AUDIO/VIDEO. Les sons enregistrés ne sont pas émis par les haut-parleurs. Vérifiez - Sony DCR TRV33E | Operating Instructions - Page 129
(supplied)/ Cordon de liaison audio et vidéo (fourni) Note When dubbing with the AUDIO/VIDEO jack (DCR-TRV22E/TRV33E only) or the built-in microphone, pictures are not output through the S VIDEO jack or AUDIO/VIDEO jack. Check the recorded picture on the screen. You can check the recorded sound by - Sony DCR TRV33E | Operating Instructions - Page 130
. While recording new sound, the red indicator appears on the screen. (7) Press on your camcorder at the point where you want to stop recording. 1) DCR-TRV12E/TRV14E 2) DCR-TRV19E/TRV22E/TRV33E 130 (5) Appuyez sur AUDIO DUB. L'indicateur vert X s'affiche à l'écran. (6) Appuyez sur sur votre cam - Sony DCR TRV33E | Operating Instructions - Page 131
pressed. We recommend that you add new sound on the tape recorded with your camcorder If you add new sound on the tape recorded with another camcorder (including other DCR-TRV12E/TRV14E/TRV19E/TRV22E/ TRV33E), the sound quality may become deteriorated. Vous ne pouvez pas effectuer de doublage audio - Sony DCR TRV33E | Operating Instructions - Page 132
after you disconnect the power source or remove the battery pack, the setting of AUDIO MIX returns to the original sound (ST1) only. The default setting is original sound only. 1) DCR-TRV12E/TRV14E 2) DCR-TRV19E/TRV22E/TRV33E (5) Appuyez sur r/R pour régler l'équilibre entre le son d'origine - Sony DCR TRV33E | Operating Instructions - Page 133
/TRV14E/TRV19E uniquement) Réglez le commutateur POWER sur ou 1)/ 2). Effectuez cette opération à l'aide de l'écran tactile. 1) DCR-TRV12E/TRV14E 2) DCR-TRV19E/TRV22E/TRV33E (1) Insérez la cassette dotée d'une mémoire de cassette. (2) En mode d'attente, d'enregistrement, de lecture ou de - Sony DCR TRV33E | Operating Instructions - Page 134
set. To use the custom title If you want to use the custom title, select in step 5. The titles superimposed with your camcorder •They appear only by DV format video equipment with index titler function. •The point you superimposed the title may be detected as an index signal when searching - Sony DCR TRV33E | Operating Instructions - Page 135
erase, then press OK. The ERASING indicator flashes on the screen. When the title is erased, the COMPLETE indicator appears. 1) DCR-TRV12E/TRV14E 2) DCR-TRV19E/TRV22E/TRV33E Suppression d'un titre Réglez le commutateur POWER sur ou 1)/ 2). Effectuez cette opération à l'aide de l'écran tactile - Sony DCR TRV33E | Operating Instructions - Page 136
up to 2 titles and store them in the memory of your camcorder. Each title can have up to 20 characters. The POWER switch saisir le titre. (8) Appuyez sur SET. Le titre est mémorisé. 1) DCR-TRV12E/TRV14E 2) DCR-TRV19E/TRV22E/TRV33E 4 TITLE SET EXIT CUSTOM1 SET CUSTOM2 SET r R EXEC RET. 5 - Sony DCR TRV33E | Operating Instructions - Page 137
once and then to CAMERA again, then start again from step 1. We recommend setting the POWER switch to PLAYER1)/VCR2) or removing the cassette so that your camcorder does not automatically turn off while you are entering title characters. 1) DCR-TRV12E/TRV14E 2) DCR-TRV19E/TRV22E/TRV33E To erase the - Sony DCR TRV33E | Operating Instructions - Page 138
-TRV12E/TRV14E 2) DCR-TRV19E/TRV22E/TRV33E L'étiquette peut comprendre jusqu'à 10 caractères et est enregistrée dans la mémoire de cassette. Lorsque vous insérez la cassette dotée d'une étiquette et que vous réglez le commutateur POWER sur CAMERA ou PLAYER/VCR, l'étiquette s'affiche pendant environ - Sony DCR TRV33E | Operating Instructions - Page 139
Labelling a cassette on a cassette with Cassette Memory Création d'une étiquette sur une cassette dotée d'une mémoire de cassette To return to FN Press EXIT. To erase the label you have made Erase the label by selecting C in step 5, then press SET. To change the label you have made Insert the - Sony DCR TRV33E | Operating Instructions - Page 140
Select EXECUTE, then press EXEC. The ERASING indicator flashes on the screen. Once erasing is complete, the COMPLETE indicator appears. 1) DCR-TRV12E/TRV14E 2) DCR-TRV19E/TRV22E/TRV33E Les données suivantes sauvegardées dans la mémoire de cassette peuvent être complètement effacées d'un seul coup - Sony DCR TRV33E | Operating Instructions - Page 141
encryption technology. File format Still image (JPEG) Your camcorder compresses and records image data in JPEG (Joint Photographic ées comme support d'enregistrement externe amovible. "Memory Stick" Operations (DCR-TRV22E/TRV33E only) Opérations « Memory Stick » (DCR-TRV22E/TRV33E uniquement) Il - Sony DCR TRV33E | Operating Instructions - Page 142
name Still image 101-0001: This file name appears on the screen of your camcorder. DSC00001.JPG: This file name appears on the display of a computer. Moving picture MOV00001: This file name appears on the screen of your camcorder. MOV00001.MPG: This file name appears on the display of - Sony DCR TRV33E | Operating Instructions - Page 143
"Memory Stick" Operations (DCR-TRV22E/TRV33E only) Opérations « Memory Stick » (DCR-TRV22E/TRV33E uniquement) Using "Memory Stick" Utilisation speakers and TV. We recommend backing up important data on the hard disk of a computer. On handling •When you carry or store the "Memory Stick," put it in - Sony DCR TRV33E | Operating Instructions - Page 144
PRO" with a capacity up to 1 GB can be used with this camcorder. The "Memory Stick" formatted by a computer The "Memory Stick" formatted by Windows OS or Macintosh computers does not have a guaranteed compatibility with your camcorder. Remarques sur l'utilisation du « Memory Stick Duo » (en option - Sony DCR TRV33E | Operating Instructions - Page 145
Memory Stick » "Memory Stick" Operations (DCR-TRV22E/TRV33E only) Opérations « Memory Stick » (DCR-TRV22E/TRV33E uniquement) Notes on image data compatibility •Image data files recorded on the "Memory Stick" by your camcorder conform with the Design Rules for Camera File Systems universal standard - Sony DCR TRV33E | Operating Instructions - Page 146
because your camcorder is reading the data from the "Memory Stick" or recording the data on the "Memory Stick." Do not turn the power off, eject the "Memory Stick" or remove the battery pack. Otherwise, image data breakdown may occur. If " MEMORY STICK ERROR" appears Reinsert the "Memory Stick - Sony DCR TRV33E | Operating Instructions - Page 147
"Memory Stick" Operations (DCR-TRV22E/TRV33E only) Opérations « Memory Stick » (DCR-TRV22E/TRV33E uniquement) Selecting image quality and size Selecting still image quality The default setting is FINE. The POWER switch should be set to or . Operate by - Sony DCR TRV33E | Operating Instructions - Page 148
qualité et de la taille d'image Sélection de la taille des images fixes (DCR-TRV33E uniquement) Vous pouvez sélectionner les tailles d'image 1152 × 864 ou 640 × 480. (Lorsque le commutateur POWER est réglé sur CAMERA ou VCR, la taille d'image est automatiquement réglée sur 640 × 480.) Le réglage - Sony DCR TRV33E | Operating Instructions - Page 149
images varies depending on the selected image quality mode and image size. Details are shown in the table below. 1152 × 864 image size (DCR-TRV33E only) Image quality FINE STANDARD Memory capacity About 500 KB About 200 KB 640 × 480 image size Image quality FINE STANDARD Memory capacity About - Sony DCR TRV33E | Operating Instructions - Page 150
Selecting image quality and size Selecting the moving picture size You can select picture size 320 × 240 or 160 × 112. The default setting is 320 × 240. The POWER switch should be set to or . Operate by touching the panel. (1) Press FN to display PAGE1. (2) Press MENU to display the menu. (3) - Sony DCR TRV33E | Operating Instructions - Page 151
"Memory Stick" Operations (DCR-TRV22E/TRV33E only) Opérations « Memory Stick » (DCR-TRV22E/TRV33E uniquement) * DCR-TRV33E only/DCR-TRV33E uniquement Moving pictures/Images be recorded on the "Memory Stick" formatted with your camcorder. Le tableau indique le nombre approximatif d'images fixes et - Sony DCR TRV33E | Operating Instructions - Page 152
image. The green z indicator stops flashing, then lights up. The brightness of the image and the focus are adjusted and fixed while your camcorder targets at the centre of the image. Recording does not start yet. (2) Press PHOTO deeply. Recording is complete when the bar scroll indicator disappears - Sony DCR TRV33E | Operating Instructions - Page 153
Digital effect - SPORTS of PROGRAM AE (The indicator flashes.) - Title - SteadyShot While you are recording a still image You cannot turn off the power or press PHOTO. When you press PHOTO on the Remote Commander Your camcorder (DCR-TRV22E/TRV33E only) Opérations « Memory Stick » (DCR-TRV22E/TRV33E - Sony DCR TRV33E | Operating Instructions - Page 154
angle of view when the POWER switch is set to CAMERA. Recording images continuously (DCR-TRV33E only) You can record still images continuously. Before recording, select a desired mode described below in the menu settings. NORMAL [a] ( ) Your camcorder shoots up to 4 still images in 1152 × 864 size - Sony DCR TRV33E | Operating Instructions - Page 155
Stick" Operations (DCR-TRV22E/TRV33E only) Opérations « Memory Stick » (DCR-TRV22E/TRV33E uniquement) r self-timer or the Remote Commander Your camcorder automatically records up to the maximum number We recommend viewing images on TV or the computer to recognise the effect. When selecting NORMAL - Sony DCR TRV33E | Operating Instructions - Page 156
sous forme d'image fixe Image size is automatically set to 640 × 480. Before operation Insert the "Memory Stick" and the recorded tape into your camcorder. The POWER switch should be set to . Operate by touching the panel. (1) Press . The picture recorded on the tape is played back. (2) Keep - Sony DCR TRV33E | Operating Instructions - Page 157
"Memory Stick" Operations (DCR-TRV22E/TRV33E only) Opérations « Memory Stick » (DCR-TRV22E/TRV33E uniquement) Recording an image from is in poor condition due to being used repeatedly for dubbing and so on, your camcorder may not be able to record the image, or the recorded image may appear jagged. - Sony DCR TRV33E | Operating Instructions - Page 158
(Memory Overlap) You can make a moving picture you are recording with your camcorder fade in on top of a still image recorded on the "Memory Stick." You can use Memory Overlap only when the POWER switch is set to CAMERA. Vous pouvez superposer une image fixe que vous avez enregistrée sur un « - Sony DCR TRV33E | Operating Instructions - Page 159
"Memory Stick" Operations (DCR-TRV22E/TRV33E only) Opérations « Memory Stick » (DCR-TRV22E/TRV33E uniquement) Superimposing a still image in "Memory Blue/Bleu Moving picture/ Image animée The "Memory Stick" supplied with your camcorder stores 20 images: - For M. CHROM: 18 images (such as a frame - Sony DCR TRV33E | Operating Instructions - Page 160
(p. 41), the image on the LCD screen does not appear as a mirror-image. Image data modified on a computer You may not be able to play back modified images with your camcorder. Recording a superimposed image to the tape Before operation •Insert the "Memory Stick" containing the still images into your - Sony DCR TRV33E | Operating Instructions - Page 161
"Memory Stick" Operations (DCR-TRV22E/TRV33E only) Opérations « Memory Stick » (DCR-TRV22E/TRV33E uniquement) Superimposing a still adjustment necessary (You can select M. OVERLAP only when the POWER switch is set to CAMERA.) (6) Press EXIT to return to FN. (7) Press START/STOP to start recording - Sony DCR TRV33E | Operating Instructions - Page 162
Superimposing a still image in "Memory Stick" on an image - MEMORY MIX Superposition d'une image fixe d'un « Memory Stick » sur une image - MEMORY MIX To change the still image to be superimposed Press -/+ in the lower right corner before step 5. To cancel MEMORY MIX Press OFF to return to PAGE2. - Sony DCR TRV33E | Operating Instructions - Page 163
"Memory Stick" Operations (DCR-TRV22E/TRV33E only) Opérations « Memory Stick » (DCR-TRV22E/TRV33E uniquement) Superimposing a still image Before operation Insert the "Memory Stick" containing the still images into your camcorder. The POWER switch should be set to . Operate by touching the panel. - Sony DCR TRV33E | Operating Instructions - Page 164
Interval Photo Recording Enregistrement de photos par intervalles You can carry out a time-lapse recording by setting the camcorder to automatically record still images. Example [a] [a] [a] [b] [b] [a] Memory Photo recording [b] INTERVAL The POWER switch should be set to . Operate by - Sony DCR TRV33E | Operating Instructions - Page 165
the menu settings. Pour désactiver le mode d'enregistrement de photos par intervalles Réglez INT. R -STL sur OFF dans les réglages de menu. "Memory Stick" Operations (DCR-TRV22E/TRV33E only) Opérations « Memory Stick » (DCR-TRV22E/TRV33E uniquement) 165 - Sony DCR TRV33E | Operating Instructions - Page 166
capacity of the "Memory Stick" (MPEG MOVIE EX). The POWER switch should be set to . Press START/STOP. Your camcorder starts recording. The camera recording lamp located on the front of your camcorder lights up. The picture and sound are recorded up to the capacity of the "Memory Stick." See page 151 - Sony DCR TRV33E | Operating Instructions - Page 167
"Memory Stick" Operations (DCR-TRV22E/TRV33E only) Opérations « Memory Stick » (DCR-TRV22E/TRV33E uniquement) Recording moving pictures on "Memory Stick" - MPEG MOVIE recording When the POWER switch is set to MEMORY The following functions do not work: - Digital zoom - Super NightShot - Colour Slow - Sony DCR TRV33E | Operating Instructions - Page 168
Self-timer recording You can record still images and moving pictures on the "Memory Stick" with the selftimer. You can also use the Remote Commander for this operation. Prise de vue avec le retardateur Vous pouvez faire des prises de vue d'images fixes et d'images animées sur un « Memory Stick » en - Sony DCR TRV33E | Operating Instructions - Page 169
"Memory Stick" Operations (DCR-TRV22E/TRV33E only) Opérations « Memory Stick » (DCR-TRV22E/TRV33E uniquement) Self-timer recording self-timer recording of the still images. When the POWER switch is set to CAMERA You can also perform self-timer recording (p. 67). Enregistrement d'une image animée - Sony DCR TRV33E | Operating Instructions - Page 170
picture Enregistrement d'une image d'une cassette sous forme d'images animées Before operation Insert the recorded cassette and "Memory Stick" into your camcorder. The POWER switch should be set to . Operate by touching the panel. (1) Press . The picture recorded on the tape is played back - Sony DCR TRV33E | Operating Instructions - Page 171
the " AUDIO ERROR" indicator appears Sound that cannot be recorded by your camcorder has been recorded. Connect the A/ V connecting cable to input images played back pas enregistrés. "Memory Stick" Operations (DCR-TRV22E/TRV33E only) Opérations « Memory Stick » (DCR-TRV22E/TRV33E uniquement) 171 - Sony DCR TRV33E | Operating Instructions - Page 172
Recording a picture from tape as a moving picture Enregistrement d'une image d'une cassette sous forme d'images animées Recording a moving picture from other equipment You can use either A/V connecting cable or i.LINK cable. See pages 122 and 123 for the connection. When connecting with the A/V - Sony DCR TRV33E | Operating Instructions - Page 173
DCR-TRV22E/TRV33E only) Opérations « Memory Stick » (DCR-TRV22E/TRV33E uniquement) Recording edited pictures from tape as a moving picture - Digital Stick" for recording into your camcorder. (2) Press FN to display PAGE1. (3) Press MENU to display the menu. (4) Select VIDEO EDIT in , then press EXEC - Sony DCR TRV33E | Operating Instructions - Page 174
programme (sur « Memory Stick ») Notes •You cannot dub the titles, display indicators, or the contents of Cassette Memory. •You cannot operate recording during the Digital program editing on the "Memory Stick." On a blank portion of the tape You cannot set IN or OUT on a blank portion of the tape - Sony DCR TRV33E | Operating Instructions - Page 175
tape as a moving picture - Digital program editing (on "Memory VIDEO EDIT in , then press EXEC (p. 251). (4) Select MEMORY, then press EXEC. (5) Press START. (6) Press EXEC. Your camcorder searches " Operations (DCR-TRV22E/TRV33E only) Opérations « Memory Stick » (DCR-TRV22E/TRV33E uniquement) 175 - Sony DCR TRV33E | Operating Instructions - Page 176
numérique d'un programme (sur « Memory Stick ») To end Digital program editing Your camcorder stops when the dubbing ends. Then the display returns to VIDEO EDIT in the menu settings. Press END to end Digital program editing. Note Your camcorder may stop recording the image, or the recorded image - Sony DCR TRV33E | Operating Instructions - Page 177
"Memory Stick" Operations (DCR-TRV22E/TRV33E only) Opérations « Memory Stick » (DCR-TRV22E/TRV33E uniquement) Changing the recording folder Modification du dossier d'enregistrement You can create plural folders in a "Memory Stick." This feature is convenient for sorting out the - Sony DCR TRV33E | Operating Instructions - Page 178
in each folder. When a folder is full, a new folder is automatically created. •Once a folder is created, it cannot be deleted with your camcorder. •As the number of folders increases, the number of recordable images in the "Memory Stick" decreases. (4) Appuyez sur r/R pour sélectionner le dossier - Sony DCR TRV33E | Operating Instructions - Page 179
(2) Press - (to see the previous image)/+ (to see the next image) on your camcorder to select a desired still image. To cancel Memory Photo playback Press CAM. When no file » s'affiche. "Memory Stick" Operations (DCR-TRV22E/TRV33E only) Opérations « Memory Stick » (DCR-TRV22E/TRV33E uniquement) 179 - Sony DCR TRV33E | Operating Instructions - Page 180
Viewing a still image - Memory Visionnage d'une image fixe - Photo playback Lecture des photos en mémoire Screen indicators during still image playback To make screen indicators disappear, press DSPL/BATT INFO. Indicateurs à l'écran pendant la lecture des images fixes Pour faire disparaître les - Sony DCR TRV33E | Operating Instructions - Page 181
"Memory Stick" Operations (DCR-TRV22E/TRV33E only) Opérations « Memory Stick » (DCR-TRV22E/TRV33E uniquement) Viewing a still image - Memory Visionnage d'une image fixe - Photo playback Lecture des photos en mémoire When the "Memory Stick" contains multiple folders The following - Sony DCR TRV33E | Operating Instructions - Page 182
Viewing a moving picture - MPEG MOVIE playback Visionnage d'images animées - Lecture d'un film au format MPEG MOVIE You can view the moving pictures recorded in the "Memory Stick." The POWER switch should be set to . Operate by touching the panel. (1) Press PLAY. The last recorded image appears. - Sony DCR TRV33E | Operating Instructions - Page 183
"Memory Stick" Operations (DCR-TRV22E/TRV33E only) Opérations « Memory Stick » (DCR-TRV22E/TRV33E uniquement) Viewing a moving picture - MPEG MOVIE playback Visionnage d'images animées - Lecture d'un film au format MPEG MOVIE Playing back a picture from a particular segment Moving - Sony DCR TRV33E | Operating Instructions - Page 184
Viewing a moving picture - MPEG MOVIE playback Visionnage d'images animées - Lecture d'un film au format MPEG MOVIE Screen indicators during moving picture playback To make screen indicators appear or disappear, press DSPL/BATT INFO. Indicateurs à l'écran pendant la lecture de films Pour faire - Sony DCR TRV33E | Operating Instructions - Page 185
"Memory Stick" Operations (DCR-TRV22E/TRV33E only) Opérations « Memory Stick » (DCR-TRV22E/TRV33E uniquement) Choosing a playback à FN Appuyez sur EXIT. Note Your camcorder does not recognise folder names created or changed using the computer. Current playback folder The current playback folder is - Sony DCR TRV33E | Operating Instructions - Page 186
un « Memory Stick » - PB ZOOM Mémoire You can enlarge the still images to be played back, and record the enlarged images on the "Memory Stick" (DCR-TRV33E only). Image size is automatically set to 640 × 480. The POWER switch should be set to . Operate by touching the panel. (1) Play back the image - Sony DCR TRV33E | Operating Instructions - Page 187
PB ZOOM Mémoire ne fonctionne pas. Pour enregistrer les images traitées avec la fonction PB ZOOM Mémoire sur le « Memory Stick » (DCR-TRV33E uniquement) Appuyez sur PHOTO pendant que l'image est affichée. La taille de l'image est automatiquement redimensionnée à 640 × 480. "Memory Stick" Operations - Sony DCR TRV33E | Operating Instructions - Page 188
" FOLDER sss : To play back the images in the folder selected with PB FOLDR * The folder name appears in sss. (5) Press START. Your camcorder plays back the images recorded on the "Memory Stick" in sequence. When all images are played back, slide show automatically stops. To cancel slide - Sony DCR TRV33E | Operating Instructions - Page 189
, puis appuyez sur EXIT. Pour faire démarrer le diaporama à une image particulière Sélectionnez l'image souhaitée à l'aide des touches + ou - avant l'étape 5. "Memory Stick" Operations (DCR-TRV22E/TRV33E only) Opérations « Memory Stick » (DCR-TRV22E/TRV33E uniquement) 189 - Sony DCR TRV33E | Operating Instructions - Page 190
Preventing accidental erasure - Image protection To prevent accidental erasure of important images, you can protect selected images. The POWER switch should be set to . Operate by touching the panel. (1) Press INDEX to display the index screen. (2) Press - MARK. The screen to protect the image - Sony DCR TRV33E | Operating Instructions - Page 191
formater. Si l'onglet de protection en écriture du « Memory Stick » est réglé sur LOCK L'indicateur - ne peut pas être activé ou désactivé. "Memory Stick" Operations (DCR-TRV22E/TRV33E only) Opérations « Memory Stick » (DCR-TRV22E/TRV33E uniquement) 191 - Sony DCR TRV33E | Operating Instructions - Page 192
Deleting images - DELETE Suppression d'images - DELETE You can delete all images or selected images. Deleting selected images The POWER switch should be set to . Operate by touching the panel. (1) Play back the image you want to delete. (2) Press FN to display PAGE1. (3) Press DEL. The DELETE? - Sony DCR TRV33E | Operating Instructions - Page 193
? s'affiche à l'écran. (4) Appuyez sur OK. Les images sélectionnées sont supprimées. "Memory Stick" Operations (DCR-TRV22E/TRV33E only) Opérations « Memory Stick » (DCR-TRV22E/TRV33E uniquement) 1 INDEX 2 DEL RET. DEL 1 EXEC EXIT 2 3 4 5 6 T 3 / 8 101 t To return to FN Press EXIT. To - Sony DCR TRV33E | Operating Instructions - Page 194
Deleting images - DELETE Suppression d'images - DELETE Deleting all the images You can delete all the unprotected images in the "Memory Stick." The POWER switch should be set to . Operate by touching the panel. (1) Press FN to display PAGE1. (2) Press MENU to display the menu. (3) Select DELETE - Sony DCR TRV33E | Operating Instructions - Page 195
le commutateur POWER et n'appuyez sur aucun bouton. Même si toutes les images sont supprimées Les dossiers ne sont pas supprimés. "Memory Stick" Operations (DCR-TRV22E/TRV33E only) Opérations « Memory Stick » (DCR-TRV22E/TRV33E uniquement) 195 - Sony DCR TRV33E | Operating Instructions - Page 196
de la taille des - Resize (DCR-TRV33E images - Redimensionnement only) (DCR-TRV33E uniquement) After recording, you can change MOVIE recording. •You may not be able to resize the picture recorded on other camcorder. •You cannot select an image quality level (FINE or STANDARD) for resized pictures - Sony DCR TRV33E | Operating Instructions - Page 197
Operations (DCR-TRV22E/TRV33E only) Opérations « Memory Stick » (DCR-TRV22E/TRV33E uniquement) Writing a print mark - Print mark The print mark function is useful for printing out still images later. However you cannot set the number of printing. Your camcorder conforms with the DPOF (Digital Print - Sony DCR TRV33E | Operating Instructions - Page 198
Writing a print mark - Print mark Inscription d'une marque d'impression - Marque d'impression To return to FN Press EXIT. To erase the print marks Press the image you want to erase the print mark in step 3 again. The disappears from the image. If the write-protect tab on the "Memory Stick" is set - Sony DCR TRV33E | Operating Instructions - Page 199
(DCRTRV22E/TRV33E uniquement). English Camcorder connection jack Connection cable Computer environment requirements Reference pages For For Windows Macintosh Users Users Tape image/live from your camcorder USB jack USB cable USB port, 203 - 216 - (supplied) editing software 217 - Sony DCR TRV33E | Operating Instructions - Page 200
installation of the USB driver before connecting your camcorder to the computer. If you connect your camcorder to the computer first, you will not be able to install the USB driver correctly. For details about the computer's ports and editing software, contact the computer manufacturer. Viewing - Sony DCR TRV33E | Operating Instructions - Page 201
computer - Introduction When connecting to a computer with the DV port The computer must have a DV port and editing software installed that can read video the "Memory Stick" (DCRTRV22E/TRV33E only) When connecting to a computer with the USB port See page 203 when using Windows and page 233 when using - Sony DCR TRV33E | Operating Instructions - Page 202
card adaptor for "Memory Stick." When purchasing an accessory, check its catalogue beforehand for the recommended operating environment. Notes on using your computer "Memory Stick" (DCR-TRV22E/ TRV33E only) •"Memory Stick" operations on your camcorder cannot be assured if a "Memory Stick" formatted - Sony DCR TRV33E | Operating Instructions - Page 203
on a computer (USB Streaming function). Furthermore, if you download pictures from your camcorder to a computer, you can process or edit them in image processing software and attach them to e-mail. You can view images recorded on the "Memory Stick" on a computer (DCRTRV22E/TRV33E only). Terminez - Sony DCR TRV33E | Operating Instructions - Page 204
your camcorder to a Raccordement de votre caméscope à computer using the USB cable votre ordinateur à l'aide du câble USB (For Windows users) (pour les utilisateurs de Windows) Recommended computer usage environment when connecting with the USB cable and viewing tape pictures on a computer OS - Sony DCR TRV33E | Operating Instructions - Page 205
de Windows) Recommended computer usage environment when connecting with USB cable and viewing the "Memory Stick" images on a computer (DCR-TRV22E/TRV33E only) Recommended Windows environment OS: Microsoft Windows 98, Windows 98SE, Windows Millennium Edition, Windows 2000 Professional, Windows XP - Sony DCR TRV33E | Operating Instructions - Page 206
aide du câble USB (For Windows users) (pour les utilisateurs de Windows) Installing the USB driver Installation du pilote USB Start the following operation without connecting the USB cable to the computer. Connect the USB cable according to "Making the computer recognise your camcorder" on page - Sony DCR TRV33E | Operating Instructions - Page 207
your camcorder to a Raccordement de votre caméscope à computer using the USB cable votre ordinateur à l'aide du câble USB (For Windows users) (pour les utilisateurs de Windows) (4) Move the cursor to "USB Driver" and click. This starts USB driver installation. (4) Cliquez sur « USB Driver - Sony DCR TRV33E | Operating Instructions - Page 208
Connecting your camcorder to a Raccordement de votre caméscope à computer using the USB cable votre ordinateur à l'aide du câble USB (For Windows users) (pour les utilisateurs de Windows) Installing Image Transfer (DCR-TRV22E/TRV33E only) Make sure USB driver installation is complete. This - Sony DCR TRV33E | Operating Instructions - Page 209
USB driver installation is complete. "ImageMixer Ver. 1.5 for Sony" is an application that can capture or edit images, or create video CDs. To install and use this software in Windows 2000, you must be authorised as administrators. For Windows XP, you must be authorised as computer administrators - Sony DCR TRV33E | Operating Instructions - Page 210
camcorder to a Raccordement de votre caméscope à computer using the USB cable votre ordinateur à l'aide du câble USB (For Windows users) (pour les utilisateurs de Windows terminée, redémarrez votre ordinateur. Album MEMORY MIX (DCR-TRV22E/TRV33E uniquement) Une fois que « ImageMixer » est install - Sony DCR TRV33E | Operating Instructions - Page 211
matériel Windows démarre. Computer/Ordinateur (USB) jack/ Prise (USB) USB port/ Port USB Viewing images with your computer Visualisation d'images à l'aide de votre ordinateur USB cable (supplied)/ Câble USB (fourni) 1) DCR-TRV12E/TRV14E 2) DCR-TRV19E/TRV22E/TRV33E 1) DCR-TRV12E/TRV14E - Sony DCR TRV33E | Operating Instructions - Page 212
Anyway" (Windows XP). Viewing images recorded on the "Memory Stick" (DCR-TRV22E/ TRV33E only) (1) Insert the "Memory Stick" into your camcorder. (2) Connect the AC Adaptor, then set the POWER switch to . (3) Connect the (USB) jack on your camcorder to the USB port on the computer using - Sony DCR TRV33E | Operating Instructions - Page 213
USB driver 1 Turn on the computer and allow Windows to load. 2 Connect the AC Adaptor and set the POWER switch to 1)/ 2). 3 Connect the USB port on the computer to the (USB) jack on your camcorder using the USB cable supplied. 1) DCR-TRV12E/TRV14E 2) DCR-TRV19E/TRV22E/TRV33E Vous - Sony DCR TRV33E | Operating Instructions - Page 214
your camcorder to a Raccordement de votre caméscope à computer using the USB cable votre ordinateur à l'aide du câble USB (For Windows users) (pour les utilisateurs de Windows) 4 Open the computer's "Device Manager." 4 Ouvrez le « Gestionnaire de périphériques » de votre ordinateur. Windows - Sony DCR TRV33E | Operating Instructions - Page 215
à l'aide du câble USB (For Windows users) (pour les utilisateurs de Windows) Viewing images with your computer Windows 2000 Windows XP 6 Set the POWER switch to OFF (CHG) on your camcorder, then disconnect the USB cable. 7 Restart the computer. Step 2: Install the USB driver on the supplied CD - Sony DCR TRV33E | Operating Instructions - Page 216
Stick" (DCR-TRV22E/ TRV33E only) Step1: Uninstall the incorrect USB driver 1 Turn on the computer and allow Windows to load. 2 Insert the "Memory Stick" into your camcorder. 3 Connect the AC Adaptor and set the POWER switch to . 4 Connect the USB port on the computer to the (USB) jack on - Sony DCR TRV33E | Operating Instructions - Page 217
Ver.1.5 for Sony" You need to install the USB driver and ImageMixer to view pictures recorded on the tape on a computer (p. 206, 209). Viewing pictures recorded on the tape (1) Turn on the computer and allow Windows to load. (2) Connect the AC Adaptor, then insert the cassette into your camcorder - Sony DCR TRV33E | Operating Instructions - Page 218
) (10) Click . (10) Cliquez sur . Monitor window/ Fenêtre d'aperçu (11) Connect the (USB) jack on your camcorder to the USB port on the computer using the supplied USB cable. (USB) jack/ Prise (USB) (11) Raccordez la prise (USB) de votre caméscope au port USB de votre ordinateur avec le câble - Sony DCR TRV33E | Operating Instructions - Page 219
Viewing pictures recorded on tape on a computer - USB Streaming (For Windows users) Visionnage sur un ordinateur d'images enregistrées sur une cassette - USB Streaming (pour les utilisateurs de Windows) (12) Click to start playback. You can control video operations with the buttons on the - Sony DCR TRV33E | Operating Instructions - Page 220
computer - USB Streaming (For Windows users) Visionnage sur un ordinateur d'images enregistrées sur une cassette - USB Streaming (pour les utilisateurs de Windows) Capturing still images Monitor window window/ Fenêtre d'aperçu Thumbnail list window/ Fenêtre de la liste par vignettes Video - Sony DCR TRV33E | Operating Instructions - Page 221
screen of your camcorder do not appear on images that are captured into the computer. •If you capture a fast moving picture, the preview window may not les images avec votre ordinateur alors qu'il est raccordé avec le câble USB, les phénomènes suivants peuvent se produire. Il ne s'agit pas de - Sony DCR TRV33E | Operating Instructions - Page 222
de Windows) If image data cannot be transferred by the USB connection The USB driver has been registered incorrectly as the computer was connected to your camcorder before installation of the USB driver was complete. Reinstall the USB driver following the procedure on page 213. If any trouble - Sony DCR TRV33E | Operating Instructions - Page 223
recorded on tape on a computer - USB Streaming (For Windows users) Visionnage sur un ordinateur d'images enregistrées sur une cassette - USB Streaming (pour les utilisateurs de Windows) Making Video CDs - Easy Video CD This function makes it simple to create a video CD by capturing images recorded - Sony DCR TRV33E | Operating Instructions - Page 224
Viewing pictures recorded on tape on a computer - USB Streaming (For Windows users) Visionnage sur un ordinateur d'images enregistrées sur une cassette - USB Streaming (pour les utilisateurs de Windows) The tape is automatically played back. Easy Video CD automatically begins to capture images - Sony DCR TRV33E | Operating Instructions - Page 225
ées sur une cassette - USB Streaming (pour les utilisateurs de Windows) Playing back the Video CDs You can use a DVD player or a computer with a DVD drive to play back the Video CDs you created. To play back the Video CDs on a computer, you need to have Video CD software installed. You can play - Sony DCR TRV33E | Operating Instructions - Page 226
on tape on a computer - USB Streaming (For Windows users) Visionnage sur un ordinateur d'images enregistrées sur une cassette - USB Streaming (pour les utilisateurs de Windows) Seeing the on-line help (operating instructions) of ImageMixer An "ImageMixer Ver.1.5 for Sony" on-line help site - Sony DCR TRV33E | Operating Instructions - Page 227
» (pour les utilisateurs de Windows) (DCR-TRV22E/ TRV33E uniquement) The image data recorded on the "Memory Stick" is automatically transferred (copied) to a computer with Image Transfer. You can view images with ImageMixer. Before operation You need to install the USB driver, Image Transfer and - Sony DCR TRV33E | Operating Instructions - Page 228
Stick" on a computer (For Windows users) (DCRTRV22E/TRV33E only) (6) ImageMixer automatically starts up, enabling you to view the copied image. Visionnage sur un ordinateur d'images enregistrées sur un « Memory Stick » (pour les utilisateurs de Windows) (DCRTRV22E/TRV33E uniquement) (6) ImageMixer - Sony DCR TRV33E | Operating Instructions - Page 229
the USB driver to view the "Memory Stick" images on a computer (p. 206). •An application such as Windows Media Player must be installed to play back moving pictures in Windows environment. (1) Turn on the computer and allow Windows to load. (2) Insert the "Memory Stick" into your camcorder, then - Sony DCR TRV33E | Operating Instructions - Page 230
Viewing images recorded on "Memory Stick" on a computer (For Windows users) (DCRTRV22E/TRV33E only) (6) Double-click a desired image file enregistrées sur un « Memory Stick » (pour les utilisateurs de Windows) (DCRTRV22E/TRV33E uniquement) (6) Double-cliquez sur le fichier d'image souhaité dans le - Sony DCR TRV33E | Operating Instructions - Page 231
Viewing images recorded on "Memory Stick" on a computer (For Windows users) (DCRTRV22E/TRV33E only) Image file storage destinations and image files Image files recorded with your camcorder are grouped according to the folders in the "Memory Stick." The meanings of the file names are as follows. ssss - Sony DCR TRV33E | Operating Instructions - Page 232
computer (For Windows users) (DCRTRV22E/TRV33E only) Visionnage sur un ordinateur d'images enregistrées sur un « Memory Stick » (pour les utilisateurs de Windows) (DCRTRV22E/TRV33E the USB cable and remove the "Memory Stick" or set the POWER switch to OFF (CHG) For Windows 2000, Windows Me, Windows - Sony DCR TRV33E | Operating Instructions - Page 233
Macintosh) (DCRTRV22E/TRV33E uniquement) When connecting to a computer with the USB cable You must install a USB driver onto a computer in order to connect your camcorder to the computer's USB port. The USB driver can be found on the CD-ROM supplied, along with the application software required for - Sony DCR TRV33E | Operating Instructions - Page 234
case in this manual. Installing the USB driver Do not connect the USB cable to a computer before installation of the USB driver is complete. For Mac OS 8.5.1/8.6/9.0 users (1) Turn on the computer and allow the Mac OS to load. If you have been using the computer, close all softwares. (2) Insert the - Sony DCR TRV33E | Operating Instructions - Page 235
Camcorder USB Driver •Sony Camcorder USB Shim Viewing images with your computer Visualisation d'images à l'aide de votre ordinateur (6) When the message appears, click "OK." The USB driver is installed on the computer. (7) Remove the CD-ROM from the computer. (8) Restart the computer. For Mac - Sony DCR TRV33E | Operating Instructions - Page 236
de Macintosh) (DCR-TRV22E/ TRV33E uniquement) Viewing images Before operation •You need to install the USB driver to view the "Memory Stick" images on a computer (p. 234). •QuickTime 3.0 or later must be installed to play back moving pictures. (1) Turn on the computer and allow Mac OS to load - Sony DCR TRV33E | Operating Instructions - Page 237
" from the "Special" menu at the top left of the screen. (3) Disconnect the USB cable and remove the "Memory Stick" or set the POWER switch to OFF (CHG). For Mac OS X (v10.0) users Shut down the computer, then disconnect the USB cable and remove the "Memory Stick" or set the POWER switch to OFF - Sony DCR TRV33E | Operating Instructions - Page 238
partir d'un appareil vidéo analogique - Fonction de conversion des signaux (DCR-TRV22E/ TRV33E uniquement) You can capture images and sound from an analog video unit connected to a computer which has the DV port via your camcorder. Before operation Set DISPLAY in to LCD in the menu settings. (The - Sony DCR TRV33E | Operating Instructions - Page 239
•You need the software and computer that support the exchange of digital video signals. •Depending on the condition of the analog video signals, the computer may not be able to output the images correctly when you convert video signals into digital video signals via your camcorder. Depending on the - Sony DCR TRV33E | Operating Instructions - Page 240
- Customizing Your Camcorder - Changing the menu settings - Personnalisation de votre cam you want to change other items. Press RET. to return to step 3. 1) DCR-TRV12E/TRV14E 2) DCR-TRV19E/TRV22E/TRV33E 3) DCR-TRV22E/TRV33E For details, see "Selecting the mode setting of each item" (p. 242). Pour - Sony DCR TRV33E | Operating Instructions - Page 241
TRV12E/TRV14E 2) DCR-TRV19E/TRV22E/TRV33E 3) DCR-TRV22E/TRV33E Customizing Your Camcorder Personnalisation de votre caméscope To return to FN Press EXIT. Pour revenir à FN Appuyez sur EXIT. Menu items are displayed as the following icons: MANUAL SET CAMERA SET PLAYER SET (DCR-TRV12E/TRV14E) VCR - Sony DCR TRV33E | Operating Instructions - Page 242
you can operate at the moment. Icon/item MANUAL SET PROGRAM AE Mode -- P EFFECT -- Meaning To suit your specific shooting requirement (p. 80) To add special effects when shooting in bright conditions 1) DCR-TRV22E/TRV33E 2) DCR-TRV12E/TRV14E 3) DCR-TRV19E/TRV22E/TRV33E Note on FLASH MODE and - Sony DCR TRV33E | Operating Instructions - Page 243
/TRV19E/TRV22E/TRV33E 2) DCR-TRV12E 3) DCR-TRV22E/TRV33E Notes on SteadyShot •SteadyShot will not correct excessive camera- shake. •Attachment of a conversion lens (optional) may influence SteadyShot. If you cancel SteadyShot The (SteadyShot off) indicator appears. Your camcorder prevents excessive - Sony DCR TRV33E | Operating Instructions - Page 244
and stereo 2 (p. 132) 1)/ 2) 1)/ 2) ST1 ST2 A/V t DV OUT3) z OFF To output digital images and sound in analog format using your camcorder ON To output analog images and sound in digital format using your camcorder (p. 238) NTSC PB z ON PAL TV To play back a tape recorded in the NTSC colour - Sony DCR TRV33E | Operating Instructions - Page 245
Changing the menu settings Customizing Your Camcorder Icon/item MEM SET 11) STILL SET BURST2) QUALITY file numbering sequence each time the "Memory Stick" is changed POWER switch 1) DCR-TRV22E/TRV33E only 2) DCR-TRV33E only When you select image quality The number of images you can shoot in - Sony DCR TRV33E | Operating Instructions - Page 246
The COMPLETE indicator appears when formatting is complete. 1) DCR-TRV22E/TRV33E only 2) The folder name is displayed in sss. Notes Stick" •The "Memory Stick" supplied with your camcorder has been formatted at factory. Formatting with your camcorder is not required. •You cannot format the "Memory - Sony DCR TRV33E | Operating Instructions - Page 247
ALL z RETURN OK To cancel erasing all the data To erase all the data in Cassette Memory (p. 140) 1)/ 2) 1) DCR-TRV12E/TRV14E 2) DCR-TRV19E/TRV22E/TRV33E 3) DCR-TRV14E/TRV19E/TRV22E/TRV33E (continued on the following page) Customizing Your Camcorder Personnalisation de votre caméscope 247 - Sony DCR TRV33E | Operating Instructions - Page 248
PLAYER1)/VCR2) or CAMERA and inserting a cassette, then your camcorder calculates the remaining DCR-TRV12E/TRV14E 2) DCR-TRV19E/TRV22E/TRV33E 3) DCR-TRV22E/TRV33E Notes on the LP mode •When you record the tape in the LP mode on your camcorder, we recommend playing back the tape on your camcorder - Sony DCR TRV33E | Operating Instructions - Page 249
-TRV22E/TRV33E 2) DCR-TRV12E/TRV14E 3) DCR-TRV19E/TRV22E/TRV33E 4) European models only 5) Models for other countries/regions only Notes on DEMO MODE •You cannot select DEMO MODE when the cassette or the "Memory Stick" (DCRTRV22E/TRV33E only) is inserted in your camcorder. •When NIGHTSHOT is slid to - Sony DCR TRV33E | Operating Instructions - Page 250
-TRV14E/TRV19E/TRV22E/TRV33E 2) DCR-TRV12E/TRV14E 3) DCR-TRV19E/TRV22E/TRV33E 4) DCR-TRV22E/TRV33E Note If you press DSPL/BATT INFO with DISPLAY set to V-OUT/LCD in the menu settings, the picture from a TV or VCR will not appear on the LCD screen even when your camcorder is connected to the output - Sony DCR TRV33E | Operating Instructions - Page 251
make programmes and perform Digital program editing on the "Memory Stick" (p. 175) 1) 2)/ 3) 1) DCR-TRV22E/TRV33E 2) DCR-TRV12E/TRV14E 3) DCR-TRV19E/TRV22E/TRV33E When recording a close subject When REC LAMP is set to ON, the red camera recording lamp on the front of your camcorder may reflect on - Sony DCR TRV33E | Operating Instructions - Page 252
pouvant être utilisés à un moment donné apparaissent. Icône/Elément MANUAL SET PROGRAM AE Mode -- P EFFECT -- FLASH MODE z ON ON vue dans un endroit très bien éclairé 1) DCR-TRV22E/TRV33E 2) DCR-TRV12E/TRV14E 3) DCR-TRV19E/TRV22E/TRV33E Remarque sur les fonctions FLASH MODE et FLASH LVL Vous - Sony DCR TRV33E | Operating Instructions - Page 253
réglages de menu Icône/Elément CAMERA SET D ZOOM Mode z OFF 20× 120 sactivation de l'éclairage NightShot 3) 1) DCR-TRV14E/TRV19E/TRV22E/TRV33E 2) DCR-TRV12E 3) DCR-TRV22E/TRV33E Remarques sur la fonction SteadyShot •La ) Customizing Your Camcorder Personnalisation de votre caméscope 253 - Sony DCR TRV33E | Operating Instructions - Page 254
PAL DCR-TRV22E/TRV33E Remarque sur NTSC PB Lors de la lecture d'une cassette sur un téléviseur multi-système, sélectionnez le meilleur mode lors de la lecture de l'image sur le téléviseur. 254 Remarques sur les modes LCD B.L. et VF B.L. •Lorsque vous sélectionnez BRIGHT, l'autonomie de la batterie - Sony DCR TRV33E | Operating Instructions - Page 255
Modification des réglages de menu Customizing Your Camcorder Icône/Elément MEM SET 11) STILL SET que le « Memory Stick » est remplacé Personnalisation de votre caméscope 1) DCR-TRV22E/TRV33E uniquement 2) DCR-TRV33E uniquement Lors de la sélection de la qualité d'image Le nombre d'images - Sony DCR TRV33E | Operating Instructions - Page 256
l'indicateur EXECUTE s'affiche. L'indicateur FORMATTING clignote pendant le formatage. Lorsque le formatage est terminé, l'indicateur COMPLETE apparaît. 1) DCR-TRV22E/TRV33E uniquement 2) Le nom de dossier s'affiche dans sss. Remarques sur le formatage •N'effectuez aucune des opérations suivantes - Sony DCR TRV33E | Operating Instructions - Page 257
la suppression de toutes les données Suppression de toutes les données dans la mémoire de cassette (p. 140) 1)/ 2) 1) DCR-TRV12E/TRV14E 2) DCR-TRV19E/TRV22E/TRV33E 3) DCR-TRV14E/TRV19E/TRV22E/TRV33E (Suite à la page suivante) Customizing Your Camcorder Personnalisation de votre caméscope 257 - Sony DCR TRV33E | Operating Instructions - Page 258
glage du commutateur POWER sur PLAYER1)/VCR2) ou CAMERA et après l'insertion d'une cassette, votre 2) 1) DCR-TRV12E/TRV14E 2) DCR-TRV19E/TRV22E/TRV33E 3) DCR-TRV22E/TRV33E Remarques sur , nous recommandons l'utilisation des cassettes vidéo Sony Excellence/Master mini DV pour l'enregistrement en mode - Sony DCR TRV33E | Operating Instructions - Page 259
MODE est STBY (attente) et la démonstration démarre environ 10 minutes après le réglage du commutateur POWER sur CAMERA sans qu'une cassette ou un « Memory Stick » (DCR-TRV22E/TRV33E uniquement) ne soit inséré. Pour désactiver la démonstration, insérez une cassette, réglez le commutateur POWER sur - Sony DCR TRV33E | Operating Instructions - Page 260
le viseur V-OUT/LCD Affichage sur l'écran du téléviseur, sur l'écran LCD et dans le viseur 2)/ 3) 4) 1) DCR-TRV14E/TRV19E/TRV22E/TRV33E 2) DCR-TRV12E/TRV14E 3) DCR-TRV19E/TRV22E/TRV33E 4) DCR-TRV22E/TRV33E Remarque Si vous appuyez sur DSPL/BATT INFO alors que DISPLAY est réglé sur V-OUT/LCD dans - Sony DCR TRV33E | Operating Instructions - Page 261
ément OTHERS REC LAMP VIDEO EDIT Mode Signification Commutateur » (p. 175) 1) 2)/ 3) 1) DCR-TRV22E/TRV33E 2) DCR-TRV12E/TRV14E 3) DCR-TRV19E/TRV22E/TRV33E Lors de la prise de vue d'un sujet , WHT BAL, HiFi SOUND et COMMANDER (sauf pour le DCR-TRV12E) sont rétablies à leurs réglages par défaut. - Sony DCR TRV33E | Operating Instructions - Page 262
English - Troubleshooting - Types of trouble and how to correct trouble If you run into any problem using your camcorder, use the following table to troubleshoot the problem. If the problem persists, disconnect the power source and contact your Sony dealer. If "C:ss:ss" appears on the screen, the - Sony DCR TRV33E | Operating Instructions - Page 263
trouble CAMERA or DEMO MODE is set to ON in the menu settings without a cassette and the "Memory Stick"* inserted, your camcorder appear when you record a TV screen or computer screen. c Set STEADYSHOT to OFF in DCR-TRV22E/TRV33E only (continued on the following page) Troubleshooting Dépannage 263 - Sony DCR TRV33E | Operating Instructions - Page 264
trouble During playback Symptom Cause and/or Corrective Actions Playback is not possible. • The tape has run out. c Rewind the tape (p. 53). There are horizontal lines on the picture or the playback picture is not clear or does not appear. • The video ON (p. 247). * Except for DCR-TRV12E 264 - Sony DCR TRV33E | Operating Instructions - Page 265
Troubleshooting Types of trouble and how to correct trouble During recording and playback Symptom Cause and/or Corrective Actions The power does not turn on. • The battery pack is not installed, or is dead or nearly dead. c Install a charged battery pack (p. 24, 25). • The AC Adaptor is not - Sony DCR TRV33E | Operating Instructions - Page 266
and how to correct trouble When operating using the "Memory Stick" (DCR-TRV22E/TRV33E only) Symptom The "Memory Stick The "Memory Stick" formatted incorrectly is inserted. c Format the "Memory Stick" using your camcorder or use another "Memory Stick" (p. 141, 246). • The write-protect tab on the - Sony DCR TRV33E | Operating Instructions - Page 267
to play back some images processed with the computer or whose folder or file names have been changed with the computer. • If you record images with any other equipment, the images may not be played back normally on your camcorder. (continued on the following page) Troubleshooting Dépannage 267 - Sony DCR TRV33E | Operating Instructions - Page 268
Digital program editing to the • Setting programme on a blank portion of the tape is "Memory Stick" does not function. attempted. (DCR-TRV22E/TRV33E only) c Set the programme again on a recorded portion (p. 173). The Remote Commander supplied with your camcorder does not work (except for DCR - Sony DCR TRV33E | Operating Instructions - Page 269
, you may hear a clattering sound from inside your camcorder. (DCR-TRV33E only) • This is because some functions use a linear mechanism. This is not a malfunction. While charging the battery pack, no indicator appears. • The battery pack is not properly installed. c Install it properly (p. 24 - Sony DCR TRV33E | Operating Instructions - Page 270
display • C:ss:ss You can service your camcorder yourself. • E:ss:ss Contact your Sony dealer or local authorised Sony service facility. 5-digit display C:04:ss C:21:ss C:22:ss C:31:ss C:32:ss E:20:ss E:61:ss E:62:ss Cause and/or Corrective Actions • You are using a battery pack that is not an - Sony DCR TRV33E | Operating Instructions - Page 271
270) E The battery pack is dead or nearly dead Slow flashing: • The battery pack is nearly dead. Depending on operational, environmental or battery conditions the E indicator You hear the melody or beep sound. 2) DCR-TRV22E/TRV33E only 3) DCR-TRV12E/TRV14E/TRV19E only 271 Dépannage Troubleshooting - Sony DCR TRV33E | Operating Instructions - Page 272
BATTERY ONLY Use an "InfoLITHIUM" battery pack (p. 25). • CLEANING CASSETTE The video camcorder.1) USB STREAMING ON GOING3) USB streaming is being performed. 1) You hear the melody or beep sound. 2) Reinsert the "Memory Stick" and play back. 3) DCR-TRV22E/TRV33E only 4) DCR-TRV19E/TRV22E/TRV33E - Sony DCR TRV33E | Operating Instructions - Page 273
Sony. Si « C:ss:ss » s'affiche à l'écran, la fonction de code d'autodiagnostic a fonctionné. Reportez-vous à la page 281. Pendant l'enregistrement Troubleshooting glé sur CAMERA. c Réglez-le sur CAMERA (pp. 17 et 36). • Votre caméscope s'éteint automatiquement pour empêcher la batterie de s'épuiser - Sony DCR TRV33E | Operating Instructions - Page 274
inconnue s'affiche à l'écran. • Si dix minutes s'écoulent après que vous avez réglé le commutateur POWER sur CAMERA ou que DEMO MODE est réglé sur ON dans les réglages de menu sans qu'une cassette ou un . c Réglez PROGRAM AE sur AUTO dans les réglages de menu. * DCR-TRV22E/TRV33E uniquement 274 - Sony DCR TRV33E | Operating Instructions - Page 275
(p. 254). Le titre ne s'affiche pas. • TITLE DSPL est réglé sur OFF dans les réglages de menu. c Réglez-le sur ON (p. 257). * Sauf pour le DCR-TRV12E (Suite à la page suivante) Troubleshooting Dépannage 275 - Sony DCR TRV33E | Operating Instructions - Page 276
d'éjecter la cassette du logement. • La source d'alimentation est débranchée. c Connectez-la solidement (pp. 16 et 25). • La batterie est vide. c Utilisez une batterie chargée (pp. 24 et 25). Les indicateurs % et Z clignotent et seule la fonction d'éjection de cassette fonctionne. • De la - Sony DCR TRV33E | Operating Instructions - Page 277
mes et leurs solutions Lors de l'utilisation du caméscope avec un « Memory Stick » (DCR-TRV22E/TRV33E uniquement) Problème Cause et/ou Solution Le « Memory Stick » ne fonctionne pas. , puis activez la protection de l'image (p. 190). (Suite à la page suivante) Troubleshooting Dépannage 277 - Sony DCR TRV33E | Operating Instructions - Page 278
de problèmes et leurs solutions Problème Vous ne pouvez pas attribuer de marque d'impression à l'image fixe. Impossible de redimensionner l'image (DCR-TRV33E uniquement). Vous ne pouvez pas effectuer la lecture d'images en taille réelle. Vous ne pouvez pas effectuer la lecture des données d'image - Sony DCR TRV33E | Operating Instructions - Page 279
Autres Troubleshooting Problè Votre caméscope est raccordé à un appareil DV de marque autre que Sony à l'aide du câble i.LINK. c Réglez-le sur IR (p. est raccordé aux sorties du téléviseur ou du magnétoscope (DCR-TRV19E/ TRV22E/TRV33E uniquement). • DISPLAY est réglé sur V-OUT/LCD dans - Sony DCR TRV33E | Operating Instructions - Page 280
. Pendant la charge de la batterie, le voyant de charge (CHG) clignote. • La batterie n'est pas installée correctement. c Installez-la correctement (p. 24). • La batterie est défectueuse. c Contactez votre revendeur Sony ou un centre de service après-vente Sony agréé. Les boutons ne s'affichent - Sony DCR TRV33E | Operating Instructions - Page 281
la batterie. Apr service après-vente Sony agréé et donnez-leur le code à 5 caractères. (p. ex E:61:10) Si vous n'êtes pas en mesure de remédier au problème, même après plusieurs tentatives, contactez votre revendeur Sony ou le centre de service après-vente Sony agréé le plus proche. Troubleshooting - Sony DCR TRV33E | Operating Instructions - Page 282
160). C:21:00 Code d'autodiagnostic (p. 281) E La batterie est épuisée ou presque Clignotement lent : • La batterie est presque vide. En fonction des conditions de fonctionnement, 65).3) 1) Vous entendez la mélodie ou le bip. 2) DCR-TRV22E/TRV33E uniquement 3) DCR-TRV12E/TRV14E/TRV19E uniquement - Sony DCR TRV33E | Operating Instructions - Page 283
informations. Troubleshooting • CLOCK SET Réglez la date et l'heure (p. 31). • FOR "InfoLITHIUM" BATTERY ONLY Utilisez une batterie « InfoLITHIUM le nombre maximal de dossiers pouvant être créés.1) • USB STREAMING ON GOING3) USB streaming en cours. Dépannage 1) Vous entendez la mélodie - Sony DCR TRV33E | Operating Instructions - Page 284
is mounted on this type of cassette. Your camcorder can read and write data such as dates the search functions may not work properly (except for DCR-TRV12E). Perform the following to prevent a blank may occur when you record using a digital video camera recorder without Cassette Memory on the tape - Sony DCR TRV33E | Operating Instructions - Page 285
back If the tape you play back on your camcorder contains copyright signals, you cannot copy it with another video camera connected to your camcorder. When you record (DCR-TRV19E/ TRV22E/TRV33E only) You cannot record software on your camcorder that contains copyright control signals for copyright - Sony DCR TRV33E | Operating Instructions - Page 286
sound track stereo tape tape Stereo Main sound and sub sound L channel R channel Main sound Sub sound You cannot record dual sound programmes on your camcorder. Mode Audio Mode 12 bit : Le son original peut être enregistré en stéréo 1 et le nouveau son en stéréo 2 en 32 kHz. L'équilibre entre - Sony DCR TRV33E | Operating Instructions - Page 287
a label on the cassette Be sure to affix a label only on the locations as illustrated below [a] so as not to cause malfunction of your camcorder. Lors de la pose d'une étiquette sur la cassette Ne collez une étiquette qu'aux emplacements indiqués dans l'illustration ci-dessous [a] afin de ne - Sony DCR TRV33E | Operating Instructions - Page 288
time in minutes. With an AC adaptor/charger (optional), the remaining battery time and charging time appear. Charging the battery pack •Be sure to charge the battery pack before you start using your camcorder. •We recommend charging the battery pack in an ambient temperature of between 10°C to - Sony DCR TRV33E | Operating Instructions - Page 289
POWER switch to OFF (CHG) when not taking shots or playing back on your camcorder. The battery pack is also consumed when your camcorder is during tape recording standby or playback pause. •Have spare battery packs handy for 2 or 3 times the expected recording time, and make trial recordings before - Sony DCR TRV33E | Operating Instructions - Page 290
reste longtemps en pleine charge ou si elle est utilisée fréquemment. L'indicateur d'autonomie de la batterie indique le temps de prise de vue approximatif. •La marque E indiquant que la batterie est presque vide clignote parfois en fonction des conditions d'utilisation ou de la température ambiante - Sony DCR TRV33E | Operating Instructions - Page 291
battery pack up on your camcorder, leave your camcorder during tape recording standby until the power goes off without a cassette inserted. Battery life •The battery life is limited. Battery battery pack. "InfoLITHIUM" is a trademark of Sony Corporation. Rangement de la batterie •Si la batterie - Sony DCR TRV33E | Operating Instructions - Page 292
is a digital serial interface for handling digital video, digital audio and the characteristics and specifications of the equipment more DV Interfaces, refer to the operating instructions of the equipment to be connected. About 1394 data transport bus proposed by Sony, and is a trademark approved by - Sony DCR TRV33E | Operating Instructions - Page 293
maximum baud rates are defined: S100 (approx. 100Mbps*) S200 (approx. 200Mbps) S400 (approx. 400Mbps) The baud rate is listed under "Specifications" in the operating instructions of each equipment. It is also indicated near the i.LINK on some equipment. The maximum baud rate of equipment on which it - Sony DCR TRV33E | Operating Instructions - Page 294
) compatible equipment made by Sony (e.g. VAIO series personal computer) other than video equipment. Before connecting this unit to your computer, make sure that application software supported by this unit is already installed on your computer. Some video equipment such as digital TV, DVD, MICRO MV - Sony DCR TRV33E | Operating Instructions - Page 295
or region with the AC Adaptor supplied with your camcorder within 100 V to 240 V AC, 50/ 60 Hz. Your camcorder is a PAL system based camcorder. If you want to view the playback picture on a TV, it must be a PAL system based TV with the AUDIO/VIDEO input jack. The following shows TV colour systems - Sony DCR TRV33E | Operating Instructions - Page 296
can be used again if the % or Z indicator does not appear when the power is turned on again. If moisture starts to condense, your camcorder sometimes cannot detect condensation. If this happens, the cassette is sometimes not ejected for 10 seconds after the cassette lid is opened. This is not - Sony DCR TRV33E | Operating Instructions - Page 297
bring your camcorder from a cold place into a warm place, put your camcorder in a the above problem, [a], [b] or [c] occurs, clean the video heads for 10 seconds with the Sony DVM-12CLD video head is worn. Please contact your Sony dealer or local authorized Sony service facility to have the video - Sony DCR TRV33E | Operating Instructions - Page 298
Maintenance information and precautions Précautions et informations relatives à l'entretien Cleaning the LCD screen If fingerprints or dust make the LCD screen dirty, we recommend using a cleaning cloth (supplied) to clean the LCD screen. When you use the LCD Cleaning Kit (optional), do not apply - Sony DCR TRV33E | Operating Instructions - Page 299
battery is always charged as long as you are using your camcorder. The battery, however, will get discharged gradually if you do not use your camcorder et laissez votre caméscope se charger pendant plus de 24 heures. •Vous pouvez également installer une batterie en pleine charge dans votre caméscope - Sony DCR TRV33E | Operating Instructions - Page 300
OFF (CHG). (2) Eject the tape from your camcorder, then disconnect any connecting cable from your camcorder. (3) Set the POWER switch to PLAYER1)/ the LCD screen when the LCD screen is facing out. 1) DCR-TRV12E/TRV14E 2) DCR-TRV19E/TRV22E/TRV33E Remarques •Si vous n'avez pas appuyé au bon endroit, - Sony DCR TRV33E | Operating Instructions - Page 301
camcorder on 7.2 V (battery pack) or 8.4 V (AC Adaptor). •For DC or AC operation, use the accessories recommended in this operating instructions. •If any solid object or liquid get inside the casing, unplug your camcorder and have it checked by a Sony revendeur Sony avant de le remettre en service. • - Sony DCR TRV33E | Operating Instructions - Page 302
or in a dusty place, protect it from the sand or dust. Sand or dust may cause your camcorder to malfunction, and sometimes this malfunction cannot be repaired. 1) DCR-TRV12E/TRV14E 2) DCR-TRV19E/TRV22E/TRV33E AC Adaptor •Unplug the unit from a wall socket when you are not using the unit for a long - Sony DCR TRV33E | Operating Instructions - Page 303
periodically perform the above. We recommend turning on and operating your camcorder about once per month to keep your camcorder in an optimum state for a long time. Rechargeable battery pack •Use only the specified charger or video equipment with the charging function. •To prevent an accident from - Sony DCR TRV33E | Operating Instructions - Page 304
the batteries. •If you touch the liquid, wash it off with water. •If the liquid get into your eyes, wash your eyes with a lot of water and then consult a doctor. If any problem occurs, unplug your camcorder and contact your nearest Sony dealer. Remarques sur les piles sèches (sauf pour le DCR - Sony DCR TRV33E | Operating Instructions - Page 305
English Specifications Video camera recorder System Video recording system 2 rotary heads Helical scanning system Audio recording system Rotary heads, PCM system Quantization: 12 bits (Fs 32 kHz, stereo 1, stereo 2), 16 bits (Fs 48 kHz, stereo) Video signal PAL colour, CCIR standards Usable - Sony DCR TRV33E | Operating Instructions - Page 306
Specifications General Power requirements 7.2 V (battery pack) 8.4 V (AC Adaptor) Average power consumption (when using the battery pack) DCR-TRV12E/TRV14E/TRV19E/ TRV22E: 3.3 W1) 2.5 W2) DCR-TRV33E: 4.0 W1) 3.2 W2) 1) During camera recording using LCD 2) Viewfinder Operating temperature 0°C to 40 - Sony DCR TRV33E | Operating Instructions - Page 307
vidéo Système couleur PAL, normes CCIR Cassette DCR-TRV33E : 3,8 mm (type 1/4,7) CCD CAMERA 3) En mode MEMORY Température de couleur Auto, HOLD, INDOOR (3 200 K), OUTDOOR (5 800 K) Eclairement minimum DCR-TRV12E/TRV14E/TRV19E/ TRV22E : 5 lx (lux) (F 1,7) 0 lx (lux) (en mode NightShot)* DCR-TRV33E - Sony DCR TRV33E | Operating Instructions - Page 308
Poids approximatif Appareil principal uniquement DCR-TRV12E/TRV14E/TRV19E : 520 g DCR-TRV22E : 530 g DCR-TRV33E : 540 g Y compris la batterie rechargeable NP-FM30, la cassette DVM60 et le capuchon d'objectif DCR-TRV12E/TRV14E/TRV19E : 610 g DCR-TRV22E : 620 g DCR-TRV33E : 630 g Accessoires fournis - Sony DCR TRV33E | Operating Instructions - Page 309
and controls - Référence rapide - Identification des composants et des commandes Camcorder 1 2 3 4 5 6 1 Lens cap (p. 36) 2 LCD Eyecup (p. 298) 9 Viewfinder (p. 43) 0 START/STOP button (p. 13, 36, 166) qa Battery pack mounting surface (p. 24) qs Hooks for shoulder strap Caméscope 7 8 9 q; qa qs - Sony DCR TRV33E | Operating Instructions - Page 310
equipped with a Carl Zeiss lens which can reproduce fine images. The lens for your camcorder was developed jointly by Carl Zeiss, in Germany, and Sony Corporation. It adopts the MTF* measurement system for video camera and offers a quality as the Carl Zeiss lens. * MTF stands for Modulation Transfer - Sony DCR TRV33E | Operating Instructions - Page 311
less than 5.5 mm (7/32 inch). Otherwise, you cannot attach the tripod securely, and the screw may damage your camcorder. qd Commutateur POWER (alimentation) (pp. 17, 19 et 25) qf Commutateur LOCK (DCR-TRV22E/ TRV33E uniquement, p. 19) qg Prise DC IN (pp. 16 et 18) qh Touche de relâche BATT (p. 24 - Sony DCR TRV33E | Operating Instructions - Page 312
Lens wg Camera recording lamp (p. 36) wh Microphone (p. 36) wj Remote sensor (except for DCR- TRV12E) wk Infrared rays emitter (p. 47, 112) wl OPEN button (p. 33) Notes on the intelligent accessory shoe •The intelligent accessory shoe supplies power to optional accessories such as a video light or - Sony DCR TRV33E | Operating Instructions - Page 313
on your camcorder is silent. ek MIC jack (PLUG IN POWER) (red) Connect an external microphone (optional). This jack also accepts a "plug-in-power" microphone. el Access lamp (DCR-TRV22E/TRV33E only, p. 14, 146) r; S VIDEO jack (DCR-TRV22E/TRV33E only, p. 61) S VIDEO OUT jack (DCR-TRV12E/ TRV14E - Sony DCR TRV33E | Operating Instructions - Page 314
that have the same name on the Remote Commander as on your camcorder function identically to the buttons on your camcorder. 1 2 3 4 5 Identification des composants et des commandes Télécommande (DCR-TRV14E/ TRV19E/TRV22E/TRV33E uniquement) Les touches portant le même nom sur la télécommande et le - Sony DCR TRV33E | Operating Instructions - Page 315
Insert 2 R6 (size AA) batteries by matching the + and - on the batteries to the + and - in the battery compartment. Pour préparer la télé 3 are used to distinguish your camcorder from other Sony VCRs to avoid erroneous remote control operation. If you use another Sony VCR in the Commander mode VTR - Sony DCR TRV33E | Operating Instructions - Page 316
Cassette Memory (p. 38) 2 Remaining battery time (p. 38) 3 Zoom (p. 44)/Exposure (p. 82)/ Data file name*1 (p. 180) 4 Digital effect*1 (p. 77, 93)/MEMORY MIX qs Manual focus (p. 84) qd Self-timer (p. 67, 168) qf Recording mode (p. 248) 316 1 Mémoire de cassette (p. 38) 2 Autonomie de la batterie (p. - Sony DCR TRV33E | Operating Instructions - Page 317
Identification des composants et des commandes qg Camera recording lamp*3 (p. 43) qh STBY/REC (p. 36)/Video control mode (p. 52)/Image size*2 recording*2 (p. 154) *1 DCR-TRV22E/TRV33E only *2 DCR-TRV33E only *3 DCR-TRV12E/TRV14E/TRV19E only *4 DCR-TRV19E/TRV22E/TRV33E only qg Voyant de tournage du - Sony DCR TRV33E | Operating Instructions - Page 318
battery pack 25, 288 Infrared rays emitter ...... 47, 112 Insert editing 125 Intelligent accessory REC FOLDER 178 Rec Review 51 Recording time 27 Remaining battery time indicator 38 Remaining 77 Transition 37 TV colour systems 295 USB jack 199 USB Streaming 217 W, X, Y, Z Warning - Sony DCR TRV33E | Operating Instructions - Page 319
S VIDEO 61 prise LANC 313 prise USB 200 PROGRAM AE 80 protection de l'image 190 qualité d'image 147 R REC FOLDER 178 recharge complète 26 recharge de la batterie rechargeable intégrée ........ 299 recherche d'images 57 recherche par date 100 recherche par titre 98 Rec Review - Sony DCR TRV33E | Operating Instructions - Page 320
Printed on 100% recycled paper using VOC (Volatile Organic Compound)-free vegetable oil based ink. Imprimé sur papier 100 % recyclé avec de l'encre à base d'huile végétale sans COV (composés organiques volatils). Printed in Japan
-
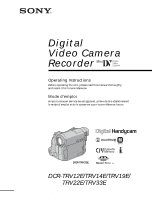 1
1 -
 2
2 -
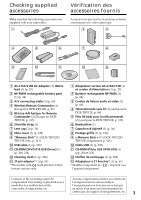 3
3 -
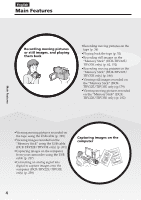 4
4 -
 5
5 -
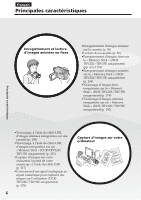 6
6 -
 7
7 -
8
-
9
-
10
-
11
-
12
-
13
-
14
-
15
-
16
-
17
-
18
-
19
-
20
-
21
-
22
-
23
-
24
-
25
-
26
-
27
-
28
-
29
-
30
-
31
-
32
-
33
-
34
-
35
-
36
-
37
-
38
-
39
-
40
-
41
-
42
-
43
-
44
-
45
-
46
-
47
-
48
-
49
-
50
-
51
-
52
-
53
-
54
-
55
-
56
-
57
-
58
-
59
-
60
-
61
-
62
-
63
-
64
-
65
-
66
-
67
-
68
-
69
-
70
-
71
-
72
-
73
-
74
-
75
-
76
-
77
-
78
-
79
-
80
-
81
-
82
-
83
-
84
-
85
-
86
-
87
-
88
-
89
-
90
-
91
-
92
-
93
-
94
-
95
-
96
-
97
-
98
-
99
-
100
-
101
-
102
-
103
-
104
-
105
-
106
-
107
-
108
-
109
-
110
-
111
-
112
-
113
-
114
-
115
-
116
-
117
-
118
-
119
-
120
-
121
-
122
-
123
-
124
-
125
-
126
-
127
-
128
-
129
-
130
-
131
-
132
-
133
-
134
-
135
-
136
-
137
-
138
-
139
-
140
-
141
-
142
-
143
-
144
-
145
-
146
-
147
-
148
-
149
-
150
-
151
-
152
-
153
-
154
-
155
-
156
-
157
-
158
-
159
-
160
-
161
-
162
-
163
-
164
-
165
-
166
-
167
-
168
-
169
-
170
-
171
-
172
-
173
-
174
-
175
-
176
-
177
-
178
-
179
-
180
-
181
-
182
-
183
-
184
-
185
-
186
-
187
-
188
-
189
-
190
-
191
-
192
-
193
-
194
-
195
-
196
-
197
-
198
-
199
-
200
-
201
-
202
-
203
-
204
-
205
-
206
-
207
-
208
-
209
-
210
-
211
-
212
-
213
-
214
-
215
-
216
-
217
-
218
-
219
-
220
-
221
-
222
-
223
-
224
-
225
-
226
-
227
-
228
-
229
-
230
-
231
-
232
-
233
-
234
-
235
-
236
-
237
-
238
-
239
-
240
-
241
-
242
-
243
-
244
-
245
-
246
-
247
-
248
-
249
-
250
-
251
-
252
-
253
-
254
-
255
-
256
-
257
-
258
-
259
-
260
-
261
-
262
-
263
-
264
-
265
-
266
-
267
-
268
-
269
-
270
-
271
-
272
-
273
-
274
-
275
-
276
-
277
-
278
-
279
-
280
-
281
-
282
-
283
-
284
-
285
-
286
-
287
-
288
-
289
-
290
-
291
-
292
-
293
-
294
-
295
-
296
-
297
-
298
-
299
-
300
-
301
-
302
-
303
-
304
-
305
-
306
-
307
-
308
-
309
-
310
-
311
-
312
-
313
-
314
-
315
-
316
-
317
-
318
-
319
-
320
 |
 |
3-080-368-
12
(1)
©2003 Sony Corporation
Operating Instructions
Before operating the unit, please read this manual thoroughly,
and retain it for future reference.
Mode d’emploi
Avant la mise en service de cet appareil, prière de lire attentivement
le mode d’emploi et de le conserver pour toute référence future.
DCR-TRV12E/TRV14E/TRV19E/
TRV22E/TRV33E
Digital
Video Camera
Recorder
DCR-TRV33E