Sony DCR TRV33E Operating Instructions - Page 130
Adding an audio sound on the, recorded tape, Audio dubbing, Doublage audio
 |
UPC - 072874309039
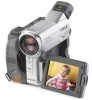
View all Sony DCR TRV33E manuals
Add to My Manuals
Save this manual to your list of manuals |
Page 130 highlights
Audio dubbing Doublage audio Adding an audio sound on the recorded tape Ajout d'un passage sonore sur une cassette enregistrée Choose a connection mentioned on page 127, and connect audio equipment or microphone to your camcorder. Then follow the procedure below. Choisissez un des raccordements décrits à la page 127 et raccordez l'appareil audio ou le micro à votre caméscope. Suivez ensuite les directives ci-dessous. The POWER switch should be set to 1)/ 2). Operate by touching the panel. Réglez le commutateur POWER sur 1)/ 2). Effectuez cette opération à l'aide de l'écran tactile. (1) Insert the recorded tape into your camcorder. (2) Locate the recording start point. Press to start playing back. To pause playing back, press at the recording start point. You can fine adjust the recording start point by pressing / . (3) Press FN and select PAGE3. (4) Press A DUB CTRL. The A DUB CTRL screen appears. (1) Insérez une cassette enregistrée dans votre caméscope. (2) Repérez le point de début d'enregistrement. Appuyez sur pour lancer la lecture. Pour faire une pause de lecture, appuyez sur au point de début d'enregistrement. Vous pouvez régler plus précisément le point de début de l'enregistrement en appuyant sur / . (3) Appuyez sur FN, puis sélectionnez PAGE3. (4) Appuyez sur A DUB CTRL. L'écran A DUB CTRL apparaît. A DUB CTRL RET. REC PAUSE ARUEDCIO STDAURBT (5) Press AUDIO DUB. The green X indicator appears on the screen. (6) Press on your camcorder and at the same time start playing back the audio you want to record. The new sound is recorded in stereo 2 (ST2) during playback. While recording new sound, the red indicator appears on the screen. (7) Press on your camcorder at the point where you want to stop recording. 1) DCR-TRV12E/TRV14E 2) DCR-TRV19E/TRV22E/TRV33E 130 (5) Appuyez sur AUDIO DUB. L'indicateur vert X s'affiche à l'écran. (6) Appuyez sur sur votre caméscope et lancez en même temps la lecture du son que vous souhaitez enregistrer. Le nouveau passage sonore est enregistré en stéréo 2 (ST2) pendant la lecture. L'indicateur rouge s'affiche à l'écran pendant l'enregistrement d'un nouveau passage sonore. (7) Appuyez sur sur votre caméscope au point où vous souhaitez arrêter l'enregistrement. 1) DCR-TRV12E/TRV14E 2) DCR-TRV19E/TRV22E/TRV33E
-
 1
1 -
2
-
3
-
4
-
5
-
6
-
7
-
8
-
9
-
10
-
11
-
12
-
13
-
14
-
15
-
16
-
17
-
18
-
19
-
20
-
21
-
22
-
23
-
24
-
25
-
26
-
27
-
28
-
29
-
30
-
31
-
32
-
33
-
34
-
35
-
36
-
37
-
38
-
39
-
40
-
41
-
42
-
43
-
44
-
45
-
46
-
47
-
48
-
49
-
50
-
51
-
52
-
53
-
54
-
55
-
56
-
57
-
58
-
59
-
60
-
61
-
62
-
63
-
64
-
65
-
66
-
67
-
68
-
69
-
70
-
71
-
72
-
73
-
74
-
75
-
76
-
77
-
78
-
79
-
80
-
81
-
82
-
83
-
84
-
85
-
86
-
87
-
88
-
89
-
90
-
91
-
92
-
93
-
94
-
95
-
96
-
97
-
98
-
99
-
100
-
101
-
102
-
103
-
104
-
105
-
106
-
107
-
108
-
109
-
110
-
111
-
112
-
113
-
114
-
115
-
116
-
117
-
118
-
119
-
120
-
121
-
122
-
123
-
124
-
 125
125 -
 126
126 -
 127
127 -
 128
128 -
 129
129 -
 130
130 -
 131
131 -
 132
132 -
 133
133 -
 134
134 -
 135
135 -
136
-
137
-
138
-
139
-
140
-
141
-
142
-
143
-
144
-
145
-
146
-
147
-
148
-
149
-
150
-
151
-
152
-
153
-
154
-
155
-
156
-
157
-
158
-
159
-
160
-
161
-
162
-
163
-
164
-
165
-
166
-
167
-
168
-
169
-
170
-
171
-
172
-
173
-
174
-
175
-
176
-
177
-
178
-
179
-
180
-
181
-
182
-
183
-
184
-
185
-
186
-
187
-
188
-
189
-
190
-
191
-
192
-
193
-
194
-
195
-
196
-
197
-
198
-
199
-
200
-
201
-
202
-
203
-
204
-
205
-
206
-
207
-
208
-
209
-
210
-
211
-
212
-
213
-
214
-
215
-
216
-
217
-
218
-
219
-
220
-
221
-
222
-
223
-
224
-
225
-
226
-
227
-
228
-
229
-
230
-
231
-
232
-
233
-
234
-
235
-
236
-
237
-
238
-
239
-
240
-
241
-
242
-
243
-
244
-
245
-
246
-
247
-
248
-
249
-
250
-
251
-
252
-
253
-
254
-
255
-
256
-
257
-
258
-
259
-
260
-
261
-
262
-
263
-
264
-
265
-
266
-
267
-
268
-
269
-
270
-
271
-
272
-
273
-
274
-
275
-
276
-
277
-
278
-
279
-
280
-
281
-
282
-
283
-
284
-
285
-
286
-
287
-
288
-
289
-
290
-
291
-
292
-
293
-
294
-
295
-
296
-
297
-
298
-
299
-
300
-
301
-
302
-
303
-
304
-
305
-
306
-
307
-
308
-
309
-
310
-
311
-
312
-
313
-
314
-
315
-
316
-
317
-
318
-
319
-
320
 |
 |
