Netgear GS752TS GS7xxTS-TPS Software Admin Manual - Page 100
Timer Schedule Configuration, Delete, Apply, Cancel, System > Timer Schedule >
 |
View all Netgear GS752TS manuals
Add to My Manuals
Save this manual to your list of manuals |
Page 100 highlights
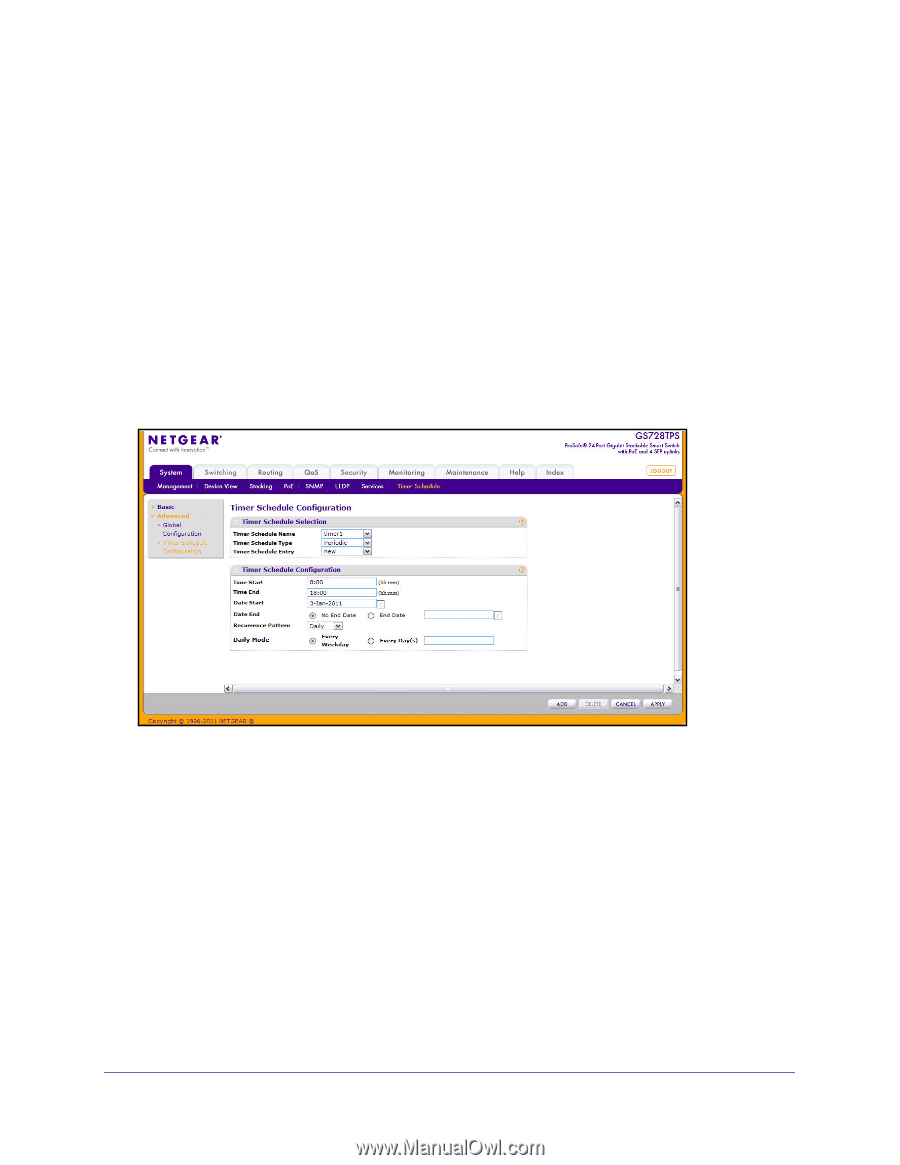
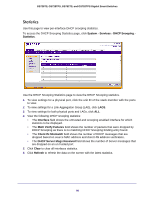
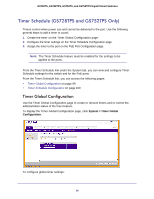
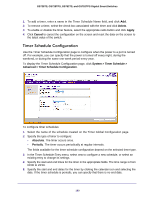
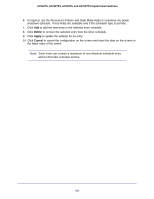
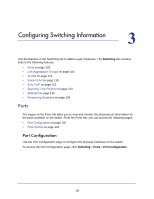
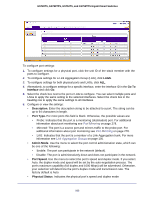
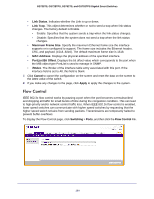
GS728TS, GS728TPS, GS752TS, and GS752TPS Gigabit Smart Switches 1. To add a timer, enter a name in the Timer Schedule Name field, and click Add. 2. To remove a timer, select the check box associated with the timer and click Delete. 3. To enable or disable the timer feature, select the appropriate radio button and click Apply. 4. Click Cancel to cancel the configuration on the screen and reset the data on the screen to the latest value of the switch. Timer Schedule Configuration Use the Timer Schedule Configuration page to configure when the power to a port is turned off. For example, you can specify that the power is turned off every night, during the weekend, or during the same one-week period every year. To display the Timer Schedule Configuration page, click System > Timer Schedule > Advanced > Timer Schedule Configuration. To configure timer schedules: 1. Select the name of the schedule created on the Timer Global Configuration page. 2. Specify the type of timer to configure: • Absolute. The timer occurs once. • Periodic. The timer occurs periodically at regular intervals. The fields available for the timer schedule configuration depend on the selected timer type. 3. In the Timer Schedule Entry menu, select new to configure a new schedule, or select an existing entry to change its settings. 4. Specify the start and end times for the timer in the appropriate fields. The time range is from 00:00 to 23:59. 5. Specify the start and end dates for the timer by clicking the calendar icon and selecting the date. If the timer schedule is periodic, you can specify that there is no end date. 100
-
 1
1 -
2
-
3
-
4
-
5
-
6
-
7
-
8
-
9
-
10
-
11
-
12
-
13
-
14
-
15
-
16
-
17
-
18
-
19
-
20
-
21
-
22
-
23
-
24
-
25
-
26
-
27
-
28
-
29
-
30
-
31
-
32
-
33
-
34
-
35
-
36
-
37
-
38
-
39
-
40
-
41
-
42
-
43
-
44
-
45
-
46
-
47
-
48
-
49
-
50
-
51
-
52
-
53
-
54
-
55
-
56
-
57
-
58
-
59
-
60
-
61
-
62
-
63
-
64
-
65
-
66
-
67
-
68
-
69
-
70
-
71
-
72
-
73
-
74
-
75
-
76
-
77
-
78
-
79
-
80
-
81
-
82
-
83
-
84
-
85
-
86
-
87
-
88
-
89
-
90
-
91
-
92
-
93
-
94
-
 95
95 -
 96
96 -
 97
97 -
 98
98 -
 99
99 -
 100
100 -
 101
101 -
 102
102 -
 103
103 -
 104
104 -
 105
105 -
106
-
107
-
108
-
109
-
110
-
111
-
112
-
113
-
114
-
115
-
116
-
117
-
118
-
119
-
120
-
121
-
122
-
123
-
124
-
125
-
126
-
127
-
128
-
129
-
130
-
131
-
132
-
133
-
134
-
135
-
136
-
137
-
138
-
139
-
140
-
141
-
142
-
143
-
144
-
145
-
146
-
147
-
148
-
149
-
150
-
151
-
152
-
153
-
154
-
155
-
156
-
157
-
158
-
159
-
160
-
161
-
162
-
163
-
164
-
165
-
166
-
167
-
168
-
169
-
170
-
171
-
172
-
173
-
174
-
175
-
176
-
177
-
178
-
179
-
180
-
181
-
182
-
183
-
184
-
185
-
186
-
187
-
188
-
189
-
190
-
191
-
192
-
193
-
194
-
195
-
196
-
197
-
198
-
199
-
200
-
201
-
202
-
203
-
204
-
205
-
206
-
207
-
208
-
209
-
210
-
211
-
212
-
213
-
214
-
215
-
216
-
217
-
218
-
219
-
220
-
221
-
222
-
223
-
224
-
225
-
226
-
227
-
228
-
229
-
230
-
231
-
232
-
233
-
234
-
235
-
236
-
237
-
238
-
239
-
240
-
241
-
242
-
243
-
244
-
245
-
246
-
247
-
248
-
249
-
250
-
251
-
252
-
253
-
254
-
255
-
256
-
257
-
258
-
259
-
260
-
261
-
262
-
263
-
264
-
265
-
266
-
267
-
268
-
269
-
270
-
271
-
272
-
273
-
274
-
275
-
276
-
277
-
278
-
279
-
280
-
281
-
282
-
283
-
284
-
285
-
286
-
287
-
288
-
289
-
290
-
291
-
292
-
293
-
294
-
295
-
296
-
297
-
298
-
299
-
300
-
301
-
302
-
303
-
304
-
305
-
306
-
307
-
308
-
309
-
310
-
311
-
312
-
313
-
314
-
315
-
316
-
317
-
318
-
319
-
320
-
321
-
322
-
323
-
324
-
325
-
326
-
327
-
328
-
329
 |
 |