Netgear GS752TS GS7xxTS-TPS Software Admin Manual - Page 237
MAC ACL, Security, ACL > Basic > MAC ACL., Rules, Direction, Delete, Apply., Cancel
 |
View all Netgear GS752TS manuals
Add to My Manuals
Save this manual to your list of manuals |
Page 237 highlights
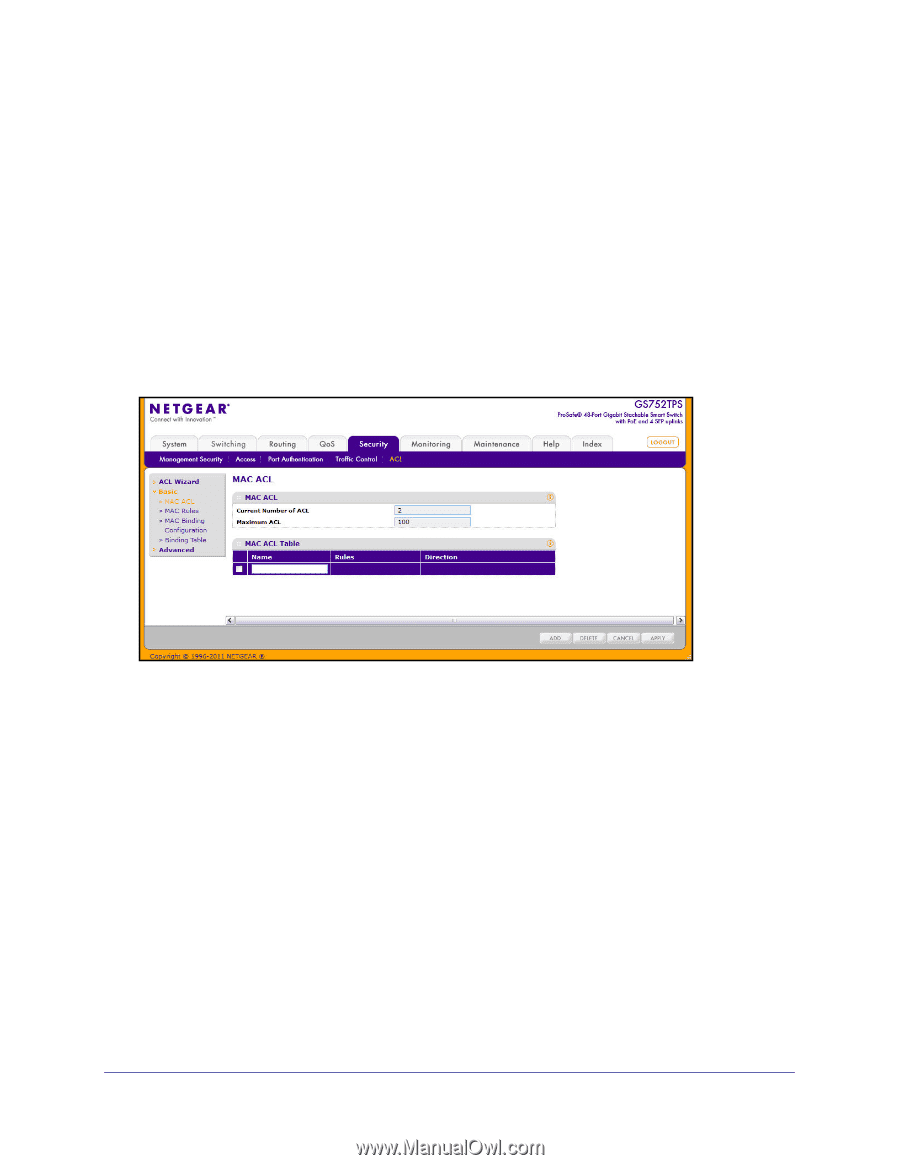
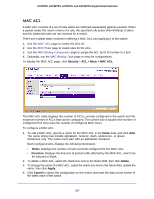
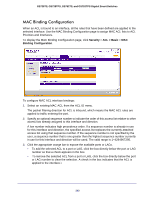
GS728TS, GS728TPS, GS752TS, and GS752TPS Gigabit Smart Switches MAC ACL A MAC ACL consists of a set of rules which are matched sequentially against a packet. When a packet meets the match criteria of a rule, the specified rule action (Permit/Deny) is taken and the additional rules are not checked for a match. There are multiple steps involved in defining a MAC ACL and applying it to the switch: 1. Use the MAC ACL page to create the ACL ID. 2. Use the MAC Rules page to create rules for the ACL. 3. Use the MAC Binding Configuration page to assign the ACL by its ID number to a port. 4. Optionally, use the MAC Binding Table page to view the configurations. To display the MAC ACL page, click Security > ACL > Basic > MAC ACL. The MAC ACL table displays the number of ACLs currently configured in the switch and the maximum number of ACLs that can be configured. The current size is equal to the number of configured IPv4 ACLs plus the number of configured MAC ACLs. To configure a MAC ACL: 1. To add a MAC ACL, specify a name for the MAC ACL in the Name field, and click Add. The name string may include alphabetic, numeric, dash, underscore, or space characters only. The name must start with an alphabetic character. Each configured ACL displays the following information: • Rules. Displays the number of rules currently configured for the MAC ACL. • Direction. Displays the direction of packet traffic affected by the MAC ACL, which can be Inbound or blank. 2. To delete a MAC ACL, select the check box next to the Name field, then click Delete. 3. To change the name of a MAC ACL, select the check box next to the Name field, update the name, then click Apply. 4. Click Cancel to cancel the configuration on the screen and reset the data on the screen to the latest value of the switch. 237
-
 1
1 -
2
-
3
-
4
-
5
-
6
-
7
-
8
-
9
-
10
-
11
-
12
-
13
-
14
-
15
-
16
-
17
-
18
-
19
-
20
-
21
-
22
-
23
-
24
-
25
-
26
-
27
-
28
-
29
-
30
-
31
-
32
-
33
-
34
-
35
-
36
-
37
-
38
-
39
-
40
-
41
-
42
-
43
-
44
-
45
-
46
-
47
-
48
-
49
-
50
-
51
-
52
-
53
-
54
-
55
-
56
-
57
-
58
-
59
-
60
-
61
-
62
-
63
-
64
-
65
-
66
-
67
-
68
-
69
-
70
-
71
-
72
-
73
-
74
-
75
-
76
-
77
-
78
-
79
-
80
-
81
-
82
-
83
-
84
-
85
-
86
-
87
-
88
-
89
-
90
-
91
-
92
-
93
-
94
-
95
-
96
-
97
-
98
-
99
-
100
-
101
-
102
-
103
-
104
-
105
-
106
-
107
-
108
-
109
-
110
-
111
-
112
-
113
-
114
-
115
-
116
-
117
-
118
-
119
-
120
-
121
-
122
-
123
-
124
-
125
-
126
-
127
-
128
-
129
-
130
-
131
-
132
-
133
-
134
-
135
-
136
-
137
-
138
-
139
-
140
-
141
-
142
-
143
-
144
-
145
-
146
-
147
-
148
-
149
-
150
-
151
-
152
-
153
-
154
-
155
-
156
-
157
-
158
-
159
-
160
-
161
-
162
-
163
-
164
-
165
-
166
-
167
-
168
-
169
-
170
-
171
-
172
-
173
-
174
-
175
-
176
-
177
-
178
-
179
-
180
-
181
-
182
-
183
-
184
-
185
-
186
-
187
-
188
-
189
-
190
-
191
-
192
-
193
-
194
-
195
-
196
-
197
-
198
-
199
-
200
-
201
-
202
-
203
-
204
-
205
-
206
-
207
-
208
-
209
-
210
-
211
-
212
-
213
-
214
-
215
-
216
-
217
-
218
-
219
-
220
-
221
-
222
-
223
-
224
-
225
-
226
-
227
-
228
-
229
-
230
-
231
-
 232
232 -
 233
233 -
 234
234 -
 235
235 -
 236
236 -
 237
237 -
 238
238 -
 239
239 -
 240
240 -
 241
241 -
 242
242 -
243
-
244
-
245
-
246
-
247
-
248
-
249
-
250
-
251
-
252
-
253
-
254
-
255
-
256
-
257
-
258
-
259
-
260
-
261
-
262
-
263
-
264
-
265
-
266
-
267
-
268
-
269
-
270
-
271
-
272
-
273
-
274
-
275
-
276
-
277
-
278
-
279
-
280
-
281
-
282
-
283
-
284
-
285
-
286
-
287
-
288
-
289
-
290
-
291
-
292
-
293
-
294
-
295
-
296
-
297
-
298
-
299
-
300
-
301
-
302
-
303
-
304
-
305
-
306
-
307
-
308
-
309
-
310
-
311
-
312
-
313
-
314
-
315
-
316
-
317
-
318
-
319
-
320
-
321
-
322
-
323
-
324
-
325
-
326
-
327
-
328
-
329
 |
 |