Dell 5130 Color Laser User's Guide (PDF) - Page 220
Importing a Digital Certificate, Upload Signed Certificate
 |
View all Dell 5130 Color Laser manuals
Add to My Manuals
Save this manual to your list of manuals |
Page 220 highlights
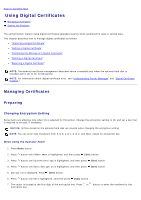
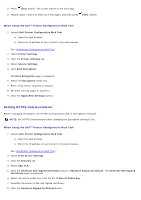
9. The Restart Printer button is displayed after generating the self-signed certificate, and then click the Restart Printer button. 10. Repeat steps 2 to 4 to display the SSL/TLS page after restarting the printer. 11. If the self-signed certificate is set correctly, since the HTTP- SL/TLS Communication column is set to Enable and a check box is displayed, select Enable. Importing a Digital Certificate NOTICE: Before importing a certificate file, back up the certificate file. NOTE: Be sure to import the certificate with Internet Explorer. NOTE: After importing a PKCS#12 format certificate, the secret key is not exported even if you execute exporting. 1. Launch Dell Printer Configuration Web Tool. a. Open the web browser. b. Enter the IP address of your printer in the web browser. See "Dell Printer Configuration Web Tool." 2. Select Print Server Settings. 3. Click the Security tab. 4. Select SSL/TLS. 5. Click the Upload Signed Certificate button of Machine Digital Certificate. The Upload Signed Certificate page is displayed. NOTE: The Upload Signed Certificate button is displayed only when the optional hard disk is installed and is set to On for encryption. 6. Enter a password. 7. Re-enter the password again to confirm it. 8. Press the Browse button of File Name, and select the file to be imported. 9. Press the Import button to import the certificate. Setting a Digital Certificate 1. Launch Dell Printer Configuration Web Tool. a. Open the web browser. b. Enter the IP address of your printer in the web browser. See "Dell Printer Configuration Web Tool." 2. Select Print Server Settings. 3. Click the Security tab. 4. Select SSL/TLS. 5. Click the Certificate Management button to display the Certificate Management page.
-
 1
1 -
2
-
3
-
4
-
5
-
6
-
7
-
8
-
9
-
10
-
11
-
12
-
13
-
14
-
15
-
16
-
17
-
18
-
19
-
20
-
21
-
22
-
23
-
24
-
25
-
26
-
27
-
28
-
29
-
30
-
31
-
32
-
33
-
34
-
35
-
36
-
37
-
38
-
39
-
40
-
41
-
42
-
43
-
44
-
45
-
46
-
47
-
48
-
49
-
50
-
51
-
52
-
53
-
54
-
55
-
56
-
57
-
58
-
59
-
60
-
61
-
62
-
63
-
64
-
65
-
66
-
67
-
68
-
69
-
70
-
71
-
72
-
73
-
74
-
75
-
76
-
77
-
78
-
79
-
80
-
81
-
82
-
83
-
84
-
85
-
86
-
87
-
88
-
89
-
90
-
91
-
92
-
93
-
94
-
95
-
96
-
97
-
98
-
99
-
100
-
101
-
102
-
103
-
104
-
105
-
106
-
107
-
108
-
109
-
110
-
111
-
112
-
113
-
114
-
115
-
116
-
117
-
118
-
119
-
120
-
121
-
122
-
123
-
124
-
125
-
126
-
127
-
128
-
129
-
130
-
131
-
132
-
133
-
134
-
135
-
136
-
137
-
138
-
139
-
140
-
141
-
142
-
143
-
144
-
145
-
146
-
147
-
148
-
149
-
150
-
151
-
152
-
153
-
154
-
155
-
156
-
157
-
158
-
159
-
160
-
161
-
162
-
163
-
164
-
165
-
166
-
167
-
168
-
169
-
170
-
171
-
172
-
173
-
174
-
175
-
176
-
177
-
178
-
179
-
180
-
181
-
182
-
183
-
184
-
185
-
186
-
187
-
188
-
189
-
190
-
191
-
192
-
193
-
194
-
195
-
196
-
197
-
198
-
199
-
200
-
201
-
202
-
203
-
204
-
205
-
206
-
207
-
208
-
209
-
210
-
211
-
212
-
213
-
214
-
 215
215 -
 216
216 -
 217
217 -
 218
218 -
 219
219 -
 220
220 -
 221
221 -
 222
222 -
 223
223 -
 224
224 -
 225
225 -
226
-
227
-
228
-
229
-
230
-
231
-
232
-
233
-
234
-
235
-
236
-
237
-
238
-
239
-
240
-
241
-
242
-
243
-
244
-
245
-
246
-
247
-
248
-
249
-
250
-
251
-
252
-
253
-
254
-
255
-
256
-
257
-
258
-
259
-
260
-
261
-
262
-
263
-
264
-
265
-
266
-
267
-
268
-
269
-
270
-
271
-
272
-
273
-
274
-
275
-
276
-
277
-
278
-
279
-
280
-
281
-
282
-
283
-
284
-
285
-
286
-
287
-
288
-
289
-
290
-
291
-
292
-
293
-
294
-
295
-
296
-
297
-
298
-
299
-
300
-
301
-
302
-
303
-
304
-
305
-
306
-
307
-
308
-
309
-
310
-
311
-
312
-
313
-
314
-
315
-
316
-
317
-
318
-
319
-
320
-
321
-
322
-
323
-
324
-
325
-
326
-
327
-
328
-
329
-
330
-
331
-
332
-
333
-
334
-
335
-
336
-
337
-
338
-
339
-
340
-
341
-
342
-
343
-
344
-
345
-
346
-
347
-
348
-
349
-
350
-
351
-
352
-
353
-
354
-
355
-
356
-
357
-
358
-
359
-
360
-
361
-
362
-
363
-
364
-
365
-
366
-
367
-
368
-
369
-
370
-
371
-
372
-
373
-
374
-
375
-
376
-
377
-
378
-
379
-
380
-
381
-
382
-
383
-
384
-
385
-
386
-
387
-
388
-
389
-
390
-
391
-
392
-
393
-
394
-
395
-
396
-
397
-
398
-
399
-
400
-
401
-
402
-
403
-
404
-
405
-
406
-
407
-
408
-
409
-
410
-
411
-
412
 |
 |