Dell 5130 Color Laser User's Guide (PDF) - Page 397
Auger mark, Understanding Your, Printer Software, Replacing the Fuser, Understanding Your Printer
 |
View all Dell 5130 Color Laser manuals
Add to My Manuals
Save this manual to your list of manuals |
Page 397 highlights
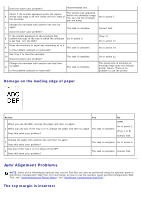
2. After you replace the drum cartridge, start Tool Box. 2 For how to start Tool Box, see "Understanding Your Printer Software." The Tool Box opens. 3. Select Chart Print from the left list. The task is complete. (The drum cartridge you are using has been damaged. Replace it with a new one.) Contact Dell. 4. Click the MQ Chart button. The MQ Chart is printed. Does this solve your problem? Replace the fuser if you have a spare. 1. Replace the fuser. See "Replacing the Fuser." 2. After you replace the fuser, start Tool Box. For how to start Tool Box, see "Understanding Your Printer Software." 3 The Tool Box opens. 3. Select Chart Print from the left list. The task is complete. (The fuser you are using has been damaged. Replace it with a new one.) Contact Dell. 4. Click the MQ Chart button. The MQ Chart is printed. Does this solve your problem? Replace the belt unit if you have a spare. 1. Replace the belt unit. See "Replacing the Belt Unit." 2. After you replace the belt unit, start Tool Box. For how to start Tool Box, see "Understanding Your Printer Software." 4 The Tool Box opens. The task is complete. 3. Select Chart Print from the left list. 4. Click the Pitch Configuration Chart button. Contact Dell. The Pitch Configuration Chart is printed. Does this solve your problem? Auger mark Action Yes Check if the print defect falls under the patterns of auger marks. 1. Start Tool Box. For how to start Tool Box, see "Understanding Your Printer Software." 1 The Tool Box opens. 2. Select Chart Print from the left list. 3. Click the Pitch Configuration Chart button. The Pitch Configuration Chart is printed. Go to action 2. Does the print defect fall under the patterns of auger marks? The toner cartridges may be low or need to be replaced. Confirm the amount of toner in each toner cartridge. 2 1. Check the toner level in the Status tab in the Status Monitor. The task is complete. 2. Replace the toner cartridges as necessary. No Contact Dell. Go to action 3.
-
 1
1 -
2
-
3
-
4
-
5
-
6
-
7
-
8
-
9
-
10
-
11
-
12
-
13
-
14
-
15
-
16
-
17
-
18
-
19
-
20
-
21
-
22
-
23
-
24
-
25
-
26
-
27
-
28
-
29
-
30
-
31
-
32
-
33
-
34
-
35
-
36
-
37
-
38
-
39
-
40
-
41
-
42
-
43
-
44
-
45
-
46
-
47
-
48
-
49
-
50
-
51
-
52
-
53
-
54
-
55
-
56
-
57
-
58
-
59
-
60
-
61
-
62
-
63
-
64
-
65
-
66
-
67
-
68
-
69
-
70
-
71
-
72
-
73
-
74
-
75
-
76
-
77
-
78
-
79
-
80
-
81
-
82
-
83
-
84
-
85
-
86
-
87
-
88
-
89
-
90
-
91
-
92
-
93
-
94
-
95
-
96
-
97
-
98
-
99
-
100
-
101
-
102
-
103
-
104
-
105
-
106
-
107
-
108
-
109
-
110
-
111
-
112
-
113
-
114
-
115
-
116
-
117
-
118
-
119
-
120
-
121
-
122
-
123
-
124
-
125
-
126
-
127
-
128
-
129
-
130
-
131
-
132
-
133
-
134
-
135
-
136
-
137
-
138
-
139
-
140
-
141
-
142
-
143
-
144
-
145
-
146
-
147
-
148
-
149
-
150
-
151
-
152
-
153
-
154
-
155
-
156
-
157
-
158
-
159
-
160
-
161
-
162
-
163
-
164
-
165
-
166
-
167
-
168
-
169
-
170
-
171
-
172
-
173
-
174
-
175
-
176
-
177
-
178
-
179
-
180
-
181
-
182
-
183
-
184
-
185
-
186
-
187
-
188
-
189
-
190
-
191
-
192
-
193
-
194
-
195
-
196
-
197
-
198
-
199
-
200
-
201
-
202
-
203
-
204
-
205
-
206
-
207
-
208
-
209
-
210
-
211
-
212
-
213
-
214
-
215
-
216
-
217
-
218
-
219
-
220
-
221
-
222
-
223
-
224
-
225
-
226
-
227
-
228
-
229
-
230
-
231
-
232
-
233
-
234
-
235
-
236
-
237
-
238
-
239
-
240
-
241
-
242
-
243
-
244
-
245
-
246
-
247
-
248
-
249
-
250
-
251
-
252
-
253
-
254
-
255
-
256
-
257
-
258
-
259
-
260
-
261
-
262
-
263
-
264
-
265
-
266
-
267
-
268
-
269
-
270
-
271
-
272
-
273
-
274
-
275
-
276
-
277
-
278
-
279
-
280
-
281
-
282
-
283
-
284
-
285
-
286
-
287
-
288
-
289
-
290
-
291
-
292
-
293
-
294
-
295
-
296
-
297
-
298
-
299
-
300
-
301
-
302
-
303
-
304
-
305
-
306
-
307
-
308
-
309
-
310
-
311
-
312
-
313
-
314
-
315
-
316
-
317
-
318
-
319
-
320
-
321
-
322
-
323
-
324
-
325
-
326
-
327
-
328
-
329
-
330
-
331
-
332
-
333
-
334
-
335
-
336
-
337
-
338
-
339
-
340
-
341
-
342
-
343
-
344
-
345
-
346
-
347
-
348
-
349
-
350
-
351
-
352
-
353
-
354
-
355
-
356
-
357
-
358
-
359
-
360
-
361
-
362
-
363
-
364
-
365
-
366
-
367
-
368
-
369
-
370
-
371
-
372
-
373
-
374
-
375
-
376
-
377
-
378
-
379
-
380
-
381
-
382
-
383
-
384
-
385
-
386
-
387
-
388
-
389
-
390
-
391
-
 392
392 -
 393
393 -
 394
394 -
 395
395 -
 396
396 -
 397
397 -
 398
398 -
 399
399 -
 400
400 -
 401
401 -
 402
402 -
403
-
404
-
405
-
406
-
407
-
408
-
409
-
410
-
411
-
412
 |
 |