Dell 5130 Color Laser User's Guide (PDF) - Page 388
Toner smears or print comes off., Pitch Configuration Chart, Chart Print, Action, Paper Type
 |
View all Dell 5130 Color Laser manuals
Add to My Manuals
Save this manual to your list of manuals |
Page 388 highlights
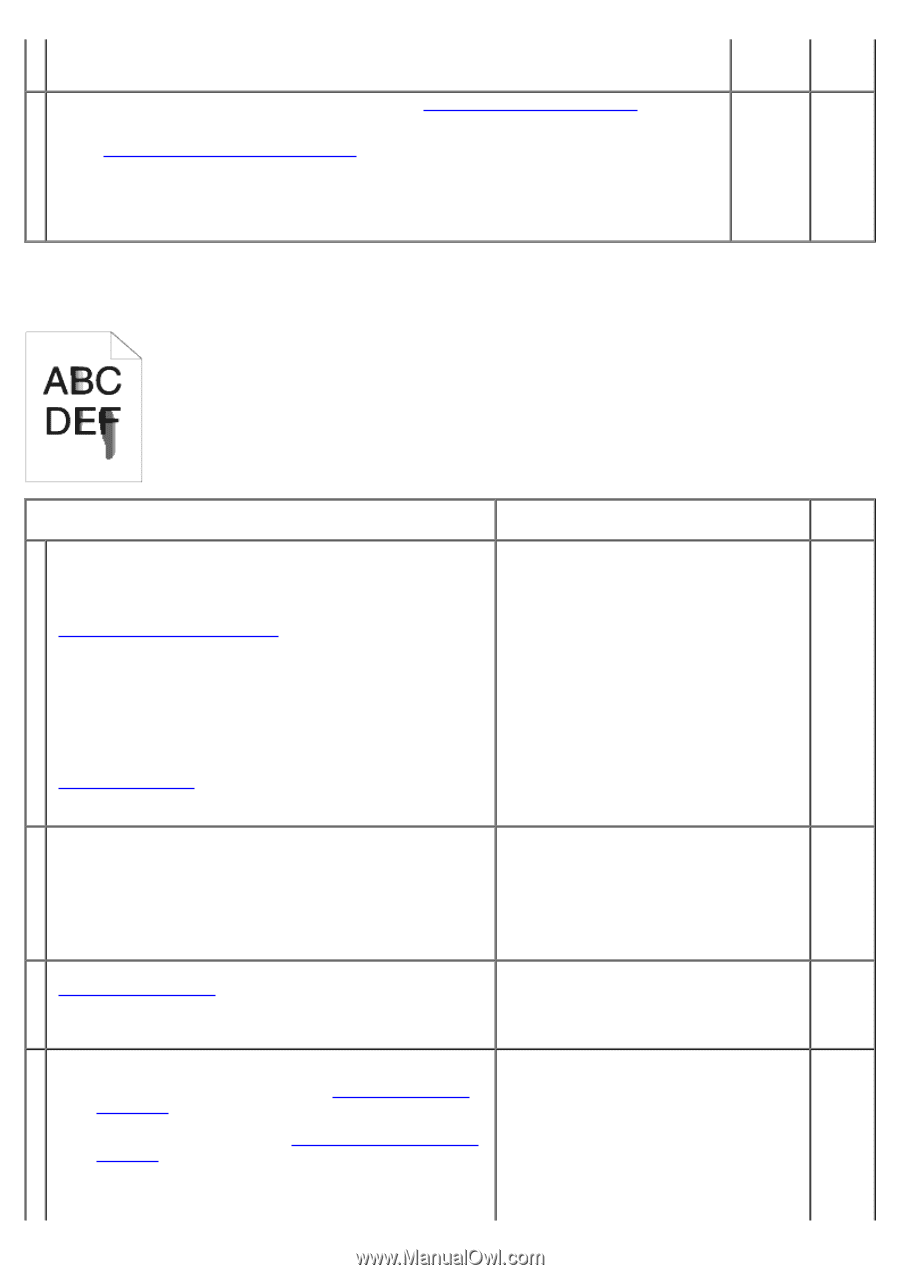
3. Click the Pitch Configuration Chart button. The Pitch Configuration Chart is printed. Does this solve your problem? Replace the drum cartridge if you have a spare. See "Replacing the Drum Cartridges." 1. After you replace the drum cartridge, start Tool Box. For how to start Tool Box, see "Understanding Your Printer Software." 9 The Tool Box opens. 2. Select Chart Print from the left list. 3. Click the Pitch Configuration Chart button. The Pitch Configuration Chart is printed. Does this solve your problem? The task is complete. Contact Dell. Toner smears or print comes off. Action Yes No Check if the envelope lever of the printer is lifted when you print on plain paper. If so, change it to the plain paper mode. For more information on how to change the mode, see "Loading an Envelope in the MPF." Then raise the fixing temperature by turning up the value of 1 the Adjust Fuser of the Dell Configuration Web Tool. NOTE: When you use the optional output expander, check if the lever of the output expander is pulled down (normal mode). For more information on how to change the mode, see "Loading Print Media." The task is complete. Go to action 2. Does this solve your problem? The print media surface may be uneven. Try changing the Paper Type setting in the printer driver. For example, change the plain paper to plain thick. 2 1. On the Paper/Output tab, change the Paper Type setting. The task is complete. Go to action 3. Does this solve your problem? Verify that the correct print media is being used. See "Supported Paper Sizes." If not, use the print media 3 recommended for the printer. Does this solve your problem? The task is complete. Go to action 4. Replace the drum cartridge if you have a spare. 1. Replace the drum cartridge. See "Replacing the Drum Cartridges." 2. After you replace the drum cartridge, start Tool Box. For how to start Tool Box, see "Understanding Your Printer The task is complete. (The drum cartridge Go to 4 Software." you are using has been damaged. Replace action The Tool Box opens. it with a new one.) 5. 3. Select Chart Print from the left list. 4. Click the 4 Colors Configuration Chart button. The 4
-
 1
1 -
2
-
3
-
4
-
5
-
6
-
7
-
8
-
9
-
10
-
11
-
12
-
13
-
14
-
15
-
16
-
17
-
18
-
19
-
20
-
21
-
22
-
23
-
24
-
25
-
26
-
27
-
28
-
29
-
30
-
31
-
32
-
33
-
34
-
35
-
36
-
37
-
38
-
39
-
40
-
41
-
42
-
43
-
44
-
45
-
46
-
47
-
48
-
49
-
50
-
51
-
52
-
53
-
54
-
55
-
56
-
57
-
58
-
59
-
60
-
61
-
62
-
63
-
64
-
65
-
66
-
67
-
68
-
69
-
70
-
71
-
72
-
73
-
74
-
75
-
76
-
77
-
78
-
79
-
80
-
81
-
82
-
83
-
84
-
85
-
86
-
87
-
88
-
89
-
90
-
91
-
92
-
93
-
94
-
95
-
96
-
97
-
98
-
99
-
100
-
101
-
102
-
103
-
104
-
105
-
106
-
107
-
108
-
109
-
110
-
111
-
112
-
113
-
114
-
115
-
116
-
117
-
118
-
119
-
120
-
121
-
122
-
123
-
124
-
125
-
126
-
127
-
128
-
129
-
130
-
131
-
132
-
133
-
134
-
135
-
136
-
137
-
138
-
139
-
140
-
141
-
142
-
143
-
144
-
145
-
146
-
147
-
148
-
149
-
150
-
151
-
152
-
153
-
154
-
155
-
156
-
157
-
158
-
159
-
160
-
161
-
162
-
163
-
164
-
165
-
166
-
167
-
168
-
169
-
170
-
171
-
172
-
173
-
174
-
175
-
176
-
177
-
178
-
179
-
180
-
181
-
182
-
183
-
184
-
185
-
186
-
187
-
188
-
189
-
190
-
191
-
192
-
193
-
194
-
195
-
196
-
197
-
198
-
199
-
200
-
201
-
202
-
203
-
204
-
205
-
206
-
207
-
208
-
209
-
210
-
211
-
212
-
213
-
214
-
215
-
216
-
217
-
218
-
219
-
220
-
221
-
222
-
223
-
224
-
225
-
226
-
227
-
228
-
229
-
230
-
231
-
232
-
233
-
234
-
235
-
236
-
237
-
238
-
239
-
240
-
241
-
242
-
243
-
244
-
245
-
246
-
247
-
248
-
249
-
250
-
251
-
252
-
253
-
254
-
255
-
256
-
257
-
258
-
259
-
260
-
261
-
262
-
263
-
264
-
265
-
266
-
267
-
268
-
269
-
270
-
271
-
272
-
273
-
274
-
275
-
276
-
277
-
278
-
279
-
280
-
281
-
282
-
283
-
284
-
285
-
286
-
287
-
288
-
289
-
290
-
291
-
292
-
293
-
294
-
295
-
296
-
297
-
298
-
299
-
300
-
301
-
302
-
303
-
304
-
305
-
306
-
307
-
308
-
309
-
310
-
311
-
312
-
313
-
314
-
315
-
316
-
317
-
318
-
319
-
320
-
321
-
322
-
323
-
324
-
325
-
326
-
327
-
328
-
329
-
330
-
331
-
332
-
333
-
334
-
335
-
336
-
337
-
338
-
339
-
340
-
341
-
342
-
343
-
344
-
345
-
346
-
347
-
348
-
349
-
350
-
351
-
352
-
353
-
354
-
355
-
356
-
357
-
358
-
359
-
360
-
361
-
362
-
363
-
364
-
365
-
366
-
367
-
368
-
369
-
370
-
371
-
372
-
373
-
374
-
375
-
376
-
377
-
378
-
379
-
380
-
381
-
382
-
 383
383 -
 384
384 -
 385
385 -
 386
386 -
 387
387 -
 388
388 -
 389
389 -
 390
390 -
 391
391 -
 392
392 -
 393
393 -
394
-
395
-
396
-
397
-
398
-
399
-
400
-
401
-
402
-
403
-
404
-
405
-
406
-
407
-
408
-
409
-
410
-
411
-
412
 |
 |