Dell 5130 Color Laser User's Guide (PDF) - Page 224
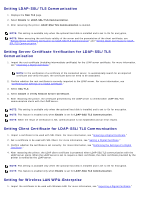
Setting Client Certificate for LDAP-SSL/TLS Communication
 |
View all Dell 5130 Color Laser manuals
Add to My Manuals
Save this manual to your list of manuals |
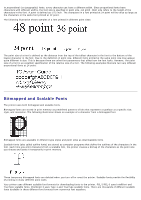
Page 224 highlights
Setting LDAP-SSL/TLS Communication 1. Displays the SSL/TLS page. 2. Select Enable for LDAP-SSL/TLS Communication. 3. After restarting the printer, LDAP-SSL/TLS Communication is enabled. NOTE: This setting is available only when the optional hard disk is installed and is set to On for encryption. NOTE: When executing the certificate validity of the server and the presentation of the client certificate, see "Setting Server Certificate Verification for LDAP-SSL/TLS Communication" and "Setting Client Certificate for LDAPSSL/TLS Communication." Setting Server Certificate Verification for LDAP-SSL/TLS Communication 1. Import the root certificate (including intermediate certificate) for the LDAP server certificate. For more information, see "Importing a Digital Certificate." NOTE: In the verification of a certificate of the connected server, to automatically search for an imported certificate and verify the path, the certificate does not need to be associated. 2. Confirm whether the root certificate is correctly imported to the LDAP server. For more information, see "Confirming the Settings of a Digital Certificate." 3. Select SSL/TLS. 4. Select Enable of Verify Remote Server Certificate. 5. After restarting the printer, the certificate presented by the LDAP server is verified when LDAP-SSL/TLS communication starts with the LDAP server. NOTE: This setting is available only when the optional hard disk is installed and is set to On for encryption. NOTE: This feature is enabled only when Enable is set for LDAP-SSL/TLS Communication. NOTE: When the result of verification is NG, communication is not established and an error results. Setting Client Certificate for LDAP-SSL/TLS Communication 1. Import a certificate to be used with SSL Client. For more information, see "Importing a Digital Certificate." 2. Set a certificate to be used with SSL Client. For more information, see "Setting a Digital Certificate." 3. Confirm whether the certificate is set correctly. For more information, see "Confirming the Settings of a Digital Certificate." 4. After restarting the printer, the LDAP client certificate is presented when LDAP-SSL/TLS communication with the LDAP server starts. When the LDAP server is set to require a client certificate, the client certificate provided by the printer is verified by the LDAP server. NOTE: This setting is available only when the optional hard disk is installed and is set to On for encryption. NOTE: This feature is enabled only when Enable is set for LDAP-SSL/TLS Communication. Setting for Wireless LAN WPA-Enterprise 1. Import the certificate to be used with Wireless LAN. For more information, see "Importing a Digital Certificate."
-
 1
1 -
2
-
3
-
4
-
5
-
6
-
7
-
8
-
9
-
10
-
11
-
12
-
13
-
14
-
15
-
16
-
17
-
18
-
19
-
20
-
21
-
22
-
23
-
24
-
25
-
26
-
27
-
28
-
29
-
30
-
31
-
32
-
33
-
34
-
35
-
36
-
37
-
38
-
39
-
40
-
41
-
42
-
43
-
44
-
45
-
46
-
47
-
48
-
49
-
50
-
51
-
52
-
53
-
54
-
55
-
56
-
57
-
58
-
59
-
60
-
61
-
62
-
63
-
64
-
65
-
66
-
67
-
68
-
69
-
70
-
71
-
72
-
73
-
74
-
75
-
76
-
77
-
78
-
79
-
80
-
81
-
82
-
83
-
84
-
85
-
86
-
87
-
88
-
89
-
90
-
91
-
92
-
93
-
94
-
95
-
96
-
97
-
98
-
99
-
100
-
101
-
102
-
103
-
104
-
105
-
106
-
107
-
108
-
109
-
110
-
111
-
112
-
113
-
114
-
115
-
116
-
117
-
118
-
119
-
120
-
121
-
122
-
123
-
124
-
125
-
126
-
127
-
128
-
129
-
130
-
131
-
132
-
133
-
134
-
135
-
136
-
137
-
138
-
139
-
140
-
141
-
142
-
143
-
144
-
145
-
146
-
147
-
148
-
149
-
150
-
151
-
152
-
153
-
154
-
155
-
156
-
157
-
158
-
159
-
160
-
161
-
162
-
163
-
164
-
165
-
166
-
167
-
168
-
169
-
170
-
171
-
172
-
173
-
174
-
175
-
176
-
177
-
178
-
179
-
180
-
181
-
182
-
183
-
184
-
185
-
186
-
187
-
188
-
189
-
190
-
191
-
192
-
193
-
194
-
195
-
196
-
197
-
198
-
199
-
200
-
201
-
202
-
203
-
204
-
205
-
206
-
207
-
208
-
209
-
210
-
211
-
212
-
213
-
214
-
215
-
216
-
217
-
218
-
 219
219 -
 220
220 -
 221
221 -
 222
222 -
 223
223 -
 224
224 -
 225
225 -
 226
226 -
 227
227 -
 228
228 -
 229
229 -
230
-
231
-
232
-
233
-
234
-
235
-
236
-
237
-
238
-
239
-
240
-
241
-
242
-
243
-
244
-
245
-
246
-
247
-
248
-
249
-
250
-
251
-
252
-
253
-
254
-
255
-
256
-
257
-
258
-
259
-
260
-
261
-
262
-
263
-
264
-
265
-
266
-
267
-
268
-
269
-
270
-
271
-
272
-
273
-
274
-
275
-
276
-
277
-
278
-
279
-
280
-
281
-
282
-
283
-
284
-
285
-
286
-
287
-
288
-
289
-
290
-
291
-
292
-
293
-
294
-
295
-
296
-
297
-
298
-
299
-
300
-
301
-
302
-
303
-
304
-
305
-
306
-
307
-
308
-
309
-
310
-
311
-
312
-
313
-
314
-
315
-
316
-
317
-
318
-
319
-
320
-
321
-
322
-
323
-
324
-
325
-
326
-
327
-
328
-
329
-
330
-
331
-
332
-
333
-
334
-
335
-
336
-
337
-
338
-
339
-
340
-
341
-
342
-
343
-
344
-
345
-
346
-
347
-
348
-
349
-
350
-
351
-
352
-
353
-
354
-
355
-
356
-
357
-
358
-
359
-
360
-
361
-
362
-
363
-
364
-
365
-
366
-
367
-
368
-
369
-
370
-
371
-
372
-
373
-
374
-
375
-
376
-
377
-
378
-
379
-
380
-
381
-
382
-
383
-
384
-
385
-
386
-
387
-
388
-
389
-
390
-
391
-
392
-
393
-
394
-
395
-
396
-
397
-
398
-
399
-
400
-
401
-
402
-
403
-
404
-
405
-
406
-
407
-
408
-
409
-
410
-
411
-
412
 |
 |